Why a homemade house for Barbie is better than a store-bought one?
Several arguments in favor of spending an evening or two making it. Yes, it will take much more time than going to the store, but in the end it will pay off in other dividends.
Do not miss
- Do not miss
Is it normal for a boy to play with dolls?
1. You can save money
Selling accessories for toys is a whole business, so a branded house for Barbie can cost a pretty penny. An addition to the toy will cost from 2-3 to 28 thousand rubles, depending on the size and brand. It’s much cheaper to express yourself and make a house - in this case you definitely won’t have to overpay for the brand. And the house itself will be exclusive and absolutely unique - the daughter’s friends will open their mouths with envy.
2. Creativity develops imagination
Invite your daughter to try herself as a designer. Let your child think about what an ideal home should look like and make some drawings. Don’t limit your little one’s imagination, and if she has a creative crisis, remind her of the rooms of her favorite cartoon princesses. Welcome any experiments. Does your daughter want the floor to be pink and there to be pictures on the walls? Great. Or maybe she doesn’t like castles, but practical and modern studio apartments? Wonderful!
Source: @oliveroseuk
Source: @oliveroseuk
Source: @oliveroseuk
Source: @oliveroseuk
3. The child will learn to bring his ideas to life
Let Barbie's big house be her first project, think together about how to make her fantasy come true. Break down the creation of your ideal home into several stages, starting from the design and ending with furniture and decorative items.
Perhaps the girl will want to paint the wallpaper in the doll’s room herself or suggest using old magazines for this. Use everything you have around the house: buttons, scraps of fabric and leftover yarn.
3. Working together unites the whole family
Let the head of the family cut out the parts and hammer homemade shelves, and the mother will control the process and help her daughter with interior design. Turn the process into a game: it will captivate the child no less than a tabletop or computer game.
There would be a desire, and the excitement will appear during work. On the Internet you can find dozens of drawings and visual diagrams that even a beginner can understand.
Children's room for a girl. Interior style - “Barbie”
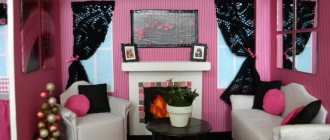
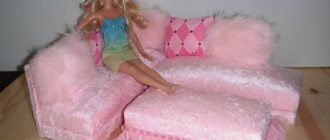
Decorating a children's room in Barbie style. Barbie style is designed by representatives of the fairer sex of any age. After all, in each of us, even after many years, there lives a princess who sometimes wants to be weak and defenseless, to be surrounded by care, love and teddy bears. Why was this interior style called “Barbie”? Because this doll is the most beloved and famous throughout the world. All girls love Barbie, many women strive for doll ideals, and some even collect Barbie. And of course, many people dream of such a house or apartment. If you decide to create an interior in the Barbie style, you cannot do without a professional interior designer. The color pink is associated with love, spring, femininity, good health and a carefree childhood. In all shades, from pale pink to glamorous magenta, it looks warm, comfortable and calming. For a girl, it is not at all necessary to decorate a bright pink nursery; a slightly coolish, soft pink shade will also do - it is unobtrusive, cute and soft. A room whose walls are painted bright pink indicates that its owner knows her worth, loves luxury, glamor, but at the same time has impeccable taste. If you are still not ready to live in pink walls, you can highlight several details in this color, they will help brighten not only the interior, but also life. To decorate a room in Barbie style, pink color is actively used in the interior. Numerous frills, flounces, bedspreads and canopies are unacceptable attributes of the room. Wall applications with rhinestones will perfectly complement the interior. There is no stereotype in the Barbie style interior, so you can safely add something to the interior. Furniture in this style should be made in the same style and, if possible, in the same color. The bed should be large, with a thick mattress and many pillows in bright colors. You can use a canopy with white and pink fabric or completely pink with Swarovski crystals. The shape of the beds can be completely different, the main thing is that it does not have sharp corners. Next to the bed there should be bedside tables, a dressing table and a wardrobe. How to decorate a bathroom in Barbie style. The bathroom is a place where you relax and unwind, and therefore its design should reflect your mood and combine those things that bring you pleasure. The walls can be repainted pink or soft colors with a pink accent or print. Or you can just buy pink bathroom furniture. You can also experiment with mirrors in the bath, placing them in frames of bright colors, or with tiles. General shades of bathroom accessories are one of the easiest ways to add originality to your room design. Pink towels, pink toilet paper, pink soap. A white robe, a white sink, a bathtub, a bath mat and towel hooks will brighten up the interior. Barbie mania has swept America and Europe, it has already lasted about 50 years, during which time the aesthetics have already been formed. It has become fashionable not only to dress in Barbie style, but also to decorate your apartment and buy furniture. Any children's furniture in pink looks great in this interior. White tulle and dark velvet curtains tied with bright bows look stylish. An abundance of light toys and heart-shaped pillows, images of multi-heroes. To enhance the effect, you can add a large royal chandelier with many light modes and bulbs. Lay a deep-pile carpet in white or pink on the floor. The room should shine and exude bright, good thoughts of those princesses who will live in such a room.
How to make a house for Barbie. Instructions
From cardboard
Option 1. Easy
Take two large sheets of cardboard and connect them crosswise using glue or tape. The result is a house without a floor and a roof. Cut out the doorways and cover them with colored paper.
Source: @karton_mania
Option 2. More complicated
- Take a large and wide cardboard box (you probably have one lying around after buying a vacuum cleaner or microwave oven). Cut it in two to make two or three boxes, depending on whether you want to make a two- or three-story house.
- Draw windows and doors with a pencil, and then carefully cut them out. Cover with electrical tape, masking tape or white paper.
- Paste colored paper, leftover wallpaper and/or self-adhesive film onto the walls and floor. You can paint patterns on the walls with watercolors or gouache.
- Cut glass from a transparent folder or cover. Glue cardboard on top and attach it to the walls.
Do not miss
- Do not miss
12 colors in the interior that “speak” to your subconscious
- From leftover cardboard you can make furniture - a table, a bed and a shelving unit.
- Download a picture of the door from the Internet, print it on a color printer and glue it. The handle can be made from a button or bead.
- You can also find other interior “items” for Barbie’s house online, such as certificates, telegrams, a laptop and a small library. Print them on a color printer and glue them.
From fiberboard
- The height of the Barbie house should be 15-20 centimeters greater than the doll’s height, so that from the outside it does not look like a closet. Approximate dimensions for a two-story apartment consisting of six identical rooms: width - 100 cm, height - 90 cm, depth - 40 cm, door sizes - 13 and 28.5 cm, and height of one room - 45 cm.
- Join the fiberboard sheets using wood glue. Make windows using tin snips or a jigsaw.
- The edges of the house can be covered with brown wood-look film, and the walls with remnants of wallpaper, colored paper, fabric or magazine clippings. The main thing is that the color of the materials fits into the overall concept.
From plywood
- For a two-story house with an attic, you will need 2 sheets of plywood no more than 20 mm thick.
- Mark the lines along which your husband will cut the sheets with a pencil (it is better to use an electric tool for this). Don’t forget about windows and doorways; if desired, you can also make a balcony. Refer to the diagram below. Sign every finished detail to avoid confusion.
- Sand the sheets before assembling.
- It's time for hammer and nails. In order for the structure to hold well, it is better to use self-tapping screws and wood glue in especially important places. Maybe my husband will come to the rescue again?
- When the frame is ready, cover it with two layers of white paint.
For the lazy
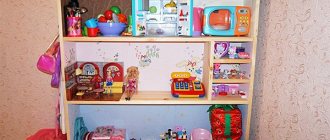
From a rack or bookshelf
- Not the most budget option, but if you don’t want to bother with cutting out parts and assembling, then why not try it. The basis of a wooden house for Barbie will be an ordinary bookshelf, suitable in height. True, such apartments will not have a door, but they will last much longer than cardboard ones.
- The back of the house is made from a sheet of plywood, which can be glued with special glue and nailed down for reliability.
- We suggest covering the walls of the house with multi-colored fabric so that the craft does not look boring, and for the windows you can use the remains of photo wallpaper or a photograph of the sky printed on a color printer.
From a wooden box or suitcase
- This is not a full-fledged DIY Barbie dollhouse, but rather a portable option if the box or suitcase has a lid. Just cover it with wallpaper and then make holes in the cardboard for the windows.
- You can hammer nails into the walls of the suitcase and hang framed pictures and photographs on them.
LiveInternetLiveInternet
We create your dream home ourselves! DIY furniture for dolls. Recently a game with a sequel appeared in our kiosks. It's called YOUR DREAM HOUSE. Bought the first issue. I just liked the price and my grandson loves the dishes. But mainly for information – what and how. Such toys are very expensive if you collect all the issues. But here's an idea... a wonderful idea! We are not just mothers and grandmothers! We are also needlewomen! Therefore, you can make the house of your and your child’s dreams yourself! To begin with, you can see what and how you ate in this topic. For example? Antique dollhouses HERE https://babiki.ru/blog/dom_kuklu/9374.html And I was also very pleased with this post. Exclusive doll furniture https://babiki.ru/blog/dom_kuklu/8599.html It’s beautiful, interesting and good for the family budget. Did you like it? For now, for starters, we can limit ourselves, so to speak, to training products. Well, first of all, furniture for a doll can... EMBROIDERY! Don't believe me? Then look HERE Embroidery on plastic canvas. Furniture for a doll. Embroidery on plastic canvas. Bedroom for a doll 2 If you don’t know what plastic canvas is and how to embroider furniture on it, you can look HERE Cross stitch on plastic canvas. Or you can knit furniture! Openwork furniture for Barbie doll. Hook Full description HERE Knitting. Furniture for dolls. Ideas And so it is possible. DIY houses and furniture. https://www.prokukol.ru/communication/forum/forum20/topic71/ Scroll through the entire page. There is only knitted furniture at the beginning, and then... Or you can make furniture from scrap materials! Greenpeace is with you! DIY furniture for dolls from boxes. https://www.podelki.lifemammy.ru/mebel-dlya-kukol-svoimi-rukami-iz-korobok/ Furniture for dolls from plastic bottles And you can also weave furniture! what is this made of? From newspaper tubes! Wicker furniture for dolls (Ideas) Master class on weaving from newspaper for beginners from Vera S. https://stranamasterov.ru/node/52293 Or you can do it for real! Chair and stand for MK dolls from flyka HERE https://stranamasterov.ru/node/222004?tid=451 And from clothespins? Haven't tried it yet? Then here you go https://www.julieoldcrow.com/tutorials/lawnchair/pinchairchris.htm Or here https://blog.kp.ru/users/nadjunja/post149086459/?upd I know what many of you will say! Well, we can knit and sew and embroider, but the frames...? It's simple! Much easier with frames than you think! Back to plastic bottles again! We take the bottle and.. cut it off... How do we cut it to get the base for such a stroller? What about this armchair? Hint from Elena Manoilova https://stranamasterov.ru/node/49350 Doll furniture from everything at hand. HERE https://tutmoidom.ru/svoimi_rukami/svoimi_rukami_kukolnaya_mebel_iz_vsego.htm So... We have everything to create our own dream home: leftover yarn and fabric, plastic bottles and newspapers, clothespins. We also have children, dolls and a great desire - to make the house of our dreams with our own hands! And it doesn’t matter that he will be so small for now. The main thing in any business is to take the first step! Have a joyful journey towards your dream! YES! Don't forget to call the kids! They will definitely help! And doing it together is more fun and faster!
How to make light in a dollhouse
Even if the walls of the house are white, it will still be quite dark in the evenings. The situation can be aggravated by poor lighting in the room or cloudy weather outside the window. What if a child wants to play with dolls after dinner? Wire the light with your own hands.
Option 1. For those who like ready-made solutions
- Buy small closet lights that are battery powered. Glue them to the ceiling with Moment glue.
Option 2. Difficulty level – medium
- You'll need a 12-volt, 1.5-amp power supply, a switch, and an RGB LED strip.
- In the house itself you need to drill or cut holes and insert a flexible module into them. To keep the tape in place, it can be additionally secured with tape. If your child finds the light too bright, we recommend installing diffusers.
Option 3. Advanced level
Source: master-klass.livejournal.com
Source: master-klass.livejournal.com
Source: master-klass.livejournal.com
Source: master-klass.livejournal.com
Source: master-klass.livejournal.com
- For one lamp you will need a knife, a microswitch, a small light bulb and its socket, a battery case, wire and electrical tape.
- Cut two pieces of wire and cut away the covering on both sides so that they are exposed. Insert one end into the “ears” of the cartridge, and the other into the microswitch. Screw it up.
- Attach the battery case to the back wall and connect it to the socket and switch. To do this, you need to expose the ends of the wires, twist them together and stick electrical tape on top.
Do not miss
- Do not miss
How to make a bouquet of tea with your own hands: instructions and inspiring photos
Required tools and materials
It’s interesting to come up with and make different elements of furniture in a toy house from scrap materials. It is impossible to clearly define the list of necessary tools; it will depend on the imagination of the craftsmen. Useful in any case:
- Scissors;
- Glue;
- Ruler;
- Napkins;
- Oilcloth;
- Threads with needles;
- Pencils.
These things will help create very beautiful details. In fact, it is possible to create furniture using a much larger list of items. For example, to make a lamp with a switch you may need a blowtorch, LEDs, and wires.
Regular cardboard will help in production. Real masterpieces are created from the material. Making furniture from cardboard is an accessible way for everyone to furnish a toy house with high-quality furniture.
