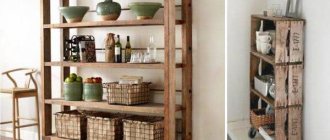
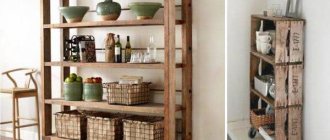
Rational use of additional square footage of the balcony space can be ensured not only by modern repairs and insulation. An important part of the furnishings will be suitable furniture, in particular storage systems, for example, a shelving unit. This is practical and very stylish, because you can make a shelving unit for a loggia or balcony yourself, adapting it to the decor and size of the room.
Types of shelving for balconies
Racks are usually presented as open shelves of a kind of mini-cabinet. In fact, this is a correct definition, but this does not mean that throughout its existence this piece of furniture has not undergone some modifications.
What types of racks are used:
- With open shelves.
- With hinged doors.
- With a sliding door.
- Corner models.
The choice of a suitable option must be coordinated with the possibilities of its placement. It is also important to immediately determine the areas of use of such structures, the maximum load and operating conditions.
Types of construction
Balcony shelving comes in a wide variety of models. Everyone can choose the option that suits their preferences.
Depending on the type of structure, shelving can be open or closed. Each option allows you to use the balcony as conveniently and practically as possible. You can put a lot of things in them that you don’t use, but don’t want to throw away. A well-built rack will create cleanliness and order on the balcony.
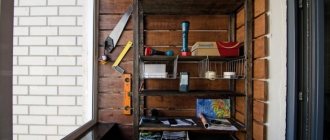
Open shelving is similar in appearance to a closet, but it does not have walls and only includes open shelves. This option may have several tiers. The choice depends on your personal wishes. Typically, an open shelving unit is installed near the wall and also mounted on metal brackets. Open models are ideal for placing flowers. This will decorate the balcony and create comfortable conditions for relaxation. You can also grow seedlings on open shelving.
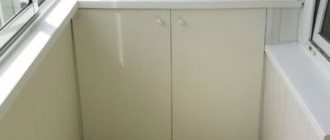
Closed models can be built-in. They are usually installed along the side wall of the balcony. Built-in models always have a height from floor to ceiling. Closed shelving will hide things from prying eyes. You can store things in them that you only use in winter or summer.
Shelves on the side walls
Ordinary open shelves on the side walls of a balcony or loggia can be made from wood, plastic or durable metal sheets.
The procedure is as follows:
- The fastenings are marked on the wall at the required height, along the length of the shelf itself and at the same level (be sure to use a level or plumb line);
- Metal corners are attached to the shelf on the bottom side in two or three places, depending on its length;
Small corner mount - In the places where it is attached to the walls, the shelf is screwed to the same corners.
In this way, you can make a strong and wide shelf from any material, the main thing is to take into account the load on the side wall of the balcony. The shelf will be closed on three sides, so it becomes possible to place a variety of items on it without any problems.
Balcony shelving:
The rack can also be made of different materials - wood or metal. The choice depends on the budget and features of the balcony. Wooden racks and shelves are suitable for glazed insulated balconies, but for open ones it is better to choose materials such as metal and plastic.
To make a wooden rack you need:
- Draw at least an approximate layout of supports and shelves with all dimensions; Rack drawing
- Prepare supports - four thick wooden blocks, as well as the required number of cross bars to support the shelves and create a frame;
You can use corners to support shelves
- Cut sheets of plywood or chipboard for the shelves themselves;
- Assemble a frame of four vertical and eight transverse beams, strictly checking the level. The same metal corners can be used as additional reinforcement for the fasteners. It is better to start assembling the frame on the floor;
- You can then attach several more horizontal supports for shelves to the frame;
- Attach shelves made of chipboard, plywood or lining of suitable thickness to the supports.
If necessary, there can be more supports, especially if the rack is planned to be installed not against the side wall, but against the long wall adjacent to the room. To keep the rack in place, it can be attached to the wall using the rear supports.
https://youtube.com/watch?v=etDbFsrltK4
Advantages of shelving on the balcony
You can equip the free space of the balcony in different ways. Even though its use is no longer considered solely as a storage space, a balcony shelving unit is essential. Such furniture will not only fit organically due to its small size, but will also become a practical addition to the decor, because there are many ways to use such shelves.
Advantages and application of balcony rack:
- Small dimensions allow you to squeeze the rack even into limited space. Due to the open shelves, such furniture does not visually overload the room.
- Corner shelving is usually less practical and is suitable for very small spaces. As an option, you can use corner shelves.
- Along with open shelving, you can also use mini-cabinets with doors. To do this, there must be free space on the balcony to allow easy access to the shelves.
- Original countertops - shelving is often used in limited space. You can install a tabletop on top of them and use them as a dining group or parapet.
Balcony racks are used to store various items that do not have a place in the apartment. Most often these are tools, canned goods, fishing and other special equipment that is used infrequently.
Varieties
When choosing a cabinet, take into account its purpose, the presence of niches and glazing on the balcony, the width of the loggia. The specified criteria will allow you to make a rack of the required size, characterized by maximum functionality.
Depending on the design features, several models are distinguished:
- Built-in. Rack equipped with hanging shelves. It is mainly installed on those balconies where there are niches. The model allows you to make the most efficient use of the available space. The width of the rack will be limited by the size of the niche.
- Angular. The corner cabinet is attached to the wall on both sides. Brackets are used as mounting elements. The advantage of the model is its spaciousness and compactness. The model will take up less space and will not block the passage.
- Open. A shelving unit without doors is installed against the wall and can be of any height and width. The model is well suited for storing seedlings, since this way the plants will have enough sunlight. If you make it in the form of hanging shelves, there will be space below for storing large items. In particular, a bicycle can fit under the cabinet.
- Closed. Model with doors. In such a rack they store items that need to be kept in a dark place, as well as things that the owner of the balcony wants to hide from prying eyes. The doors can be located along the entire height of the cabinet or cover only a few shelves. When choosing such furniture, it is important to leave free space for unhindered opening of the rack.
Requirements for shelving on the balcony
The specific conditions of the balcony space impose strict requirements on its organization. Most finishing materials and pieces of furniture will not fit here. Even on a glazed and insulated balcony, it is possible that precipitation, as well as more dust and dirt, can get inside. That is why balcony furniture must meet the following requirements.
What should a balcony rack be like:
- Practical and roomy enough, does not take up much free space.
- Durable, all fastenings must be designed for the total weight of the stored items.
- Aesthetically attractive and also fits into the overall interior of the room.
- Moisture-resistant, because on the balcony there is still a risk of moisture getting inside. Often this is not only precipitation, but also accidentally spilled water after watering plants.
- Easy to clean, as dust will accumulate on the shelves.
- Resistance to temperature changes, especially in uninsulated rooms.
- The most commonly used materials are wood and metal, and both options have advantages and disadvantages.
When decorating, you should choose the lightest colors possible so as not to overload the space with a dark accent. It is also necessary to consider the location of lighting sources and the direction of the light flux from the windows so that the rack does not interfere with the illumination of the room.
Beautiful design ideas
Minimalistic shelving with a minimum of details is distinguished by its versatility: they can be placed in almost any interior. If the owner of a balcony wants to create a unique, eye-catching interior, he can opt for furniture of an unusual design. Gardeners will love racks with holes cut into the shelves for pots.
The solution not only looks original, but is also characterized by high functionality.
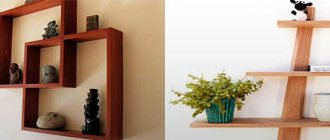
Models with asymmetrical shelves are an option for those who want to furnish a loggia in a modern style. You can choose materials in bright colors, play with contrasts, place souvenirs, books, photo frames or decorative elements on the shelves. Such furniture will look advantageous with colorful walls.
A narrow shelving unit mounted into the wall will be appropriate in conditions of limited space, when every centimeter counts. The choice of wood as a material will give the model a conceptual and deliberate simplicity.
An original solution would be a shelving unit constructed from square cubes attached to the wall. Alternating open and closed shelves will create the illusion of a checkerboard pattern. In plain sight are figurines, flowers, table clocks, and small candlesticks. And behind the doors you can hide items that are not used every day.
How to make wooden shelving
With minimal woodworking skills and the availability of tools, building a balcony rack is not difficult. To do this, it is necessary to design in advance the dimensions and configuration of the future cabinet, as well as cut and prepare wooden elements. After this, you can safely proceed directly to assembling all the parts.
Preparing wood for installation
The easiest way to make a rack on a balcony or loggia with your own hands is from wood. For this purpose, chipboard, which is sensitive to moisture and temperature changes, is not used. It is easier and more reliable to use a laminated board, or pre-treated boards and beams.
The finished drawing is adjusted to size
Stages of preparatory work:
- According to the dimensions of the future rack, cut the materials.
- Clean the cut areas, remove burrs and polish the surfaces.
- Treat all exposed parts with a deep penetration antiseptic solution.
- Paint the wooden parts of the structure.
Where to begin
Before you start building a rack with your own hands, you need to carefully calculate everything, choose the right place and material. The shelving structure should be strong and the shelves should be wide and spacious to provide ample storage space. The cabinet must be stable; it is important to correctly calculate the load and, if it wobbles slightly, additionally secure it to the wall.
In no case should the rack block the natural light entering through the window, and its dimensions should correspond to the area of the balcony in order to leave enough space for movement. Fire safety rules should be observed, and if there are heaters on the balcony, then the wooden shelving should be placed away from it.
Before you start building a wooden shelving unit, you need to properly treat the wood so that it is not exposed to moisture or dryness. You also need to sand the wood very well and make sure it is dry before use. If you use unfinished material, the quality of the shelf fastenings may suffer and then you will have to start the work all over again.
Door arrangement
Closed shelving models have many advantages over open ones. At the same time, the organization of such storage systems requires more space for maneuvers, as well as the construction of beautiful and practical doors.
Three assembly options are usually considered:
- Conventional hinged doors, fastened using furniture hinges and opened using pre-installed handles.
- Sliding doors based on the principle of wardrobe doors - compartments. The most popular and practical option for modern balcony design. At the same time, a lot of space is saved, and the rack itself looks stylish and attractive.
- Combined designs, when open shelves alternate with doors. Most often, the lower and upper compartments are closed, and an open space is left in the middle for unhindered access to the items located there.
The option of opening doors using closers is not considered in our article, because this is quite expensive and impractical for infrequently used furniture groups.
Preparation
Before installing storage systems, the pantry must be repaired: clean the space, carry out dry and wet cleaning, remove old wallpaper and flooring. If necessary, the walls of the storage room or attic are leveled and also put in order: painted or pasted over.
It is recommended to use a primer that contains antifungal impregnations.
Laminate, parquet or linoleum is laid on the floor. It is also worth equipping the pantry with ventilation and lighting, which will greatly facilitate the use of the room.
What material can be used?
One of the most affordable and durable materials for creating shelves in a pantry is wood. Boards made of natural wood (pine, larch), as well as chipboard, are fixed with metal fasteners. The heavier the items that will be stored in the pantry, the thicker the boards should be. For conservation, large equipment, construction tools and other heavy things, it is worth providing an additional stiffener.
If you make shelves in the pantry with your own hands, you can use what you have at hand - wooden pallets, old unnecessary furniture, plastic fruit boxes. Plywood is considered a budget option, but thin sheets are not suitable for heavy objects. Lightweight but durable plastic is suitable for storing books, clothes and bulk products. It is easy to care for, and the material is not afraid of moisture.
Metal racks are considered the most durable and do not require additional reinforcement. Modern products have a collapsible design, they are easy to rearrange and transport, and the material can easily withstand temperature changes
The photo shows shelving, drawers and wall shelves for a spacious pantry.
What is the best way to arrange shelves in a pantry?
The placement of shelves is primarily affected by the size of the utility room.
- A small pantry (about 2 meters) allows you to install shelves in only one row - linearly, along one wall. Sometimes structures are made rounded - this shape allows you to gain a few centimeters and use three walls.
- The angular arrangement in the form of the letter “L” is considered much more practical, but the storage area should exceed 2 meters. For maneuvers you need to leave a small passage, especially if the room is elongated and narrow.
- In a large utility room, it is optimal to place shelves in the shape of the letter “U”. In this case, it is necessary to calculate the depth of the structures so that there is room in the middle for movement.
The photo shows a pantry in which the shelves are functionally arranged in the shape of the letter “P”.
Deciding on the sizes
The most popular and practical form of shelves is straight. The length of the shelf is usually equal to the length of the wall. If the distance between opposite walls is 2 meters or less, then the shelf does not need additional support. Otherwise, the structure should be strengthened, especially if you plan to store seaming tools and tools.
The thicker the wooden shelf, the more fasteners it requires. Also, its strength is determined by the distance between the support posts: the more massive the structure, the smaller the gaps.
To make using the shelves convenient and safe, the heaviest items must be moved down. The width of the projections should decrease from bottom to top. The standard shelf width for canned food is 30 cm. The height depends on the size of the items.
Racks for flowers and growing seedlings
Balcony shelving is often used for flower gardens and even mini-vegetable gardens. Despite the limited space, the practicality of this option is very high. The main conditions are maximum illumination and resistance to moisture. To do this, you can place rows of shelves along the parapet, as well as make the end parts of the balcony.
It is preferable to use painted wood or moisture-resistant boards, as well as plastic shelves that can withstand sufficient weight.
Material selection
The base material affects the quality, appearance and durability of the structure. Racks are made from the following raw materials.
- Made of wood. This environmentally resistant material does not emit foreign substances into the atmosphere. Also, thanks to their external aesthetic properties, wooden shelving will fit into any interior. Treatment of raw materials with antibacterial agents will help increase the wear resistance of a wooden structure. You can also varnish the finished structure.
- Made from metal profile. Racks made from metal profiles can support weights from 60 to 120 kg. Also, this design will last a very long time. To prevent the metal from rusting, it is treated with an anti-corrosion coating or galvanized. In addition, the price of the material is significantly lower than other options.
- Made from compressed wood. This material is used to make rack shelves. Such raw materials are cheap and easy to work with. Chipboard is suitable only for glazed balconies and loggias due to its instability to humidity and temperature changes.
- Made of plastic. This material is highly resistant to environmental influences. However, a plastic rack will not withstand heavy loads.
- From glass. Manufacturing glass shelving is quite expensive. But this solution gives the furniture a modern look. The material used is impact-resistant glass.
Photo ideas for design and placement of shelving
It’s easy to make a balcony rack with your own hands from available materials, for example, an old wardrobe or other furniture. After appropriate processing and reliable fastening of the elements to each other, such a design will withstand all the hardships of “street” use and become a practical element in the interior. The main points of using racks, as well as the stages of self-assembly, are discussed in the information provided.
Buy or make it yourself?
When purchasing a ready-made bedside table for a balcony, you need to measure the dimensions of the room in advance, and then only make a choice in favor of one model or another. Of course, store-bought options often look more aesthetically pleasing and attractive than those made independently, but not always.
An example of making a cabinet, very technologically advanced.
https://youtube.com/watch?v=dqzMAv0hBGY
It should be noted that the cost of modern cabinets in stores can reach up to 5,000-15,000 rubles, so if you are not striving for special aesthetics and the ability to maintain a certain style, then it is best to buy materials and do everything yourself; there is nothing complicated in this process.
https://www.youtube.com/embed
DIY hanging shelf-shelf
A charming hanging shelf for the kitchen with your own hands will allow you to rationally use the space. It will look great in a colonial living room, a nautical-style children's room or a Mediterranean-style bathroom. Anyone can handle this kind of work, since you can make a shelf with your own hands in just a few simple steps.
how to make a shelf with your own hands. Master Class
Wood blanks are aligned both in shape and size.
Mark the locations for the holes and make them with a drill with a feather drill. To avoid problems in the future, the diameter of the drill is chosen larger than the diameter of the rope by which the bookcase will be suspended.
It is easier to mark using a template in the form of a 4x4 square cut out of paper. The template needs to be placed on the corner of the board and marked at the point of intersection of the diagonals of the square.
Paint the boards.
There are many options on how to make a shelf more interesting. You just need to show a little imagination, for example, paint it only from the ends.
Now the structure can be assembled. The rope is folded in half and, retreating approximately 30 cm, a knot is tied on each half. The ends are pulled through the holes on one side of the board and secured with another knot. The board thus becomes motionlessly fixed between two nodes. The process is repeated with each shelf, positioned in the required increments.
Do the same with the other side. The main thing is that the nodes on both sides are located at the same distance from each other.
The remaining free ends of the ropes are cut and unraveled to form tassels.
All that remains is to hang the finished bookcase on the wall.
This DIY shelf has several advantages:
- the design will be exclusive, you won’t find one like it anywhere else;
- You won’t have to spoil the wall with too many holes for hooks to hang so many shelves.
Manufacturing
Choose the optimal box size. An easy manufacturing option is vertical loading, where the lid is at the top. A little more complicated, but more convenient, when the drawer opens from the side. Drawers are also often used.
Stage 1. Insulation material is laid. It is advisable to give preference to those that can withstand heavy weight and have a dense structure. For example, polystyrene foam. Plywood or chipboard sheets are placed on this layer.
Stage 2. Making the box. Both boards and sheets of lumber are suitable for this. Make a frame. Furniture corners are useful for installation work.
Stage 3. The inner part must be covered with chipboard or plywood of the appropriate size. Insulating material is attached to the cracks between the boards or beams, then the outer cladding is installed.
So, you know how to make a box on the balcony. Now about the final steps. Be sure to make a small hole in the structure to allow as much fresh air circulation as possible.
The optimal solution for temperature control is to install a thermometer on the door.
Shelf made of plywood (MDF) for flowers or souvenirs. Scheme drawing
A flower shelf made of plywood for the wall, which you can easily make with your own hands according to the drawings given below.
1) Cut out 5 shelf blanks from plywood (See drawing). To do this, it is convenient to make a template from hardboard or durable cardboard and trace it on plywood, then cut out the parts.
2) On the vertical posts at the back, we mark the location of the hinges and, using a groove cutter (chisel, etc.), carefully cut out grooves for them, all the time checking the accuracy of their location and compliance with the metal hinges.
3) We cover the outer ends of the plywood with veneer edge tape.
4) We assemble the entire structure using PVA glue and self-tapping screws, first check whether the angle is 90 degrees. 5) We cover our wall shelves with stain or varnish and screw in the hinges.
This shelf would also look great if it was made of solid pine or another type of wood. The main thing is interest and desire.
Photo from Woodmaster magazine
Step-by-step manufacturing instructions
Step 1. On a piece of paper, make several sketches of the bedside tables. Look for successful examples on the Internet and adapt them to your conditions. Do not rush to accept the final version, try to look not only at today, but also into the future. The more versatile a bedside table is, the more convenient it is to use, the more different items you can place. It is recommended to take into account not only the height and width, but also the number of shelves and the distance between them. Another important point - for each element, make a safety margin; do not count on storing only light items.
Corner cabinet diagram
Diagram of a corner cabinet with dimensions and arrangement of shelves
Corner cabinet drawing
Step 2. Once the final option has been selected, you can determine the nomenclature and quantity of fittings, hardware and assembly fixtures. It is recommended to fix the frame with corners, it is much easier than making a tenon/groove or half-tree connection. Although, of course, this is a matter for the master; everyone must decide for himself what to do.
Furniture corners. Kinds
Step 3. Take measurements of the cabinet. Take measurements from the walls and ceiling, but when calculating the frame elements, these values need to be reduced by double the thickness of the lining plus another centimeter or two for the gap.
Take measurements on the balcony in the place where the cabinet will be installed
Prepare a template for each element; you should use it to cut out all the others.
Pay attention to the corners; it is better to cut bars at angles using a special device. If it is not there, then use a square
The more tightly the frame bars fit together at the joints, the stronger the frame will be. Don't expect that all mistakes can be corrected with corners, this is not true. If the fixation density is violated, the stability of the frame will significantly decrease.
Step 4. Start assembling the frame. First, the upper and lower parts are connected. Place them next to each other, they should be completely identical. Fix with corners on self-tapping screws, tighten tightly. The length and diameter of the screws are selected in such a way that they provide the required strength of the connection and at the same time do not split the bars.
Secure the frame posts. Be guided by the scheme you choose
Step 5. Once the top and bottom are assembled, you can attach the side vertical posts to them. It is easier to do the work on a flat surface; it is advisable to have an assistant. Together, it is much easier to control the strength and accuracy of the frame assembly. Once the uprights are secured, place the frame in place and check the position and shape again. Don't forget about the gaps between it and the walls for the lining. Problems have been discovered - it’s not too late to fix everything.
Cabinet frame, top view
Step 6. Screw the horizontal bars for the shelves to the frame. It is better to make the distance between them different; it will be possible to store objects of various sizes in the closet.
The photo shows an example of a base for a shelf. Frame made of bars
Instead of bars for shelves, you can use plastic corners
Attaching shelves to corners
Example of shelves for a wardrobe on a balcony with adjustable height
Shelves made of boards
Step 7. Now you can start covering the top, bottom and sides with clapboard. If you did everything correctly, the dimensions of the lining will be the same. You need to make legs in the lower part, the surface should be ventilated. The legs can be made from pieces of wood or bought ready-made.
If, due to a lack of practical experience, the ends of the lining turned out to be ugly and uneven, this is not a problem. Buy thin decorative wooden or plastic strips at the store and use them to frame the cabinet.
Below is a gallery of photographs of clapboard cabinets. Illustrative examples will help you choose the best option for your balcony closet.
The photo shows the process of covering the side of the cabinet with clapboard
Wardrobe lined with clapboard, decorative strips are used around the perimeter of the doors
Flashing strip for cabinet doors made of lining
Wardrobe covered with clapboard horizontally
Another option for a lining cabinet
Wooden cabinet
shelves on the window for dishes and assorted displays:
This idea, as a rule, appeals to those who are fascinated by 2 solutions: (1) open shelves + (2) tableware in plain sight. If you have blind windows in your kitchen, feel free to implement this non-standard move. Here are 12 options for similar decor in real American homes:
displays for beautiful things: If you don’t want to limit yourself to just dishes or just plants, create an interesting composition on shelves suspended from a blind window. Check out some ideas for inspiration:
several windows in one line: If there are several windows “in a row” on one wall, try installing long shelves or combining several into a single structure. For example, like in these photos:
