Home » Building a house » Do it yourself
Alexander Korovaev 03/29/2020
2119 Views
This piece of furniture has long served not only as a place to store and view the press. A handmade coffee table can be used for gatherings in the living room, as a workplace or as a “podium” for arranging collection items or flower arrangements.
What can a coffee table be made from?
The most commonly used materials to create such products are environmentally friendly wood, chipboard, medium-density fiberboard, and hardboard. Such furniture made of forged metal in high-tech or loft style looks great.
A combination of several materials at once is also welcome: wood and metal, metal, tempered glass or mirror. You can also make an original wood-look coffee table from leftover laminate flooring.
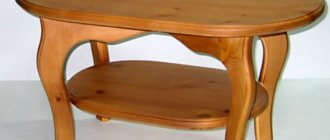
Natural wood product
Some craftsmen even make this type of furniture from car wheels or used pallets. Other improvised means are also used: forged legs from old sewing machines, old suitcases, boxes, birch logs, etc.
Using scrap materials for a coffee table is justified only if the products made from them fit perfectly into the overall style. The thoroughness of surface treatment is also important. Otherwise, the product will not look very presentable.
Product dimensions
Standard sizes
There are a lot of drawings of coffee tables assembled with your own hands on the Internet. Their standard height is 40-50 cm. A design with a height of more than 70 cm already applies to dining tables. The usual tabletop size is 80x40 cm. But you can choose other parameters for your product. A table-stand for a flowerpot or a landline telephone can be quite high, and a table on which cute trinkets will fit, giving the room a cozy feel, is only 10 cm high.
A coffee table can easily turn into a miniature coffee table by reducing the length and width of the tabletop to a minimum. A classic product for hotel gatherings, the tabletop dimensions are 80x40 or 80x80 cm. In order for it to fit harmoniously into the interior, when installed near a sofa or upholstered furniture, its height should not be higher than the seats themselves. It is also necessary to take into account the general proportions - the larger the tabletop, the lower the legs must be made.
Square table
To make it you will need 4 timbers for the legs and boards for the bottom and table top. The dimensions of the parts can vary depending on the size and height you plan to create the furniture.
Connect the legs together with 8 boards - 2 on each side of the square, top and bottom, to form drawers. Nail the boards parallel to each other onto the bottom planks, creating a shelf.
Note!
Corrugated paper flowers: TOP 100 photos of ready-made options + instructions on how to make them yourselfDIY family tree: instructions for creating a family tree + DIY design ideas
Do-it-yourself sun lounger: photos with instructions for creating sun loungers + detailed diagrams of the stages of work
Knock down the tabletop so that its edges protrude 5-10 cm beyond the frame of the structure. Nail long boards on 2 opposite sides. Now nail the shorter pieces perpendicular to the first two boards. After this, the structure can be sanded, painted and decorated.
Materials and tools
You can get neat shaped cuts with a jigsaw
The simplest coffee table (see photo), made by yourself, can consist of only a few parts. To make the legs we will need wooden blocks, metal corners or pipes. You can buy ready-made steel or aluminum racks in specialized stores.
To assemble the tabletop, board, plywood, fiberboard or chipboard are used. It is advisable to match the wood to the tone of the rest of the furniture. The product can be equipped with additional shelves for dishes or storage drawers. This type of furniture can be simply made up of separate boxes, fastening them together. The result is an original piece of furniture with an unusual shape.
To work we need a minimum of tools and fasteners:
- roulette
- screwdriver or screwdriver
- self-tapping screws
- jigsaw: you can also use a regular saw, but the cuts will be less even and will take longer to grind; It is better to order cutting of figured sections at the nearest workshop
- grinder: you can replace it with attachments for a screwdriver or drill
Home and Garden
Stylish and comfortable home
Do-it-yourself: sofa tables
Three projects for making side tables with instructions.
Project No. 1.
Table from Dremel
— compact saw (Dremel DSM20); - rectangular guide; — a set of wood drills; — cutter for shape milling machine (HSS) 6.4 mm; — attachment for milling; — linear milling compass; - sanding attachment and sanding belt; — furniture panel made of thermowood (wooden board) made of acacia (200x60x1.8 cm); - glue and wood oil, screws, clamps, sandpaper.
Making a wooden table step by step
When adding additional shelves, drawers are not required
The process of assembling a simple coffee table from solid wood with your own hands is simple:
- The designs of such products are varied. It can consist only of a tabletop and support posts (legs). To increase the rigidity of the frame, you will also need drawers - wooden blocks assembled into a frame to support the tabletop
- For a coffee table with intermediate shelves, drawers will no longer be required - the shelves inserted inside will serve as an additional element of rigidity
- When cutting workpieces, it is better to secure them with workbench clamps. The cuts will be perfectly straight, strictly at 90°
- The part is sawed halfway, then turned over and sawed to the end. All cuts are sanded
- It is more convenient to assemble the base first, consisting of legs and a drawer frame to which the lid will be attached.
- The strongest corner connection of wooden parts is the tongue-and-groove fastening. The transverse arrangement of the fiber and a tight fit guarantees a reliable connection. To create several tenons and grooves, just have a jigsaw, rasp and chisel on hand
- Connections with screws are considered simpler, but less reliable. To secure the sidewalls to the legs, holes are prepared at an angle. You can further strengthen the connection with metal corners
- First, the product is assembled dry, without glue. The final connection using an adhesive composition is carried out after checking the angles, as well as the horizontal and vertical positions of the parts. All obstructions or slopes must be removed
- The last thing to attach is the tabletop. To do this, holes are drilled in the frame, the diameter of which is slightly smaller than the diameter of the screw. Fiberboard products can be screwed using small z-shaped holders
Storing things on the table
The product must be selected based on the intended method of use. Two-tier models are designed to store things in an additional furniture compartment. The advantage is the accessibility of items and a good overview. At the same time, these table options are distinguished by their light and elegant design, which significantly distinguishes them from their analogues.
Table with two tiers Source dekoriko.ru
Boxes are useful in cases where you want to hide the contents from prying eyes. In some models, the drawers are locked with a key, providing privacy and security. This solution is especially convenient in families with small children who are very curious. The accessories will be located nearby, but at the same time they will be inaccessible to outsiders. It is worth considering that a table with drawers can make the interior a little heavier.
Drawer in the table Source dekoriko.ru
Product made from eurolining
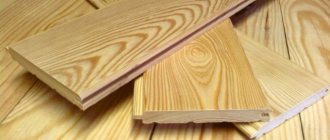
This board is equipped with very convenient tongue-and-groove joints. You can assemble a lid from it by fitting the boards tightly to each other quite quickly. The same material is used for the legs. For stability, they are reinforced with sides.
Example of a finished table
We will describe how to make an original coffee table with your own hands from clapboard:
- The tabletop can be of any shape. When making a cover of complex shape, it is necessary to prepare a sketch of it and indicate in the drawing the width of the boards from which it will be folded. Then use a jigsaw to cut the parts
- Carefully sand each of the resulting workpieces using sandpaper or a screwdriver or drill attachment.
- The boards will be connected to each other using a strapping block located on the back side of the tabletop. The principle of such an assembly is similar to the panel one. To strengthen it, the strapping beam is additionally attached to wood glue
- After assembling the shield, we begin making the base. Each pair of legs must be connected on both sides with side crossbars. If you don’t have a screwdriver, you can use a regular screwdriver if you first make holes in the wood of a slightly smaller diameter
- The legs fastened in pairs are connected to each other with a bar so that its end protrudes from the inner sidewall by 2.5 cm
- We attach wheels to the legs for ease of movement. There is no point in saving on this type of fittings - after all, it must withstand considerable weight
- To tint, the wood can be covered with stain, matching its color to the color of the rest of the furniture, and then varnished
- In a similar way, you can make a coffee table with your own hands from chipboard, plywood or laminate. The principle of its assembly will be similar
DIY coffee table
To make a coffee table you need to take a sheet of chipboard. Its thickness is 16 mm. Make markings: find the center at the intersection of two diagonals. A nail is driven into the center, to which a thread and a pencil are tied. With its help you can draw a circle. If you want to make a table of a different shape, then draw the bends. After this, the shape is cut out using a jigsaw. The edges must be sanded.
The legs of the table are attached with screws. Paint the countertop itself in the color you want.
Transformable table
Transformable table
A small coffee table can be made in the form of a transformer, which in a matter of minutes, when unfolded, turns into a full-fledged dining or work table. When folded, a wooden table (see photo), made by yourself, will take up a minimum of free space.
Types of table transformations
There are several types of this type of furniture. May change:
- only dimensions (length and width) of the tabletop
Product with adjustable leg heights
- table height only: a similar method is used if you want to turn a small coffee table into a taller dining table
Product with double table top and adjustable height
- both the height of the legs and the dimensions of the tabletop: a method in which more complex mechanisms are used
Coffee table with lifting lid
- a variation of the previous designs is a table with a lifting lid that can be moved to the side; in this case, it is easy to turn it into a working one and lay out documents on it or install a laptop
Main stages of manufacturing
Lifting mechanism
To assemble the structure, you will first need a special mechanism. It's easier to buy it at a furniture store. But if you want, you can assemble it yourself, with your own hands, by cutting out parts from durable metal.
- A similar product can be made from 22 mm thick chipboards. You will need 2 plates for an extendable tabletop measuring 750x900 mm, plates used as side racks, 4 furniture corners, support bars. You also need to prepare screws, hinges, washers, nuts and bolts
- Cutting parts to assemble such a table must be done with millimeter precision. Otherwise, when unfolding, its flaps will constantly jam
- It is better to connect the sides together with a metal tie - corners. This will add strength and reliability to the product.
- After connecting the sidewalls, mark the attachment points for the transformation mechanism
- Drill through the wood for bolts and nuts
- We fasten the mechanism parts and check their operation
- The last thing we do is attach the tabletop parts. This must be done using metal corners
- We check the operation of the mechanism. If necessary, align the joints
Old suitcase
Even something like grandma's suitcase can be made the basis of a designer coffee table.
To do this, you will need furniture legs that match the design and a piece of plywood that fits the size of the bottom of the suitcase. Mark the places at the bottom of the suitcase for attaching the legs and drill holes in those places.
Place a sheet of plywood inside the suitcase and mark where the legs are attached and drill holes. Now you can attach the legs to the structure. The plywood in the suitcase can be decorated with fabric or scrap paper.
Veneer finishing
Veneer finishing
Restoring an old coffee table with your own hands is a simple process. Today it is not difficult to choose veneer that matches the color of the rest of the furniture - stores offer a huge range of similar products that imitate a wide variety of wood species.
Veneer can be fixed to the tabletop using the cold or hot method. In the first case, you will need a press. Finding it at home is problematic. But it’s quite possible to cover a tabletop with veneer using the hot method with your own hands:
- To ensure that the veneer lays perfectly evenly, clean the surface, removing all irregularities and knots
- The wood must be degreased by treating it with acetone. If there is resin, it is first cleaned off with a knife.
- After carrying out the above procedures, treat the surface to be glued with a primer.
- Apply a small layer of glue (preferably PVA) to the cleaned surface. You can also use hidewood, polyurethane or a special composition for working with wood.
- The glue should be sufficiently thick and viscous. Water-based formulations are not recommended. Otherwise, the veneer, having absorbed moisture, will swell
- The veneer can be glued only after the applied layer of glue has dried. It shouldn't stick to your hands
- Carefully apply the veneer and then place a white sheet of paper on top
- We begin to warm up the veneer with a hot, but not too hot iron. If air bubbles appear, they must be pierced with a needle, smooth the surface with your hand, and then ironed again. The glue protruding at the edges is immediately removed with a rag.
- A stain or varnish is applied over the veneer. They will protect the material from external influences and moisture
remove the swellings formed on the old veneer using the same heated iron. After warming up, pierce the void with a needle and straighten the surface well.
What do you need for work?
So, the simplest version of the table that you can make at home is a wooden one. And to work with wood or its derivatives, the following tools and materials may be required.
- Jigsaw or hacksaw for wood . The latter is not so effective when it comes to creating large-sized furniture, since the work will proceed slowly. But to create a small coffee table, a hacksaw is quite enough. Although working with a jigsaw is definitely more convenient and faster.
- Sandpaper of various roughnesses or a sander. They are necessary for processing the edges and surface of wood, which without it will simply be prickly and unpleasant. Before covering the product with paint or varnish, it must be sanded to perfect smoothness.
Sanding wood during manufacturing
- Varnish and paint . The wood must be covered with paints and varnishes, otherwise it will quickly darken and become dirty. The varnish will allow you to preserve and brighten the natural pattern of the wood, and the paint will allow you to give the table the color that you would like to see. The compositions can be applied with a brush or roller; the paint can be sprayed from a spray can.
- Primer for wood. This substance must be applied if you plan to paint the product. Otherwise, the paint will simply be absorbed into the wood, and the color of the table will turn out unsaturated. You will also have to spend a lot of the paint and varnish composition itself.
Primer for wood
- Fastening material and fittings . Self-tapping screws, screws - all this will be useful when installing the table. However, it is important to remember that nails are not the best option. Tables connected with their help, especially those that are constantly used, will quickly become loose. So it’s better to stick with self-tapping screws, which require a screwdriver or screwdriver to screw in. You may also need some accessories - for example, wheels or some decorating elements.
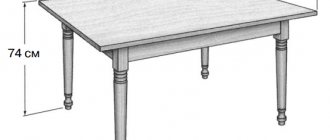
Do not forget that before the main work you need to draw a clear diagram of the future table and estimate its dimensions. The drawing will help you avoid making mistakes in the future, and will also provide the ability to calculate the required amount of materials to manufacture the product. So it won’t hurt to arm yourself with a sheet of paper and a pencil, as well as a square, a ruler, and a tape measure.
Drawing of a simple coffee table
On a note! Those who own a computer can be advised to use design programs where you can draw the selected model of the table, calculate its dimensions and even estimate its final appearance.
WOODY furniture design software
Decoration
Even a simple product can be turned into a true work of art with the help of simple techniques. With the help of decor, you can also update an old coffee table with your own hands. Today there are many finishing techniques:
- decoupage: imitation of hand painting by transferring various images to the surface of the tabletop and then fixing them with varnish; You can use fabric, decorative napkins, lace, as well as postcards, decals, book illustrations, old photos or photos printed on a special printer; thick sheets of paper are pre-cleaned from the thick bottom layer; so that the drawing is not damaged, it is pre-treated with hairspray or a special composition
Decoupage technique
- volumetric decoupage: to obtain 3D drawings, additional processing with decorative plaster or surface modeling composition is required
- mosaic: covering the surface of the tabletop with small tile elements, pieces of planks or broken pieces of porcelain; with the right selection of mosaic patterns, you can create entire pictures
Mosaic
- craquelure: a similar term refers to the artificial aging of a surface; A similar effect can be achieved by treating with special compounds (craquelure varnish); painting is done before the previous layer has completely dried, resulting in a cracked pattern
Craquelure technique
- painting with brushes followed by varnishing: if you do not have drawing skills, you can use any types of stencils; elements of painting may also be present in other types of decoration, for example, individual elements of decoupage are sometimes highlighted in a brighter or contrasting color
If you have a bright, eye-catching decor, any additional elements will be out of place. You should not place souvenirs and vases on a piece of furniture decorated using decoupage or painting techniques.
Benefits and Features
The undeniable advantage of coffee tables over other similar furniture is its versatility. At such a table you can do completely different things. For example, you can have a romantic dinner, just have a snack, work at the computer, write, draw, and also store books, photographs, interesting souvenirs, a TV remote control and much more on it. Therefore, for many people, having such furniture in the living room is simply necessary.
It also differs from other interior items in its special maneuverability and, if desired, can be moved to another place. The coffee table should be harmoniously combined with the overall design of the room, and often it becomes its main highlight. Particularly popular are transformable products with complex design solutions. In normal times, such furniture can be used for storing things, and if necessary, it can easily be turned into a full-fledged workplace and moved to another room.
Surface preparation
Removing old paint
Whatever decoration technique you choose, before finishing the tabletop you should first prepare:
- For ease of operation, unscrew the legs first
- Using a sander or sandpaper, completely scrape off the layer of old paint or varnish
- To remove small nicks and tiny dust particles, treat the surface again with fine-grained paper
- re-screw the table legs
- seal all board joints with putty and dry the surface thoroughly
- cover it with a layer of acrylic primer in 2-3 layers; each subsequent one is applied only after the previous one has completely dried; this requires at least 4-5 hours
- paint the tabletop with varnish, and then treat it with fine sandpaper to improve adhesion
Tabletop with lighting
A creative modern coffee table can be created by installing LED strip lighting into its tabletop. The glass cover is removable so that if the light sources fail, they can be easily replaced.
1 You need to cut out the center of the tabletop - this is where the bottom mirror layer, glass and LED strips will be inserted. It is enough to retreat 5-6 cm from the edge
Volumetric table lighting
2 The cut areas must be painted with paint that matches the tone of the entire product, otherwise they will be noticeable when illuminated
3 To hold the “insides” of the structure, you will need 4 metal corners, which will be fixed in the inner perimeter of the frame
4 Screw on only three of them first, leaving the fourth side free. We will install the controller in this place
Controller installation
5 Place a 4mm mirror on the frame, having previously coated its edges with glue. The resulting gaps must also be painted with black paint.
6 You should not take an LED strip with water protection. Due to the layer of silicone coating, it shines less brightly, and the light will be diffused. To obtain sufficient lighting, the number of LEDs must be at least 72 per meter
7 The power of the power supply directly depends on the total power of the tapes. For example, with a tape length of 1.7 m, a 36 W device is sufficient. If power values are not indicated in the documentation, they are calculated based on the output voltage and the amount of output current. These two parameters must be multiplied
8 For single-color ribbon, a controller is not required. Installing a device with an IR receiver may only be necessary when using multi-color lighting. But here, a controller with special bells and whistles is not needed. The only requirement is that it must be small in size. After all, it will need to be installed inside a small frame. To ensure that it fits in effortlessly, remove the plastic case, leaving only the circuit board
LED connection diagram
9 The LED strip is glued exactly in the center between the mirror and the tabletop, strictly parallel to the base. Otherwise, the light tunnel will shift. We start attaching it from the corner where the RGB controller is located. We cut off the excess tape along a special cutting line. It is marked every 5 cm
10 After soldering the wires, they should be tinned. You can replace soldering with connectors for LED strips
11 We cut out a suitable size hole in a metal corner for the output of the tape wires and attach it to the fourth side
12 Cover the structure with a table top. Glass can simply be placed on glue. However, replacing LEDs in this case will be a serious problem. It is better to make holes in it and fasten it with self-tapping screws
13 There are special spear-shaped drills for creating holes in glass. Drills with abrasive diamond coating are safer and more accurate
14 It is better to order glass cutting from a specialized company. Be sure to indicate that you require minor corner rounding and edge finishing. Otherwise you will constantly be cutting yourself off about them.
15 Turn on the backlight and admire the result
Original backlight
The author of the following video suggests making an unusual coffee table from old pallets with your own hands. A master of his craft, he masters the tool so well that the product ends up looking like a high-quality exclusive item that is not a shame to place next to expensive furniture:
