Restoration of an old sideboard with before and after photos.
Everything new is well forgotten old. Few people have not heard the saying, and it can also be correlated with the restoration of old furniture. Vintage items, also known as antiques that have seen several generations of families, are becoming increasingly popular. However, in Soviet times, many items had the same appearance, since they were mass produced but were famous for their quality.
Restoration of an old kitchen cupboard
That is why most houses in the post-Soviet space are still filled with them. But it all depends on your desire: restoring your grandmother’s sideboard with your own hands will add originality to any interior.
Restoration of a kitchen buffet in shabby chic style
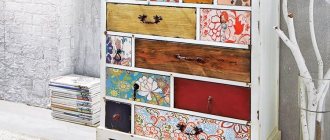
Decoupage on a kitchen cabinet - a beautiful handmade item
Beginning of restoration
New life for an old sideboard
The desire to make a unique thing in a fashionable vintage style is not enough. Grandma's buffet or sideboard can only get a second life with enough effort. Before starting work, you need to prepare everything you need.
Buffet in Provence style after restoration
First, you should find out everything about the restoration of the selected piece of furniture and decide on the restoration technique and subsequent decoration, because simply painting the old sideboard will not be enough.
Restoration of an old cabinet with decoration of the back wall and bottom of the drawers
Antique products
Not everyone can afford to buy real antiques. In this case, you can choose so-called antique furniture. It is made in modern conditions, but according to ancient samples, processed in a special way. The interior with artificially aged furniture looks very respectable, and the cost of the products is significantly lower than that of the original.
To make a completely new piece of decor look like an antique, it can be artificially aged. For this purpose, the product is painted in a special way, varnished with a craquelure effect, corners are chipped, edges are made uneven, metal parts are subjected to corrosion, and a patina is applied to the wood. Brushed furniture acquires a roughness characteristic of natural aging of wood. By rubbing, a brighter and deeper texture is achieved. To make things more believable, the items are made from old wood.
Currently, there are several design trends that allow you to decorate an antique interior. These include:
- Provence. The furniture is distinguished by emphasized simplicity. Pastel colors, ruffles, floral patterns on the upholstery of sofas and armchairs - the so-called provincial theme - create a cozy atmosphere. Aged furniture, made in Provence style, is one of the frequently used elements in modern design.
- Shabby chic decor. It is distinguished by the use of vintage elements with characteristic abrasions in the interior. It is not necessary to look for an antique piece of furniture; you can use artificially aged ones.
- Old Russian style. Tables, chairs, and stools made of natural wood decorated with artistic painting and carvings are actively used. The characteristic features of furniture in the Old Russian style are massiveness and good quality.
- Interior in Scandinavian style. The idea of decorating the room is based on the traditions of the Mediterranean countries and fully conveys the Scandinavian flavor. In a room furnished in this direction, light colors predominate. The furniture is simple, uncomplicated, made of natural wood. Preference is given to pine, birch, and beech.
ProvenceShabby chic
Old Russian
Scandinavian
Necessary tools for restoring old furniture
- Sandpaper and solvent
Sandpaper of different densities
Types of solvents for cleaning surfaces
Any old piece of furniture is first of all covered with a factory layer of paint and varnish; it is possible that earlier they also tried to change or restore it. Therefore, it is necessary to rid the buffet of any old covering. Coarse sandpaper is needed for sanding and cleaning all surfaces. It’s easy to ruin wood by simply trying to peel off the top layers with sandpaper, which is why a solvent is needed; acetone is ideal. It is applied with a brush over the entire surface, special attention should be paid to the carved parts. Another way is to soak a rag or cloth and cover the sideboard for a few minutes. The layer of old coating will come off on its own, and the buffet can be cleaned with a simple cloth.
- Tools
Multifunctional Household Hand Tool Set
It is better to process furniture in a disassembled state, so you will need a lot of tools. It is possible that the buffet will only require cosmetic repairs. But sometimes you may need to tighten loose doors or secure legs. You need to have a set of screwdrivers and wrenches, a hammer, etc. on hand.
- Accessories
Antique furniture fittings for an updated buffet
Updating the sideboard will also entail installing new fittings - handles, fasteners, etc. All this can be easily found in specialized stores or made to order in workshops.
- Additional materials: wax and putty to remove unevenness; primer for surface treatment.
- Brushes, sponges and rollers for painting.
- Paints and varnishes (acrylic and oil paints, varnish, stain).
- Masking tape, PVA glue.
Additional materials for do-it-yourself buffet restoration
The doors of an old cupboard are often glazed, so you will need tape to protect them from paint. You will need glue if the furniture has already begun to delaminate.
How to make a wardrobe or chest of drawers from a sideboard
The difference between a wardrobe and a sideboard is, perhaps, not so much external as functional.
A sideboard is usually understood as a cabinet in which dishes and kitchen textiles are stored. Personal belongings are stored in the closet. The top doors of sideboards traditionally have glass. The bottom of this piece of furniture consists of drawers. Cabinets are often made entirely of wood, although glass and stained glass are also used here.
- If you need to convert a sideboard into a cabinet, you can replace some of the glass elements with wood, or made of plywood, chipboard, etc.
- Another option is to transform the glass from transparent to colored and non-translucent using a special film.
- Also, most likely, you will have to change the color of the sideboard so that it fits seamlessly into the living room.
- It’s not uncommon lately to see master classes on converting old unnecessary sideboards from the Soviet era into multi-colored cabinets for children’s games.
- The chest of drawers is a vertical series of drawers. It is installed in bedrooms and living rooms, allowing you to store personal items and clothing out of prying eyes. If the lower part of the sideboard consists of drawers, depriving this item of the top, you can get a chest of drawers. In some furniture models, individual elements can be detached from the overall structure without problems, in other pieces you will have to use a saw.
So, as you can see, there are many ways to give old furniture a second life. The main thing is to have a desire to work with your hands, as well as a good imagination.
Are you wondering how to make a cabinet out of a sideboard? Then watch the following video, where a wardrobe will be made using the example of an old sideboard-chest of drawers:
https://youtube.com/watch?v=XDdWusGHOqE
Recovery technique
Buffet “Malachite Box” after restoration
Restoration begins with cleaning the surface and restoring problem areas. Before starting work, the furniture is disassembled: all fittings are removed, shelves and glass are removed (if it is removable). If you cannot remove the glass, cover it with tape or paper. In general, there are no special rules or methods for restoring old furniture.
- Deep restoration
The next step is to remove the old coating. It is better to do the cleaning outdoors - dust, dried paint and pieces of varnish will be difficult to remove later. After cleaning, you should thoroughly wash the buffet, degreasing the surfaces.
We process the surface with a grinding machine and remove the old coating
The sideboard needs to be inspected for unevenness or delamination, and then the cracks need to be puttyed and then sanded. If necessary, additional parts are restored - handles, legs or chipped edges. Most often, they use other similar furniture or cut it out of wood. Next comes priming. Only after all repairs and preparatory work have been carried out can you begin painting.
Putty on small cracks and then sand again
It is better to start painting from the main surfaces, and then move on to decorative elements (crown or carved sides). The paint is applied in two layers, but for simple aging of the wood, one thin layer will be enough.
We apply special paint for wood
- Decoration
Decorate the updated surface in decoupage style - this is the easiest way. To do this, select napkins or fabric with a pattern that matches the idea. The design is cut out and glued to the side of the sideboard. In this simple way you can get vintage furniture with an original pattern.
Artistic processing of old facades using decoupage technique
Painting is also used. Thin brushes and multi-colored colors are selected for it. The ornament is either drawn or outlined using a stencil.
DIY stencil painting of furniture using an airbrush
The finishing touch of decoration is varnish. It is applied in two layers after the glue or paint has completely dried, depending on the chosen decoration method. After the work is completed, assembly can begin.
Varnish on wood
An antique sideboard after restoration in a classic design
Decorative elements
If the main covering of the buffet is in good condition (or, for example, you want to preserve the charm of antiquity, while only slightly updating the appearance of the item), you can add various decorative elements. The easiest way is to apply designs on the doors or walls of the buffet. For this, it is most convenient to use ready-made stencils (even a person who does not have any special talent for drawing can use this method).
However, some rules must be followed:
- Clean the area where the design is applied from dust and dirt, and coat with varnish.
- Place the stencil in the desired location and secure it.
- Dilute the paint to medium thickness (too thick or liquid composition will not work).
- The coating must be applied with a sponge in a thin layer 1-2 times.
- After the paint has dried, cover the finishing area with protective varnish.
Caring for restored furniture
New life for an old sideboard with your own hands using the decoupage technique
Restoring an old sideboard has minor drawbacks, which, however, are no different from caring for new furniture. The surface should be carefully washed when dirty, ideally with clean water and a soft cloth, so the sideboard will not be scratched.
White buffet with old grandma's dishes
It is not recommended to place old refurbished furniture in areas of high humidity or heat generation. Next to the stove in the kitchen, near a radiator, or even just near a window, the condition of the paint can quickly deteriorate. You should also not leave the buffet on the veranda.
Unusual design of a Soviet buffet in the old Russian style
Restoring a sideboard with your own hands begins with inspection and repair, after which you can begin decorating the surface. This way you can give an old sideboard a completely new life and update your home interior.
Restored old furniture allows you to update your interior at minimal cost
Do-it-yourself restoration of a buffet in Provence style
Advantages
Restoring furniture yourself has a number of advantages.
These include the following:
- Saving money on purchasing new products. A restored wooden sideboard can last for many years, while buying antique furniture will cost a lot of money.
- To decorate wooden furniture, you can use available materials, especially for cosmetic repairs.
- Restoration allows you to restore the original color, eliminate chips, cracks, stains and other defects that appear due to negative external influences or during long-term use.
Photo gallery with the best do-it-yourself restoration work on buffets:
PreviousFurnitureInteresting ideas for creating furniture with your own hands
Next
FurnitureWe make our own original furniture from pallets
Expert advice
Many people very often believe that to embody a vintage or retro style it is worth using antique wallpaper, which, due to its age and unusual patterns, can be called vintage. However, professionals do not recommend doing this, since these are building materials whose service life may be limited.
If you find old, but beautiful wallpaper from your grandmothers' time, this is far from a guarantee that it will serve you for a long time. Nevertheless, sometimes the designers themselves choose such building materials for non-standard wall decoration.
To be sure to choose the right design for decorating the walls in your home, it is best to use the services of specialists, since vintage and retro styles are not as simple as it might seem at first glance.
It is also best to give preference only to trusted brands and brands that produce decent wallpaper products. And excellent manufacturers of such building materials are not only foreign, but also domestic.
Padding
This process is not complicated, but painstaking: you can reupholster an old chair, an armchair or a sofa. Dense natural fabrics are better suited for reupholstery. The first step is to disassemble the furniture and inspect it - this will help you understand how exactly the material is attached to the wooden frame.
If the upholstery is old, damaged or smells, it is recommended to remove it and strengthen the frame with metal plates. Sometimes the filler requires replacement. In the case of reupholstering Soviet armchairs that are popular today, we recommend adding foam rubber: the product will be softer, more comfortable and more solid.
Calculate the amount of fabric with a margin
It is important to fasten it tightly so as not to create folds. The material is fixed with a furniture stapler
Planning an interior design in an antique style
Before you start work, you should carefully consider the design of the future room. You need to make a list of all the Soviet period items that are available.
It is welcome to draw up a drawing of each room, where you can draw a diagram of the arrangement of objects. This approach will allow you to:
- Make a list of required materials.
- Get an accurate idea of what the result will be.
- Purchase the necessary funds in sufficient quantities.
Pre-planning allows you to speed up the work process. You can purchase everything you need in advance to get started. Don't be afraid to show your imagination. Vintage items will allow you to enjoy creativity.
Using Soviet furniture you can decorate a room in a retro style
The result will give you pleasure. Your apartment will turn into a cozy nest, designed for a comfortable stay.
Painting and varnishing
It was decided to paint the sideboard with chalk paint. For this purpose I bought English interior chalk paint. At this stage I needed:
- synthetic brushes of different sizes;
- flock rollers of different sizes;
- contour paste (baguette paste for restoration work) “TAIR”;
- sponge for applying paste;
- spray varnish Rust-Oleum Painter's Touch, 2x ultra cover clear - matte.
I'll tell you a little about this paint. I’ll say right away that the paint is quite expensive, but taking into account many advantages over other paints, I chose this one, and as it turned out, I was right - painting the buffet turned out to be not so expensive. Why I liked this paint: It took me less than 2 liters to paint the entire buffet from the outside and inside with all the shelves and drawers in 2 layers. I bought 2 liter cans and still have some paint left. Photo 59 In my work I used synthetic brushes and flock rollers of different sizes. I tried different rollers, but I liked the flock ones for this paint the best. First, I painted all the decorative elements with brushes, and then I painted the buffet itself with a roller. Flock rollers. Photo 60 Painting. Photo 61 The next stage of painting was gilding the decorative elements. But since my new fittings were the color of antique bronze, I had to decorate the elements to match the color of this fittings. Therefore, what I ended up with was not gilding, but something like bronzing.))) So, I took contour paste in the color “antique bronze”
I would like to draw your attention to the fact that “TAIR” also sells just “contour” in the same tubes, but in my work I used exactly contour paste, also known as “baguette paste for restoration work.” You can buy it at Leonardo, but, unfortunately, sales consultants cannot always distinguish “contour” from “contour paste”
I won’t go into details, I’ll just say that you can use several shades of paste at the same time and get amazing effects. Contour paste (baguette paste for restoration work) “TAIR”. Photo 62 I’ll briefly tell you how I applied the baguette paste. She applied a small amount of paste to a sponge, rubbed it in a circular motion on a disposable plate, evenly distributing the paste on the sponge, and then, barely touching the convex parts of the applied decor with this sponge, highlighted the relief. Photo 63 After painting and decorating, the buffet was coated with two layers of matte aerosol varnish Rust-Oleum Painter's Touch, 2x ultra cover clear. About 8 of these cans were required for the entire buffet. Photo 64 Well, we have reached the final stage. There is very little left to do - put the glass back in, put in a new mirror that I ordered from the workshop, install new fittings and assemble the buffet. I will not describe all these operations, because everything here is simple and there is nothing to describe. I did this in one day. Of course, the men helped me assemble the buffet itself and drag it into place.))) HURRAY! The buffet, which had a completely run-down and outdated look, has been transformed. Painting, decorative elements for furniture and new fittings changed its appearance and gave it new stylistic shades. Photo 65 Photo 66 Photo 67 Photo 68 Photo 69 I am very glad that I completed my task. “Resuscitation” and “plastic surgery” were carried out in a hurry - the client was not only alive, but also returned to duty in a new look. I am sure that it will delight us for many years to come and serve faithfully for its intended purpose. I apologize that the post turned out to be long and long-lasting, but I did not break it into parts. To everyone who was patient and read to the end, thank you very much - I wrote this for you!
painting
Having the proper skills, you can start painting on wood. For painting, it is enough to use brushes of the appropriate size and paint of the desired color.
Varnish
Applying varnish to a wooden surface not only transforms the appearance and changes the visual perception, but also protects the sideboard from external influences. Wooden furniture elements can be varnished immediately after processing or after painting.
Antique finish
A special type of finishing helps to restore a sideboard and at the same time preserve its ancient appearance. To add antiquity, you can use several techniques.
Craquelure varnish
When starting to restore a sideboard, craquelure varnish is applied between layers of acrylic paint and left for 35-40 minutes. After drying, the varnish creates a cracking effect on the entire surface of the applied paint layer.
Mechanical aging
For mechanical aging of a wooden surface, you need to use a stiff brush, with which some of the fibers are removed. The created relief can be restored with paint and varnish to emphasize the structure. The final result depends on the degree of surface treatment with a brush.
Gold plated paint
You can paint a Soviet sideboard gold using materials created from artificial components. The most common option is decorative acrylic paints that imitate gold color. To apply the material, it is allowed to use foam rollers, a spray gun and brushes.
Step-by-step master class
Before you restore an old sideboard, prepare the necessary tools and materials:
- Water-based matte primer
- Acrylic paints: dark ivory, light ivory, pink, sienna (natural), green, yellow and magenta
- Slowing Medium
- Matte water-based varnish for decoupage
- Wax varnish-gel (flatting)
- Glue for decoupage
- Transparent cooking film
It’s easy to update a buffet with your own hands; to do this, follow the step-by-step master class:
Start by preparing the base: polish the wood surface using progressively finer sandpaper, working in the direction of the wood grain.
Thoroughly clean the surface of dust, apply 2-3 layers of matte primer with a soft brush and leave to dry; clean the surface of each layer. Using a dry and clean foam roller, apply 1 coat of dark ivory paint to the entire surface of the sideboard (the roller does not leave strokes like a brush).
When the work is dry, apply a coat of light ivory paint diluted with retarding medium in a ratio of 1:10. Using a size 50 bristle brush, remove some of the paint in long, criss-crossing strokes, this will allow the paint underneath to show through, creating an aged effect.
Both colors will be mixed into one shade with a hazy effect.
For a DIY Provence buffet, on lightly primed transparent cooking film, apply a layer of pink acrylic paint diluted with a retarding medium.
Place the film diagonally on the cupboard door and, using gentle pressure, transfer the paint layer to the wooden surface. Pull sharply and remove the film, creating the effect of marble veins
Be patient and repeat this technique, covering the entire surface to be decorated.
Use a sea sponge to tamp the paint, creating transitions of color tones. Using a writing brush, use natural sienna paint to highlight the marble veins. Using a stiff bristle brush, lightly paint the typical “holes” on a marble surface onto the wood surface. Leave to dry, then coat the work with a protective layer of matte decoupage varnish.
Start decoupaging your buffet by carefully cutting out your chosen decoupage pattern and immersing the piece in water for a few minutes. It is necessary to moisten the paper with water in order to soften it, this way you can avoid the formation of folds and air bubbles during gluing.
Apply glue evenly to the back of the cut out piece and stick it onto the surface of the sideboard. Use a damp sea sponge to remove excess glue.
Using a synthetic brush with a pointed tip, apply your chosen paint next to the pasted pattern, creating a bright spot. Using a dry sponge pad, begin to create a haze of color, brightening the color close to the decoupage pattern and gradually weakening its intensity as it moves away. Start with a lighter paint and create a hazy effect where the different colors meet.
First, think over and put together the composition and only then finally glue the parts. Create harmonious compositions in accordance with the decorated base.
To decoupage a buffet with your own hands, cut out all the small paper parts and secure them with a reusable rubber profile that does not leave marks on either the wooden surface or the paper.
Using a glass jar, draw a false handle using light pencil lines.
Take a sharp-tipped brush with paint thinned with retarding medium and draw a fake pen by tracing a pencil outline.
Create a "tramré I'oeil" effect by gluing two cute paper mice on top of a false hole painted with different shades of brown paint, alternating dark and light areas.
To get a more realistic effect, paint cracks at some points on the surface of the furniture using brown paint diluted with a retarding medium. Cover the work with a protective layer of flatting.
Unnecessary junk or luxury item
Many people try to immediately get rid of old furniture as soon as the opportunity arises. Yes, of course, a new modern interior is wonderful, but few people will be surprised by it now. Therefore, think before you take the old sideboard that you inherited from your grandmother to the landfill; perhaps it will become the main decoration in the interior of your home. This is especially true for furniture from the beginning of the last century; today, it is a real rarity into which you can breathe new life.
It is important to understand that restoring a sideboard with your own hands is not such a difficult task, but it will require some time and skills. You can contact restoration specialists, they will be happy to get to work and do everything you need, just call them. But such a pleasure will be very expensive, and the process of professional restoration itself is quite time-consuming
Advice, roll up your sleeves and try to do this work yourself. This will not only cost you much less, but it can become a very exciting activity, help you master some of the skills of a restoration artist and enrich you spiritually
But such pleasure will be very expensive, and the process of professional restoration itself is quite time-consuming. Advice, roll up your sleeves and try to do this work yourself. This will not only cost you much less, but it can become a very exciting activity, help you master some of the skills of a restoration artist and enrich you spiritually.
Where does the process of restoring old furniture begin?
Restoring an old sideboard requires studying some issues related to the history of the product, especially if it is antique. You should first try to determine in what time, era it was made, from what materials, conduct an examination for damage, possible loss of some elements, in a word, look at the future masterpiece with passion.
You may need to order the manufacture of some parts from wood craftsmen, but it is worth paying attention to one fact. Restoring a Soviet sideboard will not require any deep knowledge or special skills from you; there can be many design solutions; sometimes it’s enough to change the color of the product and buy vintage handles, and the thing will sparkle with new colors. When we are talking about truly unique antique furniture from a famous master, made from valuable types of wood with special virtuoso execution, then it is still better to give it to specialists for restoration, since without any knowledge you can simply ruin an expensive thing. If you decide to breathe new life into an old sideboard yourself, you need to properly prepare for this
Perhaps the restoration requires some non-standard solutions, parts made from special valuable types of wood, the advice of a knowledgeable, reputable cabinetmaker will not hurt you
If you decide to breathe new life into an old sideboard yourself, you need to properly prepare for this. Perhaps the restoration requires some non-standard solutions, parts made from special valuable types of wood, the advice of a knowledgeable, reputable cabinetmaker will not hurt you.
Buffet as a designer find
In order to make a unique, inimitable piece of furniture from an old sideboard, you need the eye of an artist - a designer and hands that grow from where it is needed. There are a huge number of techniques for restoring old furniture, ranging from partial restoration and refreshing the color to completely changing the appearance. The method of decoupage, painting, mechanical aging, varnishing, gilding, and many other methods that entirely depend on your taste preferences can be used here.
Many designers, taking antique pieces of furniture to remodel, completely change the color scheme, adjusting it to the overall look of the room, using new handles, inserts, adding details and all kinds of decorations. The main thing here is not to overdo it and not slip into bad taste, which is the sin of many amateur craftsmen when they first turn to this activity.
Finishing of main surfaces
Ceiling
The ceiling, as a rule, is simply painted white. There is no place for stretched canvases or spotlights. However, you can “outwit” the composition with matte materials and appropriate lamp design. But stucco remains more appropriate.
Floor
Traditionally, the floor is laid with wooden planks in simpler interiors, parquet in noble premises, tiles in the kitchen, bathrooms, and hallways. Modern parquet can look quite varied, but it always looks expensive. But you need to choose boards that are worn.
Walls
Walls can be varied. Most often they are covered with wallpaper. But if in the aristocratic version of the vintage style these are textile materials, then in a simpler interior ordinary paper strips are used. The pattern of these imitates brickwork, whitewash, the texture of stone or wood. You can choose a small floral pattern or a large classic ornament.
The walls can be painted or paneled at the bottom, leaving wallpaper or paint on top. It all depends on the character and mood of the situation.
The choice of color and pattern depends on many factors. For example, in the Provence style, the wallpaper will be exclusively pastel in color and with small flowers. The interior is closer to classical and baroque and can use large floral or ornate patterns, as well as stripes. The design of the mid-20th century will “prefer” graphic contrasting solutions - black and white tiles, or rather its imitation, geometric patterns. An industrial loft can also be vintage, in which case the brick walls will remain. But most often vintage is wallpaper with flowers or stripes.
We create it ourselves
If you don’t have a suitable old piece of furniture, but you are eager to create, don’t despair, there are many techniques for creating a buffet with your own hands.
Made from wood and other materials
Since hand-made is now in fashion, on the Internet you can find many master classes on creating sideboards, chests of drawers, tables and other furniture with your own hands.
- So, for example, you can create a buffet from clapboard. This material is usually not used in the manufacture of factory furniture, but it is easy to process, and therefore is excellent for a homemade sideboard. In addition, the lining resists moisture and temperature changes well. In this version of the sideboard, bars for window frames are used as a frame. The drawer is made of plywood, and the front panels are covered with veneer.
- You can make a buffet with your own hands from wood. Of course, this will require more solid skills and close familiarity with carpentry tools. The lower part of a wooden sideboard is usually held together with pegs and glue. The back part and drawers are held on with screws, and other planks and horizontal surfaces are attached with glue and nails.
- Quite often, sideboards are made from chipboard and MDF.
The technology for making a buffet can be divided into several stages:
- Project development. Before starting work, you need to create a drawing of the future sideboard. This piece of furniture usually includes the following components:
- The body, that is, the lower part of the sideboard, represented by the tabletop, sides and back;
- Top box;
- Shelves;
- Box;
- Doors;
- Fastenings and handles.
- Manufacturing of parts. If you do not have sufficient skills, the components of the buffet designed by you can be ordered from the workshop. Having decided to create a sideboard yourself, in addition to the material, you will need a number of tools, in particular, a jigsaw and a circular saw. Having made the frame, you can supplement it with purchased doors. This solution is appropriate when the material for the buffet is chipboard or MDF;
- Assembling finished parts together. Here you will need a screwdriver (or drill) and fasteners. The assembly is performed in the following sequence:
- Creating a frame;
- Attaching backdrops to the frame;
- Hanging the upper part of the sideboard and installing supports, which can be decorative balusters;
- Installation of shelves;
- Door fastening.
- Finishing. After the buffet is assembled, we begin decorating. Glass and mirrors are inserted, cornices and trims are added, crystal and dishes are displayed.
DIY Asian style sideboard
In Provence style and more
Of course, only a professional carpenter can create a full-fledged classic buffet with his own hands. In addition, such a product will require expensive wood, glass and various metal decorations.
It is much easier to create a sideboard or buffet with your own hands in one of the rustic styles, for example, Provence or country. The materials used in such interior items are cheaper, and the finishing on them is much simpler.
- A rustic buffet should be practical, which means it should have drawers, closed and open shelves. The tone chosen for it is light (white in Provence and natural wood colors in country).
- Aiming at country, the wood is not painted, but carefully sanded and varnished.
- Sideboards in the Provence style are created by artificially aging the wood using white paint, and then complemented with patterns, among which small flowers predominate. The easiest way to recreate the French provincial style is to use the decoupage technique.
- Minimalist styles (high-tech, Scandinavian) are unlikely to need a buffet. Here, greater preference is given to wardrobes, niches and shelves.
- A sideboard in the Rococo style, like other furniture, should be turned and carved. However, even if your buffet is devoid of openwork, you can add some decorative elements to it yourself to get closer to the desired style.
So, curlicue painting, asymmetrical overlays made of bronze and copper, and plastic inserts imitating gilded metal will come to the rescue. You can purchase fancy door handles. If it is possible to make a replacement, match the curved legs to the buffet.
A buffet in an English interior is trendy. Here he acts as the custodian of not only porcelain dishes, but also the owner’s library. Such a sideboard should be made in darker and richer colors.
Photos of old sideboards and cupboards after restoration with your own hands
