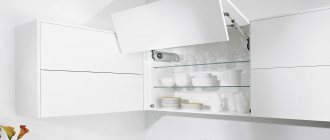
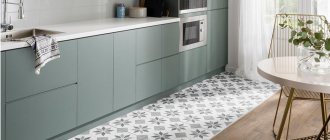
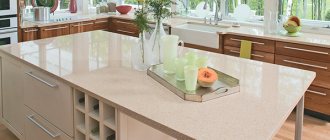
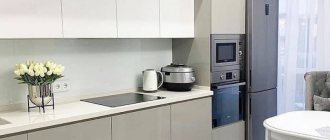
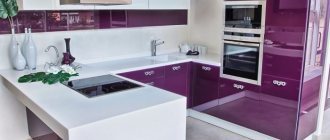
Hello, dear friends! Today we are talking about facades without handles. This is a modern, as well as stylish and largely practical solution that can be used for kitchens, living rooms, hallways and other rooms with furniture.
Many people are accustomed to using the standard type of opening. These are accessories in the form of handles. You can buy them for little money and easily install them yourself.
Handles are relevant if it is an ordinary hinged cabinet, a facade with a dishwasher or washing machine, wall-mounted and floor-standing modules, etc.
But this is not the only option. Pens are not the only solution. And today you will see this. Let's look at the different options and see what their pros and cons are.
Method 1. Kitchen facades without handles with opening by pressing, pros and cons
There are two series of fittings for implementing the “push-open” system - these are push-up (push-up) and tip-on (tip-on) from Blum and Hettich. In fact, there are much more mechanisms for making kitchen facades without handles, with different price categories and quality.
- The mechanism itself for pushing out the facade when pressed can be built into the loop on which the facade is hung.
- There are also options on sale where the electric drive is activated by pressing. This is a very expensive pleasure.
- But there is a more budget-friendly way. When push-up is installed separately. In this case, it is a capsule with a “pump” that pops out when pressed, which pushes out the façade.
This capsule can be overhead, screwed to the side wall from the inside.
Or mortise, hide in the end of the cabinet side.
These devices are inexpensive, around 50-100 rubles in a budget version. That is, in fact, you can make it yourself so that the doors open when pressed and get rid of handles. All you have to do is go and buy overhead push-ups and screw them into your closets.
Why you shouldn’t make kitchen facades without handles that open when pressed
There is no definite answer as to whether it is worth making kitchen facades without handles that open when pressed. It all depends on the habits of each individual person.
The disadvantages are usually the following:
Glossy facades quickly become stained.
After all, in the kitchen you have to do a lot of things with wet and not entirely clean hands. But the hands don’t get any less dirty, it’s just that the dirt on them is not so visible. Therefore, the argument is highly controversial.
You start trying to open all the doors by pressing.
We do a lot of actions in our lives “automatically”. That’s why situations arise when you don’t remember whether you turned off the lights before leaving the house or whether you locked the door. Cabinet doors also often open automatically. And some owners of kitchens with facades without handles note that they begin to “stupid” near each door, trying to press and open. But perhaps you are not one of them. If every time you think about something of your own, you don’t fumble for the handle in front of the closet, then you definitely won’t have problems with push-ups in the kitchen.
Recommendations for selection
The first and foremost thing you need to know about handleless kitchens is that the options suit ultra-modern styles.
In a modern, hi-tech or minimalist interior, such kitchen sets will look best. In classic or country cuisine - strange and inappropriate. 3 tips will help you avoid mistakes:
- Focus on light and matte facades. They are more practical and get dirty less than dark and glossy ones.
- Don’t give up on grab handles throughout your kitchen—it’s more convenient to open a built-in refrigerator or dishwasher using a familiar bracket or rail.
- Combine systems to create the most functional kitchen possible. It is convenient to open the upper hinged cabinets by pressing, and the lower drawers using profiles or embedded handles.
Method 2. Play with the shape of the kitchen facade without a handle, pros and cons
The handle on the kitchen facade does not necessarily have to be attached to the front surface. It can be integrated into the facade itself and not “give” itself away.
The role of a handle can be played by a profile fixed at the end.
Or a special recess running along the entire length of the facade.
The handle can be mortise, recessed into the facade.
Each of these methods has its own advantages. The main thing is that no other opening mechanisms are needed. In fact, the door will open in the same way by grabbing the handle. It just won't be noticeable at all.
Of the minuses, it is worth noting that a handle can be integrated into any facade. And the choice of decors, the price range is sharply limited by the possible options. As does the choice to integrate handles into the façade to achieve the desired effect.
Preparation of components for furniture modernization
When ordering internal facades, which can be made from laminated chipboard or MDF boards with different types of facing coatings (PVC film, enamel, acrylic, laminated plastics), it is important to correctly determine the size of the gaps. Ideally, the thickness of the cracks on each side of the facades should be 1.5 mm. Gaps that are almost invisible from the outside are sufficient for swing doors to open and close freely.
However, the recommended size is designed for a perfectly leveled cabinet with excellent rigidity. In reality, things are different - the diagonals of the internal openings do not coincide, and their sizes may change during operation. The reasons are seasonal subsidence of the foundation, deformation of laminated slabs, weakening of fasteners.
The listed size changes are insignificant, however, even such distortions are enough to provoke friction of the facades against the vertical posts, the bottom or top of the opening. To eliminate such risks, it is advisable to increase the width of the gaps to 2.5 mm on each side. That is, you need to subtract 5 mm from the height and width of the opening. This will be the size of the facade (without taking into account the edges for laminated chipboard panels). When calculating the height of the drawer fronts, you need to take into account the gaps between all the linings.
Determining the length of the guides
Regardless of the modification of the extension system, when assembling furniture, you need to take into account the thickness of the facades (16 or 19 mm). The additional distance required to recess the guides inside is also important. For concealed mounting guides and telescopic models it is 5-7 mm. That is, the nominal length of the guides should be 21-26 mm less than the length of the body. It is optimal to take a large value for calculations in order to have a margin.
If you make a mistake with the size, the internal facade will protrude beyond the body. There may also be problems with opening the drawer, since due to lack of free space the pusher mechanism will not be able to operate, so it is important to be on the safe side. For example, for a case with a total depth of 470 mm, you need to choose guides with a length of 400 mm.
Selection of hinges and pushers for swing facades
To complete modules with internal door leaves, you will need internal hinges without springs. The cup diameter of such canopies is 35 mm. There are hinges with a standard fastening method and a new CLIP top fixation system, which is a latch on a spring. It is better to choose the first option because it is simpler and more reliable.
Facade pushers are available in two modifications - with a short or long piston. The difference between them is the buoyancy force. Models with a long piston are designed for opening heavy facades. Well-known European hardware manufacturers offer pushers with an adjustment function, thanks to which you can beautifully position the door leaf in the opening.
Method 3. Install a special profile on the furniture body
Among the disadvantages of the third method, it is worth noting its exclusivity, the impossibility of achieving the desired effect of facades without handles by changing only the facades or installing additional mechanisms.
Everything will have to be redone. And the furniture body, embedding a special profile into it.
For upper cabinets it looks like this.
You will also have to change the height of the lower facades.
Therefore, the installation of the Gola profile to create the effect of cabinets without handles should be considered at the furniture design stage. It looks very impressive. Kitchen facades without handles with a Gola profile are convenient. But you will have to find a manufacturer who works with it.
Three reasons to make a cabinet without handles
Any design decision should be considered from a practicality point of view. Of course, facades without protruding handles look modern and stylish. And, as practice shows, they turn out to be quite convenient to use. We can highlight at least three undoubted advantages:
- Visually, facades without handles with a flat surface are perceived as a continuation of the walls. The absence of unnecessary details helps create the feeling of more space than it actually is. This effect is good to use in small kitchens.
- Also, the absence of protruding elements is valuable for narrow spaces. For example, in a narrow hallway where you can’t turn around, cabinets without handles will help you avoid uncomfortable moments: there will be nothing else to bump into or cling to.
- Corner kitchens without handles also guarantee that the surfaces of the facades adjacent to the corner will remain undamaged. Situations where, when opening, the handle “hits” the adjacent door are not uncommon, although this is considered a design error.
Installation of self-opening facades
It is appropriate to divide this process of furniture modernization into the following stages: preparation of the body, installation of doors, assembly and integration of drawers. When choosing a sequence of actions, you need to take into account that preparing the body and installing the facades are interrelated activities. But the order of installation of doors and drawers does not matter.
Preparing the body
Adaptation of the body consists of cutting down the internal shelves. Their front end should be recessed inward at a distance equal to the thickness of the facade. Usually this procedure does not take much time, but sometimes you have to disassemble the entire body in order to remove and shorten the shelves on a machine or with a jigsaw.
Installation of facades
Along with the manufacture of door panels, it is recommended to order their milling for hinge cups. You can do this yourself using a drill or screwdriver. A cutter with a diameter of 35 mm can be immediately purchased along with other furniture components. However, when drilling, precision and accuracy are required. Not everyone succeeds in performing high-quality milling the first time. The process of fixing the canopies is much simpler:
- Insert the hinge cups into the holes, then lean the chipboard strip against the back of the awnings. It will help give the canopies the correct position.
- Mark the entry points of the screws with an awl, remove the hinges and drill shallow holes in the marked places. A little later, they will help you quickly and accurately screw in the screws when fixing the hinges. The depth of the blind holes is about 7 mm; they need to be made with a Ø2 mm drill.
- Insert the hinges and fasten with 3.5x16 mm self-tapping screws.
- Mark the places where the strike plates are fixed on the vertical posts, make tattoos with an awl, drill blind holes Ø2 mm and screw them.
- Mark the mounting points for the pusher housings on the shelves. Models from different manufacturers may have different dimensions, so you need to use specific installation instructions.
- Attach pushers to shelves.
- Hang the facades and attach strikers for magnetic repellers to the back of the door leaves.
The easiest way is to attach the counter and mounting strips to parts that lie on the table. If possible, it is advisable to disassemble the furniture.
Installation of boxes
This step involves assembling the new drawer bodies and installing the slides. The algorithm of actions looks like this:
- Mark the ends and front surface of the sidewalls, rear and front walls, as well as the bottoms for drilling holes for confirmations.
- Drill holes with a confirmatory router and assemble the drawers.
- Using the instructions, find, mark and prepare points for the mounting screws to enter under the guides. This must be done taking into account the thickness of the internal facades and the gaps for the Push-to-Open mechanism to operate.
- Secure the fasteners to the bottoms of the drawers.
- Attach the right and left rails to the side posts.
- Place the drawers one by one on the extended guides, and then push them all the way. When the drawers are in the correct position, two clicks will sound. This is a signal that the clamps on a pair of fasteners have activated.
- Cover the confirmation hats with special decorative stickers.
- Adjust the height of the pads so that the gaps at the bottom and top are the same. This can be done using the orange or red wheel, which is located under the bottom of the box on the fastening element.
The final adjustment of the gaps between the internal facades and the body is best done after installing the module in the place where it should be at all times. First you need to set it level and only then start adjusting the gaps. Otherwise, the procedure will have to be repeated twice.
What tools and consumables will be needed for the job?
The main tool for modifications is a screwdriver or drill with the option of adjusting the rotation speed. To mark, drill and screw in self-tapping screws you will need:
- confirmat cutter;
- bit adapter;
- measuring tool: tape measure, square;
- bits for tightening confirmations and self-tapping screws;
- awl, marker.
In addition to facades, guides, furniture hinges and pushers, you will need confirmations, decorative plugs, as well as 3.5×16 and 3.6×30 mm self-tapping screws.

