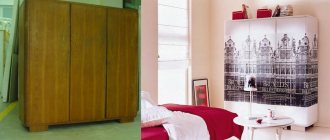
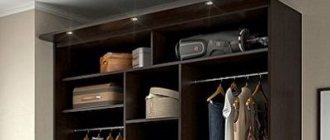
Each closet has a number of shelves, drawers, hooks and hangers that serve as storage for clothes, shoes, accessories, books, dishes, small and large household items. All structural elements of the product experience different mechanical and physical loads. As a result, some shelves on which light things lie retain their shape, while others become deformed or warp under the weight of bulky household belongings.
In classic wardrobes without a back wall, hinged doors sag over time, and in coupe models, the doors move to one side or fall out of the sliding system guides. The backdrop gives the furniture structure additional rigidity and stability, preventing it from skewing and loosening.
A furniture box assembled in compliance with all technological processes will last for many years. The back wall covering the back of the cabinet will not only provide strength and hardness to the product. It will protect the interior of the wardrobe from ubiquitous dust, hide defects in the room walls from view, and give the product a finished look.
Do you need a back wall in wardrobes?
Rigidity for large cabinets, such as sliding wardrobes, is an important characteristic. The internal content of an ordinary wardrobe is quite uneven; voluminous niches with rods alternate with narrow and dense shelves. The load inside the cabinet is distributed extremely unevenly. Both the shelves and the body require additional rigidity.
Another thing is built-in wardrobes and dressing rooms. Here, rigidity is given to the shelves in a different way - through additional consoles.
All other freestanding cabinets with sides, bottom and roof require a back wall, of course.
The consequences of deformation due to insufficient rigidity of the overall structure can be serious. Therefore, in addition to the rear wall, stiffening ribs made of the main material - chipboard - are laid between the wide spans of the internal sections at the project stage.
How to repair a shoe section for a hallway set?
The photo shows that the facade was skewed to one side due to a breakdown.
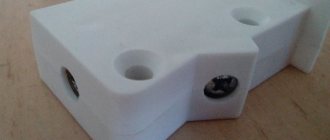
The most common breakdown of this section is the failure of the plastic bushings of the opening mechanism of the section with doors (facade). They are usually divided in half - external and internal. You can, of course, turn new bushings on a lathe, but not everyone can do this. A more accessible and simpler way is to attach the outer part of the mechanism bushings using self-tapping screws (4x25 mm). From this “set” we use only self-tapping screws with a press washer and a larger plastic ring, and throw away the rest. After the work has been done, everything will be as it was originally.
please help me with the closet
No registered user is viewing this page.
6 ready-made IKEA kitchen storage solutions that won't break the bank
10 ideas for kitchen organization that we spotted in Finnish apartments
How to place lamps on a suspended ceiling
- Construction and repair
- Foundation
- Roof
- Walls
- Window
- Doors and partitions
- Ceiling
- Balconies and loggias
- Internal structures
- Floor
- Water supply and sewerage
- Heating
- Ventilation and air conditioning
- Gas and energy supply
- Lighting
- Plumbing equipment
- Security and home automation
- Baths, saunas, swimming pools
- Construction Materials
- Decoration Materials
- Tools
- Technique
- Laws and finance
- TechnoNIKOL
- Design and decor
- Apartment
- Bedroom
- Kitchen
- Dining room
- Living room
- Bathroom, toilet
- Hallway
- Children's
- Attic
- Small rooms
- Workplace
- Wardrobe
- Library
- Decoration
- Furniture
- Accessories
- Vacation home
- Landscape
- Redevelopment
- Catalog of houses
- Magazine
- News
- Events
- about the project
- Advertising on the website
- Advertising in a magazine
- Terms of use
- Contacts
- about the project
- Advertising on the website
- Advertising in a magazine
- Terms of use
- Advertising on the website
- Advertising in a magazine
- Terms of use
- Contacts
Are you a professional architect or designer?
IVD. Repair and finishing
Are you a professional architect or designer?
The IVD.ru website is a leading Internet project dedicated to the issues of reconstruction and interior design of residential premises. The main content of the site is the archive of the magazine “Ideas for Your Home” - exclusive author’s articles, high-quality illustrations, practical tips and lessons. A team of professionals is working on the project in close collaboration with famous designers, architects and leading publishing experts.
On our website you can choose comprehensive design solutions; view detailed reviews of the market for construction and finishing materials, furniture, machinery and equipment; compare your own ideas with design projects of leading architects; communicate directly with other readers and editors on the forum.
How to repair a hinge with epoxy resin
To repair larger damage, epoxy resin can be used. This is a plastic material that, after hardening, turns into a hard surface.
Epoxy resin consists of two components that must be mixed thoroughly before use. The resin must be tightly filled into the damaged hole and the surface leveled with the main one.
While the resin has not hardened, you need to screw the confirmat into it and leave it until it hardens completely. The fastener will then easily unscrew from the wall and be installed again along the thread through the loop. Instead of a confirmat, you can use a regular bolt: cut off its head and make a slotted thread at the end. Glue the bolt with the thread outward using epoxy glue or drown it in resin, as in the previous version. Then install loop and secure it with a suitable size nut
If the inner surface of the wall is white, you can mask the repair area with a regular corrector, and for colored surfaces, select a suitable paint or cover the area with self-adhesive film
You can also use filling the hole with cotton wool soaked in PVA glue. When the glue hardens, you can screw a self-tapping screw into this place
Functional purpose
Let's be honest. Even when buying a fairly expensive cabinet, few people pay attention to what its back wall is made of.
No one is interested in the thickness, the fastening used by the master during assembly and other aspects. After all, its functionality is supposedly limited to the fact that when putting things on shelves they do not fall out of the closet. And indeed it is.
But I will tell you that the main function is still not this. Surprised? I myself was amazed at the time, when I had not yet dealt with furniture issues. Now I advise all clients to pay attention to what the back wall of the cabinet is made of, the material of which largely influences a number of factors.
The main function is to maintain the correct geometry of the furniture body.
It is the back wall (another name is the backdrop) that allows you to lay the assembled box diagonally and fix it in this position for the entire subsequent service life.
The back acts as an additional stiffening rib. Due to this, the structure does not become loose or warp. This is due to the unevenness of the structure and different loads on different compartments. Somewhere light things are stored, other shelves contain heavy items.
If you do not use the backdrop, or install it incorrectly, the structure will soon change its geometry, the swing doors will sag, the sliding system will begin to move tightly along its guides, fall out of the rail, etc.
I’m telling you all this from personal experience, since I had to repeatedly correct the mistakes of would-be masters.
Manufacturing technology
We will divide the cabinet manufacturing process into several stages:
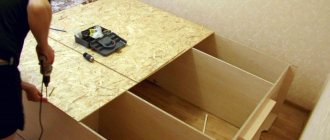
Stages of manufacturing a cabinet from laminated chipboard
Project preparation
At the design stage, it is necessary to understand all the nuances of the design, such as:
- Dimensions;
- Number of departments and configuration;
- Number of shelves.
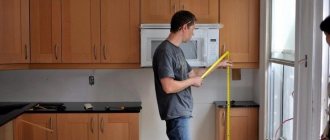
Therefore, before you start designing, you should decide in which room and where exactly the new furniture will be placed. Having allocated a place, measure the area several times - its length, width and height. In fact, these will be the dimensions of the structure.
Measure your closet space before designing
The only thing is that if the cabinet is not built-in, its dimensions should be somewhat smaller than the size of the space allocated for it so that the design “fits in” easily.
Sample Project
Having decided on all the above aspects of the furniture, draw it on paper or on a computer. In principle, it is not necessary to make an exact drawing to scale. You can even draw up a diagram by hand. The main thing is that it is clear to you, and all the dimensions of the furniture in millimeters are indicated on it.
Preparation of materials
For work you need to prepare the following materials:
- laminated chipboard;
- Fiberboard;
- Self-tapping screws;
- Plugs for screw heads (selected according to the diameter of the screw heads. You can purchase plugs at a furniture store);
- Accessories - door awnings, handles, legs, guides for drawers and removable shelves, clothes rail with flanges;
- Self-adhesive film according to the color of the chipboard coating;
Cabinet fittings can be purchased at a furniture store
Having the project in front of your eyes, you can independently calculate the amount of all materials.
In addition, prepare the following set of tools:
- Jigsaw;
- Electric drill and drill set;
- Construction corner;
- Tape measure and pencil;
- Screwdriver;
- Construction stapler;
- Rule.
Manufacturing of parts
We begin work with the manufacture of parts:
| Illustrations | Actions |
Manufacturing of parts:
| |
Making holes for fastening shelves:
|
After preparing the parts, stick strips made of self-adhesive film on all their ends.
Additional advice from experts on installing cabinet fasteners
- Vibrations of the drill at the beginning of drilling can be eliminated by first punching a small hole with a punch.
- To prevent the wall from crumbling, reduce the diameter of the drill.
- The depth of the hole is controlled using a mark on the drill.
- Before drilling, determine the location of the electrical wiring.
Having chosen the fastening option, taking into account the strength and material of the walls in the room, having prepared the place and tools, you can safely get to work.
vote
Article rating
How to choose quality fittings
There are a great variety of alloys from which furniture fittings are made, so there is no need for a non-specialist to understand all these intricacies. In addition, manufacturing companies are constantly improving the quality of their products and patenting new compositions.
The main things you should pay attention to when choosing accessories:
- The manufacturer's logo must be in the most visible place and clearly legible.
- The color of the metal must be uniform, without stains, burrs, roughness, or streaks.
- Open fittings are a thing of the past; it is better to give preference to hidden mechanisms.
- When opening and closing doors, they should not creak, knock, wobble or generally cause any suspicion.
- Drawers should not rattle, jam, or slide to the side.
- The finishing mechanism, if present, must work without any complaints.
By following these recommendations, you can not only choose high-quality furniture that is suitable in price and functionality, but also purchase a product that will last for many years, maintaining its presentation.
Comments: 41
Galina
- Like | 2
- Save
Related discussions
How to make the most of a small wardrobe? Collecting ideas!
Which is better: a wardrobe or a closet? Need advice
I have doubts about choosing an apartment in a new building, which option is better?
Planning with questions.
Most likely they don’t want to bother with the fact that the hinges are not attached to the wall, I know, I assumed that these would be false panels.
- Like
- Save
And about the extra walls - designers, tell me. This is probably for symmetry?
- Like
- Save
Svetlana Gavrilova
Since you have a wall, the door needs a radius and needs to be built up a little so that the door moves. I made it with 1.8cm plywood
- Like
- Save
Sergey Moiseev
When making a decision, pay also attention to the right cabinet. He's near the window. Window sills are usually made with a projection from the plane of the wall. When attaching the sash to a false panel of small thickness, inconvenience may arise when opening it.
- Like | 1
- Save
You have a full design project? Then attach a visualization of this place so that it is clear. Apparently, this was done not because of the fastening, but simply because of the designer’s idea.
- Like | 1
- Save
DOMUS DESIGN
If desired, you can attach everything wherever and however you wish. As for the built-in wardrobe, it’s much nicer to have at least shelves for T-shirts, etc. not made of wallpaper or plaster on all sides. Those. Even just from an aesthetic point of view, it is better that the frame inside is made of furniture. And for reliability, it would be better to at least make it from MDF. Swing doors on laminated chipboard must be constantly adjusted; they are not a reliable material. But here it’s about abundance, of course. And if you make all the walls furniture. then of course you don’t need partitions inside!
- Like
- Save
No visualization yet. And thanks about the window sill, no one even thought about it! In the first version, the cabinets were against the wall with an interior door.
Svetlana, how did you hide the plywood for the radius?
- Like
- Save
Galina
Tell us how to attach a furniture hinge to a wall made of plasterboard, foam concrete, brick, etc.
- Like
- Save
Galina
Whatever the phrase is, it’s a masterpiece! Tell us why laminated chipboard facades constantly need to be adjusted? Egger and Bloom look at you with bewilderment.
- Like
- Save
Svetlana Gavrilova
It's simple. There is wood putty. It was puttied. My walls are ready to be painted. Along with the walls, the putty plywood was also painted inside the cabinet. I bought the interiors for the cabinet at IKEA (I think it’s called algot)
- Like
- Save
DOMUS DESIGN
Galina, and you. apparently. just one of those furniture makers. which sell furniture made from chipboard at the price of MDF. Even from the manufacturing technology of these materials and their density, it is clear which one is preferable.
- Like
- Save
Galina
At least read your comments before you post them. Admit it, logic is not your strong point. What do MDF and chipboard have to do with it? What do furniture makers and prices have to do with it? Are you on drugs there?
- Like
- Save
DOMUS DESIGN
- Like
- Save
ARTdesign interior studio
- Like
- Save
DOMUS DESIGN
- Like
- Save
Artyom Geyvandov
Without visualization, it is difficult to judge why the designer decided to build these walls. Maybe some kind of decor was planned for them? Maybe you wanted to allocate a niche for TV? I will assume that the wall thickness is 90-100mm, so there is no threat to the window sill. Regarding the build-in, I think that it is more correct to build in the entire cabinet, along with the side walls and the back. You can also attach it to the walls, but this is more difficult to assemble and I think less reliable, although this can also be done.
- Like
- Save
Galina
At the very beginning I wrote what can be done in this case if the customer does not want to make a cabinet in order to save money. If the customer is not satisfied with the partitions proposed by the designer, then the furniture makers will make a regular cabinet.
- Like
- Save
Artyom Geyvandov
Galina, you wrote. Everyone noticed this. Everything is fine!
- Like
- Save
Galina
- Like
- Save
Artyom Geyvandov
Galina Let me decide for myself what to do.
- Like
- Save
Galina
- Like | 1
- Save
Natalia Preobrazhenskaya | Studio “Cozy Apartment”
I think it would be easier and cheaper to buy two identical hinged cabinets, 1 meter each, based on your drawing. This is not the size of the cabinet itself, where you should bother with a built-in, and there is no non-standard architecture of the room, where there is nothing left to do but adapt to every cm! And choose the appropriate TV stand! Good luck)
- Like
- Save
Svetlana Gavrilova
I agree with many of the comments that it is important to understand the full intent. It’s easier to do as the previous commentator advised (I’m attaching a picture of something similar). The installation certainly looks neater, but you need two surfaces on the sides to attach the hinges and doors that will support the weight. This can be aerated concrete blocks or plasterboard with embeds (it’s easier to make the first sheet of plywood from plasterboard, and the second sheet is already plasterboard, which is puttied as usual, but plywood allows you to hang and secure shelves, doors, and the guides and profile need to be attached not after 60 cm .and more often, so that there is rigidity). Shelves also need a surface that can support weight. This could be a system like algot and fastening to the back wall, or ordinary shelves and then fastening to the sidewalls (I wrote above about the sidewalls, which are possible). You also need to think about the top and bottom of your built-in closet. It depends on the height of the door and your concept. Personally, I like it when there is a regular apartment plinth running along the bottom (I also attached a photo). That is, I put an aerated concrete block in the base at the height of the plinth. Inside the cabinet, I lay out the bottom of the cabinet with tiles (on aerated concrete). Sometimes the idea includes moldings on the sides and top of the building (a frame like interior swing doors). Then you also need to calculate and provide for everything. With such an installation, I immediately bring the doors (sample) and door hinges to the apartment, so that everything is actually measured and it does not happen that the doors do not close. I buy doors and hinges from IKEA (one of the cheapest options for making an inexpensive addition). And one more thing: in my version, using IKEA doors and the Algot system, the cabinet came out cheaper if I bought a ready-made cabinet (and even cheaper than a custom-made cabinet)
vote
Article rating
