/Accessories and decor/Lighting/
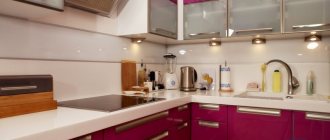
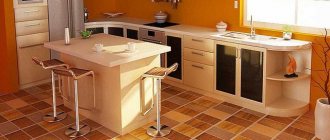
Proper lighting is one of the components of the effective design of any room. It is especially important in the kitchen, where the correct distribution of light flux turns cooking into a pleasant and comfortable process. All you need for this is a lighting design and calculation. One of the most interesting options in modern interiors, which you can implement with your own hands, is LED strip lighting.
LEDs are special semiconductors that emit light when electrical energy passes through them. LEDs can have different chemical compositions, which causes the brightness of the light they generate to differ. There is one more nuance - the installation of LED backlighting is never carried out directly, since this way the tape can overheat and break. A prerequisite for connecting LEDs is the presence of a stabilizer.
Advantages and disadvantages of LEDs
Kitchen lighting with LED strip provides a number of advantages:
- Resistance to mechanical damage.
- Long service life. The average lifespan of LEDs is 14-16 years based on 15 hours of daily use.
- Many color options. Possible colors include red, white, orange, green, blue, yellow and purple. The choice can also be made of light diodes operating in infrared and ultraviolet modes.
- High brightness. At the same time, the lamp does not need time to warm up.
- Constantly falling prices. Although LEDs are more expensive than competing light sources, prices are gradually coming down thanks to their increasing adoption.
- Availability of tapes with different angles of light emission.
- Safe to use.
- Environmentally friendly.
- Independence from room temperature.
LED strips also have disadvantages:
- Relatively high cost.
- Light bulbs with a warm white glow disrupt color rendition. In addition, such light tires the eyes.
- To install LED lighting, a power source (driver) is required. This device makes the entire system more expensive.
- Over time, the chemical and physical properties of light-reflecting crystals lose their qualities, causing the light to become dimmer.
Types of desk lamps
Manufacturers offer various solutions for desk lamps. There are different types of housings, materials for their manufacture, luminous flux power, etc.
| Lighting type | Brief operational and technical characteristics |
| They are sold fully assembled and ready for installation or in separate parts. The second option requires professional knowledge of electrical installation, but makes it possible to create the most optimal options for each specific case. Finished equipment is installed within a few hours, but in many cases it is impossible to make adjustments to them. LED lamps are used as lighting devices. |
| They allow you to separately zone small spaces and focus attention only on those areas that are necessary for performing kitchen work. Each device operates separately and can be switched on either manually or automatically. Housings of various sizes and geometries can be metal or plastic. |
| The cabinets are hidden in kitchen furniture or walls above the work area. The most difficult installation option; installation requires special tools. Disadvantages: recessed lamps take a long time to install; they are not suitable for all sets of kitchen furniture. And this applies not only to design, but also to technical difficulties. |
When choosing a specific option, it is necessary to take into account the maximum number of individual factors, including the architectural features of the kitchen, the type of furniture and the cost of the system.
Prices for LED strips
LED strips
LED lighting challenges
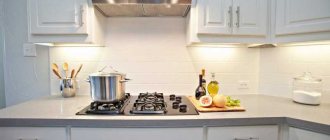
LED backlight allows you to achieve the following goals:
- Organization of combined lighting with the creation of separate zones in the room.
- Illumination of paintings and decorative elements of the interior.
- Illumination of individual areas in the kitchen.
- Lighting inside drawers and cabinets.
- Glow in the lower part of the furniture or under it, thanks to which you can achieve the visual effect of “floating furniture”.
- Lighting for ceilings with several levels.
- Bar counter lighting.
Note! Installation of warm spectrum light diodes is more suitable for interiors designed in a classic style. For high-tech or minimalism, cold light would be appropriate.
Connecting the neon lighting of the kitchen unit
Another interesting way to organize lighting in the kitchen is neon lighting.
Most often it is presented in the form of lamps or tubes. It has exclusively decorative functions. This type of lighting can be multi-colored. A special block that can be installed will allow you to observe the change of colors after a certain time interval.
Previously, neon lighting was used exclusively for suspended ceilings. In recent years, designers have come up with a new use case. Neon lamps were used to illuminate the kitchen cabinets.
The installation principle is identical to that of LED lighting. The only difference is the temporary color change sensor. Its installation is optional.
LED strip selection options
There are a number of important factors to consider when choosing a tape.
These parameters include:
- structure;
- type;
- color;
- level of moisture protection;
- number of diodes;
- diode sizes;
- cable section;
- power unit.
LED strip structure
The figure below shows the typical structure of an LED strip.
Before you start connecting, you need to understand the design of the lighting device. This will avoid installation errors.
Important information:
- An LED strip is a strip of flexible printed circuit board, on one side of which light diodes and transistors are mounted. On the same side there are contacts to which the conductors are soldered. The conclusions are easy to recognize by the “+” and “-” signs. The tape is powered exclusively by a DC source.
- Between the four contact outlets there is a black stripe with a scissor design. This is how the cutting line of the tape is indicated. You need to cut along the strip, because otherwise the tape will be damaged. The smallest section of LED to be separated is three LEDs.
- The reverse side of the tape is adhesive, as a result of which it can be glued to any surface.
- The power supply meets strict standards. LED strips are connected to 12 or 24 V networks. Most often, connections are made to 12 V networks. The current in the circuit is limited by resistors installed in the strip.
- The width of the tape varies between 8 and 20 mm. The thickness of the device varies from 2 to 3 mm. Tapes are sold in reels - in 5-meter lengths.
Note! A strip of more than 5 meters in length cannot be connected in series to one power source. The reason is a gradual increase in resistance in the circuit, which will lead to dim lighting of LEDs located at a long distance. In this case, diodes located close to the power source will overheat. As a result, the ICE will quickly become unusable.
Diode strips are connected to an AC-to-DC transformer. The power of the power supply must meet the real needs of the light sources. If this condition is violated, the diodes will not work according to their stated capabilities.
Types of tapes
LED devices come in two types:
- Manufactured using SMD technology (surface mounted). The variety is one of the most common. Good light characteristics are combined with compactness. Flat diodes - rectangular or triangular in shape.
- Manufactured using DIP technology. They are produced in the form of cylinders and are installed in end devices. They are encased in silicone, which makes them possible to use in conditions of high humidity. The main advantage in comparison with SMD is the ability to bend in any desired direction.
Ribbon colors
Light diodes are divided into color and monochrome. The latter include devices that provide only one spectrum - white, blue, yellow, red or green. White-emitting diodes have a fixed color temperature, which can be in the range of 2700-10000 K.
Color models are equipped with three diodes (red, green, blue). Mixing colors allows you to get a variety of shades. RGB models cost more than monochrome ones, as their functionality is higher.
To control RGB, a special controller is required. The device regulates not only the colors themselves, but also the speed at which one is replaced by another, as well as the order in which the shades change. The controller has a built-in memory that allows you to store selected colors. The controller is controlled using a button.
If additional lighting is needed, the tape is switched to daylight mode. The controller also allows you to adjust the brightness of the lighting.
There are a large number of controllers on the market. The standard device includes the following components:
- the device itself;
- IR signal sensor;
- remote control.
Many models are equipped with a USB output, which allows you to download new firmware via the Internet. There are controllers with Wi-Fi on the market. This allows you to monitor the device using a smartphone with a special application.
Moisture protection
The degree of protection against humidity is determined by the IP index with a digital code:
- IP33. Not protected from moisture. All conductive elements are open. Used only in dry rooms. Such lamps cannot be installed in kitchens or bathrooms.
- IP65. Silicone treated tape. Suitable for use in relatively damp areas.
- IP67, IP68. Maximum sealed luminaires. All surfaces are treated with silicone. Used in the most humid areas or even outdoors.
The figure below shows the classification of ICE depending on the degree of protection against moisture.
Note! Silicone tapes should be installed on a metal base, since protected diodes are prone to overheating and, as a result, burn out.
Number of diodes
The tapes differ from each other in a number of parameters, and one of them is the number of diodes per linear meter.
The principle of diode arrangement is shown in the figure below.
3528 LED devices contain 60, 120 or 240 diodes per linear meter. 5050 tapes are produced with 60 or 120 light diodes. The minimum possible quantity per linear meter is 30 units. The more bulbs, the stronger the luminous flux.
Note! The strips for 240 LEDs are wide, which creates difficulties during installation.
The diode installation density can be as indicated in the table.
The uniformity of light distribution depends on the number of diodes. For example, a device with 60 LEDs produces a glow in the form of stripes with variable brightness. If you choose a strip with 120 lamps, this defect disappears.
Diode sizes
In addition to the letter marking of the type of tape, lighting devices are indicated by numbers. For example, the numbers 3528 are added to SMD. They indicate the size and model of the chip. In this case we are talking about the parameters 3.5x2.8 mm. The most common models are SMD3528 and SMD5050. There are others on the market (eg 5060, 5630, 5730). However, they are significantly less popular compared to the 3528 and 5050.
In the case of the 3528, the current rating is 6.7 mA. The minimum for cutting a tape with three diodes is 20 mA.
The 5050 produces a glow that is 2.5 times brighter than the 3528. The diodes produce red, blue and green colors, which combine to produce a white glow.
The next characteristic is the dimensions of the diodes themselves; they can be determined by the first digits of the marking. Thus, in the SMD3528 model the size of the diodes is 3.5x2.8 mm, and the SMD5050 tape has 5x5 mm elements. There are also SMD5060, SMD5630 and SMD5730 models on our market, but they are not very popular in everyday life.
power unit
There are power supplies of different power. The size of the blocks also depends on this indicator. To calculate it correctly (with some margin), a simple formula is used. For example, for the 12 V SMD5050 model, calculations are carried out as follows:
- We multiply 5 W (power consumption per linear meter) by 5 (tape length) and get 60 W.
- We take into account the power reserve factor. In this case we use a coefficient of 1.25. We calculate: 60 W × 1.25 = 75 W.
Thus, you need to buy a 75 W power supply.
Cable cross-section
Advice! Illumination of the work area can be done using corner lamps. They are shown in the photo below.
DIY installation and fastening of diode strip in the kitchen
The installation procedure directly depends on the location of the LED strip.
If you decide to power the lighting from a battery, you must remember that this method is not suitable for long distances. The assembly principle will be identical to the previous one, but the lighting power will be much lower.
Step-by-step instructions for connecting LED strip in the work area
First of all, you need to decide where the power supply will be hidden. This factor determines not only how much wire is required, but also the appearance of the kitchen. It is recommended to place the box closer to the outlet or at least to the connection point of the hood.
The next step is to measure the distance where the tape will be attached. After checking several times, you can cut it off.
On the tape of absolutely any manufacturer there are special marks that need to be cut. Failure to comply with this condition will result in damage to the material.
Wires are soldered to the contacts located at the end of the tape, or attached using ordinary connectors. Isolation of this place is mandatory.
- Observing polarity, that is, plus to plus, and minus to minus, connect the wires. And the resulting structure is connected to the output of the block.
- The fact that all tape is made on a self-adhesive basis makes the work easier. Therefore, the LEDs are simply glued to a previously degreased surface.
- At this stage it is important not to touch the tape for a while. The glue should “grab”, that is, stick thoroughly.
Preparatory activities
Installation of LED strip
Anyone can install an LED strip on their own. Knowing how to use the tool is enough.
Installation tools
Before installing the tape with your own hands, you need to prepare the necessary materials and tools:
- LED Strip Light;
- electrical cable with a cross-section of 0.74 sq. mm;
- power unit;
- soldering iron, solder, rosin;
- insulating tape or heat shrink tubing;
- electric drill;
- scissors;
- PVC corner or aluminum profile (they are used to attach the ICE);
- double sided tape;
- electrical installation brackets.
Buying aluminum tape
People who do not know how to make an LED strip on a kitchen set often choose aluminum tape. This is what sellers in construction stores recommend. This is due to the fact that the material is reliable and durable.
Initially, the tape is glued to the surface of the headset, and then the LED strip is applied. To increase adhesion, some people additionally apply a small amount of superglue. With this installation, aluminum not only acts as a method of fixation, but also plays the role of a heat sink and reflector.
Installation rules
Before starting installation, you need to carry out preparatory work. First, the electrical tape is tested for damage. It should not have any creases or scratches. They also check the compatibility of the transformer and the LED according to the power parameter. In order for the work to be completed correctly, the specified preparation is necessary, since otherwise the ICE may quickly fail.
When planning the placement of the tape, you need to consider options for its laying and fastening:
- To create lighting at the bar counter or dining area, it is not recommended to buy an overly bright strip. Otherwise the light will be too intrusive.
- For a bar or dining area, there is no need for high moisture barrier tape.
- An aluminum profile is used to attach the ICE to a table or stand. It allows you to protect the wires and at the same time hides them, allowing you to provide a cosmetic effect. Double-sided tape for fastening is not a very reliable method.
Installation steps
Installation work is performed in the following sequence:
- The tape is most often offered in reels on which it is wound 5 m long. To cut off the desired section, scissors are used. Cut strictly along the marked line. Then clean the contact area from silicone (1-1.5 cm).
- 2 cables are soldered to the bare contacts. If soldering is not possible, use an alternative option - connection using connectors.
- When soldering is completed, insulation is carried out. The best option is to use heat shrink tubing. To do this, cut off a section 2 cm long and place it on the welded area. Then the tube is heated with a construction hair dryer, as a result of which it is fixed.
- The tape can be secured with either double-sided tape or special staples. The area where the lamp will be fixed is cleaned and degreased in advance. This is the only way to secure the device with the required quality.
- The location of the power supply should be thought out in advance. It is advisable to mount the transformer in close proximity to the tape. Then connect the plug to the cable.
- The conductors are connected using the parallel method.
- Install a plastic box. The conductor in it is fixed with brackets.
- If there is a dimmer, its installation is the final stage of work.
After this, the functionality of the system is checked.
Note! When installing the tape on the ceiling, use a polyvinyl chloride corner.
Useful tips
Even before purchasing the tape, you should take measurements of the place where it will be located. You always need to buy material with some reserve (15-25%).
After soldering is completed, it is recommended to check all contacts. There should not be any contact between them. Poorly soldered contacts often cause short circuits.
The transformer is not installed in a visible place. The optimal location for the unit is a cabinet. In this case, the conductor with the plug is routed to the socket. This location of the block is optimal from the point of view of aesthetics and as a way to minimize the risk of mechanical damage.
