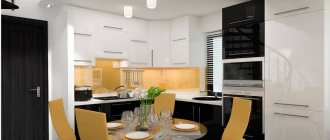
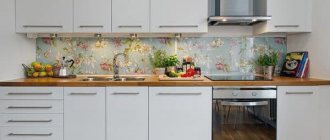
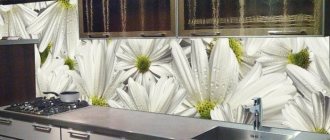
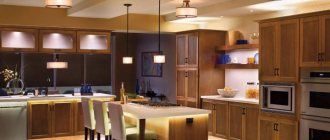
Skinali is a very broad concept. This includes all decorative panels - for walls, ceilings and furniture, which use glass and photo printing. In addition, the Russian consumer is accustomed to classifying any glass wall panels in the same category - plain, covered with film, painted, etc.
But no matter what design option is chosen, you can install the panels yourself.
Varieties of skinali
You need to choose a material for a kitchen apron taking into account not only the design, but also the characteristics of the room itself.
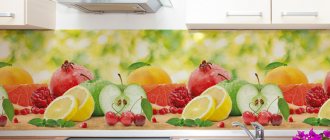
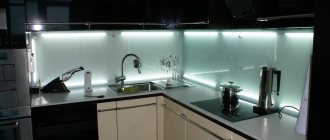
- Glass panels - this means they are made from tempered glass, since regular glass is too fragile and dangerous: if damaged, it crumbles into sharp fragments. Hardened is much stronger, and fragments, if any appear, have rounded edges and are much less dangerous. In the photo they were made of tempered glass.
Photo printing on such glass is extremely durable and perfectly conveys color. The image is chosen to suit your taste - in the company catalog or on a video with samples of work.
- Plexiglas - more precisely, panels made of acrylic and polycarbonate. Photo printing on them has the same advantages, but the material itself is somewhat different. While superior to silicate glass in strength and safety, plastic tends to deform when heated. This option is recommended for kitchens with an electric stove or induction hob. The photo below shows acrylic panels with photo printing in the kitchen.
- MDF. Making an apron from laminated MDF or with photo-printed material is a fairly popular option. MDF is relatively resistant to moisture and is not prone to swelling like regular wood. However, the service life of such panels is much shorter.
- Chipboard is not the best option for sheathing boards, as it is noticeably more sensitive to moisture. For the skinali, chipboard laminated on both sides is used. This is a budget, but short-lived option, and you can only choose it as a temporary solution.
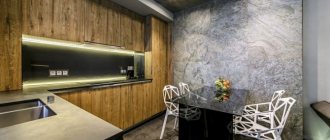
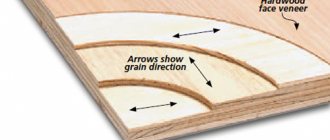
- Laminated plywood. A material is used that is laminated on both sides to prevent the absorption of condensation that appears in the gap between the wall and the panel. In the next photo it was made from laminated plywood.
Plywood is even more resistant to moisture than MDF, but images are rarely formed on it. As a rule, this is an option for kitchen interiors in rustic, rustic or classic styles.
Skinals are attached in several ways. The method is determined by the size of the apron, the condition of the wall and the desire of the kitchen owners. Installation depends little on the nature of the material.
Why you should trust the installation of a kitchen glass splashback to professionals
Although the description of the installation of a skinali may seem quite simple, it is very difficult to independently carry out such work at the proper level. If the panels are not fastened correctly, defects or joints will be visible on them. Because of this, the glass kitchen splashback will lose its aesthetic properties.
If you decide to buy a glass apron for the kitchen, it is best to entrust its installation to the experienced craftsmen of our company Skinali-Fresh, who have all the necessary tools and materials at their disposal. After professional installation of glass panels, you can be proud of the interior of your kitchen.
Some restrictions
Real skinals are made to order, as they involve photo printing. Sometimes they try to replace the panels with ordinary glass, with a vinyl film glued to the inside. The appearance of such an apron is quite decent, but the durability is much lower. On the other hand, this option can always be updated by replacing one image with another, while photo printing can no longer be removed from the surface of the glass. The photo shows vinyl film under glass.
- Installation of the skin is possible only after installing the headset. Moreover, it is desirable that the dimensions of the product be determined after assembling the furniture. The following video looks at how to take measurements for panels.
- Before ordering, it is necessary to determine exactly how the skins are supposed to be mounted: whether the railing will be installed (the latter is attached to the wall through the glass), whether there are sockets and switches in this area. All holes for fastenings and accessories must be made in advance at the manufacturing stage.
- Triplex, that is, two- or three-layer panels, where the film with the image is located between layers of glass, does not allow the formation of holes. In this case, the skinals can only be attached with glue or in a profile, and the sockets and switches will have to be moved to another part of the wall.
Question answer
- Why did they throw it off? What are their advantages over other types of kitchen aprons?
Currently, glass skins are the most environmentally friendly and durable material for making an apron. At the same time, glass is the material that is most resistant to scratches, household impacts, damage and temperature changes. As for the picture, it is applied on the reverse side and is completely protected from damage. In addition, this is a material that does not have seams, unlike tiles.
- What is the difference between clarified glass and unclarified glass?
All technical characteristics of these two types of glass are the same, except for color. Uncleared glass has a slight greenish tint, the so-called bottle glass color. You can get acquainted with glass samples from the measurers when measuring the skin, and also look at the description and photo on our website (https://studio-fartukov.ru/kakie-vidy-stekla-byvayut-pomoshh-v-vybore/).
- Strength has been removed. How safe is this material?
Skinals are made from tempered glass, which makes an apron made of this material up to 10 times more durable than ordinary glass. Even an adult needs to make serious efforts to break it. And if this does happen, the tempered glass does not break off, but collapses into equal, non-sharp pieces. To prevent them from scattering, the apron and seal are additionally covered with armor film on the reverse side.
- What type of fastening to the wall is better?
We install skinals using two types of fastening to the wall: using special mounting adhesive for glass and using fasteners with decorative caps through holes. Both types of installation are equally reliable. If you didn’t want to spoil the glass with the appearance of fastener heads and your wall is smooth, you can choose glue. If the wall is not perfectly flat or you plan to remove/replace the glass in the future, it is absolutely possible to remove the glass intact without deforming the wall only with fasteners.
- When did you decide to invite a surveyor?
If you are planning cutouts for sockets in the apron or glass up to the hood level (above the main height), you should call a measurer after installing all kitchen facades and countertops. Otherwise, there is a possibility that you will not reach the planned size after finishing the room and installing the kitchen unit, which will require ordering new glass.
- How is the glass attached to the baseboard?
Most often, the glass is first attached to the wall, and then covered with a side. If you already have a side installed or your tabletop has an integrated side (cast), glass can also be placed on top of the side. In this case, there will be a small technical gap of approximately 2 mm between the upper cabinets and the glass.
- Do I need to specially prepare the wall, and how opaque are the skins?
If you want to order an apron with an image or a single color, you do not need to specially prepare the wall. Glass on fasteners does not require plastering or painting the wall. The printed image on glass is dense and opaque, since in addition to printing, there is an armor film on the back side.
- Is it necessary to remove the old backsplash or tile?
Skinali can be installed both on a bare wall and on decorative plaster, stone, brick, timber and so on, including on top of an old MDF apron or tile, without dismantling them.
- Can I print my own image or do I have to choose from a catalog?
We can print an image provided by you onto glass. It is necessary that the picture is of good quality and panoramic. We also work with all photo banks and will buy any image for your order among tens of millions of options. If you liked the image in other sources or catalogs, send it to us by email, and our designers will find it in good quality.
- The hood is located above the upper cabinets. How will the picture be placed there?
This is a standard situation for skinali. Our designers harmoniously complete the image for free, including under the hood for each order.
- Is it necessary to invite your measurer?
If you already have data from a professionally performed measurement of the backsplash after installing the kitchen, we can manufacture the product according to your design. To do this, send information to us by email. In other cases, we recommend not saving at this important stage. In case of an error, it will no longer be possible to change the tempered glass.
- What is the production time for skins?
The standard period for a full cycle of work on tempered glass with photo printing until installation is 7–10 days from the date of making an advance payment and taking measurements.
- How to place an order? Is it necessary to come to your office?
It is not necessary to come to the office to place an order. For your convenience, our measurers have everything you need to place your order, including documents and samples. Coordination of the layout also takes place by phone and email.
- How to preview the picture in your kitchen?
To understand how a particular picture will look, our designers apply the image to a photograph of the kitchen. We will send you a photo reference of the image in the exact dimensions of your apron by email, so that the choice is the most balanced. In addition, you have an excellent opportunity to try on any picture from the catalog in your kitchen on the website before calling a measurer. To do this, simply upload a photo of the kitchen to the website in the section https://studio-fartukov.ru/primerka/
- How to choose the color of a plain apron?
We took care of our customers who would like to match the color of the skinali to a certain tone in the interior. At the measurement stage, you can select the shade you are interested in from the catalogue, and we will print a free color proof on glass with various shades and halftones so that the color matches the desired one as closely as possible. You can also print a life-size piece of the future image on a color proof.
- What is the maximum allowable apron size?
In our company, glass aprons can be made in one piece, up to 3200 mm in length. It all depends on the ability to bring glass into your room and install it without interference, such as gas pipes, complex plumbing, and so on. You can consult with a measurer about all this.
- How is the image applied to the glass, and can it be changed later?
Our equipment, unlike cheaper analogues, allows you to print a picture directly on glass using special technology and antibacterial ink. This apron is the most durable and of the highest quality, and also does not fade or peel over time. You can erase the image in the future and print a new one if you want to change it.
Source: studio-fartukov.ru
Preparatory work
Glue installation requires a perfectly flat wall. Installation using a mount or profile is less demanding. But still, height differences of more than 1 cm on the wall are unacceptable.
- The surface of the area is carefully leveled. If the apron is angular, you need to make sure that the angle between the walls is 90 degrees.
- Covers for sockets and switches are dismantled. The rosette cups are extended to a length equal to the thickness of the skinal – 6–10 mm. It is preferable to leave this work to a specialist.
- The width and length of the panels are quite large, especially when the apron is made as a single structure. Care must be taken to remove pieces of furniture from the “path” and, if possible, empty the kitchen. You need to be especially careful when delivering the apron.
Practical apron for the kitchen made of MDF
A modern manufacturer offers many options for finishing aprons for kitchen sets. An MDF kitchen apron is a cheap and practical option for finishing the wall between the countertop and the top drawers.
Advantages of MDF panels
MDF is a material made from fine wood chips by dry pressing under high pressure. A natural polymer compound is used as a connecting material.
MDF kitchen apron
Modern technologies have made it possible for chipboard to become environmentally friendly. Operational durability, a range of board formats, and the possibility of various processing have earned MDF well-deserved popularity.
Main advantages of the material:
- resistance to mechanical stress, moisture and water;
- simple installation;
- wide range of colors;
- environmental cleanliness;
- installation on any surface;
- light weight;
- availability of wet cleaning;
- resistance to plaque and mold;
- easy to process;
- high operating period;
- reasonable price.
A practical kitchen apron made of MDF can be easily installed even by a person without special training. The material can be used in rooms with poor ventilation systems.
Photo printing on an apron
Simple processing allows you to make complex reliefs and various shapes from slabs. The material has different colors; plates are produced with a pattern applied by photo printing.
The MDF kitchen apron can be washed with ordinary detergents.
Photo printing, various compositions, decorative overlays, proper lighting design, and a non-standard approach will turn the kitchen into a stylish and attractive corner.
Low cost and excellent modern appearance allow buyers of various levels of financial solvency to use MDF to decorate kitchens.
The correct choice of color and size of an MDF apron
Salons and stores now offer to buy panels for finishing the apron along with the furniture, which will be in perfect harmony with the furniture set.
Imitation of masonry with MDF panels
When choosing an apron, it is good to follow the recommendations of experts, who will help you avoid a number of mistakes and misconceptions.
MDF panels well imitate natural materials and various images from photos to art reproductions. A colored apron easily fits into the interior and decorates the space well.
The design of the work area should not completely match the color of the facades of the kitchen unit. Choose an option that is several shades lighter, because then the kitchen will look more spacious and more attractive.
Consider your tastes and the fact that you will have to admire the apron for a long time, so it should be pleasant, not boring, but not provocative.
Installation skinned
Most often, the panels are mounted on special glass holders. Firstly, in this case there is no need to level the walls so carefully. Secondly, dismantling is much easier than installing with glue.
Installation of kitchen apron panels.
- The glass or MDF plate is pressed to the area where it is attached, and the fixation points are marked, which will facilitate subsequent installation.
- Holes are drilled in the wall for a plastic dowel - 6 mm. If the apron in the kitchen is mounted on drywall, then use a butterfly dowel.
- The dowels are driven into the holes.
- The panel is pressed against the wall so as to align the holes and places where the dowels are attached. The glasses of sockets and switches must fit exactly into the holes intended for them.
- Installation of a corner kitchen begins with the fragment that is placed end-to-end against the wall, and then a slab is attached that rests on the first one.
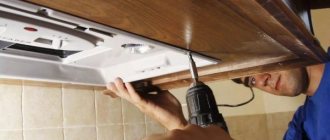
- Silicone bushings are inserted into the holes to prevent contact of the screw with the glass, and then a brass bushing with threads is inserted. Screw in the self-tapping screw to its full length. Do not tighten the fasteners: the glass may be damaged. Pay attention to how the panels are secured in the video.
- Self-tapping screws are masked with decorative caps. The seams between the panels, if any, are sealed with silicone sealant. The photo shows the fastening of the caps.
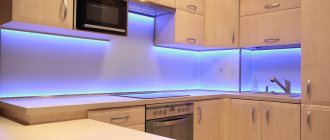
- A glass apron is often combined with lighting - this adds glamor. The backlight is LED and should be mounted following certain rules. The distance between the diode strip and the panel with photo printing must be at least 70 mm, between the backlight and the triplex - at least 30 mm.
- Install removed covers for sockets and switches.
The installation of the skin is presented in the following video with all the details.
Installation with glue is technically very simple and boils down to uniform application of silicone glue or liquid nails to the surface of the slabs. The difficulty is that the glue must be applied during the process, and not in advance. Therefore, first, the skins are placed on the tabletop, checked to see if the dimensions match, then the product is tilted at a certain angle and glue is applied to the entire surface. The panels are then pressed down and left to dry.
The following video provides more information about this method of fastening, however, even after watching the video, you will not be able to become a good installation specialist.
Installing a glass apron is not particularly difficult, especially if you watch the video instructions, but it requires accuracy and the participation of at least one assistant. The panel is quite heavy, and when fastening it must be held tightly to prevent slipping or damage.
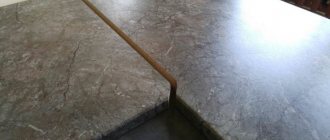
How to design the joint between the countertop and the apron?
There is only one way to achieve a perfect connection: first assemble the kitchen, install the countertop and only lay the apron on top of it. If there is no gap between the apron and the set, you don’t have to use the baseboard at all. In this case, the seam is filled with sealant or epoxy grout.
Interesting materials:
How to create an email for registration? How to place the bed with your head where? How to use a mass gainer correctly? How to properly install a trellis for cucumbers? How to properly insulate a balcony for living? How to properly cook beans for vinaigrette? How to properly freeze vegetables for baby feeding? How to run for weight loss? How to properly steam feed for fishing? How to correctly fill out a notice of transition to the Usn for individual entrepreneurs?
