You don’t always have the time or money for a full renovation, but you still want to update the interior. Then use self-adhesive. This is a real lifesaver in such cases. With its help, you can quickly “repaint” furniture and doors and update the interior. Over time, the material becomes unusable and requires replacement. Before you stick on new decor, you need to get rid of the old one. Let's talk about how to remove self-adhesive film quickly and without a trace.
How or with what can you peel off adhesive furniture film?
The auto store sells a special aerosol composition. Its label says: Sticker and Label Remover . Simply spray the product under the edge of the film, and slowly tear off the film as the composition penetrates under it. This product is highly penetrating. VD-40 also belongs to such means .
This is what is written on the packaging of a container of penetrating multi-purpose lubricant:
- cleans surfaces of glue;
- peels off labels;
- removes dried adhesive tape;
- makes it easier to peel off stickers;
- even removes bitumen stains;
- and leaves no traces.
So, as they say, I bought it for my car, and after reading it, I now use it in everyday life, and I wish you the same.
The self-adhesive film, in principle, will come off easily, if it is tight and there is a danger of the furniture covering being torn off (although it is probably not so great there anymore, that is why they were sealed), it needs to be heated with a construction hairdryer, the glue will soften and go more fun, you need to warm it up and pull it, and Don't heat it up completely and then try to rip it off.
If the coating is to be repaired, then safely remove the remaining film and glue with sandpaper; if you need to preserve the coating, then this is more problematic; you need 646 solvent and a soft cloth.
Wet the corner of the cloth, wipe it with solvent, apply it to the remaining glue and quickly wipe it off until the solvent evaporates.
Attention! The solvent evaporates very quickly and you cannot rub it, as you will rub it even deeper and ruin the coating, if you get wet and immediately wipe the area clean, you need to act quickly and confidently!
Do not forget about safety precautions, work in protective gloves and goggles, in a well-ventilated area, and even better in a respirator,
It is best not to try to immediately tear off the film from the furniture, since basically all self-adhesive films now are of good quality and the glue in them is quite sticky, which will not be so easy to remove from the surface. So here's what you need to do:
- Take a hair dryer; you can use either a hair dryer or a regular home hair dryer to style your hair. The goal is to heat the film to a certain temperature, which will facilitate better film removal. I won’t say what the temperature should be, I always do it by eye, the main thing is that the film begins to lag on its own.
- Next, if possible, wipe off the remaining glue with a soft cloth soaked in hot water, but without an abrasive, so as not to scratch the furniture.
- Remove all glue that remains with a non-greasy solvent, but first test the solvent in some less visible place on the furniture; if the solvent leaves traces, then try changing the brand.
In principle, it is not so difficult to remove adhesive film from furniture; it is problematic to remove the glue that remains after it, which has firmly grasped the surface. To remove the film, you need to heat it with a hairdryer; the hot film can be removed very easily. Heat to a temperature that is not dangerous for furniture.
And remove the remaining glue with white spirit or gasoline. Some offer another option, using unrefined oil. Apply the oil to the glue, leave for 20-30 minutes and then use a soft cloth or paper napkins to collect the remaining glue. Depending on what material the furniture is made of, oil can leave greasy stains. Then there will be another question: how to remove greasy stains from furniture.
The adhesive film can be easily removed if it is preheated. I once did this with a hair dryer (hot air supply), but if you don’t have one, you can heat the film with an iron. First, of course, place a damp cloth on the surface of the film.
You can stick another film on top - however, flaws may be visible. It will be easier. As it is, it’s quite difficult to peel off the film. Take a spatula and gasoline, slowly pry it up with a spatula, wipe with gasoline. You can use white spirit. The work is long.
Source: remotn.ru
Do I need to take it off?
If this film is so useful, then maybe it can be left on the metal? You shouldn't do this. And that's why:
- Firstly, during transportation and installation the integrity of the film is inevitably compromised. Even if a high-quality thick film of 60 microns was used, glued with a composition with high adhesion (as is the case with products), it will inevitably fray, tear and peel off in several places.
- Secondly, the film is not designed for a long service life. When exposed to UV rays, it begins to deteriorate and over time its insulating properties will be reduced. The result is the appearance of cracks, swelling and other defects.
All this leads to the fact that instead of an almost invisible, ideal, even protective film, a “fringe” of scraps appears on the metal surface - while some of the material is firmly held on the base, some hangs down, and some forms unsightly bubbles. And problems with aesthetics are only half the story: when moisture begins to penetrate under the film, conditions are created in the gap between the metal and polyethylene for rapidly developing corrosion.
Therefore, the answer to the question in the title will be unequivocal: you need to remove the film!
Advantages and disadvantages of self-adhesive film
Self-adhesive film has the following positive qualities:
- Resistant to moisture. The material can be used when finishing kitchens and bathrooms.
- Insensitivity to elevated temperatures. The material is suitable for decorating pieces of furniture in contact with household appliances.
- Resistance to mechanical damage.
- Affordable price.
- Wide range of colors. This will create a coating that fits well into any interior.
- Versatility. The film can be glued to wooden, plastic, glass and metal surfaces. The pasting process does not take much time. During operation, no dust, construction debris or dirt is generated.
- Easy to dismantle. If necessary, the coating can be removed without damaging the surface. After this, you can immediately begin further decoration.
- Durability. The coating can last more than 3 years without losing its attractive appearance.
- Easy to care for. The surface can be easily cleaned of dirt using a soap solution.
The disadvantage is the need to properly prepare the furniture for decoration. A loosely fitting film forms bubbles and comes off. The material does not allow hiding large defects in furniture or door panels. It can only be used once. The dismantled film must be recycled.
Pasting furniture with self-adhesive film
Pasting furniture with your own hands takes a lot of time. You need to be patient and try to carefully complete each step.
Surface and material preparation
To properly prepare the surface and the product for pasting furniture, perform the following steps:
- Leveling the surface. The base to be decorated must not have chips, protruding areas or cracks. Defects are covered with putty and sanded with sandpaper. Otherwise, the furniture will become covered with bubbles or will not adhere well to the base.
- Cleansing. Dust and other contaminants are removed from the surface. To do this, use a clean sponge and soap solution.
- Removing decorative elements. It is necessary to temporarily remove linings, handles, glass shelves and other parts. After gluing the film, they are returned to their place.
- Degreasing. At this stage, you can use special chemical compounds or simple dishwashing detergent. Wooden surfaces are treated with acrylic varnish.
- Open it up. Before purchasing a finishing product, create a drawing containing elements intended for gluing. This will help to correctly determine the width of the roll and eliminate the need to create a large number of joints. The joints should not have small surfaces. The sketch is applied to the wrong side of the canvas. There is a marking grid with a mesh size of 1 cm. After cutting out the parts, you can glue the self-adhesive film to the furniture.
Gluing technology
If a small area is to be treated, for example, the facade of a kitchen unit, the film can be applied using a dry method. When decorating a cabinet or other large object, the surface is first moistened with soapy water or soap. This provides the material with mobility and eliminates unevenness. This method is suitable for people performing such work for the first time. Pasting a cabinet with self-adhesive film is done as follows:
- The edge of the canvas is installed on the upper part of the base. The doors can be dismantled before decoration. The top layer of the film is separated from the paper base by several centimeters. The material is pressed tightly against the surface to be treated. In this case, you need to smooth the surface with a cloth, moving downwards. The lower part along with the backing should hang down.
- Gradually remove the top layer from the paper base, carefully smoothing the glued area. They go down in small sections, removing bubbles.
- Inspect the processed item. If bubbles are found, they are pierced with a needle. By pressing the film to the surface, air is removed. When smoothing, wrinkles may appear. The damaged area is heated with a hairdryer and smoothed out again.
If pasting was done wet, you need to wait until the material dries and sets to the base. After this, you can proceed to installing shelves and fittings.
Difficult areas
Difficulties may arise when processing corners and other difficult areas. The following tricks will help you properly cover your cabinet with self-adhesive film:
- You can use a hair dryer to bend the fabric. The material is heated with a stream of hot air.
- Difficulties may arise at the stage of comparing coverage elements. To prevent gaps from appearing, the sheets are glued with an overlap of 1.5 cm. A ruler is applied to the allowance. Using a construction knife, make an incision and remove the excess strip. The result is an even joint.
- You need to work in good lighting. If you paste over complex parts in a dark room, you may miss minor imperfections. They will stand out in daylight.
- If the film quickly adheres to the surface, use talc. The base is sprinkled with powder, after which the canvas is applied.
Repair of wooden surfaces
Monolithic elements of furniture sets made from solid natural wood are restored by re-painting the facades.
For the kitchen it is better to choose enamel rather than paint. The first has a higher degree of abrasion resistance and fades less.
Acrylic enamels are water-based. Having chosen to paint kitchen wooden facades with this material, it is recommended to apply a protective layer of transparent varnish on top. Alkyd enamels do not need such protection.
Painting kitchen facades is a popular method because it does not require much expense and takes little time. Most often, a different color is simply applied on top of the old, washed and degreased layer.
In case of major damage (deep scratches, holes, traces of fire), it is necessary to prepare the natural wood surface. Old paint is removed using chemicals (removers) or heating with a hairdryer. After this, the wood is cleaned with fine emery cloth. Deep damage must be filled with a special putty for wood. To ensure that the composition holds better, cracks and crevices are cleaned of dust and debris.
The putty is applied using a plastic spatula, pressing it in so that it fills the entire space. Otherwise, it will sag and depressions will appear.
The next step in restoring the coating is applying a primer. It will create better adhesion of the base to the paint, play the role of a protective layer, and extend the service life of the product.
The last stage is coloring. It is done with a paint roller or brushes of different widths. Narrow ones are used to process thin relief parts (they are painted first), wide ones are used for panels and other planes. For best results, it is recommended to apply several layers of paint.
How to remove self-adhesive film from furniture?
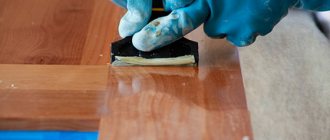
You need to know not only how to paste over furniture, but also how to remove coatings that have lost their attractive appearance. The principle of film removal is based on heating the adhesive base. To treat small areas, use a hair dryer designed for drying hair. You can remove the self-adhesive film from a large surface using a construction tool.
By supplying a stream of hot air, the coating begins to be separated from the base. Pull the film slowly, otherwise traces of glue will remain on the chipboard or wood. If this does happen, the composition is removed with alcohol or a solvent. The product is applied to an inconspicuous area. If the surface is not damaged, the composition is used for its intended purpose.
How to remove glue from self-adhesive tape?
- Isopropyl alcohol works - but when there is a thick layer, it spreads poorly and dissolves poorly. ...
- Solvents like 646 are used, but the surface is severely damaged. ...
- The most interesting are various household products (such as fairies and sanitary products, etc.)
- Galosh gasoline, kerosene, white spirit, etc.
12 Sep.
2007 Interesting materials:
How much does a Child Support Agreement cost? How much does Sony PlayStation 4 cost in Ukraine? How much does a taxi cost from Larnaca airport to Ayia Napa? How much does a taxi cost from Kazansky railway station to Sheremetyevo? How much does a taxi cost in Istanbul 2022? How much does it cost to insulate a turnkey balcony? How much does Utilsbor cost? How much does vitamin b12 cost? How much is the visa fee for Poland 2022? How much does a 2022 passport cost through government services?
Using self-adhesive film is a great way to update your kitchen set
A good quality kitchen set can last for decades. But time passes, and the shine of the new furniture fades, stains, chips and scratches appear, and your favorite set or any of its cabinets are no longer pleasing.
There are two ways out of this situation: do some repairs and buy new furniture, or update existing cabinets and pencil cases. Moreover, in the second case, the cost of the issue will be minimal, and you will not have to deal with rearrangements. All you need is decorative self-adhesive film.
Unlimited possibilities of self-adhesive film
Kitchens covered with film look impressive both in photos and in real life. Surfaces are updated using vinyl or other film. The range of this material is amazing in its diversity, and the price pleases with its affordable price.
Decorative “self-adhesive” imitates:
- natural wood of different species;
- natural stone;
- ceramics and tile texture;
- leather and fabric.
In the photo - imitation wood
In its texture, it can resemble patterned silk, a colorful tapestry or cute chintz. The material is produced in matte and glossy versions. There are films with holographic and mirror patterns. And all this can be combined with each other, creating interesting effects, changing an ordinary kitchen cabinet beyond recognition, as in the photo below.
The price of the film depends on the manufacturer and the decorative surface.
Vinyl “self-adhesive” is quite practical because it:
- not afraid of moisture;
- does not fade in the sun;
- does not respond to temperature changes.
With its help, you can completely update the design of both the kitchen and the bathroom, transform the kitchen cabinet or the entire set.
Adhesive film is a good budget replacement for a full-fledged repair. Of course, you need certain knowledge and skills, but the video will help you quickly understand the intricacies of the process.
Restoration of glossy coatings
Another way to restore the kitchen facade with your own hands is varnishing. This method allows you to show the beauty of the texture of different species, gives the furniture an expensive and representative look.
In order for the surface to sparkle with gloss, it is pre-prepared. All fittings are removed, after which the paint from the facade or old varnish is removed. The wood is cleaned with emery, first coarse-grained, then fine.
Existing cracks in kitchen facades are sealed with putty, which is matched to the color of the wood. To make it look more similar, sometimes colored pigments are added to it. The putty must be dried before you begin varnishing the facade.
If necessary, use a special transparent primer. She:
The peculiarity of working with varnishes is that it is applied in several layers. The first layer is made as a base layer, allowed to dry, after which the next one is applied. The last layer is made the thinnest and most transparent. It gives the facade a glossy shine and enhances the depth of the pattern.
The varnish should be allowed to dry before hanging the doors in place. Drying it with a hairdryer is not recommended. Characteristic ripples may appear. It will ruin the appearance.
Which film should I choose?
First of all, you need to look at the thickness of the material and the manufacturer. German “self-adhesive” tapes are of good quality; their price depends on the thickness.
Dutch and Italian manufacturers have proven themselves to be excellent. You can choose something from budget series or take a closer look at exclusive products, but then the price will be quite high.
The most inexpensive are Chinese adhesive decorative materials from unknown manufacturers. However, low price should not be the main selection criterion, otherwise a beautiful kitchen decorated with self-adhesive vinyl film can quickly lose its appearance.
Not all adhesive materials intended for promotional products can be used in the interior. Some of them are designed for short-term use. Choose high-quality decor, and then the restoration will be durable, and a simple kitchen cabinet will become an interior decoration.
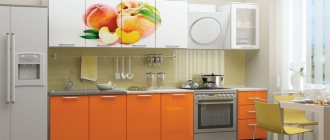
The color can be any. If you want to take a creative approach to kitchen design, place photos of fruits, vegetables or flowers on the facades, thereby decorating ordinary old furniture. The drawing can also be applied using photo printing.
Coating restoration
Restoration of kitchen facades depends on both the base material and the finishing layer. In most cases, if the main material is damaged, the entire façade will have to be replaced. The exception is small scratches and chips, which can be repaired with a special wood putty or wax pencil.
When the finish is damaged, everything is not so clear.
For small defects, the PVC film is simply glued: draw PVA glue, “Moment”, into a syringe from a needle and fill the area under the film. Then smooth out the coating and secure with tape for 4 hours. If the damage is extensive, you can remove the entire old film from the facade by heating it with a hairdryer, and stick a new one in the same way. In this case, it is better to use liquid nails.
Technology of pasting furniture with polymer films
If you decide to update your kitchen furniture using self-adhesive film, then first prepare the base. It should be understood that the decorative covering will not hide potholes and bumps, it will only disguise the stains, so all unevenness must be removed before pasting. A video with tips will simplify the workflow.
12 rules for working with self-adhesive tape
- The fittings and doors must be removed, and each kitchen cabinet (facades and frame) must be inspected for the presence of depressions and bulges.
- If there are defects on the furniture, all irregularities are filled with putty and sanded well.
- To calculate material consumption, you will need measurements of all parts of the kitchen unit. You need to carefully measure all the parts that you plan to paste over.
- All dimensions are transferred to the back side of the film. It is usually made of white paper, on which the drawn lines are clearly visible.
- When cutting, you should always leave a margin of about 1 cm. This will help in your work: if you start gluing the vinyl at the wrong angle, the margin will make it possible to correct the situation. All excess is easily cut off with a breadboard knife.
- Decorative self-adhesive film is cut with a stationery knife, curved lines are cut out with scissors.
- Then you need to degrease all the surfaces to be decorated so that the “self-adhesive” does not come off over time. Window cleaning liquid or other products are suitable for this. Grease stains need to be treated especially carefully so that the decorative finish does not come off.
- Pasting of kitchen units is carried out on a dry and clean surface, otherwise the “self-adhesive” will begin to bubble and peel off from the base.
- The film must be applied evenly.
- The backing is removed in several stages: first, only a few centimeters are peeled off, after gluing them, a little more is removed, and so on until the entire panel covers the part to be decorated.
- Smooth out the plastic decor from the middle to the edges. Air bubbles must be removed during operation. It is convenient to work with a plastic scraper, stroking the surface with a soft cloth.
- Small air inclusions are removed with a needle. The finished part can be processed through the fabric with a warm iron.
DIY MDF door repair
If the surface of the film on facades made from MDF requires replacement, this task can be dealt with without resorting to the services of hired specialists.
Problems may include:
If the film comes off, what do they do: remove the door and unscrew the handles, hinges and locking fittings, and place the facade on a flat surface. If a corner or a small strip has come off, it is recommended to heat the coating and apply the film with strong smoothing movements. To fix it, a flat plate and a weight are placed on top.
For heating, use a household hairdryer or iron (when using it, cover it with fabric or Teflon film). If the furniture is not old, you can level it with your hands, heating the adhesive during friction.
If the factory sizing does not hold the surface, use quick-drying “Super-Moment” or universal polymer glue for fixation. The work is guided by the instructions for use of the product.
To repair a film façade whose coating has bulged, you will have to cut the bubble into 4 pieces crosswise with a utility knife. Sometimes the cause is dust or debris trapped under the film during furniture manufacturing. You need to thoroughly clean everything inside of foreign objects, apply glue and press. Depending on the type of glue, MDF doors are kept under load from several hours to several days.
If damage occurs (holes, cracks, fire marks), you need to completely renew the coating. Handles, hinges and other fittings are removed from the part, cleaned and dried, and then a film is glued on. A furniture company or specialized store will help you choose the right color and texture; the main thing is to show a sample.
Good to know! Most often, the film peels off near heat sources (stove, oven, radiators) and water (sink).
Difficulties in work and their solutions
Problems often arise with processing the ends and shaped parts of kitchen units made of MDF or other material. An industrial or household hair dryer will be a good helper in this case.
The restoration will go faster if you work together: one person stretches the material by heating it with a hairdryer, the other carefully glues it to the base.
It is easier to apply the self-adhesive tape evenly on a damp surface. To do this, lightly moisten cabinets and doors with a spray bottle. Water will not allow the material to immediately grasp the surface and will provide an opportunity to correct the work.
When cutting the material, you need to make allowances on each side. For parts with ends, do not forget to make cuts in the corners. First, they paste over the part itself, and then proceed to the ends. The rounded ends of MDF facades are treated with a hairdryer for a better fit.
Replacing door hinges
One of the most common types of breakdowns is the failure of furniture canopies on kitchen cabinet doors. It often happens that during use the adjusting screws simply come loose, and the entire repair comes down to aligning the doors and restoring the tightness.
It’s worse if the canopy is completely out of order, for example, the band spring bursts and the latch operates. In this case, you will need to unscrew the fastening, remove the canopy and replace it with exactly the same model. To align the doors, you will need to release the first stopper; by unscrewing it successively, you can achieve the most accurate position of the door leaf.
Restoration of facades with decorative film
The appearance of the kitchen largely depends on the cladding of the facades. If your kitchen has smooth doors without a relief made of chipboard, then they can be easily covered with vinyl film.
Updating kitchen MDF facades with convexes will be easier if you use an industrial hair dryer. Only a well-heated film can take the desired shape. If there are decorative details on the facades, they must be removed before pasting.
Replacement of the old film is carried out only after removing the previous layer. Remember that decorative film is only applied to prepared surfaces.
It should be taken into account that in production, MDF film facades pass through a special press, which makes it possible to obtain a smooth surface without flaws. At home, MDF can only be covered with self-adhesive.
Interior renovation using film
Designers love polymer films. They have good plasticity and decorative properties; with their help you can quickly update almost any surface. Material suitable for decoration:
- tiles in the bathroom or kitchen;
- wall panels;
- doors;
- different furniture.
Films are available in different colors, with and without patterns. With their help, you can update your kitchen set and change old furniture in your home without extra costs. After all, the price of even the most expensive film will be cheaper than a new headset.
Restoring tiles using vinyl is not difficult. It is important to choose the right drawing here. Delicate chintz designs or films with textured embossing are suitable for the kitchen.
Complete the design with a decorative kitchen apron. Its restoration using film usually does not cause difficulties. The main thing is to carefully read the instructions on the roll.
Before gluing the tiles in the bathroom, you need to carefully prepare the surface - degrease it well. Otherwise, the film will quickly peel off.
Decoupage
To restore the facades of kitchen furniture, sometimes they resort to not entirely traditional methods. Decoupage has become a trendy touch for retro kitchens. But in practice it is used quite rarely, as it requires taste and accuracy in execution.
The material for decoupage is special napkins with bright original images. In fact, in this capacity you can use newspaper clippings, pieces of fabric, fragments of lace, your own old photos, a finished image from albums or books. In the kitchen, decoupage using small objects will be very useful: coffee beans, herb stems and spikelets, dried flowers and the like.
The decoupage technique is quite simple: you sand the kitchen set with your own hands using coarse and then fine sandpaper. They are painted with a background color - acrylic paint is used, and then the image or objects are fixed to the surface using office glue. Be sure to cover the craft with several layers of transparent furniture varnish after the glue has dried.
The photo shows “plant-based” kitchen decoupage.
