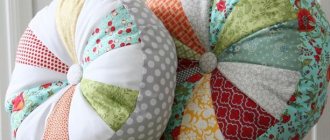
Beautiful bed linen can decorate even the smallest bed in a small room. And sofa cushions in new covers will make the room sparkle with new colors. For such products, it is better to sew the cutest pillowcases with ears; they look elegant and homely. The work will take about an hour, and every craftswoman has all the materials and tools at home.
Complicated sewing method
The hole for the pillow can be made not only along the edge of the pillowcase. The product with the entrance in the middle of the back side looks interesting. In this work you will need:
- two types of fabric;
- tailor's cutting knife;
- pins;
- ruler;
- chalk.
All details are cut out of fabric. For the front side, draw a height line on the material, adding 10 cm for the ears and 2.5 for seam allowances, the same calculations for the width. The rear element has the same first indicator. The width is equal to half the front side, add 12 cm to it.
The sides of the back parts are turned in 2.5 cm and ironed. Then they put the same amount aside and pin it with pins. The pillowcase is sewn along this line using a sewing machine. This step is repeated with the second rear side element.
Lay out the front part on the table, wrong side down, and place another part on top with the same part facing up. The stitched sections should overlap in the center of the product. Elements are stitched along the perimeter, retreating 1 cm. The corners are trimmed, the pillowcase is turned inside out and ironed at the seams. The two layers are pinned together and the ears are formed. Draw lines with a marker, retreating 5 cm from the edges of the product. The seams are sewn using a machine. The product is washed and ironed.
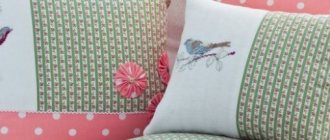
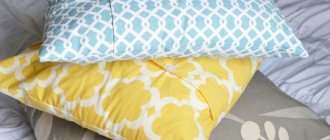
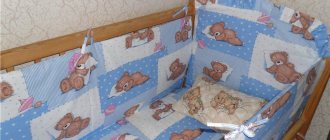
Cute pillowcases with ears on decorative pillows will become a real decoration for your sofa or sofa. You can sew a fabric product with funny designs and use it in a crib. Natural materials are suitable for bedrooms, and synthetic covers are appropriate in living rooms and on the veranda.
Cat pillow made from sweatpants
For sewing we will need:
- knitted pants, preferably plain;
- a piece of felt for the heart;
- scraps of faux fur or pink knitted fabric to decorate the muzzle;
- contrasting threads to decorate the muzzle;
- filler;
- threads, sewing tools.
Description
We decide on the size of the pillow and draw a pattern based on the photo.
We cut out two rectangular parts for the cat’s body.
Cut out four pieces for the ears from knitwear. For the inner part of the pink material, cut out two parts of the same shape as the ears, but smaller in size.
Sew the pink parts onto the blanks for the ears. We sew the ears by folding them in pairs. The seam is done by hand, using contrasting threads across the edge.
We cut out the heart and sew it in the center of the pillow with a simple basting stitch, using contrasting threads.
Cut out the nose and sew it on.
If desired, the cat’s paws can be made in one layer of material or in two. We cut out the required number of blanks and pin them onto the main part of the pillow.
Sew with a basting stitch using contrasting threads.
Fill the ears with filler and apply them to the upper edge of the pillow, controlling symmetry. We fix the position with pins or a basting stitch.
Place the top and bottom parts of the pillow right sides together and stitch around the perimeter, leaving room for stuffing.
Fill the pillow with filling. We sew up the open area by hand using hidden stitches.
Scented pillowcase
A pillowcase with a smell (flap) is the easiest to sew. These are the pillowcases that are included in the vast majority of ready-made bedding sets. They are sewn from a single piece of fabric without additional parts.
We will show you how to sew a regular pillowcase measuring 70*70 cm. Keep in mind that rectangular pillowcases are sewn in exactly the same way and will only require recalculation of the fabric consumption depending on the size of the pillow.
A square pillowcase of any size is cut according to the following pattern:
Square wrap pillowcase pattern
The smaller the size of the pillowcase, the smaller the width of the scent.
- We cut out a piece of fabric measuring 174*72 cm.
- We hem the sections of the short ends of the fabric (72 cm) on both sides.
This is done using a regular hem stitch with a closed cut. If you do not have enough skill and cannot ensure an even seam right away, use an iron. To do this, fold the fabric to the wrong side with an allowance of 0.5–1 cm and iron. Then fold another 1 cm, iron and stitch. The edges of loose fabrics are processed using this seam. - Place the fabric wrong side up. Measure 30cm from the stitched edge and fold the fabric right side up.
- Measure 70 cm from the other edge and also fold the fabric right side up; The edge of the cut should coincide with the fold. Pin the sides together using safety pins.
- Sew the sides from the front side, retreating 0.5 cm from the edges.
- Turn the resulting pillowcase inside out, not forgetting to turn out the valve. Smooth out the sides and tuck out the corners.
- Place side seams on both sides, leaving 1 cm from the edges.
Our pillowcase is ready. All that remains is to turn it out and put it on the pillow.
Step-by-step process (photo gallery)
Turn the pillowcase inside out and place it on the pillow
Turn the pillowcase inside out and stitch it from the inside out, leaving 1 cm from the edge.
Turn over the edge 70 cm wide, stitch from the front side 0.5 cm from the edge
We turn the edge 30 cm wide
Fold and stitch the seams from the wrong side
We cut out a piece of 174*72 cm
Video tutorial
Making a pattern
It would be advisable to make a pattern measuring 50x70 cm, since these are the pillowcases that now fit the majority of pillows sold.
First you need to decide on the size of the smell, it should be about 30 cm without taking into account fabric shrinkage, that is, you need to add a few more centimeters.
So, the length of the pillowcase should be 70 cm, width - 50, the smell is more than 30 cm. The linen seam should take an additional 1.5 cm, the hem of the fabric takes the same length. If done correctly, you will end up with a large rectangle. To summarize, the width of the pattern should be 73 cm (70 cm + 1.5x2), and the length should be more than 130 cm (50x2 + 30 + 1.5x2).
DIY sofa pillows: ideas, photos, patterns
Sofa cushions are an integral part of modern interior design. They can serve solely for decorative purposes if they have a lot of voluminous decor. But they can serve not just for beauty, but also perform a practical function. You can lean on such pillows, lie down, or cover them while lying on the sofa. In short, there will always be a use for sofa cushions. A few words about how to combine sofa cushions with the existing interior:
- Contrast with the sofa. Choose fabric colors for the pillows that contrast with the upholstery on the sofa. It looks impressive when there are no more than two colors or prints.
- Black and white color scheme. This color scheme is a classic. Pillows in this color will suit almost any interior. They are laconic, but at the same time look quite impressive.
- Ornaments and traditional prints. These can be prints and symbolic paintings of any nation. Ornaments and prints of the peoples of the world are a fashionable trend in interior design. If you complement the colors of the pillows with other matching elements, such as dishes or a vase, this will only emphasize the sophistication of your taste.
- Analogy with plants. If there are live plants in the room that stand in a prominent place, you can choose pillows to match. Pillows with geometric shapes interspersed with green will highlight living plants and fit well into the overall interior.
The combination of sofa cushions with the interior
Sofa cushions in the interior If you want your sofa to be decorated with a beautiful designer item with original decor, you will have to work hard. You can decorate a pillow in various ways and each of them will look impressive. For example, you can make a patch in the shape of a girl on a pillow, and then embroider the dress with buttons. It would seem that the idea is simple and easy to implement, and the pillow looks very impressive.
DIY pillow decor You can also make appliqué patches from felt in the shape of geometric shapes, in this case circles of different sizes. A variety of colors plays an important role in decor. You should not overdo it with flowers. If the room already has a lot of colorful objects, a colorful pillow will be superfluous. But such a pillow will dilute a monochromatic interior.
Sofa cushion decor with applique. Ribbon embroidery looks luxurious. These can be intricate designs, flowers, or simple, laconic elements. In each case, the pillow will look very beautiful if the work is done carefully.
Embroidery ribbons
DIY pillow decor with ribbons If you don’t know how to embroider with ribbons, but want to learn this art, the following video will teach you how to do it. Here is a master class for beginners on ribbon embroidery.
How to determine size?
To calculate the size of a pillowcase for your pillow, you need to measure the length and width of the product, as well as the dimensions of the pillowcase itself. Also find out what fabric the cover is made from, and whether the textile will shrink after washing - in this case, it is better to take a larger pillowcase or even refuse to buy such items. Please note that if the pillowcase is too small, the pillow will bunch up and you will not get any comfort while resting.
If the cover turns out to be larger than the pillow, this is also not the best solution. In addition to the fact that this appearance will make the bed as a whole untidy, such a pillowcase will not hold the shape of the pillow, folds will appear on it, and this will also not bring a pleasant feeling during sleep, you will not be able to fully rest. It is advisable to select a pillowcase as accurately as possible in size, but if you have to buy the wrong size, then the acceptable parameters are no more than 5-6 cm in length and you can take 3-5 centimeters more in width. And under no circumstances choose a smaller size.
When determining the size, it is worth considering the volume of the pillow. Standard sized pillowcases are made to be of medium thickness, but if your pillow is noticeably fuller, it is better to choose a pillowcase that is slightly larger than the pillow itself. The same applies to a flat specimen - the standard size will not be suitable for this option. If you decide to sew a pillow cover yourself, when determining the size, be guided by the parameters of the width, length and thickness of the sleeping item, and take into account the characteristics of the fabric. To prevent it from shrinking, it is recommended to wash the material for the cover before making the pattern.
Experts recommend that, even when buying a product in a store, you measure the pillowcase yourself on the spot and check it with the dimensions specified by the manufacturer. There are cases when the presented samples do not correspond to the declared parameters.
Methods for cleaning pillows
One of the methods known to many is dry cleaning; this technique allows you to completely get rid of field ticks, while each product is processed separately, without the use of chemicals. Therefore, sleeping on it after such restoration of the pillow will be absolutely safe.
The dry method is called taking the pillows out into the sun in the summer. An alternative and more effective method is to clean the products under the influence of ultraviolet rays in a special apparatus.
Dry air cleaning is carried out in dry cleaners that have special equipment. You can restore a product in this way in just 15 minutes.
We suggest you familiarize yourself with How to straighten the foam in a bra, how to return the shape to a bra?
As a result, the cleaned fluff is placed in a new pillowcase, the cost of which is included in the price of the service. The pillow becomes fuller and softer when exposed to an ozonator, which directs a powerful stream of air onto the feathers.
You can use steam cleaning; for this, using an iron that has a “steam” function, the pillow is evaporated on each side for twenty minutes. After which it is dried under the influence of sunlight. Next, the bedding is replaced and this sleeping accessory is fluffed.
The method allows you to get rid of all existing types of pollution and pests.
How to sew different types of pillowcases: regular, with ears, with a zipper, from scraps + video
In this master class we will look at three options on how to sew pillowcases for pillows: - a pillowcase with a smell; - pillowcase with “ears”; — a pillowcase with “ears” with a zipper.
If you are just starting to sew, then you can practice your skills by sewing bed linen. This is a good opportunity to explore seams, learn how to work with fabric and practice sewing a straight edge without basting.
Scented pillowcases
Let's take a closer look at how to sew a regular wrap pillowcase. You can sew such pillowcases in different ways, i.e. They may look the same, but the methods of processing the seams and the technology are different. I'll tell you how I sew such pillowcases, using a double reverse stitch. In this case, there is no need to process seam allowances; the cuts will be closed. Such a pillowcase can be sewn by first folding the fabric with the wrong side inward and stitching it along the front side, departing 5 mm from the edge. And then the pillowcase is turned inside out and stitched along the edge at a distance of 7 mm. But I like it better the other way around, when the stitching around the perimeter comes from the front side. It turns out to be a side that prevents the pillowcase from being deformed; it is easier to iron it, because The corners are always straight and do not need to be straightened. Now, to decide on the amount of fabric, let’s see how the pillowcase pattern is constructed. The standard pillow sizes are 70X70 or 50X70; pillowcases of these sizes are most often found in ready-made pastel linen sets. We will consider a pattern for pillows of this size. If your pillows are a different size, resize the sides of the pattern accordingly, leaving the seam allowances the same.
Necessary materials
Before sewing a pillowcase, you need to prepare the following materials.
- Fabrics. Satin and calico are more suitable for this purpose; you can use silk, chintz, etc., which are selected, selected scraps.
- Sewing machine.
- Threads matching color and texture.
- Tape measure.
- Pencil, chalk for drawing lines.
- Scissors and pins used to secure pieces of fabric.
- Other accessories, if needed.
- Calculation of fabric consumption for the simplest type of pillowcase.
You need to take the calculated amount of consumables plus 5%. For a pillow 50 x 50 cm, you need 1 m plus 5 cm. If the pillowcase is sewn with a wrap, then you need to add fabric for the wrap.
When calculating the required cut of fabric, we take into account the dimensions of the pillowcase itself, the scent and seam allowances
It should be remembered that when selling in stores, the material is cut unevenly or even torn, which sometimes bends it. Therefore, experienced craftswomen take about 10-20 cm more than the planned amount.
Now you should understand the instructions for sewing this element of bed linen.
Methods for making exclusive cases
A cover made and decorated with your own hands will completely transform a decorative sofa pillow, making it an ideal addition to the interior, its worthy highlight. There are several options for creating an original case. You can:
- create exclusive decor for the finished product;
- sew and decorate a pillowcase;
- knit the cover with crochet or knitting needles.
If you have a finished pillowcase in good condition, there is no need to do any sewing. You can transform it in different ways. On a single-color product, you can embroider an image using satin stitch or cross stitch, choosing a theme and shades in accordance with the features and style of the interior.
Decorate your finished pillowcase with embroidery
Pillows with artistic painting look impressive. Nowadays it is easy to purchase paints for applying designs on fabrics. You can also decorate pillowcases made of printed textiles. Available patterns and images are covered with embroidery, sequins, beads, ribbon decor, etc. Buttons, braid, lace and other available materials can be used in decoration.
Sewing a new cover provides the opportunity to choose the material by type, shade, texture, and practical properties. This guarantees the pillow full compliance with its purpose, the specifics of the interior, and ensures uniqueness. The pillowcase can be made from one material, or a combined model can be made. If there are a lot of different scraps and things in the house, the patchwork technique will help you find a use for them and sew an original, fashionable cover.
Pillowcase using patchwork technique
A knitted pillowcase on a sofa cushion looks beautiful and extraordinary. The variety of patterns, types of threads and yarns, and techniques makes it possible to produce such products for any interior style. Covers knitted in styles fit perfectly: country, rustic, Scandinavian, English, eco. Plain knitted products successfully complement modern interiors. Delicate crocheted lace pillowcases are used in decorations in styles: Provence, modern, classic, glamorous, shabby, etc.
Knitted pillowcase
By the way, it is not necessary to have skills in working with crochet or knitting needles in order to decorate the interior with an original product. Knitted pillowcases for sofa cushions can be made from old sweaters, vests, cardigans, and other things.
Step-by-step description of production
Sewing a bed is easy, as there is no need for undercuts or complex designs. You need to sew a pillowcase with a hidden zipper in the same way as with a regular lock. If you think that making a pillowcase is a difficult task, then use the following notes.
- Cut the fabric to the required size. Don't forget to add 1-2 cm on each side. We recommend that you first draw the lines with chalk or a bar of soap. This makes it easier to make straight cuts.
- Place the zipper on the edge where you will sew. Mark the edges with pins, but do not pin the zipper, it will interfere with sewing.
- Fold the fabric right side down and stitch 1cm from the edge along the side where you want the zipper to be, leaving room for it.
- Sew a wide stitch where you want the zipper to be. Do not over-tighten the seam. The stitching must be removed after sewing in the zipper.
- Place the fabric with the wrong side facing up. Iron the seam open.
- Place the lock in place face down and secure with pins.
- Sew the zipper to the pillowcase using a machine.
- Turn the cover inside out and stitch around the perimeter at a distance of 1-2 cm from the edge. If you are sewing a pillowcase with ears, make a stitch at a distance of 3-5 cm from the edge.
- Finish the edges with a special stitch.
As you can see, it’s easy to sew a beautiful pillowcase with a zipper with your own hands
It is important to choose the right fabric and take measurements. And for manufacturing, use the recommendations from the article, and then everything will work out for you
Would you like to try sewing a zippered pillowcase for your pillow yourself?
Not really
Step-by-step instructions for assembling the workpiece
For beginners, it is worth considering the pattern of the simplest pillowcase, in which there are no zippers, there is a one-piece pocket (in professional terminology it is called a “valve”). The measurement is taken from the pillow on which the pillowcase will be “worn.” Let's say the length and width of the pillow is 54 cm. The size of the valve (pocket) is 50 or 30 percent of the product. Accordingly, it will be 27 and 18 cm. You should definitely add one centimeter as an error. The allowance is allocated 1.4 cm, the cut is folded and 1.4 cm will also have to be marked on it. Additional dimensions are necessary for those who require softer pillows, if there are no such requests, then the increase can be canceled.
It makes sense to immediately make a pattern on a prepared piece of fabric, and in this case, be sure to take into account the direction of the thread. This thread is also called “lobe”, it runs along the length of the pattern fabric
The following figures are obtained after this calculation:
- 54 + 54 cm (base figure indicating the length of the pillow);
- 18 cm valve;
- two times one centimeter is considered - this is an allowance for the volume of the pillow;
- 3 cm is the parameter that goes into hemming two sections.
Once the basic parameters are available, a drawing is made on the main piece of fabric using a ruler and marker. You should step back one and a half centimeters from the edges and draw two parallel lines. There should be a distance of 55 cm between the threads (taking into account the parameters that were calculated for the volume). After this, vertical markings are built, which will indicate the fold of the main pattern, as well as the valve itself. A vertical dotted line is drawn on the right side at a distance of 21 cm (here 30% of the length of the pillow and 1 cm increase). The total is 54 cm.
The side parts are sewn with a special (hemming) stitch. At the same time, the edges are bent to the wrong side (the first time 0.6 cm, then folded again by 0.8 cm). In this case, it is recommended to take as a basis the fold of the primary edge, which has bent, it is stitched at a distance of no more than 0.3 mm. After the operation is completed, the valve is bent inward, the sections are aligned along the bend border, and they are arranged in parallel
It is important to note that the sections should be swept first, this will make it easier to work with later. And also don’t forget about horizontal cuts and vertical folds
After all operations are completed, the pillowcase is turned inside out so that the front part is inside. It will be necessary to trim the corners, straighten them, and “walk” over them with a hot iron. An indentation is made from the horizontal folds, it is stitched, and an indentation is made in the middle of the seam of one centimeter. This method allows you to avoid unnecessary processing of the sections; they are left closed. Such seams also have a second name: double reverse.
If you need to make an orthopedic pillowcase (50x50 or 40x40 cm), then there are no fundamental differences in sewing, but the calculation method changes slightly. For such models, the material should be cut two centimeters longer - 52 cm, and also 133 cm long. 2-3 cm are allowed for allowance. If the model is 40 cm wide, then the allowance is the same. It is also recommended to make a smell of 18 cm, which holds the pillow in the product itself.
The sides are stitched, the armhole remains untouched. The cuts are processed with a “zigzag”, this is the name of the seam; it is also customary to do it with an overlocker. The clasp opens, the teeth on the front side will point up. The front side is secured with pins, the indentation is about 8 mm from the edge. The clasp is attached specifically to the product. The distance from the side cuts is about 2.4 cm. A line of 2.4 cm from the side seam is laid on the inside. The line is mounted 4 mm higher, the pillowcase is turned inside out and ironed.
A pillowcase made with small “ears” also has a second name: Oxford style. It will take a little more time to make, but it will also look quite elegant and unusual. A piece of fabric measuring 62x192 cm is taken, the sections are processed to a hem of 64 cm, the edge is bent from the inside at 72 cm. An indentation is made from the edge for the line along which the smell will pass 5.6 cm. The sections are ground off on both sides, indentation from the edges 0.6 cm is made. The product is turned inside out and ironed. An indent of 5.5 cm is made from the edge, a small rectangle of 52 and 72 cm is drawn with a ruler. Markings can be made with a graphite pencil or a ballpoint pen. A new line is sewn along the line that is drawn.
How to sew a pillowcase
The first thing you need to do before sewing a pillowcase is to decide which pillow it will be placed on. The dimensions of the cover depend on the shape and size of the bedding.
Square pillows of 70X70 centimeters are considered traditional; in addition, smaller size products are used: 50X50, 40X40 centimeters, and so on.
European-style pads are considered quite popular. They have a rectangular shape and dimensions of 70x50 centimeters. For children, accessories 60x40 centimeters are used.
If you don't know exactly what pads you're using, just measure them.
To create a bedding cover, you will need fabric, scissors, chalk or a simple pencil (for marking the material), a sewing machine, thread, a needle and safety pins (pins). If the pillowcase will be fastened with buttons or a zipper, you will have to add the appropriate fittings to the list of necessary items.
When calculating the amount of fabric that will be used for a pillow, you should definitely take into account the possible shrinkage of the material after washing, as well as indents for seams. It is advisable to overlock or process the edges of the material by hand to prevent thread delamination
This is especially important for thin fabrics like cambric
Step-by-step instructions for sewing a wrap pillowcase for a 70X70 centimeter pillow:
- A piece measuring 174x72 centimeters is cut out of the material (marked using a centimeter or a ruler and crayons).
- The cut ends on both short sides of the fabric are folded. If it is difficult to sew evenly right away, you can first iron the material with an iron and then join it together. To do this, you need to fold the edge once by 1 centimeter, iron it, and then bend it again, again walking over the material with the hot sole of the household appliance. This will allow you to avoid finishing the edges with an overlocker.
- The fabric piece is laid out with the wrong side up, 30 centimeters are measured from the folded, stitched end, then this part is folded up with the right side.
- From the other edge you should measure 70 centimeters and repeat steps 3.
- Both sides are connected with pins.
- You need to sweep the sides of the future bedding accessory along the barrels.
- The pillowcase, along with the scent, is turned inside out, after which its sides are smoothed out and the corners straightened.
- Stepping back 1 centimeter from the edge, you should lay the side seams (using a machine).
The finished product is turned inside out and tried on a pillow.
There is nothing complicated in sewing pillowcases; creating pillowcases yourself will not only save you money on purchasing them, but also allow you to acquire exactly the kind of sleeping accessories you need. This is not a difficult job, although it does require some accuracy and perseverance.
This is interesting: Children's bedding - selection criteria, review of manufacturers and care tips
Choosing fabric for sewing pillowcases
You need to select fabric for pillowcases in accordance with their purpose. If this is a pillowcase for a pillow intended for sleeping, then the material should be soft and pleasant to the touch. Synthetic fabrics that tend to electrify are not suitable. The material should absorb moisture well, since people often sweat in their sleep.
Dense “non-breathable” fabrics can cause inflammation on the face when used for a long time. For bed linen, you can purchase chintz. It is inexpensive, also lightweight, absorbs moisture well and allows air to pass through.
Most often, this fabric has delicate colors in bed colors with small floral patterns. Chintz is easy to cut, the edges do not fray, and the fabric hardly wrinkles. This material has only 1 drawback - after 20 washes the color fades, and after 1 year the material loses strength and begins to tear. A more durable analogue of chintz is calico. It will last longer and will not lose its rich color after repeated washings. Calico does not wrinkle, and wrinkles that appear as a result of long-term storage are easy to smooth out.
The fabric does not irritate the skin, so it is often used for sewing baby bedding and diapers. The disadvantage of calico is the rapid formation of pellets, but they can be easily removed using a special device. Thin fabrics are not suitable for sewing pillowcases for feather pillows. Sharp feathers get knocked out and cause discomfort when resting.
The table shows the names of other materials suitable for bed pillowcases and their short characteristics:
| Textile | Peculiarity |
| Cotton | Resistant to frequent washing and will last longer than chintz. |
| Satin | Smooth shiny fabric, looks beautiful and expensive. |
| Linen | Strong and lightweight, keeps you cool in hot weather. |
| Batiste | Does not irritate sensitive skin. |
| Silk | Expensive and beautiful material. |
| Percale | Dense, soft and breathable. |
| Atlas | Shiny, looks expensive, but wrinkles a lot. |
| Viscose | Smooth texture with matte shine. |
| Crepe | Does not require ironing, wear-resistant. |
| Tencel | Budget analogue of silk. |
| Ranfors | Does not form pellets, does not crumble or shed. |
These materials give a feeling of coolness in the hot season. Pillowcases for winter can be made from flannel or terry. They also absorb moisture well, but at the same time heat up quickly and maintain heat. Sleeping pillowcases can be decorated with soft lace by sewing it over the ears. You can also tie the ears with threads, making them look like petals. This method of decoration is very popular in England. For decorative pillows that will be placed on the sofa as decoration, a rough material that is resistant to wear and tear is suitable. Velvet is considered a good option.
If velvet is too expensive, then it can be replaced with velor. It has a short and pleasant-to-touch pile. Such fabrics need to be well looked after. If there are pets in the house, then the pillows need to be vacuumed or cleaned of hair, as small and light debris easily clings to them. The problem of sticky animal hair can be solved by sewing flock pillowcases. The material has short fibers, but does not become electrified and does not catch debris. In addition, it is very durable, pets will not be able to damage it with their claws.
Another option is chenille. This is a dense fabric with short pile and an engraved pattern. Chenille is often used for upholstery. Pillows in pillowcases made of this material will hold their shape well, so they can be used as back support while sitting on the sofa.
What other fabric is suitable for pillowcases on decorative pillows:
| Textile | Peculiarity |
| Teak | Durable water-repellent material. Suitable for sewing decorative pillowcases on a kitchen sofa. |
| Satin-jaquard | Sturdy, printed fabric |
| Jeans | One of the most durable fabrics, holds its shape well |
| Wool | Soft and pleasant to the touch texture |
| Gozhka | A rough material that looks like burlap. Suitable for loft style interiors. |
| Microvelvet | Fabric with short and stiff pile |
| Tricovelor | Velor with knitwear composition. Soft, holds its shape well. |
| Suede | Dense and wear-resistant |
| Scotchgard | Durable material with protective weave underneath |
| Arpatek | Does not fade in the sun and does not shed |
| Eco-leather | Soft PU leather, waterproof and comfortable to touch |
The most popular material is microfiber. This fabric is very soft and pleasant to the touch. In stores you can find any color: plain, with a pattern, from pastel to acidic colors. However, microfiber has a couple of disadvantages: pellets quickly form on it, and the fabric becomes electrified. Sofa pillowcases can be decorated with rhinestones, beads or voluminous embroidery. You can sew a patchwork product from scraps of fabrics of different colors and textures. Tassels made of threads are often sewn onto velvet pillows.
How to sew a decorative pillowcase with lace and piping step by step with photos
Required:
- Background fabric;
- Lace fabric;
- Lace edging;
- Threads;
- Chalk;
- Scissors;
- Safety pins;
- Tape measure;
- Sewing machine.
Job:
- On the background fabric, measure a piece of 43x100 cm and cut it out.
- Process the short edges of the cut, giving each 2 cm with a bend.
- From the short processed edge of the cut, measure 40 cm above and below.
- Fold the fabric right sides along the marked line.
- Then throw the fabric on the second side so that the cut line of the other side is flush.
- Finish the raw edges and turn the pillowcase inside out.
- Measure out a square of equal sides of 43 cm on the lace fabric.
- Fold the material in half and cut out the shape, you should get two squares of equal sizes.
- Place them right sides on top of each other.
- Place the edging along the edge with the lace frills inward and secure it perpendicularly with pins.
- Process the lace fabric on 3 sides of the cuts.
- Thread the inside out pillowcase and carefully sew the lace fabric to the background one, carefully joining the 4th side together with the background one.
- You can put a pillow into the finished pillowcase.
Sad cat
For the pillow you will need:
- white felt for the body;
- a little felt in black, brown, beige, blue and pink for the rest of the details;
- filler;
- glue;
- threads, sewing tools.
Description
Print out the pillow pattern in the shape of a sad cat in life-size, taking into account the scale.
Pin it onto a sheet of white felt and draw the outlines. Cut out two identical pieces.
Patterns for small parts can be taken from the general pattern or cut out from it.
We need to cut:
- made of brown felt - four parts for ears, two parts for eyes, two parts for a tail;
- made of beige felt - two parts for the ears;
- made of blue felt - two details for the eyes;
- made of black felt - two parts for the pupils;
- made of pink felt - two parts for the spout.
We place the light parts of the ears on the dark ones and sew them on with a basting stitch by hand. We sew the details of the pupils onto the blue parts of the eyes.
We fold the parts of the tail and ears in pairs with the right sides inward, and sew them together with a machine seam. Turn it inside out and straighten it carefully.
We glue the details of the eye and nose onto one of the pillow parts. We attach them for strength by sewing a line around the perimeter.
Place the felt pieces right sides together and stitch around the perimeter, leaving an open area at the bottom.
First insert the ears and tail filled with filler.
Turn the pillow inside out and put the filling inside.
We chop off the open area, tucking the cuts inward.
Sew the edges together using a hand blind stitch.
