Hand made has become mainstream for both designers and ordinary citizens. People can no longer be wowed by high-quality bathroom carpets, so they are resorting to DIY.
Rug made from scrap material
You can use various materials: old T-shirts, T-shirts, plastic bags and even wine corks. The latter will be discussed in this article.
Useful things, in my opinion
The biggest benefit of cork is that it does not conduct heat. That is, it does not heat up at all.
Finger protection
Instructions: insert a wine or champagne cork into the loop handle on the lid of a pot, frying pan, roasting pan, etc. It’s brilliant and has been working since time immemorial: my grandmother did it this way.
Hot stand
There are several ways:
- cut the corks lengthwise and glue them with heat-resistant glue or embed them in a lid with epoxy - you will get these designer coasters, they look very cool, but are time consuming and epoxy is not found in every home;
- collecting about 20 (that's what we did) corks side by side, tying them with cotton ribbon or floss (which we did by enlisting the children and stealing the threads from my wife) - it also works out well, but washing it if you accidentally spilled soup on it is not very convenient.
Night light
Based on the same thermal insulation properties. You take a glass vase from your wife, which has long been annoying with its uselessness. Inside you put a night light from AliExpress, which shines like a spotlight and for this reason lies under the bed for a year.
It turns out to be a soft light, all the ownerless things are in use, the wife grumbles that her favorite vase has been taken. Beauty.
Bath mat
Here the matter is, firstly, in thermal insulation, and secondly, in anti-slip. Plus, cork dries well and doesn’t grow moldy, unless you put it in a bag (I didn’t test it, but a friend’s wife washed a cool spice jar with a cork lid and hurried to close it - mold started growing).
What you need: a lot of traffic jams and even more patience. The point is to glue, staple or glue many, many cork halves onto the façade mesh.
The rug, in theory, will turn out gorgeous. If you glue them to each other, then it won’t slide, and it won’t get dirty quickly (shaggy rugs pick up wool, which then sticks to wet feet), and it’s warm and gives your feet a massage. But if you glue it to the mesh, you will have to put it with corks on the floor (so as not to slip), and stand with your heels on the mesh, but it is not so-so to the touch.
Orthopedic mat
I'll put it in a separate section. If you glue a rug together from corks of different thicknesses and lay out a pattern, you will have an excellent orthopedic rug. But just don’t expect to save a lot, because you’ll have to buy the corks, and then work hard while you glue them all out.
Jewelry organizer
I appreciated this method when the other day I was unraveling my wife’s chain, which she had managed to tie with some kind of nautical knots. The method works because the cork is easy to pierce, cut and glue.
Manufacturing:
- Take an old mirror with a frame.
- We throw it away and keep the wooden or whatever backdrop and frame we had (my friend suggested an old picture, but these are usually the older they are, the more expensive they are, so I don’t recommend them).
- We cut the corks in half and glue them to the backdrop. You can lay out a pattern, but it will still look so-so. Earrings will be stuck into these plugs.
- We glue several corks entirely, with their ends - beads, chains, and bracelets will be hung on them. For reliability, I would cut small notches on these protruding plugs.
But you need a lot of traffic jams for such a craft.
Note board
I needed one of these in the office about 3 years ago, but somehow they didn’t get that many caps. The board is made and works in the same way as an earring organizer.
Wire holder
I now have a cardboard box from a dry breakfast, a lid is made from one wall, there are triangular cutouts on the sides, the ends of the wires are inserted into it. The chargers do not get confused and are easy to get out. But the ends stick out like the spines of a bald hedgehog (there are none on top, only on the sides).
If you make a holder for tips inside the box, the look will be more aesthetically pleasing. 3-5 corks are enough, depending on the size of the box.
What need to do:
- Make a box for the wires.
- In the center or evenly between the rows where the chargers will lie, glue the plugs, cutting off their sides, but not too much.
- Using a sharp knife, cut slits for the wires to create sliced cork loaves.
- Put everything together and enjoy.
Stamp
This is an old life hack, everyone already knows it. Take a sharp knife, or even better, a clay or foam cutter. And carefully cut out the design on the end or sides. Dip it into a sponge with paint or directly into watercolor/gouache and make impressions. My wife and I somehow made a stamp roller:
- We cut a pattern on the sides of 3 corks.
- They stuck them on a knitting needle like a kebab.
- We secured it with hot glue, and made handles from electrical tape at the ends of the knitting needles.
They decorated the walls of a dollhouse with this roller (for cheap reasons they took a wooden one without anything and furnished it themselves).
Plastic crafts
Such caps are no less popular. They differ from cork ones in the variety of their colors. Thanks to the wide range, they make unique mosaics, paths, panels and many other bright things. Crafts made from champagne corks can diversify not only the interior.
They easily turn into interesting entertainment for children. For the little ones, you can make a mushroom - fly agaric. Just cover it with red paint and add white dots. An excellent educational toy is ready. It is absolutely safe. There is no need to be afraid that the baby will swallow small parts, there are simply none here.
What else can be made from wine corks? Older children, especially boys, will love the boat. All you need to do is connect three products and tie them with twine. Make a sail from a toothpick and a triangle of colored paper. The basic flotation device is ready. In this case, you don’t need any special knowledge of shipbuilding; your imagination is responsible for everything.
How to make a panel from champagne corks, step by step instructions
We make a backing for the circles. We will need: a sheet of plywood or cardboard in order to create a sketch; traffic jams; paint (preferably acrylic); wood glue
Prepare: tape, glue gun, thin-bladed knife, stationery knife, foam brush, jar.
- We make a sketch from plywood (cardboard). Cut the corks into circles.
- Using a gun, we glue the corks together, as well as to the template.
- A knife can be used to cut corks in half or into more pieces.
- We paint the corks with a foam rubber brush. Move from the bottom to the top of the picture.
- To make the paint adhere better, you can dilute it with water.
- We connect the wine corks using a gun and press them tightly against each other.
- To fill small voids, you can cut pieces with a stationery knife.
- You can paint the panel using the Ombre effect.
We dry everything and your panel is ready!
Fridge magnets
Let's continue the theme of notes - you can attach them to the refrigerator door or metal board using cork magnets. To do this, cut the base in two and glue flat magnets, “gnaw out” a groove for a thicker magnet with a knife, or simply insert a magnetic button on a pin.
Crafts can be easily decorated by stylizing them as miniature flowerpots, and the plants can be not only artificial, but also living - tiny succulents are suitable, for which the soil poured inside will suffice.
Small items basket
You can make a cute basket without spending a lot of effort and money. A little more free time and the work will please the eye. To create such a masterpiece you will need: wire and plastic covers. In each you need to make four holes crosswise.
Five caps are strung on two long pieces of wire. Place them parallel to each other. I pass a piece of wire perpendicularly into the free holes in each vertical row. Now parts are put on each around the perimeter, bending the figure upward.
A piece is threaded into each horizontal layer from the inside of the basket over the entire area. And so on, up to the required work height. The ends will need to be bent inward. The craft is ready to fit into the decor of the room.
Collecting bottle caps is a hobby mostly reserved for connoisseurs of sparkling drinks. They are effectively placed in a glass interior glass or vase. But over time, their volume increases exponentially. Relatives and friends join, wanting to replenish supplies.
And so all possible drawers and shelves in the kitchen are filled. Don't rush to get rid of your unplanned collection. You can take a look at several master classes and make your own unique creation.
Crafts made from corks are always in great demand. There are people who collect them on an industrial scale. They are used to make chairs, cabinets, beds, and even cover the facades of buildings. Everyone has their own interests
It is important to have the desire to discover something new.
Candlestick
By pouring a hefty handful of wine corks into a glass flask or vase and placing a smaller container with an aromatic candle there, you will get an original table decor for a romantic evening.
If there are not enough sources for the craft, simply cover the glass with candles with corks in a circle and tie it with twine.
Plastic corks for children's creativity
As you know, children have a very well developed imagination. They can create anything from any materials they have at hand. The thing is that from early childhood, parents and kindergarten teachers develop their interest in crafts.
A material such as plastic corks is perfect for children's creativity. They are good because they stick to any surface, which means you can create all kinds of pictures and shapes. Children really like crafts made from plastic corks, and they are happy to make voluminous and interesting products.
Usually they make 3 types of crafts from this material: appliques, toys and figures.
Applications in the shape of a bird and a dragonfly for children's creativity
The easiest applique to make is a caterpillar. It can be any size and color. You can complement it with a beautiful background and various small details. For example, make a sun and a flower as a background by gluing corks together according to the design.
Another interesting applique is birds. To do this you will need 2 covers for the head and body, as well as cardboard, fabric or real feathers for the wings.
You can make a wide variety of crafts from plastic bottle caps, trusting your imagination or displaying them step by step in pictures.
So, you can make an applique, for example, in the shape of a rabbit. It is made in the same way as the bird, with two lids of different diameters, cardboard for the ears and a small pompom for the tail. In this way, you can create any animals that your child likes.
Three-dimensional crafts are also easy to make and look more interesting than appliqués. Try making a turtle.
Using fishing line and wire by stringing corks on them you can get a snake or little men
To do this you will need a large lid for the shell, cotton swabs for the limbs and an ice cream stick for the body. They need to be painted green or any other color, glue the lid onto an ice cream stick and crossed cotton swabs, draw spots on top, attach eyes - and the funny turtle is ready.
The same principle is used in making spiders, but instead of cotton swabs, you can use pieces of chenille wire.
A child can easily make crafts in the form of ladybugs or bees, which are done by painting the lids with appropriate colors. The antennae can be made from black fishing line, and the wings from cardboard.
Using fishing line and wire, you can get a snake by stringing plugs on them.
The application in the form of a rowan branch is very easy to do.
Housekeeper
You no longer need to look for keys throughout the apartment. Now a special place will be organized for them. A craft made from wine corks will not only perform a practical function, but will also be a wonderful addition to the decor.
A sheet of plywood is required for the base of the work. Everyone selects the sizes individually, depending on the future location. You can use an unnecessary piece of laminate left over from the renovation.
We cover the base with paint, it is more convenient to distribute it with an aerosol can. All that remains is to nail the furniture nails or screw in the screws. They can be arranged in any order. The wall organizer is ready, now you can hang your keys. If desired, decorate with various accessories or other small items.
Mosaic of traffic jams
You can build a mosaic panel from a large number of multi-colored corks. To do this, in addition to corks, you will need good glue or a glue gun so that the composition does not fall apart in the future.
First of all, choose a surface for creativity, decide on the image and get to work. The panel parts are attached by gluing them one by one to the prepared surface. If you want to mount them from the reverse side, then you will need screws to secure them.
An interesting solution for the panel would be the option of folding lids of different sizes one into one according to the matryoshka principle. For example, a yellow sun made from such folded lids looks great.
The “cockerel” craft is also entertaining, but requires some skills and time. To do this, you need to make a plywood base, prime it, apply an outline and use glue to fix the plugs according to the image diagram. The result is an original creation.
Panel
It’s easy to create a simple picture from corks by filling the outlined outline with scraps and choosing an interesting backing.
Advanced craftsmen sculpt stunning three-dimensional panels from this material. Such wall decorations fit organically into the interior of hallways, living rooms and personal offices.
What can be made from wine corks
Collecting bottle caps is not a pointless activity. You can use them to make a lot of beautiful and even useful things in everyday life. First of all, corks are successfully used in the kitchen in the form of coasters for hot dishes, glasses of wine or beer mugs. Trays made of cork material and other decorations for kitchen utensils look interesting. This is a useful thing in the house, but it’s worth using your imagination to create a charming designer piece in your interior.
Blockages are used not only in the kitchen, but throughout the interior. From waste material you can create original frames for mirrors, paintings, photographs and even furniture. A key holder, a shoe stand, a rug for the hallway and bathroom, wall panels, baskets and vases, massage mats, miniature trinkets for room decoration and gifts - all this will allow you to create corks.
Some craftsmen use bottle material as a finishing material, making using a combination of corks:
- baseboards;
- kitchen “aprons” for the work area;
- decorations on the entire wall.
Household crafts from wine corks
Cork is an excellent ornamental material, which is heat-resistant, wear-resistant and lightweight. It is great for making interior items for household needs. For example, they will decorate the kitchen and provide comfort in everyday use:
- hot coasters;
- cabinet handles;
- parts of tableware.
To make a hot tray, you will need to select clogs of the same size. It is better not to cut the material, but to leave it in its original form. To fix “recycled materials”, it is advisable to use superglue - it ensures strong adhesion without leaving marks. To create a one-piece cork structure for hot purposes, you can use wire, which needs to be wrapped around the outside or connected to each segment from the inside. Using the same principle, you can make a rug for the hallway or bathroom.
Housewives very often burn their fingers on metal pan lids. This problem can be solved if you insert a wine stopper into a metal handle, which you can handle without getting burned. If there was a plastic handle, but it flew off, then you need to screw the plug on and then use the lid. Using a screw you can create an original cabinet handle.
Paintings from traffic jams
What can you make from champagne corks? Yes, whatever. Original crafts made from corks are distinguished by their exquisite simplicity. Cork material is worth collecting even in order to create original paintings that will harmoniously fit into the vintage or rustic style of the house. A simple panel will not only decorate the room, but will become a stand on which you can attach important notes.
The manufacturing process of such an interior item is simple. First you need to acquire all the materials and tools in the form of wine plugs, a wooden frame, a glue gun and a cutter. You can start creating the panel:
- Cut the plugs into halves.
- We lay out an arbitrary drawing from them in a frame.
- We adjust and adjust each one to size, cutting it off to get a solid picture without gaps.
- We fix the elements of the composition with a pistol.
Decorative items made from wine corks
Wine corks are often used to decorate a variety of interior items. With this simple material you can change the look of a photo frame, flower pot, clock, lamp or basket. Crafts made from corks can be left in their original colors or transformed using paint, rhinestones, threads, ribbons and other types of decor. In the creative process, imagination and the features of an individual interior are important so that the objects fit harmoniously into the design of the room.
A cute figurine of a giraffe is one example of what to make from wine corks. To create a frame you will need wire, newspaper and texture tape for structural strength, corks, and glue. After collecting the materials, make the craft:
- Make a frame of a giraffe from wire, which must be decorated with newspaper and rewound with tape.
- Then you need to alternately glue the plugs onto the structure parallel to one another.
- At the end of the process, fill all the gaps between the plugs with glue.
Today, original jewelry is considered fashionable; it is acceptable to make them from any materials. Wine or champagne corks have found their application here too. You can easily create an original brooch, ring, pendant or earrings. You need to purchase the necessary accessories in advance, and you can start creating. For example, for pendants the cork is suitable in its entirety, but for earrings the material should be cut into an intricate shape.
Home rug
Cork stoppers are made from wood. This is one of the high-quality and durable materials. 235 years is the age of the oldest oak tree in the world. The average lifespan of a tree is 150 years. Therefore, things made from such a component are practical and will last for many years. You can make a comfortable and waterproof rug for your hallway or bathroom. To do this you will need:
- Rubberized base (for an entrance door it is more rational to use a metal one).
- Traffic jams.
- Glue tool with spare sticks.
All parts are selected the same size. Each should be cut along its length. It is better to do things on a wooden board to protect yourself. Each element should be glued to the base in even rows. For the hallway, you don’t have to divide them in half. This adds more volume and density to the product.
Rug made from old leather belts
Making a mat from belts is very simple.
For this you will need:
- 10-12 natural or faux leather belts
- awl or leather punch
- twine or string.
First make the belts the same length by cutting off the buckle. Make holes along the edges of the straps at a distance of approximately 2-3 cm from each other and 0.5 cm from the edge. Sew them together using thin hemp rope. The order of pulling the rope is arbitrary; you can sew along the belts, across, crosswise between the holes. Metal staples instead of rope will also look very stylish.
- scissors
- pieces of old (unnecessary) fabrics, maybe old clothes
- bath mat (with holes)
1. Cut the fabrics into small strips
2. Using tweezers or a hook, begin pushing the strips through the holes.
3. Tie all fabric strips with a simple knot.
- old towels
- scissors
- sewing machine (needle and thread)
1. Cut your towels into several strips. In this example, each strip is about 3 - 4 cm wide.
2. Place 3 strips of different colors together and secure them with thread (stitch the ends). Start braiding these strips. After finishing the weaving, stitch the ends again.
3. Make several of these “braids” and then connect them into one long strip using a needle and thread (or a sewing machine).
4. Start rolling your long strip into a spiral, securing it with a thick thread.
5. Secure the entire structure and turn it over so that the seams are on the bottom.
Your rug is ready!
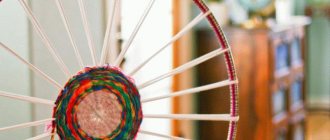
Old knitted T-shirts are actively used by craftswomen for a variety of crafts; in particular, the idea of making rugs out of them is very popular.
Necessary materials:
- 3-4 T-shirts (other things, ribbons or ropes)
- children's gymnastic hoop or hula hoop for adults scissors
The size of the mat depends on the size of the chosen hoop; you can take either your daughter’s gymnastics hoop or a large weight loss hoop. The weaving technology is very simple; even a child can do it by making a round rug on a hoop for their room.
Important! The strips of fabric should not be very stretched, otherwise the finished rug will wrinkle and will not hold its shape. Ideally, the T-shirt strip should fit almost loosely over the hoop, with minimal stretching of the fabric. It's likely that if the diameter of your hoop is larger than the T-shirt strip, it's too tight or you're using ropes altogether
In this case, simply wrap the hoop in fabric or rope and tie a knot
It's likely that if the diameter of your hoop is larger than the t-shirt strip, it's too tight or you're using ropes at all. In this case, simply wrap the hoop in fabric or rope and tie a knot.
Try to have all the base lines intersect at the center point. We start weaving the rug from the center. Take a strip of T-shirt, fasten it with a loop to one of the warp lines and pass it under and over the longitudinal lines.
When the strip ends, tie another T-shirt ring to it, hiding the knot under the previous row. Continue weaving in the same way, alternating between pulling the strip under and over the longitudinal lines. Try to keep each circle pressed tightly against the previous one, avoiding large spaces or holes between them. Once you have finished weaving, cut off the ends of the loops with scissors and tie them with a knot.
- old fabric of 2 colors (you can use old T-shirts). The width of each piece of fabric is 20-25 cm and the length is 3 meters. If you are using old T-shirts, you can join several pieces together with a thread and a needle.
- scissors
- needle and thread
- adhesive tape
1. Arrange 5 strips of different colors in the order in which you want them to look on the future carpet.
2. Next to the 5 laid out strips, place another 5 strips in a mirror image.
3. Take the first strip, in this case the pink one, and tie it as shown in the image. First, fold the fabric to form a number 4.
4. Continue tying the pink strip around the remaining strips until you reach the middle.
5. Start doing the same on the opposite side, tying another pink stripe around the other 4 stripes. Start also with the number 4, but in a mirror image.
6. When the two pink stripes meet in the middle, tie them together.
7. Repeat the same with the subsequent remaining strips. Choose the length of the rug yourself.
8. Start another rug, choosing the same colors. After this, connect both rugs with thread and needle.
9. Excess parts can be cut off and the ends secured with thread to prevent them from unraveling.
Key ring
Making such a craft will not be possible without the use of additional accessories and they can be purchased at various stores. You can replace a screw-in hook with a thread with a strong thread; use a needle to stitch the top of one plug, and on the free end you can make an inscription indicating which door the key is for.
To protect yourself and your loved ones, the inscription can easily be replaced with a certain color, and you do not need to paint the entire cork with acrylic paints; you can paint only the free end.
DIY bath mats: 8 ideas with instructions - Master classes on BurdaStyle.ru
Terry cloth and smooth cotton, knitted yarn, cork, pebbles - a DIY bath mat can be made from different materials and in different ways.
Author of the master class
Natalya_Pyhova
Such a rug will absorb water well thanks to the material from which it is made, and fairly frequent parallel zigzag stitches give it sufficient rigidity. The beauty of this particular rug is in the emphasized unevenness of the stripes, which make it look like zebra skin. For the rug you need two terry towels.
From one (in this example, light) cut several uneven strips. From the same towel, cut out a rectangular part of the bottom layer of the rug, from a second towel of a different color - a second similar part. First, stitch the strips in a fairly frequent zigzag pattern, following the unevenness of the stripes.
Then fold the two layers of the rug face inwards, sew, leaving an opening to turn inside out, turn inside out and sew up the opening. The edge can be stitched.
Smooth cotton and terry bath mat
From smooth cotton and terry cloth (or an old towel), you can sew a double-sided rug with your own hands. Cut out two identical parts, baste them and finish them with bias tape, simultaneously connecting the parts.
Patchwork bath mat + towel decorations
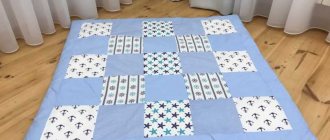
A bath mat can also be made using the patchwork technique. Sew the upper part of the rug from scraps, and the lower part can be made, for example, from a towel or terry cloth, as in the master classes above. You can also decorate bath towels with mosaic patchwork strips to create a set.
Woven bath mat made from knitted yarn
For this rug, you first need to knit several long strips of the same length.
Knitted yarn is preferable, since cotton knitwear is soft and hygroscopic, plus this yarn is so thick that you can knit from it directly with your hands.
The function of a loom can be performed by a board with two rows of nails driven in from two opposite edges. Pull a strong thread between the nails and weave a rug, fastening the junctions of the strips with knots.
Bath mat made from fabric braid
Such a rug can also be made from used terry towels. Select several towels of harmonizing colors, cut them lengthwise into equal strips 2-3 centimeters wide.
Sew the three strips together and start braiding, adding a new section to the strips when the previous one ends. You should get a long braid.
Now you need to roll it into a spiral and sew the layers together in a zigzag or by hand to make a round carpet.
An important point for all fabric rugs:
If your bathroom floor has smooth tiles, you can prevent the mat from slipping by adding a non-slip rubber mesh backing (available at hardware stores) to the bottom side. The mesh can be glued or sewn.
makelyhome.com
Bath mat made of pebbles
If you (or your children) like to collect smooth pebbles on the sea or river bank, as a result of which you have a certain supply of suitable stones - smooth, flat, not very small, you can make a bath mat from them.
(By the way, if you don’t have a sufficient supply of pebbles in your house, you can buy them, for example, at a landscaping supply store.
) A rubber mat of a suitable size is used as a base; you also need glue that can be used to glue both rubber and stone.
Bath mat made from wine bottle corks
Having accumulated a sufficient number of wine bottle corks, you can make such a tactilely pleasant and cute rug. As a base, you can use, for example, a piece of linoleum or a ready-made rubber mat. The corks are cut in half lengthwise and glued, cut side down, to the base with strong glue.
Wooden bath mat finished with cork
You can assemble such a rug yourself from wooden planks or buy a ready-made one at a hardware store.
The main point here is the top cork covering, which gives those very pleasant tactile sensations: standing barefoot on such a rug is very pleasant! Use sheet cork (available in hardware stores) or cork cloth. Cut the material into strips of the desired size and glue to a wooden base.
Hanger
Single plugs nailed to a wooden base perpendicular to the wall will serve as a convenient and unusual clothes hanger. A lighter design of parallel elements with screwed-in hooks forms a nice wall-mounted key holder.
Girls will love the idea of getting a cork jewelry organizer, because earrings can easily be stuck into this material, and rings and bracelets can be hung on hooks.
Advantages of a do-it-yourself mat made from plastic bottle caps
- the product is durable and beautiful;
- is not afraid of exposure to moisture, is not damaged by putrefactive bacteria and rodents;
Entrance mat made from corks and caps
- the material for its manufacture costs practically nothing;
- the environment is not polluted;
- DIY massage mats are an excellent alternative to industrial designs;
Using a massage mat for therapeutic and preventive purposes
It is easy to make and therefore can be done with children.
Plastic bottles have long become a common type of packaging for various types of liquid products. A huge amount of plastic containers or PET is produced. Very often you can find advice on the use of plastic bottles, but at the same time, the bottle itself is almost always used, but the cap remains unnecessary. But caps from plastic bottles are plastic elements of the same shape and design, which, of course, can also be reused and usefully. One useful use for plastic bottle caps is to make massage mats.
There’s probably no need to say much about the benefits of a massage mat; they’re obvious. A targeted or segmental effect on the superficial zones of our body has a positive effect on blood circulation, the vegetative-vascular system, neurology, helps relax muscles and stimulates cell renewal.
There are no difficulties in making a massage mat from plastic covers. Almost everyone, having set such a goal, can achieve their plans. The main thing is to collect a sufficient number of caps. This will take some time. You really need to collect a lot of plastic caps; even a small mat should consist of 50 - 60 caps. Therefore, fold the lids not only from plastic bottles, but also from packages of milk, juice, and other drinks. Ask your friends and acquaintances to help you prepare the lids, it will work out much faster.
In addition to the covers, to make a rug you will need a roll of strong millimeter fishing line; you can also take wire, an awl or a nail for making holes.
The rug can be assembled in the shape of a rectangle or other shape; it will look like a multi-colored mosaic. This is how the lids will fit tightly to each other, and the mat will be comfortable to use. To assemble a mosaic rectangular surface, you will need to make four holes in each lid, which can easily be made with an awl, or better yet, with a heated nail.
To create a small square rug you will need at least 64 caps, that is, the rug will have eight caps on each side. If you collect more plastic covers, then the rug will be larger in size.
A rug with a pattern will look more attractive and interesting, especially since multi-colored lids will allow you to lay out both an ornament and a simple picture. The drawing must be prepared in advance, and then the caps must be assembled according to the intended pattern. It is necessary to thread the fishing line sequentially through the holes in the caps, not forgetting to first secure the tail with a reliable knot. It’s even better to glue it with hot glue so that the whole structure doesn’t fall apart at the most inopportune moment.
The rug does not have to be made rectangular, because five or six pieces can be combined around the lid. Depending on this, the number of holes in the lids is made. The connection principle remains the same. At the end we fix the tail in the same way as at the beginning. For greater confidence, you can additionally pass the fishing line along the covers that form the outline of the mat.
The resulting mat can be used on one or the other side; the inner side of the lids will give a more active effect, the outer side will give a softer effect. A massage mat should be placed near the chair where someone is resting after a working day, so that they can put their feet up. By the way, the mat will also be useful for your back; if you lie on it, it will act almost like a Kuznetsov iplicator.
Another use of the mat, which consists of plastic covers, is as an entrance mat in front of the door. The cells of the lids will trap dirt, and you can wash it with water from a hose.
The mat turns out to be very durable, it holds its shape as long as the fishing line or wire holds, so during this time you can have time to use it for various purposes.
Volumetric letters
This type of decor is at the peak of popularity in Europe and the USA. The point is to make three-dimensional letters and form words from them. The base can be a wooden base or a metal frame, but the craft can be easily glued together from the wine corks themselves and used as a mini-sculpture.
A nice tradition is to declare love, make an offer and accept it using such letters, leaving messages for each other.
A rug made of pebbles from the seashore - relax in the bathroom
You can make a massage mat with your own hands and from small sea pebbles. Stock up on the following materials - a rubber base for the mat, gloves, a transparent silicone adhesive water-repellent composition (you can use tile moisture-resistant adhesive), sea pebbles, a clean cloth, a solvent, a glue gun. And start creating a luxurious massage mat:
- Use a solvent to degrease the base under the bathroom rug. After this, wait a couple of hours (harmful fumes from white spirit or other composition should evaporate completely).
- Wash the pebbles thoroughly in water and soap or powder.
- Apply a drop of water-repellent glue to the pebbles (treat each stone separately) and glue it to the base. It is advisable to press the pebbles against the rubber for 20–30 seconds so that the materials adhere well.
Pebbles and glue to create a rug
The technology, as you can see, is very simple. At the same time, you can make a coating with any unique pattern if you use sea pebbles and other small natural stones of different shapes and colors. Create real bathroom masterpieces with your own hands.
Entrance door mat made of plastic bags: description, photo, diagram
The mat located at the front door should be made of washable materials. Every time you or your guests will wipe their feet on this rug, so you will have to wash it very often.
It is logical that the material for such a rug should be selected for practical reasons. Knitted or fabric rugs certainly look very beautiful, but they are completely unsuitable for these purposes.
One of the most suitable materials for making a door mat is plastic bags. This material has a number of advantages:
- A rug made from plastic bags is easy to care for. It is enough to rinse it in running water, after washing it with a brush and powder or soap.
- Plastic bags are inexpensive.
- In almost all houses there is an abundance of such material, and housewives simply do not know how to get rid of the accumulated bags.
- By making a rug, you will still save the environment, at least a little. After all, we know about the problem of environmental pollution with bags.
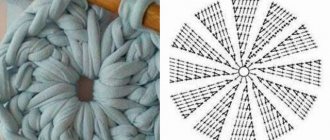
You can make a rug from plastic bags using a hook. First you need to make ribbons from plastic bags and wind them into balls. To do this, cut the plastic bags along the seams, roll them into ribbons about 1-1.5 cm wide. Then, using a thick hook, knit the rug according to the pattern you will see below.
Rug knitting pattern
Options for rugs made from crocheted bags can be seen below. In essence, these rugs are the same as those made from yarn. However, they are better suited for placement at the front door and are more wear-resistant.
DIY rug made from bags
Rugs made from plastic bags
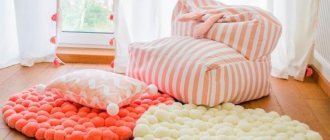
If you don't know how to crochet, you can make pom poms from plastic bags. This rug will be less practical than the previous one. But it will look beautiful. If you take bags of different colors, you can make a rug with patterns.
make a pompom like this:
- Cut the bags into long strips of the same size and width.
- Wrap many strips onto a paper base.
- Use scissors to cut from opposite edges.
- Tie the strips in the center with strong thread.
- Fluff the pompom.
Then glue the pompoms onto the base. Polyethylene pompoms can be used to form flowers and other designs.
Rug made from garbage bags
We invite you to watch a master class on making a rug from plastic bags.
How to make a rug from wine corks: master class
There are two main ways to attach wine corks: vertically or flat, first cutting each piece in half lengthwise. The first option is simpler and faster to manufacture, since it does not require cutting corks, the second gives more space for flight of fancy in the layout of the halves on the base for the rug, in addition, it will require less starting material.
Vertical installation of plugs: step-by-step instructions
- The base under the rug must first be degreased, washed and dried.
- To lay out the corks vertically, you will need to make a side, for example, from boards. As an alternative, you can take a wooden or plywood box with sides of the required height (a couple of millimeters less than the length of the plugs), treated with an antiseptic, as in the photo below.
- Corks are glued in small batches, first along two parallel sides, gradually approaching the center.
- When the surface of the bath mat is completely filled with corks, you need to let the glue dry, pressing it on top with some kind of weight.
- After drying, the mat can be painted or coated with a special varnish with waterproof properties.
Rug made of wine corks laid horizontally
This method differs from the first option in the need to carefully cut the corks in half along their length. Before starting work, it is recommended to calculate the number of blanks based on the area of the future bath mat.
- The cut corks are processed with sandpaper on the flat side.
- The rubber mat is degreased.
- First, the pattern is laid out without using glue, trying to calculate the exact number of blanks and their location.
- The cork halves can be laid out in different ways, imagining with patterns, but it is better to do this in the direction from the edges to the center, as in the photo below.
- The central plugs can always be shortened and trimmed in the right places. It is convenient to do the same with the rubber base, cutting off the excess along the edges.
- After the last “trying on”, the corks are glued according to the intended pattern, gradually moving from the edges to the center, removing excess glue.
- The following steps are similar to making a bath mat from vertically installed corks.
Curtains
Using wine corks, strong ropes or metal hooks, it is not difficult to make something like thread curtains. If desired, you can add wooden beads or glass beads to them.
Such curtains are usually fixed in doorways, but they can be used on windows as vertical blinds.
Advantages of homemade accessories
Before we begin collecting available tools and materials for work, let’s take a closer look at the advantages of the cork itself and the properties of the future rug. Wine stoppers are made from the bark of the cork oak tree, which grows in the Mediterranean, as well as from the bark of other trees. For elite wines, the bark of trees over 45 years old is used. Thus, wine corks are an environmentally friendly, durable and beautiful material that retains its qualities for many years.
A cork bath mat has many advantages. Among them:
- pleasant tactile sensations when in contact with the skin of the feet;
- light massage effect;
- anti-slip properties;
- natural material that does not cause allergies;
- the aseptic properties of wine corks are manifested in resistance to mold, mildew, and wood bugs;
- good resistance to high humidity;
- high heat transfer (pleasant to step on, the material is warm to the touch).
You may also like - 10 Natural Ways to Get Rid of Sagging Skin
Table decoration
The festive table can be decorated not only with wine bottles, but also with their corks. Make a cut in the cork, attach a spruce twig or ribbon to it, insert a postcard or card with the guest's name into the cut - and a simple table decoration is ready.
You can similarly make candlesticks or New Year’s wreaths from the same corks:
Photo frame
You can make cork decor on the wall under a photo if you simply glue a lot of corks into a regular wooden frame and attach a drawing or photograph to them. Or stick corks on cardboard (as in the case of letters) in a certain order in the form of a frame. For a wooden house or cottage, for a rustic or Provençal style, this decor is an ideal option.
