Any board, be it laminated board or solid wood, is subject to swelling and shrinkage depending on the time of year and fluctuations in humidity. Tightly fixed countertops, deprived of the ability to freely contract and expand, begin to deform under the influence of internal stresses - warp, bend, twist and eventually crack.
With seasonal changes in humidity levels, wood expands and contracts predominantly across the grain. The countertops of a room or kitchen set vary in width within 1 cm, depending on the size of the lid and the type of wood. Linear changes along the fibers are insignificant.
On the structural influence of seasonal deformations
Any board, be it laminated board or solid wood, is subject to swelling and shrinkage depending on the time of year and fluctuations in humidity. Tightly fixed countertops, deprived of the ability to freely contract and expand, begin to deform under the influence of internal stresses - warp, bend, twist and eventually crack.
With seasonal changes in humidity levels, wood expands and contracts predominantly across the grain. The countertops of a room or kitchen set vary in width within 1 cm, depending on the size of the lid and the type of wood. Linear changes along the fibers are insignificant.
Necessary materials
To attach the table legs, depending on the chosen method, the following materials are required:
- Platform for attaching the tlb60 leg, screws and bolts for the plates.
- Nuts, bolts with lugs and lugs - for T-nuts.
- Tsar and screws – for fastening with screws.
- Holders and screws – for Z-shaped holders.
- Clamps and wood screws of the appropriate length - for fastening using wooden clamps.
- Holders and screws (there are exactly twice as many screws as there are holders themselves) - for figure-eight holders.
- Tsarga, spacers and screws - for spacers.
Fastening the tabletop with screws
This is a simple and time-tested option for attaching the table top to the table frames without the use of additional fittings. The special conical extension selected in the frame ensures slight mobility of the screw when changing the size of the tabletop. The cover itself is securely attached to the body.
Having made the basic markings, an end hole is drilled in the drawer. After this, using a wide semicircular chisel, select a pocket for hidden installation of a screw.
Using a narrow chisel, make an angular expansion on the upper edge of the drawer. The extension of this groove is always done across the grain of the tabletop, since wood expands and contracts in this direction.
Installation using screws in such pockets allows you to get rid of unnecessary structural elements under the table cover. It is traditionally used in classic-style furniture, where they prefer to use exclusively wooden parts. For all its advantages, this method of hidden fastening is quite labor-intensive.
Design and production of the table
First you need to figure out the configuration and dimensions of the future piece of furniture. In principle, there are no strict restrictions in this regard. It all depends on the size and clutter of the kitchen space, as well as on the number of people who will use this table. A rectangular table measuring 90x60 centimeters is suitable for three people. The long end will be attached to the wall.
The configuration can be semicircular, oval or curly. Therefore, it is necessary to transfer the dimensions and shape of the tabletop to a sheet of chipboard with a thickness of at least 10-12 millimeters. It’s better to make a template out of cardboard, and then use it to draw the outlines of the future product on the chipboard. Thus, you can avoid unnecessary actions associated with incorrect application of the folding table design for a small kitchen.
Then the tabletop itself is cut out from a sheet of chipboard along the contours. This is done with a jigsaw. After that, all the outer ends of the cut product must be sanded with sandpaper to get rid of irregularities and chips. Next, along the ends that will not be attached to the wall, PVC tape is applied in the form of tabletop decoration. In principle, the tabletop is ready. Now you need to think about the method of mounting it to the wall and the type of device that will support it in a horizontal position.
Using Z-shaped holders
Using small metal Z-brackets is another popular way to secure a countertop. The main advantages of this method are low cost, maximum simplicity and accuracy of installation, and no need for additional structural elements.
One end of the steel holder is screwed to the table top with a screw. The second is inserted into a groove sawn in the upper edge of the drawer. The recess is made in such a way that the edge of the bracket does not rest against the wood and moves freely in the groove as it expands. Thus, the fasteners allow the tabletop to change its dimensions in any direction without consequences.
Beam installation
This method of attaching the countertop should not be considered as an independent option, but if you simply need to immobilize it after laying it on the bottom row of cabinets, then it is quite suitable. Often, the cabinets of inexpensive kitchen sets are shallower than the countertops that come with them. This allows you to install them in one row along with the sink and stove, maintaining the gaps necessary for other communications. But as a result, the working surface just hanging in the air near the wall itself needs to be attached.
Work order:
- Place the tabletop on the pedestals that have been pulled together and leveled, mark the line of the top edge on the wall, after which the slab must be removed.
- Measure the thickness and set the resulting millimeters down from the markings and draw the horizontal line using a level. This is the line that corresponds to the bottom edge of the tabletop, and the beam should be attached along it.
- Select a sufficiently strong beam, measure the height of its profile to determine the central axis - a third one is drawn under it below the two previous strips.
- Using the last marking, sockets are made for the dowels, and counter holes are made in the timber.
- After checking the horizontal position, the beam will remain attached to the wall with anchor bolts, and the tabletop will be laid on it.
Mounting on wooden clamps
Using homemade wooden clamps is a simple and reliable way to attach a tabletop to a tabletop without purchasing hardware. Clamps work on the same principle as metal Z-clamps. They are easy to make in series from scraps that can be found in every workshop. Of course, this takes time, but often not much more than it takes to go to the store for accessories.
When making wood clamps, be sure to maintain the correct grain orientation as shown in the diagram to give the bracket proper strength.
Fitting and fitting
Any tabletop is aligned with the facade. Typically, the tabletop is extended 30–50 mm from the frame or to the height of the handles in order to protect the facade from drops and objects falling from the table. Moving sections to line them up with the edge of the countertop is not always wise, especially if they are already tight and well adjusted. It will be easier and faster to trim in 2 stages, in the first of which an oblique cut is made so that when the tabletop is tightly pressed to the apron, its edge is strictly parallel to the facade.
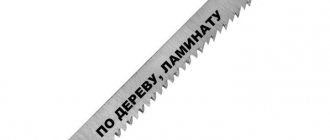
It is best to trim chipboard countertops using hand-held circular saws. It is desirable to have a standard guide rail, which, however, can be easily replaced with a rule secured with clamps. You can also cut with an electric jigsaw, but only if you have sufficient experience with the tool. Cutting an array of chipboards 40–60 mm thick using a jigsaw is quite difficult; even when guided along a guide, the saw may move and tilt, which is why right angles on the cut are lost. It is better to leave an allowance for processing and, after trimming, make a rectangular cut without chipping, using a belt sander.
At the second stage, trimming along the unevenness of the wall is carried out so that the fit is tight and uniform in all areas. If the tiles on the apron are laid fairly evenly, the matter can be accomplished by sanding those places where the wall has bumps, although sometimes the difference is about 3–5 mm. Final trimming or sanding should be carried out only according to the markings; the line is drawn with a thin marker pressed to the facade strictly perpendicular to the plane of the tabletop.
Installation of tabletops using figure-eight holders
Steel figure-eight fasteners are another popular hardware option used to secure countertops. The bracket is installed in a small recess drilled with a Forstner drill or a square recess selected with a chisel so that it is flush with the upper edge of the drawer. The holder is fixed with two screws: one to the body, the second to the back side of the tabletop as shown in the photo. As the board swells or contracts, the bracket rotates slightly, preventing the wood cap from bending. The recommended distance between fasteners is 15-20 cm.
Figure-eight holders come in two types: with washers of the same and different sizes. In the latter case, a washer with a large diameter is attached to the drawer. When deciding to attach the tabletop to a kitchen or room set in this way, you need to make sure in advance that the thickness of the drawer matches the diameter of the washer.
Advantages and nuances of using the design
A folding table with wall mounting is a tabletop fixed with a special triangular or rectangular fastener. When closed, this design looks like a small bar. When unfolded, it looks like a regular dining table extending from the wall.
This model of furniture would be quite appropriate in the kitchen or on the balcony. Wall mount tables are popular due to the following advantages:
- Compactness. Such products, when folded, do not occupy a large area.
- Functionality. When unfolded, wall-mounted folding tables perform all the functions of stationary products.
- Stylish appearance. The models fit organically into almost any interior.
- Ease of installation. Folding tables with wall mounting are delivered to the buyer ready-made with full instructions. The owner only has to fix the product on a vertical surface, which does not require special skills.
A transforming table is more relevant for a kitchen where it is not possible to install stationary models, since it folds up and saves usable space. You can install a folding table in the kitchen on any part of the wall; the main requirement is that nothing prevents the product from folding and unfolding freely.
Transformable furniture will not hold tightly to plasterboard structures.
Using slotted spacers
In this case, two or three additional spacers with rectangular grooves 10-15 mm long are attached to the side frames of the headset. When changing the width of the tabletop, the screws will move freely in the grooves, thus preventing structural deformations of the wood. Additional strips act as a tie; they increase the rigidity of the body and protect the drawers from deformation.
Table with folding support
Engineers went a little further and came up with a mechanism with a flat support for folding tables.
Supports are usually a stationary thing.
They have a triangular shape or close to it and work in the same way as the upper part itself - on hinges. You lift the lid and move the support to the side. Sometimes it is fixed, for example, with a dowel + recess connection. Magnets or ball fasteners also serve as fasteners.
These tables are reliable and beautiful, but unlike options with a removable leg, they are not as compact. The thicker the tabletop and the leg itself, the further such a table is moved away from the wall. For example, a table with a removable leg extends beyond the wall by 2-3 cm, and a table with a flat support by 6-9 cm.
This difference often plays against such a transformer.
DIY installation - pros and cons
Let's figure out whether it's worth taking on the installation yourself and, if you decide that it's worth it, we'll learn how to install the countertop.
- If you have some skills, installing a surface made of chipboard, MDF, wood or veneered wood will save you 1500-2500 rubles. – that’s exactly how much the whole complex of work costs.
- It is better to do a concrete countertop “like a stone” or tiling the surface yourself, the work will be of better quality.
On the other side:
- If you don’t have the skills to work with chipboard, MDF, or wood, then it’s better not to take risks. It is impossible to restore the previous appearance from chipped cuts and other deformations;
- Countertops made of difficult-to-process and expensive materials, such as glass, must be installed by craftsmen;
- Sometimes installation is included in the cost of the countertop.
Have you decided to do the installation work yourself? Countertop installation includes:
- Removing the old countertop;
- Measurements and cutting of a new one;
- Edge processing;
- Fastening the tabletop and joining two sheets if necessary;
- Sealing and installation of baseboards;
- Hole cutout for sink and faucet;
- The finished product must be moved very carefully so that additional stress is not created in the cut areas - otherwise they can lead to cracks. Smooth and glossy surfaces have increased fragility .
- Measurements are taken very carefully, preferably based on an already installed kitchen unit.
Before ordering a tabletop, it is better to make a template.
Installing a Wooden Countertop
To make a wooden work surface, boards 30 or more centimeters wide are used. Marking and cutting is being carried out. Holes 8 cm deep are drilled at the joints. The interval between adjacent centers is 10-15 centimeters. The joints are sanded. The ends, dowels, and drilled surfaces are lubricated with glue. The dowels are inserted into the prepared holes, and a prefabricated sheet is formed. Excess adhesive mass is removed.
To make the table smooth, the surfaces are ground and polished. There should be no gaps between the prefabricated panels. The boards are laid with a counter texture to prevent deformation in conditions of high humidity.
The transverse, longitudinal boards and legs are connected. The tabletop is attached to the formed frame. The finished product is coated with primer, stain, varnish or paint.
Wooden shaped parts are turned on lathes. To make grooves and holes for dowels, straight cutters with a diagonal angle of attack are used. Simple cutters leave chips.
Several parts of one leg can be spliced with hairpins. Decorative elements are made on lathes. Clamps and soft spacers are used to attach jewelry to round and shaped parts.
Complexity of work depending on materials
Installing a countertop yourself is not a very difficult undertaking, but a lot depends on the type of material used:
- Laminated chipboard (fiberboard) is the actual chipboard covered with a high-strength laminate. The difficulty of installation mainly lies in the careful cutting of the table top. Mechanical damage leaves unsightly marks on such surfaces.
- Wood is considered the traditional material for kitchen furniture. Such a surface will need to be regularly restored using protective coatings or lubricated with polishes. Although, if necessary, the wooden surface can be sanded with your own hands - and it will become attractive again.
- Metal surfaces are becoming increasingly popular - joining countertops made of this material will not be difficult. However, mechanical stress will leave scratches and marks on them that will need to be sanded down with your own hands.
- A stone countertop (made of natural or artificial stone) is resistant to moisture, temperature, and scratches. However, attaching a natural stone countertop can be difficult due to the heavy weight of the product, and cutting and cutting out holes is difficult and requires skill.
Hand-assembled folding table
Assembling a homemade table attached to the wall is the simplest of tasks. If you follow the proposed algorithm, it will take a maximum of half an hour.
- The workpiece is applied to the intended mounting location to clarify the parameters.
- Ready-made support strips are attached to the tabletop with hinges.
- The tabletop is attached to the wall or window sill using hinges.
- The strength of the structure is checked.
In this completely uncomplicated way, you can assemble with your own hands a surprisingly compact, but so functional folding table that is attached to a vertical surface.
Installation of surfaces made of chipboard, MDF, artificial stone
Do-it-yourself installation of countertops made of artificial stone, chipboard, or MDF follows the same principle.
Fastening the tabletop also involves installing additional moisture-insulating elements - jumpers, plugs, corners made of aluminum and plastic. They will be required for surfaces made of both chipboard and artificial stone.
- First, most likely, you will need to take measurements and then cut the sheet based on them. In this case, the length is measured taking into account the strip overlapping the ends. You can cut off the excess from the sheet with your own hands using a wood saw or jigsaw. If there are protrusions on the wall, then all the required recesses are cut out on the tabletop in advance.
- Now we lubricate the ends with silicone sealant, apply an aluminum strip and level it flush. Then you need to secure the bar with small self-tapping screws. Excess silicone can be wiped off with acetone.
When is additional fixation necessary?
The countertop in the kitchen sometimes takes on very significant loads. When slicing food, it only requires sufficient area and a flat surface. But often we also load the table with small household appliances. Microwave, oven, portable dishwasher, coffee maker, mini-bar - all these items in the kitchen often “settle” on the table, and here you will need to secure it well.
Related article: How much does it cost to putty 1 square meter of wall
You should not discount the neat appearance of the kitchen - an unfixed countertop can sometimes move, forming a noticeable gap in contact with the wall. Not only does this spoil the picture a little, but also food particles will accumulate there. It is useless to attach a decorative plinth to such a moving surface. And if the design of the set is such that the tabletop has freely hanging ends, instead of a reliable working surface you become the owner of an analogue of a children's swing. So it’s better to attach the top plate even on the cabinets to the wall so that it doesn’t “play.”
Sometimes the only way to increase the functionality of a small kitchen is to make additional surfaces with your own hands where you can place equipment or process food. You cannot provide support for such tabletops from below, but fixing them on the wall is quite possible. And of course, you can’t do without this if there is built-in appliances hidden under the work surface - a refrigerator or a washing machine.
How to properly replace a countertop
If we are talking about replacing the surface on an already installed headset, then you will have to proceed as follows:
- The old surface is dismantled without damaging the kitchen unit - the sink and baseboard are removed and all fasteners are removed.
- The new surface must be adjusted to the wall and to the existing dimensions of the furniture.
- The height is controlled very carefully as it is important that the structure rests evenly on the existing pieces of furniture.
- The resulting edges on surfaces made of chipboard, artificial stone, or wood must be sealed. This is especially important for laminated surfaces - moisture getting inside will lead to swelling and destruction of the structure.
- Fastening the tabletop also involves connecting several elements into one, so that their height along the wall is the same, and there are no gaps between the elements.
In this video, the master shows how to replace the surfaces of free-standing cabinets with a single tabletop without joints.
Two ways to fix a kitchen countertop to the wall
It would seem that such a simple question as fastening a tabletop with the modern abundance of building materials should not cause difficulties. But it’s the sheer number of options that makes you think about the best way. It’s also good when you just need to lay the work surface on the frame of the furniture module and provide it with only additional support. But cantilever mounting to the wall requires a more serious and balanced approach. Below we will look at both options, but for now it’s worth deciding in which cases you will have to attach the work surface at all.
How to install a concrete countertop
In the kitchen, you can install a concrete countertop, and then tile it or polish it to resemble artificial stone. In this case, production and installation are carried out simultaneously. Here's how it's done:
- The cabinets are aligned so that their height along the wall is the same, after which a base (made of plywood or chipboard) is laid on them. In this example, concrete is poured onto the old tiles.
- The base is securely attached to the top of the furniture, after which formwork is installed on its sides.
- The formwork is sealed with polyethylene, and reinforcement is placed inside it. The area where the sink will be installed is fenced off with a ring of metal strip.
- A cement mortar is prepared - cement M400, sand and crushed stone in a ratio of 1: 2: 2, and a plasticizer must be added to it.
- For countertops imitating stone, dyes are added to the solution.
- The solution is poured into the formwork, leveled (so that the height along the wall does not have differences) and covered with polyethylene. The solution is left to dry - this will take about a week.
- Finishing a concrete countertop begins with rough sanding, after which the tiles are glued and the seams are grouted. If an imitation of stone is created, the concrete is processed with a grinder, after which a foam filler is applied to it.
Comments: 17
Art Atelier
In your case, it is better to rest the tabletop on the floor (it is generally undesirable to hang and sit on them). Usually, if the structure or installation conditions are complex, then those people who will supply and install the stone product themselves go to the site and calculate the weight of the structure (how thick will it be - with a glued side? How exactly is the sink installed, etc. ) then they develop a welded structure for themselves and issue an order for the installation of embedded parts / Or maybe they just sacred an L-shaped frame, where the vertical part will be in the plane of the wall. Probably no one will answer in absentia.
- Like | 3
- Save
- Like
- Save
ryllova
I just don’t want what you sent. That's why I turned to the experts
- Like
- Save
Dmitry Evgenievich
Just attach the tabletop to the wall, in the corner. To do this, even at the stage of wall construction, it was necessary to provide fastening elements. Otherwise, you won’t be able to do what you want.
- Like
- Save
ryllova
It's not too late for us to make these fasteners in the wall. It was just laid out to us. Yes, we planned to mount it in the wall and on the corner, where it would be adjacent to the cabinet wall. I'm worried about the other corner that will hang up, near the bathtub. What fasteners do you recommend? It seems to me that the letter G is a little dangerous, the edge will be hanging
- Like
- Save
SOS REPAIR
- Like
- Save
ryllova
Thank you very much for the recommendations. Some are just a mystery to me: “do it on the floor, but make the very bottom mirrored and a little ruined.” I can’t even imagine what it is and how it is :)
Do you have an example?
And about the lighter analogue. What did you mean? What could be lighter and more like a stone?
- Likes: 1
- Save
Galina
- Like
- Save
SOS REPAIR
- Like
- Save
- Like
- Save
ryllova
Thanks for the advice. But in your example, the wall in which the frame is embedded is most likely concrete. In my case, both the side wall and the back are made of tongue-and-groove slabs :(
- Like
- Save
Evgeny S
In 1 comment they wrote to you the best solution to your problem, contact the countertop manufacturer so that they issue a technical specification for the installation of embedded parts. Or so that they themselves prepare a welded structure, for example, under a tabletop.
- Likes: 1
- Save
solid wood doors
In order for the tabletop to hang in the air, a frame is made under it (chipboard, wood, if the thin option is only iron or stainless steel if the budget allows and an open design is required)
The frame is attached to the wall with anchors, screws, or better yet, a chemical anchor.
It is important that the surface is reinforced with a sheet of chipboard or plywood (they mainly make air - they save money).
The stone is very afraid of impacts when there is air under it, the overlaps on the sides are also not large (up to 30mm with a thickness of 30mm) if more, it is reinforcement during the manufacture of the tabletop.
Fastening to the frame - on a 50*50mm mesh made of silicone (holds firmly and can be easily cut if necessary.
Related article: How to remove old wallpaper from concrete walls
It is better to polish the lower edge (protruding beyond the frame) during production - better aesthetics.
Connecting to the wall - silicone with a continuous 1mm seam on the slab (remove excess immediately) - under no circumstances should we make a silicone side - it turns black over time.
We use only expensive branded silicone.
In this way we attached very thick tabletops to thin walls (they stand very well)
The sink is attached to a groove on the frame and the countertop is placed on top - all connections are silicone.
It’s important - make the height higher than the standard - the splashes don’t fly away so much and hands are washed directly in the sink and not for days - but the children will still use the high chair while they are small.
How and with what to attach the tabletop to the cabinet or table?
Most often when assembling furniture, you are faced with attaching a tabletop or lid to a base in the form of a cabinet or a simple desktop. There are four ways to mount the top cover (namely, the tabletop) to the base of the furniture.
Through and through, with the help of confirmations (euroscrews)
This is the easiest way. Used in cases where the presence of through holes on the surface is not critical. For example, when the cabinet is above eye level and the tabletop acts as a lid. Or an overhanging (overhead) visor.
It's simple: the end of the base is drilled under the confirmation using a drill with a diameter of 5 mm. A hole is also drilled in the lid in proportion to the existing overhangs, but this time for a wide part of the confirmat 7 mm with a countersink for the cap diverging to 10.5 mm.
From the inside, to the corners
The method is no less simple. The only drawback will be the fasteners protruding from the inside.
Any corners can be used.
If you do not plan to move the furniture often or lift it by the lid, you can use plastic corners, as for fastening shelves.
Metal corners are much stronger, but look less aesthetically pleasing.
If the design of the cabinet or table is hollow, look for metal furniture corners on sale that can be closed with lids.
Fastening the tabletop with eccentrics (minifixes)
Installing an eccentric coupler requires some skill and precision. It is rightfully considered a more civilized, “invisible” fastener. Among the advantages, it is worth highlighting the possibility of repeated assembly and disassembly of furniture (removing the tabletop) while maintaining the quality and strength of the fasteners. What the same corners on screws or confirmations cannot “boast” of.
The difficulty of installation lies in the marking and preparatory preparation of holes. In order to install the minifix to attach the tabletop, you will need drills with diameters of 7 and 10 mm, as well as a cutter with a diameter of 15 mm.
Using self-tapping screws to the slats - this is how you attach the kitchen countertop to the cabinets
This method of fastening is possible if slats are included in the design of the table or cabinet. They are designed by laying the length from one sidewall to the other and a width of 80-100 mm.
The kitchen countertop is fastened in the same way - it is attached from the inside using long 3x25 or 4x30 screws. The planks are pre-drilled using a 5 mm thick drill. The only caveat for the kitchen countertop is the fastening of the slats in places where there is a need to cut into the sink or hob. In these cabinet tables, the slats are turned upside down so that they do not interfere with the cut-in. Or they don’t put it at all.
What is good about this method? It provides sufficient structural rigidity.
- The planks themselves strengthen long tabletops, preventing them from sagging under load.
- You can safely lift and move a table or cabinet by the tabletop - the fasteners will hold up.
- The fasteners also allow for repeated assembly and disassembly. You can always pull the tabletop from the inside in another place, and plug the previous holes, because no one sees them there.
When I design furniture - tables, cabinets, chests of drawers - I always lay strips under the tabletop. In my opinion, this is the simplest and most reliable method of fastening.
Mounting a table to a wall without legs. Peculiarities
A wall-mounted folding table is an excellent solution for a small room. When assembled, such furniture is a thin plank that is located near the wall, almost merging with it. When unfolded, this model can replace a full-fledged kitchen table or even an element of the living room interior. When unfolded, it can become a large tabletop, which can accommodate a family at dinner or all the guests.
The table is attached to the wall and usually has clamps in the form of triangular or U-shaped supports. The peculiarity of this piece of furniture is its small size. So, it can be placed even in the smallest room without cluttering it. In addition, you can choose absolutely any part of the wall to which it will be attached.
You don't have to take into account the shape of the countertop or its parameters when arranging the room. It is very ergonomic and will fit anywhere. Another feature is the functionality of this product. Even though it is quite compact, it performs all its functions and does a great job. The fashionable design of such products should also be noted. This piece of furniture can fit perfectly into the interior of any room and even diversify it. It will complement any room in style.
The peculiarity of this design is that it is quite easy to install. Most models in stores are presented in ready-assembled form; you won’t even have to assemble them from their component parts. Thus, you can only come home and install the finished table on the wall, attaching it with screws and hinges. You just need to adjust its location on the surface and check how it looks and functions.
The main convenience is that when installing it, you don’t even need additional tools. It will not take physical effort or much time. The folding table is a very functional model. It can be placed both in the kitchen and in the living room or office if it is small.
Often a folding table is installed in a nursery. There are some unusual models that allow you to fix the tabletop in the desired position by changing its angle. This way you can make a full-fledged desk for your child. In addition, you can change its parameters, taking into account individual characteristics.
This way you can make the work process more comfortable by well organizing your workplace. This is a great solution for both children and adults.
How to attach the tabletop to drywall or window sill?
It happens that the basis for attaching the tabletop is not a hollow, but a cast structure. This could be a window sill or a specially created plasterboard ledge. It will not be possible to attach a tabletop or shelf from the inside to such a base. There is only one option left - glue it.
For this, the well-known liquid nails are used. Any leftover after renovation will do. Regardless of the composition, almost all options are suitable for gluing chipboard, MDF or solid wood to plasterboard or concrete (in the case of attaching a window sill).
For better adhesion, the base must be carefully leveled, dust-free and degreased. The glue itself is applied to the underside of the tabletop. After the recommended time, the tabletop is pressed to the base in the desired position. It is better to leave the press until it dries completely.
ADVICE! To avoid possible deformations, avoid circular motions when applying adhesive to the countertop. Longitudinal or transverse stripes, as well as spot application, work better.
Requirements for assembling floor-standing cabinets
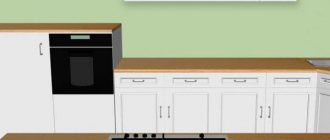
The countertop is installed only when the assembly of the kitchen unit, or at least its lower tier, is finally completed. The legs of each section must be adjusted so that all the upper ends of the housings form a common plane, verified by the two-meter rule and the bubble level.
Any countertop, and especially heavy-duty products made of concrete or stone, requires a perfectly flat and stable surface. Even the slightest differences should be eliminated, for which it is useful to cover the ends of the cabinet sides with vinyl sealing tape.
Final assembly
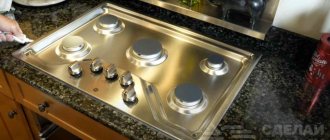
Before final fastening the countertop to the body, it is necessary to cut holes for the sink, hob, socket and other appliances. All open sections of chipboard must be treated with a 0.2–0.5 mm layer of sanitary silicone to limit the core from contact with air and thereby prevent any shrinkage.
When fixing the tabletop, while an assistant presses it against the body with his weight, the brackets are attached to the walls with 15 mm furniture screws with preliminary drilling of holes 8–10 mm deep.
After fixing the tabletop, final processing is carried out: the junctions with the walls are coated with sanitary silicone and covered with a thin plinth; a drip tray is installed under the protrusion 5–7 mm from the edge of the tabletop.
Source: rmnt.mirtesen.ru
Required Tools
The above methods require the use of your own tool. However, it makes sense to keep a complete set of everything you need on hand:
- Screwdriver, set of screwdrivers.
- Chisel: thin, wide flat, and also narrow semicircular.
- Drill with a set of drill bits for wood.
- Hammer, pliers.
- Hacksaw.
It is better to have all the necessary tools at your fingertips.
Assembly before fastening
Fastening the tabletop is necessary to give the lower tier strength and fix it from displacement due to vibration. Steel corner brackets that connect the side walls of the box and the back surface of the slab are well suited for this.
First, the tabletop is attached to the surface. If the table top is made of chipboard, the corner is attached to it with 4.5 mm screws through pre-drilled holes
1.7 mm, the length of the screw is 10–12 mm less than the thickness of the tabletop. Corners are attached to stone and composite countertops differently: the sections of the slab and the edges of the corners are first thoroughly cleaned and degreased. Then the corners are glued exactly at the installation site to 3-4 small dots of high-quality two-component adhesive that retains plasticity after drying (Sika, Hilti). The brackets must be firmly pressed into place when they are put in place; the tabletop can be attached to the body after 24 hours.
A properly made adhesive joint holds even better than screws, so fewer attachment points will be required - 2 for each section in a checkerboard pattern. You should not refuse the opportunity to make fastenings to the tabletop at the manufacturer’s factory. The exception is tabletops, on the reverse side of which metal bars are fixed, which, when installed, “drive” into the grooves at the ends of the side walls. This method of fastening should be avoided at all costs.
How to strengthen the countertop in a kitchen unit - all aspects of installation
If you have received a kitchen set and plan to install it yourself, then pay special attention to fastening the countertop - perhaps its central element. The stability of the structure as a whole depends on the installation properties of this part. In addition, there are a lot of pitfalls in the process itself, which will be difficult for a newbie to cope with. We talk about all the aspects related to attaching the countertop to the kitchen set - depending on the type of material and the installation method you choose.
