If you decide to get a professional manicure at home or open your own beauty salon, then you have a lot of shopping to do. You will need materials and tools for manicure and, of course, a high-quality manicure table. This is not only a necessary thing for ease of work, but also a stylish piece of furniture. In our article you will find a lot of useful information about choosing a truly high-quality and comfortable manicure table.
The importance of arranging a place for a manicure
The recommended working area is 8 square meters, this is the optimal space to accommodate all the necessary equipment. Well-arranged and comfortable furniture is a largely determining factor. The productivity of the master and the comfort of the client greatly depend on it. Anatomically incorrect posture, in addition to unpleasant sensations, is dangerous for the development of spinal diseases, therefore, when arranging a place to work, think about yourself and about the people who will come to you.
The manicurist's workplace should be equipped with comfortable furniture and high-quality equipment
It is better to allocate a non-passable room for work, but if there is none, you can adapt:
- a living room where you can create personal space with a folding screen;
- hall, if it is large enough;
- loggia, if it is insulated, it will be perfect for your purposes.
On the allocated area you need to place:
- manicure table;
- chairs, preferably with adjustable height, for the client and the master;
- a cabinet with shelves or drawers;
- shelves;
- table/stand for sterilizing instruments.
General requirements for the working area
The premises must meet sanitary requirements. Therefore, the walls are either painted or finished with washable panels or tiles. The floor covering must be even and smooth, without cracks.
You need to take care of lighting in advance. It is worth selecting an area for receiving clients where there will be enough natural light or ensuring overall uniform illumination by installing devices on the walls and ceiling. All table lamps on the table should be adjustable in height and beam direction.
You need to install several additional sockets to connect electrical appliances (you have at least a manicure lamp, a hood, and lighting fixtures on your desk). Wires should not interfere with work.
The room should be well ventilated . The hood gets rid of dust, but not toxic fumes from dyes and detergents, which affect the well-being and general health of people in this room.
It is imperative to designate a place where instruments will be disinfected. A medical book for a manicurist is mandatory, but one document in hand is not enough. For safety, after each procedure, the workplace and all instruments are sterilized in a disinfectant solution for 10–25 minutes. The duration of treatment depends on the composition you use.
Instruments are sterilized in a special box with a solution of the drug Septolite-Tetra
At the end of the day, the tabletop and all removable parts of working tools are processed. In addition, you need to have a supply of towels and napkins, preferably disposable ones, or change them every day for clean and ironed ones.
Take immediate care of the design style of the work area: it should be inviting so that the client wants to come back to you. You can add variety to the interior with the help of accessories, but it is better if these are not paintings and figurines, but your diplomas, certificates and certificates - this way you will confirm your qualifications and strengthen the client’s trust. If possible, you can install a TV in the room.
Sterilizer
According to SanPiN standards, a sterilizer is required to process manicure instruments. The choice of model depends on the place of work, the flow of clients, as well as the financial capabilities of the master, if the procedures are provided at home. The sterilizer must be certified.
In salons for sterilization, a separate sterilization room must be equipped, since before sterilization, instruments undergo the stages of disinfection and pre-sterilization cleaning. A dry-heat oven or glass-perlene sterilizer is installed on a separate flat surface or table. At home, a separate cabinet or stand should be provided for it.
Features of the manicure table
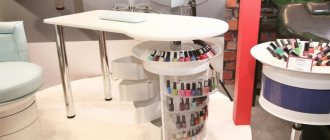
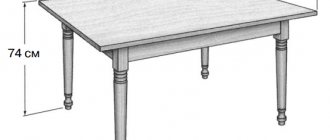
Standard dimensions of a manicure table: height - 75 cm; width - 110–150 cm (minimum - 90 cm); depth - 45–55 cm. With such parameters, both the master and the client can sit behind it without violating each other’s comfort zone. If possible, you should get a table with adjustable height. Furniture must be stable and not on wheels. It is better to refuse the option even with a locking mechanism. It is recommended to equip the table legs with rubber tips.
A convenient option is a table with a cabinet, which is located to the right of the master. Try to find an option where it is either completely with drawers, or with one open shelf.
The shape of the table (straight, T-shaped, corner, with curves) is selected for the room, depending on where and how the furniture will be placed.
Make sure it fits all the necessary accessories:
- work tool;
- means for applying manicure and disinfection;
- Lamp for manicure;
- palm rest;
- hood.
For convenience, you can hang one or more shelves above the table, where you can remove some items, unloading the table. The main thing is that you can reach them later.
You can store the necessary tools and medications in the cabinet without taking up shelf space
Light, monochromatic, calm colors are suitable for the table. This color will reflect natural light and your eyes will not be strained while working.
The material from which the countertop is made must be resistant to water and disinfectants. Processing is carried out daily, so for reliability you can put glass on the surface.
Materials and necessary tools
Before making such a structure, you must select materials, prepare tools and decide on the configuration. The most practical is a table with one large leg and a cabinet. It is this option that I propose to consider step by step within the framework of this material. It’s up to you to decide how to arrange the table and what to place where.
We will take laminated chipboard as a basis. The material is quite durable, easy to process and inexpensive. Therefore, prepare a set of materials consisting of:
Select a set of tools based on the situation, materials used, etc. In this case, you will need:
This is a conditional and approximate set. You may need something extra. Or some components from the above list will not be useful at all. Act according to the situation.
Now let’s look step by step at how the manicure table is assembled and what nuances this procedure has.
How to make a manicure table with your own hands
The drawings of the table, if you plan to make it yourself, are tailored to the person who will work at it. There are different assembly options, depending on the product model.
Table model No. 1 (author - Sergey Koshkin, Tolyatti)
To make a manicure table, you need the following materials:
- laminated chipboard 16 mm;
- PVC edge 2 mm (for table top);
- PVC edge 0.4 mm (for other parts);
- table leg (thick metal);
- cabinet cabinet handle;
- self-tapping screws, confirmations, eccentrics and rods for them;
- dowels 10 mm - 16 pcs.;
- four-hinged furniture hinges - 2 pcs;
- shelf holders (can be replaced with dowels) – 4 pcs.;
- PVA glue (or wood glue).
A set of tools that will be required for work:
- pencil,
- roulette,
- meter;
- jigsaw;
- metal ruler;
- scissors;
- Phillips screwdriver or screwdriver;
- hex keys;
- Forstner drill;
- iron.
Drawings and finished model of the table - photo gallery
Glued pine panels 2 mm thick are suitable for the tabletop.
The remaining parts of the panel are made of PVC with a 4 mm edge, the table leg will be metal
In homemade furniture you can make the required number of drawers and shelves
Table model No. 2 (author - Dmitry Rekun, Omsk)
Dmitry offers a simple version of a table made of light wood with assembly on a Euroscrew. Such a product can be made with your own hands without special skills and using the simplest tool. Required:
- drill 5 mm and 8 mm;
- drill or screwdriver;
- hexagon No. 4;
- accessories: guides 400 mm;
- adjustable legs M8 (4 pcs);
- euroscrew (8 pcs);
- mounting angles (6 pcs).
If desired, you can design a table with an open shelf or drawer
The author advises installing adjustable legs on the table supports; simple mortise ones can break when moving the table around the room. For ease of use in this model, you can design a drawer under the countertop or an open shelf. On the finished table, the author advises rounding the corners on the tabletop to avoid injuries and bruises.
Table parameters can be adjusted according to the height of the master
What to look for when purchasing?
Buying a table is a crucial moment, since the convenience of work directly depends on the environmental conditions. A manicure table must meet all quality requirements and take into account the personal goals and needs of the master. Today on sale you can find a huge selection of different models that can satisfy the requirements of even the most demanding buyer.
We have prepared photos for you in which you can see several successful models of stationary manicure tables.
How to choose a ready-made table for manicure
Modern manufacturers produce several basic models of manicure tables, some of them with removable components or transformable parts. Such products can be easily modified depending on needs and personal convenience.
What options can you choose from:
- Folding tables, which are a cabinet with a folding tabletop. With them you can go to the client’s home, since the models are quite functional despite their compact size. But remember that the wear resistance of the mechanisms of the products is low and they are short-lived. It is better to use them if there is very limited space in the house.
- Stationary furniture, which can be made of plastic (economy class), pressed shavings (standard/classic) and solid wood (premium). To order, you can buy a product exactly according to your dimensions by choosing a model from those offered.
- Models with built-in components: tables with a hood or equipped space for its installation. The compact housing and dust bag are usually located under the table. The gaps on the top grid are not wide so that the client’s fingers and small objects from the table do not get caught in them;
- tables with built-in lighting, which are more convenient and practical than using a regular table lamp.
Beginners who have just entered the manicure business ask questions to experienced masters on the forums. There are different problems, one of them concerns the choice of furniture for the office. To the question of which table is better to buy, experienced master Tatyana Bocharova answers:
It is best that the table surface is completely free from various kinds of stands, shelves, recesses... It is best to have a removable stand for the client’s hand. Place shelves for varnishes and tools next to each other on the wall and on a trolley with drawers. The master himself will arrange everything in a way that is convenient for him. In addition, different procedures require different arrangements of equipment on the technician’s table. It is best to pay attention to the convenience of the table and chairs or armchairs for the master and the client. Pay attention to the tabletop fastenings. Sometimes I encountered the fact that these fastenings interfere with the comfortable position of the legs (most often on the client’s side). Pay attention to how the end sides of the table are sealed if it is wooden (unevenness and poorly attached veneers tear tights and leave strings on clothes). And special attention to the chair! It should be adjustable in height, rotate, and have a comfortable back! It is very important. If your master is comfortable working, you will have a much greater return. If the client is comfortable in the chair, he orders more procedures at a time. I came to get a coating, sat down in a chair, relaxed, and ordered a full manicure with massage and coating. This happens very often.
Tatiana Bocharova
https://www.hairlife.ru/forum/post/83752
When purchasing furniture, immediately take care of spare fittings so as not to waste time searching for light bulbs or mechanical parts if they break.
Types of manicure tables - photo gallery
A folding table with all the conveniences will very quickly become unusable
A table with built-in lighting and extractor hood is a very practical purchase.
The table usually comes with a hand rest, an essential part of a manicure salon.
Which table is better to buy: new or used?
This question is considered when the budget is significantly limited. For high-end beauty salons, the answer will be clear: investing in high-quality and certified equipment will be justified. Craftsmen working at home or small budget salons can easily purchase a table for secondary use.
If you choose used furniture with built-in appliances, you need to check its operation and study the technical data sheet. It is advisable that the warranty period for the equipment does not expire.
You should also pay attention to the presence of chips, scratches and the serviceability of the folding mechanisms.
What is Damaged Hair Shielding? Read here.
Features of the manicure lamp
A manicure lamp is a fairly simple device in design, designed for drying and fixing shellac, and consists of:
- lamps of various types: ultraviolet, fluorescent or LED;
- protective housing;
- control panels;
- Modern models have a built-in fan and timer.
Without a manicure lamp, the gel on your nails will not dry.
Types of lamps for manicure - table
| Characteristic | UV lamps | LED lamps | CCFL lamps | Hybrid |
| How does it work | The gel polymerizes under the influence of ultraviolet light of a certain wavelength. | Ultraviolet rays are produced from LEDs. | The lamps that power the device are filled with gas. When current is passed through it, beams of the required length are formed. | Depending on the model. Combines the technologies of several types of lamps: UV, LED and CCFL. |
| Operating time (hours) | Up to 10 thousand | Up to 100 thousand | Up to 80 thousand | Up to 80 thousand |
| Ignition circuit | Electronic | Induction | Induction | Induction |
| Service Features | Replace light bulbs every six months | — | — | — |
| Electricity consumption | High. The device is sensitive to voltage changes. | Low | Low. The lamps do not heat up during operation. | Low |
| What materials are being polarized? | Everything except LED-curable gels | LED-curable gels, universal materials, gel polishes | Everything except LED-curable gels | all materials |
| Speed of polymerization (hardening of varnish) | 2–3 minutes | 10–60 seconds | 30–60 seconds | 30–60 seconds |
Do not forget about the rules for using lamps: you cannot wash the drying chamber, you can only wipe it with a slightly damp cloth. Lamps can be cleaned with a brush; if varnish gets in, carefully scrape it off with a knife or razor.
Varieties
Manicure tables can be of various configurations:
- Standard straight products are the simplest, most practical, and compact. The main disadvantages are that using such furniture is not always convenient.
- T-shaped models are equipped with a large number of built-in compartments, but take up a lot of space.
- Corner options save space in the room.
- Furniture with bends and curvatures has an original appearance and allows the master and the client to sit comfortably.
The optimal form is selected depending on the specialist’s habits. But experienced craftsmen usually prefer T-shaped products with a slight bend.
The parameters of manicure tables vary depending on the appearance, design, and individual preferences of the master. The most popular models:
- Stationary tables. The products are usually used in specialized salons. Their advantages: they are equipped with auxiliary equipment: hoods, lighting fixtures, shelves for tools. Some models are equipped with wheels for ease of movement.
- A folding table is suitable for installation in a small room, this is its plus. The product does not clutter up the space, is made in various configurations, designs, and is complemented by an automatic or manual mechanism.
- Express manicure stands are common in nail bars where it is important to quickly serve customers. The set includes chairs for employees and clients, lockers.
- A convenient transforming table transforms into a small bedside table. In demand among craftsmen who work at home. Pros: easy to use, equipped with wheels and shelves.
Products with hanging drawers allow you to place a large number of accessories and care products. Desks with hoods help keep your workspace clean. After all, as a result of removing the old coating from the nails with the device, dust will inevitably form, which will be sucked up by a special vacuum cleaner.
Standard
Angular
Folding
Express manicure stand
Table transformer
How to make a manicure lamp with your own hands
To assemble a regular UV lamp you need:
- ballast (electronic or induction);
- fluorescent lamps (each power is 9 watts);
- protective case (preferably metal, since the lamps heat up during use);
- foil, which is used as a reflector;
- cord with plug;
- on/off button;
- soldering iron
To roughly calculate the amount of material and dimensions, draw a diagram of the device. First you need to assemble the electrics, and then mount them in a separate compartment of the frame.
How to collect:
- Disassemble the light bulb base. To do this, you need to remove the legs with pliers, pry the white base under the metal rim and remove it. Now you can see four wires, two of which are connected through the starter, and the other two go to the legs.
- Connect the wires of the lamps to each other and connect to the ballast. It is better to use store-bought ballast, it is easier to connect. On one side there are contacts for connecting lamps, and on the other - for the power cord.
- Connect the cord with the button.
- Check the functionality of the device by plugging the entire system into a power outlet.
- Install the ballast and lamps into the housing.
DIY UV lamp (option 1) - video
You can purchase a simple UV device and modify it to the desired power, regardless of what manufacturer's lamp you purchased. The main part of the lamp is UV LEDs. A waterproof junction box is used as the housing. Fiberboard is laid on the bottom to level the surface. A layer of reflective foil is glued on top with double-sided tape. A hole for the hands is cut out from the front wide part.
DIY LED UV lamp (option 2) - video
Construction of a drawing
It’s worth starting work on making furniture by clarifying the dimensions of the manicure table. The optimal length is 1.15 m, the width of the canvas is 45–50 cm, the height is 75 cm. These are the parameters that allow the master and the client to feel comfortable. Classic indicators may change if an unusual design is used. It is important to follow the main rule - ease of use.
At the initial stage, drawings are created with dimensions that simplify the process of assembling the table and avoid many mistakes. The diagram is made using ready-made master classes, computer programs for furniture makers, or independently:
How to choose a ready-made lamp
First of all, you will need to take into account the following criteria:
- power of the selected device;
- dimensions of the drying chamber (some do not fit both hands);
- type of lamps used;
- body material (plastic/metal);
- availability of options.
Comparative characteristics of lamps of different types - table
| Lamp type | pros | Minuses |
| UV lamps |
|
|
| LED lamps |
|
|
| CCFL lamps |
| High price |
| Hybrid lamps |
| High price |
Lamps for manicure - photo gallery
UV lamp is the most budget-friendly purchase option
The UV lamp dries almost all types of gel, but fails quite quickly
The LED lamp runs on LEDs, is quite economical and durable
The design of lamps for manicurists is varied; you can choose a model that matches the color scheme of the work area
Hybrid lamps for manicures are chosen by professionals
For a professional, the best option is CCFL+LE, which are both convenient and versatile to use.
Features of the manicure stand
With the help of a roller (pillow) for manicure, the client’s hand is given a comfortable position - so that he can comfortably spend the next few hours, and it would be convenient to work at the same time.
The stands have different sizes, differ in length and width. The height, as a rule, is the same for all rollers - 5–6 cm. The shape of this object is most often the same - an elongated rectangle. The stand is made of foam rubber and covered with soft pressed leather (eco-leather or leatherette). The material must be hypoallergenic and resistant to water and compounds used to disinfect the roller cover.
A pillow, when it matches the color of the overall design of the office, will decorate the interior; the palette of shades and patterns is varied, and the product can be sewn with your own hands.
You can sew a manicure pillow yourself or choose from ready-made ones exactly in the style of your interior.
A pillow with a cutout for the arm is very comfortable for both the client and the technician: wide on the sides and narrow in the middle.
Sometimes a hand rest is included with the manicure table.
Additional functions
Some furniture manufacturers offer manicure tables equipped with additional features, such as an extractor hood or a UV sterilization unit. By purchasing a table, the master receives an almost finished workplace, designed taking into account the specifics.
Hood
It is not necessary to purchase a portable device and place it on a work surface.
Source
How to make an armrest (pillow) for a manicure with your own hands
You can make a manicure roller yourself. To do this you will need to purchase:
- pillow filler,
- fabric for the cover,
- colored threads;
- sewing needle
First you need to cut and sew the pillow itself and stuff it tightly with filling, then sew a cover using the pattern and sew a button or zipper to it. As a base, take foam rubber, polystyrene foam or a wooden plank (in this case, wrap it with soft material). It is advisable to choose washable fabric, oilcloth or leatherette.
As a base for a manicure pillow, you need to take a board or a piece of polystyrene foam or foam rubber.
You can make a manicure hand rest from wood with your own hands:
- Design and cut out parts for a future bench stand from a piece of chipboard.
Round the edges. Chipboard is suitable for making parts - Mark the locations for the holes and drill them, fastening the base conveniently onto confirmations.
- Make holes for self-tapping screws to attach foam rubber and leather to the top.
Paint the tree with a suitable color. Dried parts are fastened with self-tapping screws - While the bench is drying, measure and cut the leather and foam rubber and attach it to the plywood with a furniture stapler.
The top is attached to self-tapping screws of suitable size. You can put a manicure lamp under the stand
Built-in hood
Making wooden benches with your own hands
If you are going to install a special hood over the product, which absorbs all the dust and creates a safe working atmosphere, it is worth making a separate hole for it.
The hood itself is purchased in a specialized store.
. It has compact dimensions and stylish design. You can install the hood within 10 minutes:
- Using an electric jigsaw, we make a hole in the tabletop
according to the dimensions of the device. - Insert the hood
into the hole. - We fasten
it with self-tapping screws.
Important
: To prevent chips and cracks from forming in the countertop when drilling a hole, it is recommended to use a file with fine teeth.
