Rating: 4.83/5 (23)
Patchwork masters know how to create a large, complete blanket from small pieces. Patchwork is another name for this art, which develops accuracy, cultivates patience and enriches emotions . The painstaking combination of different fabrics into a whole pattern, they say, originated from poverty, but today it has already been elevated to the rank of art and creative hobby.
Stages of creating a product using patchwork technique
The main stages of making a product from scraps:
- selection of material for creativity;
- drawing up a diagram;
- laying out the ornament and joining the parts into a whole canvas.
Material for creativity can be chosen in different ways. Some needlewomen begin by revising the pieces of fabric they have, and only after that they draw up a diagram of the future masterpiece. Others prefer to first develop a detailed design of the product and, based on needs, select the material and cut it into pieces.
If you have not been involved in this type of needlework, then it is not recommended to develop a pattern yourself; to make your first masterpieces, it is better to use materials from specialized magazines or handicraft websites.
Beginning needlewomen can use patterns from magazines
After approving the patchwork pattern and preparing the material, you can move on to the next stage. The process of joining individual elements into a finished product also occurs in several steps, including:
- sewing scraps into blocks;
- connecting blocks into a canvas;
- sewing lining fabric to the fabric.
Individual patchwork blocks can be joined together by hand or machine stitched. Some craftswomen prefer to use knitting threads and a hook to connect elements. This type of needlework is called knitted patchwork.
Knitted patchwork
Cutting rules
The most convenient templates are frames. The inner part must correspond to the finished size of the fragment, the outer part takes into account seam allowances. The width of such a frame is the size of the allowances. When making a pattern, the frame must be circled twice and cut only along the outer contour. The inner outline will show the seam line.
The pattern is transferred to the fabric with chalk or soap; any pen leaves marks on the front side.
Cutting is done only along the grain thread, so that subsequently the sewn parts do not stretch or warp. Cut out the flaps with regular scissors or a special cutter. A roller cutter makes the process much easier, cutting long strips that are easy to cut into smaller pieces. You can't do without a cutter when the templates are curved.
Varieties of patchwork
“Traditional patchwork patterns are best suited for beginning craftswomen”
Like many types of needlework, patchwork developed not only in one direction; in this regard, it is customary to distinguish several basic techniques for this type of creativity:
- Traditional. Patterns for this type of patchwork are best suited for beginning craftswomen. To create a product using this technique, you need to prepare blocks of scraps that will have the shape of various geometric shapes. The individual elements are combined into a whole product, and its reverse side is hemmed with a single piece of fabric.
Traditional patchwork is suitable for beginners
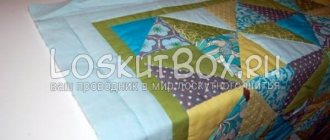
- Quilting. The peculiarity of this technique lies in the method of stitching individual elements, the canvases are connected to each other by machine stitching, and the craftswoman seems to be quilting them together. This technique is suitable for creating blankets, and a layer of batting is laid between the canvases as insulation.
Quilting technique is suitable for creating blankets
- Crazy patchwork. A complex technique using scraps of different sizes and shapes. The individual elements are connected with various stitches, and then the product is decorated with beads and seed beads, buttons and appliqués.
Crazy patchwork uses scraps of different sizes
- Japanese patchwork. For this technique, not all types of fabrics can be used, but only expensive silk. Fabric blanks can be of any shape and size.
Handbag made using Japanese patchwork technique
- Knitted patchwork. It differs in the way the elements are connected, when parts of the product are not sewn, but connected to each other with a crochet hook.
Pattern selection
There are 3 types of products in the patchwork technique:
- A fabric sewn from scraps, where the parts are assembled seam into seam. The shape of the patches can be regular, geometric (traditional sewing) or arbitrary (crazy patchwork). Watch video lessons.
- Quilted items are made from a whole piece of fabric, the pattern on which is created using stitches.
- Applique – pieces of other fabrics are beautifully placed on the base, sewn and quilted.
Features of patchwork creativity
- At first glance, this is a simple and very original type of needlework, but having mastered patchwork patterns, at least for beginners, you can already create real masterpieces.
- An excellent opportunity for creativity and self-realization, an individual approach to the manufacture of a product using any of the technologies.
- Working according to the scheme and strictly following the recommendations of the masters, it is impossible to completely replicate the original.
- Each subsequent product always turns out more beautiful than the previous one, which inspires the craftswomen to continue their patchwork creativity.
Patchwork is an excellent opportunity for creativity and self-realization
Master class “Pillow with applique”
Step-by-step instruction.
- It’s convenient to start by preparing squares. Their number and size determine the size of the pillow.
- Then you need to cut a circle out of the fabric. In the middle, put a piece of fabric and some filler for volume (cotton wool, padding polyester). Secure in a circle using a machine stitch. The middle is ready.
- Fold the squares from the flaps diagonally, as in the photo, sew around the middle piece in a circle - 3-5 pieces.
- For the next round you need to prepare large squares of the corresponding color. Continue until the end of the intended flower size.
- The sewn petals must be trimmed in a circle.
- The finished roses are beautifully distributed on a pillowcase and secured to the product with a zig-zag seam and a wide, dense stitch. The rosette has the appearance of a three-dimensional appliqué.
If desired, the bouquet can be supplemented with leaves cut from scraps of a suitable color.
Look at the photo for a step-by-step master class. The blanket in MK is made using the “crazy patchwork” technique (you can watch video tutorials), and it consists of 30x30 cm squares. For a single blanket you need 24 pieces, for a double blanket – 36. Let’s say the pattern will be made up of 4 types of fabric.
Patchwork patterns for creating designer pillows
Pillows decorated using one of the patchwork techniques always look very original. They can serve as decoration and fill the living space with special comfort and warmth. Typically, pillow patchwork patterns involve the use of bright fabrics in contrasting shades.
Types of pillows
- Classic pillow.
Traditional style is by no means boring and monotonous; on the contrary, classic decorative elements are in great demand and therefore are widely used for interior decoration. To make a pillow using the patchwork technique using the classic pattern, you need to select square or rectangular fabric scraps that will be in harmony in tone with the furniture in the room. If you have leftover fabric from curtains, they are perfect for creating a pillow.
Pillows made from patches are widely used for interior decoration.
- Knitted pillow.
Decorative pillows are perfect for decorating a relaxation area. Knitted round pillows allow you to create a warm, cozy atmosphere in the room. To create a pillow, you need to prepare yarn, foam rubber and crochet hooks. First, the needlewomen knit an openwork pattern, then secure its edges in a small square frame, and after that they begin to connect the opposite sides of the product. The side parts of the pillow are made using the circular knitting method. The finished product is stuffed with foam rubber.
Knitted patchwork pillows are suitable for decorating a relaxation area
- Denim pillow.
Patchwork patterns and patterns allow you to bring many design ideas to life and make original products for the interior. Fabrics of different compositions and shades are suitable for needlework, and it is not always necessary to purchase new cuts. Old jeans are also quite suitable for making a patchwork pillow; they should be cut into blanks in the shape of squares or rectangles and joined into a product using classical technology.
Denim patch pillow
- Crazy patchwork pillow.
The most original products are made in this style. For creativity, scraps of fabric in contrasting shades are used, they are cut into pieces of different sizes, and then they are laid out with an ornament. For crazy sewing, craftswomen use various decors, including laces, ribbon and braid.
Crazy patchwork pillow
Schemes for making patchwork pillows
Various handmade items can add special comfort and a unique atmosphere to a living space. It will be difficult for beginning craftswomen to create their first project without outside help in the form of detailed diagrams, job descriptions or master classes. From the proposed schemes, you should choose one that is not very difficult to manufacture, but suitable in color and combination of blanks. The most popular are products that are sewn from scraps in the shape of geometric shapes.
Patchwork patterns for beginners
- Square in a square - consists of connecting individual isosceles triangles into square blocks.
- Russian square - triangles or stripes are sewn around the main figure.
- American square - in the very center of the product there is a main figure, which is surrounded by rectangles of the same width, but of different lengths.
American square pillows
Needlewomen who have already taken their first steps in patchwork can use the following patterns:
- Diamond – consists of a combination of quadrilaterals and pentagons. To manufacture a product according to this scheme, it is necessary to prepare blanks according to six templates.
Patchwork pattern “Diamond”
- Mill - consists of a combination of triangular and square elements of different sizes.
Patchwork pattern “Mill”
- Star - is a beautiful combination of equilateral triangles.
Pattern for patchwork “Star”
Having decided on the technique and execution scheme, the craftswoman prepares patchwork blanks using templates and begins sewing.
Master class on patchwork sewing
We bring to your attention a detailed master class on making a patchwork pillowcase with a three-dimensional “rose”. For needlework, you can use material of any bright colors. Before cutting the blanks, be sure to wash the fabric and iron it.
Step-by-step instructions for the master class
- Prepare square-shaped scraps. The size of the finished product will depend on the number and size of the workpieces.
- Cut a circle out of fabric. Place a piece of fabric and bulk filling in the very center of the circle, secure the layers with machine stitching. The middle of your product is already ready.
- Fold the square pieces diagonally, then take 3-5 resulting pieces and sew them around the middle of the product.
- For the next circle, you should select larger squares of a different color. Continue sewing fabric blanks until you have a flower of the intended size.
- Trim the sewn petals in a circle.
- Distribute the finished flowers over the pillowcase and secure them to the product with a zigzag or tight stitch. We get the “Volume Rose” applique.
- The finished bouquet can be supplemented with leaves by making them from scraps of the appropriate shade.
Volumetric rose using patchwork technique
Step-by-step examples for beginners
Chess
For the craft, you will need two pieces of fabric of contrasting colors, one of them should be either plain or with a subtle pattern.
- Cut the fabric into strips of equal width.
- Sew stripes, alternating colors.
- Cut the fabric crosswise into new strips of the same width.
- Turn each odd-numbered strip upside down - you will have a ready-made chessboard.
- Sew the strips to each other in the order you laid them.
- Finish the edges of the product with satin ribbon or braid.
log cabin
- Prepare pieces of fabric - a square for the center and a strip. There is no need to calculate the length of the parts in advance; they will be cut off during operation.
- Apply the first ribbon to the square with the right sides and sew on the machine.
- Cut the strip along the edge of the square, fold it over and iron it.
- Attach the next strip to the long side of the resulting fragment, facing each other in the same way, stitch.
- Trim the part of the strip that extends beyond the edge.
- Bend over, iron and continue to successively sew new ribbons to the growing product. It is important to follow the chosen direction and start a new turn on the same side from which you sewed the first part.
Any final words? Try different styles and techniques. To test new color solutions, draw preliminary diagrams on your computer or tablet. Experimentation will speed up your learning and help you create home decor, clothing and accessories in your own personal way.
Photo gallery - patchwork patterns
Tack
It is best to use denim to make potholders, as it is quite dense and takes a long time to heat up. It can be performed using any of the techniques described above, but the most popular is the “Well” technique.
To do this, you need to cut 10 strips of different lengths from denim fabric of different colors. Then all the elements must be combined according to the appropriate scheme.
The final touch is the framing of the potholder: you can sew any tape along the edges, which needs to be turned into a loop at the edge.
This version of the technique is intended for beginners, but after getting the hang of it and studying many step-by-step photos, instructions and diagrams, each needlewoman will be able to perform more complex work using patchwork.
Patchwork entered the life of the Russian people a very long time ago, but in recent years it has not only not lost its luster, but is also becoming increasingly popular. Moreover, today this method of sewing is used not only by needlewomen for home design, but also by fashion couturiers for branded clothing.
Unusual things with your own hands
Sewing from scraps of fabric is a way to create original things that will not only decorate your home interior, but will also be functional and useful. For beginners, more experienced craftsmen suggest doing the first small-sized work.
To try out different sewing styles, you need to practice making oven mitts, pillowcases for decorative pillows, cosmetic bags and bags. Below you can see detailed instructions for creating unusual things for the home from scraps.
Preparation of materials and tools
First of all, you need to choose the fabric. It is desirable that the product consist of scraps of the same type of material. Using flaps of different textures it is difficult to achieve a good result. The combined style is only suitable for sewing using the crazy and pizza techniques.
The table shows the names of the most popular materials for patchwork, as well as their properties:
Sewing from fabric scraps: tools and materials for work.
| Materials | Properties |
| Cotton | They are not prone to shedding, can be ironed, and shrink when washed in hot water. |
| Linen | Often used for substrate. They don't shrink after washing, but they wrinkle a lot. |
| Woolen | They do not wrinkle and retain their original appearance for a long time. |
| Viscose | They smooth out well, but they lose their shape due to frequent washing. |
| Synthetic | Ironing should be done carefully. The edges often crumble. They retain their shape for a long time and do not lose color. |
It is important that the material is combined in color, as well as in the theme of the drawing. The most common types of designs on fabric are: floral, children's and geometric.
What tools do you need to prepare for work:
- Sewing machine and overlocker.
- Iron or steamer.
- Measuring instruments: measuring tape, straight and triangular ruler.
- Scissors or rotary cutter.
- Tailor's pins.
To create and accurately redraw diagrams, you will need graph paper.
Beautiful patchwork bags
Bags from scraps can be sewn in any style and in different styles.
This description of the work steps is suitable for classic options:
- Make patterns for the sides, bottom and ends.
- For the backing you need to use a dense material, for example, denim.
- The flaps are sewn onto the main fabric in any order, depending on the chosen style.
- The parts are combined into a whole product.
- Fasten locks and handles and other fittings.
For beach options, you can use synthetic and cotton fabrics. For everyday options, leatherette is suitable. It is easier to care for and the bag will last longer.
Patchwork knitted rug
Knitted fabrics make soft and bright rugs. To create them, needlewomen often use the “lyapochika” technique.
An example of making a square rug in 5 colors:
- The prepared fabric is cut into shreds in the form of strips of the same size.
- As a base, you need to choose a dense material that will not slide too much on the floor.
- Markings are made using colored crayons or markers to help position the material evenly. An example of a pattern based on 80x80 cm: a circle with a diameter of 20 cm in the center, 2 rings around it 7 cm wide, a frame extending 10 cm from the edge. The space between the rings and the frame will be filled with plain shreds.
- According to this scheme, it is easier to start working from the middle than from the bottom row. Therefore, using a spiral stitch from the center, the circle is filled with stripes stitched in the middle.
- The color is changed to a contrasting one and 1 ring is made, then the color of the fabric is changed again and the 2nd ring is sewn.
- Now fill the empty space up to the frame. Here you can start sewing rows from the bottom. The color may be new or the same as the first round.
- The frame is decorated with darker fabric.
If the rug still slides on the floor, you can purchase special rubberized corners. They are glued to the back of the product, and it will no longer get confused or slide off.
Blanket made from different patches
Quilts are often made using the American quilting technique. To work, you will need cotton fabric for the base and for cutting out the flaps, as well as thin padding polyester for the backing.
Here is an example of sewing a baby blanket, size 140x90 cm:
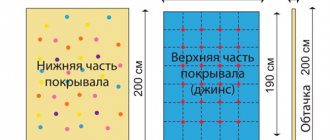
- To make the product look more interesting, you can decorate its front side with a checkerboard pattern. It will consist of 126 square patches measuring 10x10 cm, 63 of which will be one color, and the remaining 63 will be another.
- First you need to sew the finished fabric. To simplify the task, you should cut out not squares, but strips 12 cm wide and 142 cm long (with seam allowances). You will need 9 of them. Accordingly, 4 of them are one color, 5 are another. The strips are sewn along the long edge and then cut lengthwise into strips 10 cm wide.
- All that remains is to unfold the strips so that the squares are arranged in a checkerboard pattern and reconnect the fabric into a whole canvas.
- Now they cut out the base, put padding polyester on it, and cover it with a cloth of rags on top. Sew the blanket around the edges.
- Now you need to give the product a quilted look; to do this, machine stitching is passed along all the lines dividing the squares.
- The edges of the blanket can be trimmed with braid or soft lace.
For children's blankets, it is better to use soft fabrics, such as flannel, with a children's print.
Patchwork style bedspread
Bedspreads for a bed or sofa are made according to a pattern similar to a blanket. For work, it is better to give preference to dense fabrics that are easy to wash and iron. Suitable jeans, wool jacquard, bamboo.
The flaps can be of various shapes: square, triangular or hexagonal. The main thing is to get the color pattern right. Thick fabric can be sewn without a lining, but to give the bedspread a more aesthetic appearance on both sides, cotton and viscose fabrics can be used as a backing.
The patterns are connected in any order. Products assembled from prepared blocks look beautiful. To calculate the number of blanks, you need to divide the area of the bedspread by the area of 1 flap or block. At the end of the work. The edges are processed using an overlocker or decorated with a matching color braid.
Covers for stools
These products are sewn using a variety of techniques. The most popular design styles: “pizza”, “bargello”, “American quilting”.
Universal instructions:
- The seat of the stool is measured and a pattern is made from dense fabric, which will serve as the base.
- If the stool is square, then you need to sew laces to the lining at each corner, which will secure the cover. They are tied around the legs of the stool. For round seats, it is better to make a cover with an elastic band.
- Flaps are sewn onto the lining in accordance with the chosen style. The excess is cut off and the edges are trimmed with braid.
To sew an elastic band to a round product, you will need to make a border from synthetic fabric. To do this, cut out a strip 7 to 15 cm wide and sew it to the base. A wide elastic band is secured along the edges.
Toys made from fabric scraps
Sewing from scraps of fabric allows you to create more complex products, for example, soft children's toys. Basically, they are sewn using the classical technique, since the patterns are not standard, and a large number of decorative seams or small scraps can spoil the appearance of the craft. Cotton, chintz and flannel fabrics are used for sewing.
Experienced craftsmen can stitch fuzzy and synthetic patches beautifully. Standard patterns are used as a basis for work, each part is made from a different material. For beginners, it is better to start working with flat products. These toys are called “scops owls” because they are shaped like a small pillow.
The parts for such patterns are quite large, so the entire area of the toy can be filled with small scraps. To decorate such crafts, buttons, beads, and special accessories are used: eyes and noses made of plastic.
Patchwork is not difficult to master. It is important to start with simple jobs and gradually move on to more complex ones. To create beautiful products, you can use new fabric, and also give a “second life” to old things by cutting out scraps from unwearable clothes.
Some useful tips
According to characteristics, seamstresses choose cotton or linen due to optimal density and durability. Due to its naturalness, such a product will have high thermal conductivity and breathability, and will not be electrified.
Patchwork - technique and master class for sewing stylish and beautiful sewing with your own hands (80 photos)- Tilda doll - a master class in sewing toys with your own hands. 125 photos of the best toy models
How to make a car out of paper: step-by-step description of how to quickly and easily build a high-quality car (75 photos + video)
A true master will find a use for the acquired skills, all the more surprising in their brightness, beauty and originality. Always remember to be thorough and precise. If you are not afraid of difficulties, you want to make an effort and learn patchwork for beginners, you will find step-by-step diagrams on specialized websites and pages in magazines.
What is this technique?
Instead of patterns, when making patchwork, templates are used, since the patterns mainly consist of repeatedly repeating blanks (squares, polygons, triangles, segments). It is recommended to make devices directly from durable material (hard cardboard, plastic). Externally, the template looks like a frame in which the inner figure serves as the desired part, and the outer part serves as a seam allowance (approximately 0.75 cm).
The most commonly used types of tailoring are:
- The traditional look is considered a derivative of the Anglo-American style. The parts folded in geometric patterns form a single piece. The products consist of a front side and a back side (lining). The method is equally suitable for sewing large and small crafts.
- A crazy way of joining parts is to haphazardly lay out multi-colored scraps. In this case, the seams of the product are finished with decorative stitches and wide ribbons of braid. The decoration is completed by sewing on buttons of various shapes, embroidery, pieces of lace, and beads.
- The Japanese method is completely handmade. Original motifs are created from expensive fabrics, resulting in elegant items and clothes.
- The translation of the word “quilting” means “quilted fabric,” which connects the sewing method to patchwork. The peculiarity of the method is the use of a convex stitch connecting the lining to the patchwork parts.
- Knitted patchwork connects separately knitted parts into a single whole. Ready-made items look more beautiful than those made from fabric.
