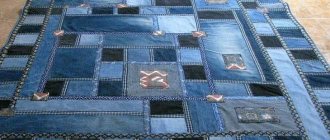
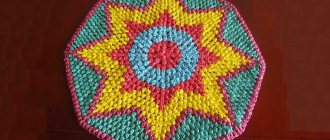
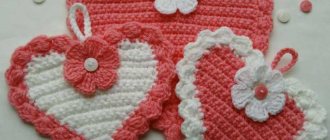
Knitting ten stitches using a knit stitch is a very interesting type of needlework. Using this method, you can create a beautiful and practical blanket from leftover knitting threads. Working using the knit stitch method is not at all difficult.
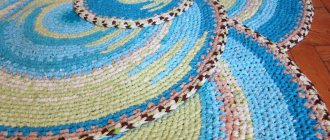
A small blanket knitted with spiral knitting using the “10 loops” method
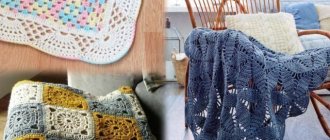
A simple beautiful crocheted blanket made of openwork squares
Knitting blankets in squares is very simple and convenient: one square a day and little by little you can move towards your intended goal, the entire large product does not get in the way under your hands, you can knit anywhere - in transport, at the dacha, on vacation.
First, knit one square, steam it through a damp cloth and estimate how many of these you will need in width and length.
It is more convenient to connect the squares together along the wrong side with connecting posts behind the inner walls of the loops.
A very interesting simple pattern of a blanket with dense vertical and horizontal paths in the center and openwork corners. But the main thing here is beautiful colors.
How to tie
We make a ring of 8 chain stitches, connecting the first and last loops.
Row 1: 4 times 5 C1H and 3 VP between them (here and further at the beginning of the row, instead of the first column - 3 air stitches).
Row 2: above the columns of the previous row we knit 5 C1H (and then in each next row the same), between them in the corners of the resulting square - 5 VP.
Row 3: 5С1Н; in the corners - 2 VP, 3S1N in an arch, 3VP, 3S1N, 2VP.
Row 4: 5С1Н; 4 VP, 3S1N in an arch, 3VP, 3S1N, 4VP.
Row 5: 5С1Н; 5 VP, RLS under the first arch (of 4 loops), 5VP, 3S1N in the corner arch, 3VP, 3S1N, 5VP, RLS in the next arch, 5VP.
Row 6: 5С1Н; 4 VP, RLS under the first arch, 4VP, RLS under the second arch, 4VP, 3S1N in the corner arch, 3VP, 3S1N, and then in reverse order RLS in the arches through 4 air ones.
Video
You can also watch a video on how to knit this square.
The finished blanket is decorated on two narrow sides with long tassels. The crocheted blanket is simple and beautiful.
Knitting Basics
This blanket is created using garter stitch with 10 stitches. We constantly remove the first loop, and make the last one using any convenient method. It is better to choose a method so that a side braid is formed from the edges. This will make it easier to attach the strips to each other. So, now we cast on 1 loop and knit the initial ribbon with the front loops along the face and on the back. To make the blanket shaped like a square, the ribbon must be nine grooves long in garter stitch, making eighteen rows.
And for it to be rectangular, the tape must be longer. We will calculate its size using the following formula: length of the blanket - width of the blanket = length of the knitted ribbon.
If you plan to create a blanket measuring 200x150 cm, then it will be: 200-150=50 cm. It turns out that in this case we need to knit an initial ribbon 50 centimeters long.
The next step will be knitting the first corner. The corners are knitted in short rows offset by 1 stitch, wrapping the adjacent stitch so that there are no holes. When the corner begins, in order not to get confused, you can count first from 9 to 1, and then, conversely, from 1 to 9 in order. If you still get confused, then this is not a problem. Since it is possible to simply unravel to the straight part and start, counting again. Don't forget that the first loop is removed.
Article on the topic: Elongated crochet loops in a circle: master class with photos and videos
The photo below shows a corner knitted to the first loop. Counting from 9 to 1.
Now, under the countdown from 1 to 9, the corner is tied to the end. The first corner is finished.
Now we begin to knit the second corner. Again counting from 9 to 1.
We finish knitting the corner, counting from 1 to 9, not forgetting to make increases. The 2nd corner is finished.
It's time to knit the ribbon, simultaneously attaching it to the side braid of the knitted fabric. To do this, remove the tenth loop (thread behind the knitting needle), pull out the front loop from the side braid of the knitted fabric and throw the removed loop over it. On the wrong side we remove this loop, the thread goes in front of the knitting needle. The road will emerge from facial loops.
There are two ways to create a knit loop from a side braid. The first method is to knit a side braid under both sections. In this case, the scar comes out dense and voluminous, consisting of 2 roads of facial loops. The second method is to knit a front loop under the back section of the side braid. In this case, the scar will be smaller and will consist of 1 row of facial loops.
The photo below shows the front side when using the first method.
The following photo shows the reverse side. Here you can see that a small groove is formed in place of the scar.
Now we knit the corner again. In the picture below it is marked in red. This blanket is knitted in a spiral with a new part attached to the edge braid of the already knitted part. This is shown in yellow in the image. The arrows indicate the direction.
Thus, by making corners and connecting knitting on straight sections, it is possible to make a blanket of any desired size, still there will always be 10 loops in the work. It knits easily, simply and comfortably.
Square patterns for knitting blankets
No less beautiful blankets can be knitted using other very simple patterns of ordinary squares.
Grandmother's Square
The photo shows the work of my reader Yulia - a blanket made from our favorite granny squares, which are very easy to knit. Such beauty is obtained with different combinations and arrangements of colors, just look at the selection in the video!
Description of knitting - follow the link>>.
Simple square
A great idea found on the internet is a combination of grandma’s and a simple square in a blanket. It looks very elegant, again thanks to the choice of color.
And from simple such squares it is convenient to knit a blanket for beginners. We have a description of knitting and a master class here>>.
Square with diagonal braids
A very delicate blanket the color of baked milk is knitted from squares with a diagonal braid pattern. The diagram and video are in front of you.
I was unable to figure out how the edges are connected; the pattern under the flowers is hard to discern and there is no detailed diagram for this blanket anywhere. We can assume that there is either a grandmother’s square or a motif connected in continuation of the voluminous flower. We have a diagram with a description and video of the latter.
And I inform you that a new article has been published with 15 options for knitting beautiful and unusual blankets from squares. Be sure to check it out!
Possible colors
This blanket will look great in any color. But before we start work, we need to decide what kind of product we want to get in the end. The most popular options:
- of two colors;
- from several different balls of thread with iridescence;
- from several different balls of thread without overflow.
Simple pattern for a striped blanket
I would like to give advice on how to set stitches for a blanket. It is not necessary to knit a sample and calculate the number of stitches.
- Cast on a chain as long as the blanket should be and even a little less, because with further knitting the chain tends to stretch a little.
- Pull out a long loop at the end of the set and remove the hook.
- Now take another skein of yarn and start knitting the pattern from the BEGINNING of the chain.
- Having reached the end, you can adjust the number of loops in the chain - tie the missing ones or undo the extra ones.
- Next, you can fasten and cut the thread from the first ball.
How to knit
First row: single crochet stitches (3ch at the beginning).
Second and all even: RLS in the space between every second and third column of the previous row, between them - 2VP.
The third and all the following are odd: 2С1Н in each arch.
Plaid with tulips
You might think that these are just stripes on a blanket, I deliberately added an enlarged fragment of the pattern, where you can see that this is a pattern with tulips.
How to knit, see the corresponding publication, there is also a video there.
Blue plaid waves
Beautiful colors transitioning from one tone to another create the appropriate effect and charm of this blanket.
How to knit
1 row and all odd ones: 3C1H from one loop, 5C1H in each next loop, not knitted to the end and knitted together.
Row 2 and all odd numbers: single crochets in each stitch.
Video
Using braids and harnesses
When creating a blanket with additional elements, you should use any of the above methods in the main knitting, and in some places adhere to a certain algorithm for creating a pattern (braids, strands).
To decorate the product “oblique”:
- Cast on the number of stitches corresponding to the size of the intended blanket pattern.
- Remove the first gearbox.
- Knit the second stitch first, then the first stitch.
- “Discard” the point of the knitting needle.
- Repeat the above steps to obtain a second thin braid, but knit the lpt not one at a time, but two at a time: first the two farthest ones, then the closest ones.
- Throw the pt onto the knitting needle.
- Repeat point 3.
- Repeat until you get the desired number of braids in the product picture.
- Complete a series of ipt.
- Close Fri.
To create “bundles” on a blanket:
- Cast on 28 stitches on needles, including 2 stitches.
- From the first to the eighth row - 2 purl loops, 2 - opposite stitches alternately throughout the entire row.
- Ninth row: purl 2 stitches, 2 opposite stitches, purl 2 stitches. Drop 8 stitches on the outside needle and leave at work. Work 6 stitches from the left needle: 2 knit stitches, 2 opposite stitches, 2 knit stitches. Return the left stitches to the knitting needle and knit: 2 purl stitches, 2 knit stitches, 2 purl stitches, 2 knit stitches. Complete the row by knitting: 2 purl sts, knit 2 sts, purl 2 sts.
- Rows 10-16: repeat step 2.
- Row 17: purl 2 stitches, knit 2 stitches, purl 2 stitches. Skip 8 sts and insert needle in next 6 sts. Remove all existing stitches from the left needle, picking up the remaining stitches to work with. Complete the row: 2pt, 2pt, 2pt, 2pt, 2pt, 2pt, 2pt, 1pt.
- Rows 18-25 repeat step 2.
- Repeat the above sequence of actions until the required size of the harness pattern on the product is obtained.
- Close the loops.
Waffle pattern for a blanket
Simple baby blankets can be knitted in a beautiful waffle pattern.
A photo of needlewoman Olga Evstropova, who once participated in our competition, has already spread all over the world. It can be found on many sites, including foreign ones, and videos have been made using it (not me). But no one sees it on my blog, but that’s another story.
Once again I want to remind you how to knit a waffle pattern:
1st row: single crochets.
2nd row: 1С1Н, 2 raised convex double crochets.
3rd row: 2С1Н, 1 embossed column.
We have detailed information about knitting children's blankets, sizes, yarn, patterns of patterns both crocheted and knitted, how to make a lining, in a separate post.
Crochet blanket for beginners with fillet pattern
Also a simple, but very cute fillet knitting pattern, in which empty and filled cells of the pattern alternate. Suitable for beginner baby blanket. For a more detailed description, follow the link.
General recommendations for crocheting blankets
Yarn
First of all, we decide on the yarn. Experienced needlewomen recommend using acrylic threads with wool - the most convenient option, they make a blanket that is neat, beautiful, warm and does not itch like pure wool. You can knit from acrylic alone or acrylic with cotton.
Thread size: approximately 100 grams 330 m or even thicker.
Yarn consumption is difficult to determine exactly. Approximately: for a meter blanket it takes 700–1000 grams, for a large one – up to 2 kilograms.
Hook
In accordance with the thickness of the thread and your knitting density, your preferences, we choose the one that is more convenient to knit. It could be number 3.5; 3.7 or 4.
How to knit
All blankets can be divided into two types: those that are knitted as a whole fabric at once and blankets from separately knitted motifs, which are then joined together in finished form. In any case, knitting them is equally simple, it’s all about the chosen pattern.
It is not at all necessary to make a calculation, because this is not a dress that should fit strictly according to your figure; you can knit a blanket a couple of centimeters wider than the desired size. And I will share with you some secrets on how to knit without calculation.
The finished blanket must be tied around the perimeter with two or three rows of single crochets - this will make the edges even and the look will be neat and complete. And then you can tie the border or attach fringe, tassels, pompoms, or leave it as is without unnecessary decorations.
Crochet blanket binding
As I already said, the simplest way to crochet blankets is to use rows of single crochets.
Other options:
- tie with a border - a mesh like in a fillet blanket
- border with knitted pompoms
- simple border with toes according to the pattern.
Color Block Baby Blanket for Beginners
This original bedspread will decorate the room of a child of any age. When it's cold, you can hide with it, and it can also replace a play mat. The simple knitting pattern makes this blanket easy to make.
Dimensions: 101.5 cm by 101.5 cm.
We will need:
- yarn, 100% acrylic (453.6g per 742m) – turquoise color – 450g;
- the same sand color – 450g;
- the same carrot color – 450g;
- the same blue color - 450g;
- knitting needles No. 6;
- needle with a large eye.
Pattern:
shawl rice-ok: all stitches in all rows are knitted.
Density: on a scarf pattern 14p. for 26 rub. equal to 10 cm by 10 cm.
Knitting motifs
The bedspread consists of motifs. Each one is a square with a side of 20.5 cm and is knitted in one piece from color blocks. We lift the loops for the new block from the previous parts - see diagram.
We connect the next color by pulling a stitch from the outer loop of the previous block. We consider the elongated stitch to be the 1st loop of the row.
For the bedspread you need to knit 25 squares with your own hands. We knit motifs in blocks, following the description and diagram.
Second block
Rotate the canvas 90 degrees clockwise. With sand yarn we raise 9 p. on the side of the 1st block. We knit 17 rubles. the same pattern. Closed p. Connect the carrot yarn to the outermost p.
Third block
Again we turn the canvas 90 degrees clockwise. Using carrot yarn we raise 9 sts. on the side of the 2nd block and 9p. on the side of the 1st block. Total 18p.
We knit 17 rubles. handkerchief rice.
Closed p. Connect the sand thread to the outermost p.
Fourth block
Rotate the canvas 90 degrees clockwise. With sand yarn we raise 9 p. on the side of the 3rd block and 9p. on the side of the 1st block. Total 18p.
We knit 17 rubles. handkerchief rice.
Closed p. Connect the blue thread to the outermost p.
Fifth block
Rotate the canvas 90 degrees clockwise. Using blue yarn we raise 9 sts. on the side of the 4th block and 9p. on the side of the 1st block and 9p. on the side of the 2nd block. Only 27p.
We knit 17 rubles. handkerchief rice.
Closed P.
