How to choose the right paint
Anyone who decided to paint furniture themselves probably wondered how to do it correctly. Interior items made from chipboard absorb moisture to a lesser extent than wood. It will take a long time for them to dry.
Chipboard will need less primer than wood.
So how to paint the cabinet? What paint should I use? The best option would be to use water-based alkyd or acrylic paint. It has many advantages - it has a rich shade, is odorless, which is of great importance when you work indoors, and is easily diluted with water. It is easy enough to wash off to correct inaccuracies during painting. Working with her is a pleasure. Once the paint dries, it will become stronger. Keep this in mind as you layer. Regular wood paint or spray paint will also work.
There is a wide variety of acrylic paints with a metallic or pearlescent effect.
To thoroughly paint, use varnishes. They will give the furniture an antique effect. She will look great. The plane must be painted in several layers, first allowing each layer to dry. This is not their only property.
Varnishes help fix the color and protect against minor defects.
You can paint the cabinet in different colors, such as a light base and multi-colored details. To achieve the desired color, add a tint to the white paint. When decorating a children's room, use all your imagination. Having decided what shade you need, apply paint to a small area of the furniture, so you will understand what color paint you will need and what its brightness will be.
Each manufacturer produces the appropriate primer for their paint, and it is better to use this particular primer.
What you will need
To work you will need the following tools and materials:
- A dense roller (or a nozzle handle with two or three replaceable rollers). The width is selected according to the size of the cabinet (chest of drawers), on average 10-15 cm; the roller will help to evenly distribute the paint over a large surface, and the result will be good the first time. The tray is selected based on the roll size.
- Two or three soft brushes of different sizes with artificial bristles. It is not recommended to use hard bristles as they will leave marks that are difficult to remove. Brushes are needed for painting on complex shaped elements where a roller cannot cope.
- Screwdriver Set. You will need to remove hardware and most likely disassemble the furniture. The work will be more comfortable and of better quality if you remove only the doors.
- Scotch. You will need it to protect small parts that cannot be removed. For example, if there are built-in lamps in the closet, they are taken out, but left hanging and protected with electrical tape.
An indispensable tool
- Sandpaper (sandpaper) of different sizes: fine (soft) and coarse.
- New accessories if you are going to change the style of the furniture or make it more original. The easiest way to find suitable pens is in large and specialized online stores: the choice of accessories is truly limitless.
- Paint and varnish materials: paint, varnish and degreasing solvent.
- Rags (napkins) are always needed; polyethylene is useful for protecting the surrounding area from paint.
Optionally, you can use the following elements:
- Grinder, glasses and gloves.
- Spatula and putty.
- If a large area needs to be treated, a sprayer is cost-effective.
Apply paint to the countertop
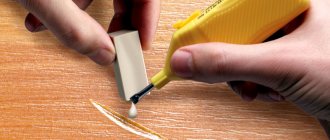
Seal the cracks
The appearance of cracks on pieces of furniture made of chipboard, as a rule, is facilitated by the ingress of moisture, they are also formed due to exposure to heat or frequent opening and closing of doors without holding them, or slamming doors. You can remove this defect yourself without resorting to outside help.
To work you will need a syringe with a needle, clamps, and PVA glue.
Fill the syringe with PVA glue and put on the needle. Fill the entire crack gap with glue. We attach a clamp to the plane from the side where the crack appeared and tighten it. Remove excess glue with a napkin. Leave it for a day or two. After time has passed, we continue restoration work.
You can get rid of cracks using putty.
Apply the mixture to the surface with a spatula in two layers. We distribute the first layer equally evenly on the surface. We wait for it to dry, apply a second layer of putty, and also let it dry.
Wardrobes in Minsk
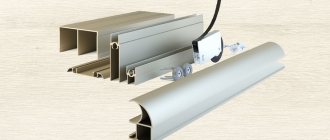
Doors are the main component and face of the wardrobe.
Their appearance determines the style of the room, complements the interior or sets accents. Doors for wardrobes come with a monotonous rate and combined ones. Doors with a monotonous insert are easier to manufacture and cost less.
Combined doors
These doors are divided into several parts.
The inserts can be homogeneous or each of a different material, dividing the sliding doors into parts.
There are a lot of options, it all depends on your imagination, needs and financial capabilities.
Huge selection of combination options
Possibility of combining materials
Chipboard doors
This is the most widely used material for the manufacture of sliding doors, which has many advantages: water resistance, strength, absence of wood defects (knots, cracks, internal voids), ease of processing.
Laminated chipboard is heat-resistant and has a wide palette of colors and shades. The undeniable advantage of chipboard is its low price .
We use only high-quality laminated chipboard of emission class E1 (the most environmentally friendly class allowed for the manufacture of children's furniture).
Increased resistance to wear and external influences
Lowest price among other door options
Mirror doors
Mirrored doors for sliding wardrobes visually expand the space. This is especially true in small rooms, where every centimeter of space counts. And in the hallway you simply cannot do without a mirror.
The door can be completely mirrored or have a mirror insert in combination with other materials.
When choosing a mirrored door for a wardrobe, it is worth considering that you should not place it opposite a window on the sunny side of the house. All mirrors are covered with a safety film, and if a mirror breaks, thousands of pieces will not scatter throughout your home.
Visually expand the space
Ideal for small spaces
Lakobel
Lakobel is a decorative opaque glass painted in various colors. It has a glossy finish and many bright colors, often used in modern interiors. It looks most interesting with horizontal divisions into parts by the joining profile of the door.
Large selection of colors
Lakomat
Lakomat – matte transparent glass coated with a special varnish (chemical etching). Beautiful and pleasant to the touch material, well suited for creating a calm environment in the room. Such doors are distinguished by their visual lightness and airiness. Often used by designers to make oriental-style wardrobes.
Almost no stains or fingerprints visible
Increased resistance to chemicals
Sandblasting
Sandblasting is the application of a matte pattern on a mirror or painted glass. The design is applied with a jet of air and sand mixture under high pressure in an automatic chamber. The finished pattern has a pleasant matte rough surface and is highly resistant to external influences. Our catalog contains more than 6,000 drawings on various topics. You can choose an image that will decorate your interior and make it unforgettable.
Create a rough surface
Before painting, you need to remove the old layer of paint. We will do this using sandpaper, after wiping the surface with a rag or sponge. Sand with circular, wide movements. First, clean with coarse sandpaper. We carry out the work carefully, thoroughly removing the old coating. Be careful not to wear off the veneer layer.
After the procedure, remove the dust with a flat brush; the dust will not be completely removed from the rag and may get stuck in the surface or crevices. This may affect the paint job.
We clean it again, but this time with fine-grained sandpaper. We remove dust in the same way. Upon completion of this stage of restoration, it is necessary to thoroughly clean the room.
This is necessary to prevent dirt from getting onto the surface to be painted in the future.
How to prepare a cabinet for painting
Painting work should be carried out outdoors or in a sufficiently ventilated area. When preparing an old polished cabinet for processing, it is necessary to free the frame by removing removable parts: hinges, doors, handles, drawers, etc.
Then dust, old paint and varnish are removed from the surface of the furniture. To paint the cabinet evenly, you need to clean the surface with sandpaper: first coarse-grained, then fine-grained. It is necessary to eliminate defects down to the wood layer in order for the fresh coating to lay smoothly.
Then the remaining paint is removed with a wide flat brush. A rag for surface treatment is not recommended, because... the material helps to clog paint residues in wood crevices.
After cleaning the surface, it is necessary to clean the room so that dust and dirt do not spoil the fresh coating.
The primer is the main character
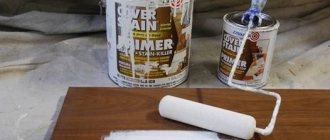
Primer is an important part in the furniture restoration process; with its help you will paint your cabinet with high quality. It will also help the paint dry quickly, as it does not allow moisture to be absorbed into the surface. A positive point is that after priming, the color saturation of the paint will remain the same as when painting.
If you choose acrylic paint for painting, then you need to use an acrylic-based primer.
The painting will be of very good quality, because the elements of the materials for painting are perfectly combined with each other. Before priming, it is important to read the instruction manual and find out how long it takes for the primer to dry, since you only need to paint a dry surface.
Apply it with a roller in a very thin layer, leave it for the time specified in the instructions.
What paint to paint the cabinet?
When choosing paint, it is best to give preference to acrylic, which has almost no odor, is easily diluted with water and mixed to obtain the desired color. It also washes off well, which makes it possible to correct flaws when painting. When the paint dries, the water in it evaporates and the paint becomes stronger, which must be taken into account when applying layers.
The closet does not have to be monochromatic. It can be painted in two colors. For example, take one paint in a neutral beige color and another in a brighter color. If it is not possible to select the desired paint, then you can purchase white acrylic paint and add color to it until the desired shade is obtained. When choosing a suitable shade, you can try it on a small area of the closet to determine the required saturation.
Padding
Acrylic primer is best suited for priming the surface of a cabinet before painting, since its components combine very well with the composition of acrylic paint.
Applying acrylic primer is easy, but before starting work it is recommended to read the instructions for using this material. It is important to adhere to the drying time of the soil and the calculation of the surface area to be treated.
The primer is applied using a roller (this is faster) in a thin layer and left until it dries completely.
How to artistically paint a closet and create color gradations
Painting is widespread nowadays. People want their apartment or house to be unique, without monotony. And many furniture manufacturers are trying to release products specifically without any embellishment, so that everyone can decorate it themselves. Many people approach this process differently - using the original style or decorating with copies of famous paintings.
You can add uniqueness to absolutely any furniture, be it a chest of drawers, a bedside table, a wardrobe, a table, a chair, an armchair, or change the appearance of the room so that no one recognizes the old furniture in the new interior.
Artistic painting is an exciting thing; furniture will sparkle in a new way. If you love and know how to draw, it won’t be difficult to make a real work of art out of an ordinary closet, using all your imagination. For creative work it is worth using acrylic paints. The image must be applied to the base. The main thing is that the theme of the drawing is in complete harmony with the interior. The flora and various patterns will look unique. Furniture painted with craquelure looks very unusual.
Cracks will give the piece of furniture a very old look.
If the cabinet has a lot of drawers, gradation is better. A transition is made between shades of the same color or you can use different colors. For example, you make a gradual transition from green to yellow, or from lilac to pink or blue. To ensure a transition without sharp boundaries, you should add a colored pigment to the paint each time. You can draw a rainbow or anything else you like.
Color selection and design
You can update an old cabinet and give standard furniture an original design by painting. Using materials, you can make the surface glossy or matte, perform monochrome decoration or combine contrasting shades, as well as complement the finish with artificial aging and decoupage. When choosing a shade, you must take into account the color scheme of the room.
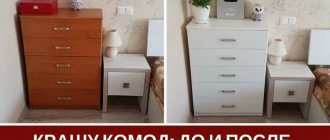
The classic option is to paint the furniture white. This will add freshness and light to the interior; the item will become a bright accent in the room. White furniture can be painted antique with your own hands by combining bleaching and sanding.
Rich shades can prolong the use of old furniture. Popular colors are green, yellow, red, orange, etc. When using bright colors in furniture design, designers recommend painting the walls in neutral tones. Cream, gray, powdery shades will become the background for rich colors. The colors of the facades are harmoniously combined with the neutral texture of wood.
Furniture painting is used to create an interior in the Provence style. Powdery pastel colors are popular in decoration. You can create a rare product by adding craquelure varnish. The material will give a lightly worn effect to wooden surfaces.
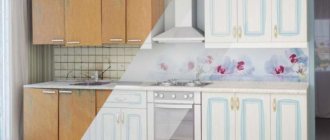
You can change the design of your kitchen by painting the kitchen cabinets; this option is simple and economical. The buffet can be monochrome or multi-colored - with a combination of bright and neutral colors.
Typical furniture can be transformed using the decoupage technique, creating a model in a retro style. Painting a rack will be an interesting design solution when using stencils, unusual color combinations, and artistic painting.
