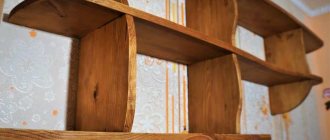
If you still consider plywood to be a rough building material, then it’s time to discard these prejudices. Cost-effectiveness, durability, versatility are just a small part of the reasons why it is increasingly appearing in interiors as an independent unit. This article contains a step-by-step guide with photos on how to make plywood shelves with your own hands. And 6 models that everyone will like.
Location and purpose of the structure
When choosing the size of the shelf, its type, consider the room in which it will be located in the future.
It is important to create a complete interior with a functional detail.
The main purpose of the shelf is to optimize space in the house
Kitchen
For the kitchen, it is important that all the necessary items are always at hand, and not hidden in numerous drawers. It is best to use a compact, yet spacious wall design
Wooden models are most suitable for the kitchen, as they create a cozy atmosphere. A variety of designs allows you to choose an option that harmoniously complements the interior of the room.
Not the most practical solution for the kitchen would be models from:
- plastic;
- glass;
- metal
A good alternative to wood is decorated gypsum fiber sheet.
In a small kitchen, the shelf has a practical purpose, helping to keep necessary utensils in order.
Hallway
By using an original hanging shelf, you can easily decorate your hallway. Such furniture can easily perform several functions.
- A small shelf is suitable for storing keys and small items.
- The larger design allows you to easily accommodate all your bags.
- The tall design, complemented by figurines, will add sophistication to the hallway.
- The shelf with hooks is easy to use as a hanger.
For the hallway you should choose wooden furniture. Glass, metal and plastic cannot be called practical or universal. Take this into account when arranging the room.
A corner shoe stand will be a functional addition to the hallway
Bathroom
It's hard to imagine a bathroom without a convenient corner shelf on which all hygiene products are stored. Of course, numerous jars can be neatly stacked in a closet, but getting them out of it every time is not entirely convenient. It is better to have them at hand at all times.
For the bathroom they most often choose:
- glass structures with chrome stands;
- plastic shelves with metal racks.
It is important that such an interior detail is distinguished by its laconic execution. This makes it easy to care for, since high humidity in the bathroom causes rapid contamination of surfaces.
Manufacturers make the design as functional as possible by adding hooks, soap dishes
Living room
The living room is an ideal place where you can install a functional corner structure. Reading lovers will use shelving to store their home library. On the shelves you can easily place:
- family photos;
- decorative items.
During installation of the structure, you should definitely consider what load is planned on it. Fastenings must be as reliable as possible. Its size directly depends on the future purpose of the selected shelf. Decorative elements look good on compact models, and for a large library or collection, choose a spacious shelving unit.
Small corner shelves with carvings and shaped wooden details are often used as stands for icons
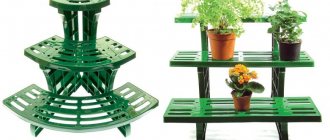
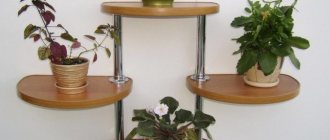
In many living rooms, wooden or metal corner shelves are used as flower stands. Glass specimens are much less common in living rooms. Designers advise not to clutter the shelves with numerous flowerpots and figurines. This eliminates the feeling of lightness that such a design is intended to add to the room.
In a spacious interior, options installed on external corners look harmonious. More often they are made of plasterboard or chipboard. You can design such an addition to the room yourself, taking into account the characteristics of the place chosen for the shelf.
For a small room it is better to purchase a compact design
Types of shelves
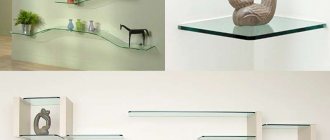
They are made of wood, plywood, laminated chipboard, fiberboard, and there are glass shelves. The same materials are used as stands, but they are also made from metal, plastic and other absolutely incredible things - for example, pipes or bottles.
In living rooms, it is not so important what material the shelf is made of. It is important that its design is in the same style as the interior. Even functionality is not always important: some play a purely decorative role. If they have anything on them, it’s only one or two items. Their role is to give the interior of the home a special style and flavor.
The shelf can serve as a divider for zones in the room
Light interior in light colors and the same shelves
The shape and color of the shelves matches the shape and color of the table drawers
If we talk about shelves in technical rooms - the kitchen and bathroom, in particular, then in addition to aesthetic considerations, practicality requirements are almost universally added. Even decorative shelves in the kitchen should be washed well. For bathroom shelves, the requirements are generally high: periodically there is very high humidity and materials are required that can withstand it without any harm. There aren't many of them. These are plastic and stainless steel. They also make bathroom shelves from MDF, but they can be used normally if there is good ventilation in the bathroom.
DIY shelf-rack
Functional and minimalist industrial style is very popular today. A DIY shelf assembled on pipes will bring into your home that very industrial chic that you may be striving for
Since the number of shelves, as well as the total length of the pipes, is easily adjustable, we will dwell on the general scheme for manufacturing this designer furniture.
Work begins with the preparation of wooden shelves. Special oil or wax is applied to them to obtain a smooth textured surface.
It would be nice if the shelves initially had an interesting texture.
If you also cover the shelves with water-based polyurethane varnish, they will acquire an even more magnificent shine.
After allowing the structure to dry, round flanges are installed in each corner of the bottom shelf approximately 2 cm from the edge.
The location of the connecting parts is marked with a pencil.
The shelves are stacked and clamped with a clamp.
A pilot hole is drilled through the center of the flange through the first and second flanges. For the next boards in order, the drill size needs to be changed to a larger one, since pipes will pass through them in the future.
Start assembly.
Each flange is placed on the lower shelf above the guide hole and secured to the surface.
Galvanized pipes of the required length with threads at both ends are inserted into the holes and tightened into the flange with a wrench. A coupling is installed at the top.
When all the parts are mounted, flanges are screwed to the tops of the pipes and fixed to the top shelf.
The finished shelf can be made mobile by installing wheels on the bottom board.
The set will be more stable if you attach it to the wall using special studs or install an L-shaped bracket.
Hanging shelf with straps
If you need a decorative shelf for small items, the following option is perfect - a board suspended on straps.
Hanging shelf with straps Hanging shelf
To make a shelf you will need:
- 2 edged boards 300x750 mm, 30 mm thick;
- 4 leather belts, 75 cm long;
- 4 long screws with plastic dowels;
- 4 short screws;
- building level;
- ruler;
- sharp knife;
- drill.
Step 1: Preparing the belts
The cuts of the belts must be perfectly even, so if necessary they are trimmed with a knife. Fold each belt in half, press the ends to the table, step back 2 cm from the edge and drill a neat through hole with a drill. The same is done with the remaining three.
Step 2. Attaching the straps to the wall
Using a level, two points are determined on the wall at a distance of 60 cm. Holes are drilled and plastic dowels are inserted. The belt folded in half is applied to one of the holes and secured with a long screw - you get a large loop on the wall. Another such loop is attached nearby.
Step 3. Installing the shelf
A sanded board is inserted into the loops and aligned horizontally. To prevent the shelf from moving, the parts of the belts adjacent to the wall near the board itself are screwed with short self-tapping screws. Now another shelf is hung under this shelf, exactly repeating the steps described above. The result is a light and neat two-tier shelf. If desired, you can add another 1-2 tiers.
To make the shelves described above, you can use not only wood, but also plywood, as well as laminated chipboard sheets. The last option is used most often, since laminated chipboard is lightweight, high strength, practicality and durability. When assembling shelves from this material, all sections must be covered with a melamine edge to match the color of the sheet.
Hinged shelf with straps
Hanging shelf
Hanging shelf with straps
Corner bookshelf with LED lighting
A shelf like this will create a cozy and welcoming atmosphere in your room.
You can cut the shelves yourself, or you can simply order them from the nearest furniture factory. Just enter in the search the query “cutting chipboard to customer sizes” and Yandex will give you those companies that do this. Just say what you want and they will cut everything out for you in the best possible way, it won’t be expensive. Cheaper than the time you spent on sawing!
BUT we advise you to take a responsible approach to choosing the FONT, it should be so bold that the letters have as much empty space as possible - it’s more beautiful.
After you fasten the central boards perpendicularly, you can determine the markings for the LED strip so that the light is distributed evenly. There is nothing complicated about this, just don’t miss this moment.
The central boards (corner) should be painted only on the outside so that the inside retains its reflective ability.
Step-by-step photos of production:
Wooden corner shelf in a semicircle
To make such a shelf with your own hands, you will need a milling machine and a piece of MDF. To make it more aesthetically pleasing, we recommend that you stick a special tape on the ends; this is done using an iron)))
Step-by-step photos of production:
Photo source: could not be determined((
Electrical equipment
Convenient cutting with a mobile and practical electric jigsaw. It makes cuts quickly and accurately, it is easy to work with and does not require any special effort. However, you need to carefully monitor the cutting process, press the jigsaw against the plywood, avoiding jerky movements.
As for the electric and circular saws, they are best used for thick plywood. The tool makes cuts very quickly, but you need to work with such devices with the utmost care. There is a high probability of material damage and chipping. And the cost of such tools is much higher. Therefore, the best option for a home shelf is a mechanical jigsaw.
DIY wooden rack
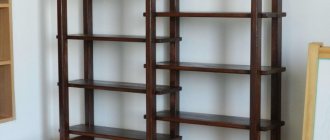
With fresh, clean lines, simple, durable construction and a contemporary design, this shelving unit will suit any room decor. The credo of many great 20th century architects was “form follows function,” and this bookcase is proof of that. Durable shelves are mounted on equally durable racks. No decorations, unnecessary details, even the back does not overshadow the ideal geometry.
The design is really surprisingly simple, so making a modern wooden shelving unit with your own hands is quite possible. Long threaded rods are hidden inside and firmly tie the entire rack together.
There are no corners to cut, no traditional grooves. Finishing is also practically unnecessary, because all parts are processed before assembly. The rack is made of laminated plywood, so it looks solid, as if it were made of solid wood. You will need a saw, a plane, a jointer, a drilling machine, a drill, and you can see the assembly procedure in the step-by-step photographs.
The size of the rack can be made at your discretion. Do you want it to cover an entire wall (even around a window) with enough shelves to house an entire library? You can do it! Cabinet shelves can be easily made to any size. Need a small shelving unit? No problem either. Familiarize yourself with the drawings, adhering to the proportions, you can assemble a structure of any size, just by changing the distances between the holes or simply reducing and increasing the number of shelves.
Photo source www.popularwoodworking.com/projects/aw-extra-contemporary-bookcase
Corner floor-standing bookshelf (cabinet)
(with your own hands in 2 hours!!! drawings and step-by-step photos of production)
The author claims that he managed to make all the parts of the shelf and assemble the entire structure in 2 hours. The rest of the time was spent on painting, varnishing and drying.
The very design of such a shelf suggests that not a single nail will be needed to make it.
It is important that all the shelves sit very tightly in their places so that the shelf does not wobble. If the connecting holes are unsuccessful and some shelves wobble in their places, then the shelves in these places can be screwed or, as the author advises, simply drive pieces and splinters of wood into the grooves
We also recommend that you remember to screw the shelf to the wall so that it does not accidentally fall)))
Floor shelf or table with shelves for the kitchen
Most likely, this option applies more to tables than to shelves. But still, we placed this model here because... We hope that this option for organizing personal information will be interesting to you, and most importantly useful, because... When arranging your home, you need to keep in mind all the options!!!
See below step-by-step photos of the master class
Photo source: dailyinteriordesignblog.com Author Photos: Josh Rhodes and Elsie Larson
Large wooden home rack
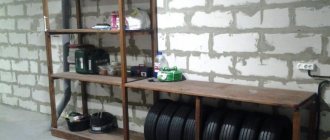
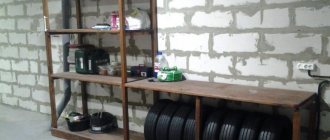
Using these step-by-step photos, you can easily make with your own hands such a huge and simple wooden rack, which is suitable for the garage, for the home, for the store, for storing toys, for flowers, for books and for storing old unnecessary things in the utility room
DIY portable shelf
An excellent option for a simple wooden shoe rack that you can easily make with your own hands from wood. This shelf has a large surface area, which means you can put more of your shoes on it. This shelf is also perfect for toys, books, tools, shoes and other things. The shelf is highly mobile, which means that you can place it at any time wherever you might suddenly need it.
Shelf bench for shoes, toys and books
It won’t be difficult for you to make such a simple wooden shelf for your hallway with your own hands. Check out the step-by-step photos below to see how this is done. The bench shelf is suitable in the hallway for shoes, in the bathroom, in the children's room for toys, in the room for books, magazines and newspapers.
Preparatory work
A homemade plywood shelf is a wonderful decoration for any room. First you need to understand for what purpose the shelf will be used and what size it should be. The master determines what width, height and depth the product will have, as well as what type of product it will be (wall-mounted or floor-mounted). It is important that the product fits into the overall design of the room and does not create a contrast in the interior.
The design, shape and size of the part determines which room it will be in and what task it will perform. For example, a small shelf of several elements can be used to store various small items, jewelry, figurines, kitchen spices or products.
A large product made of many elements is suitable for storing books, tools, clothes, and toys. A modular design is often installed in a children's room, living room, or hallway. You definitely need to decide for what purpose the shelf will be used - for shoes, books, groceries, equipment.
Shelf cabinet
Many craftsmen, having opted for a shelf-cabinet for shoes, begin to doubt their abilities. And the first question that worries them is: “How to make a shelf-cabinet for shoes yourself?”
It's actually not that difficult. First you need to prepare all the necessary materials, and you can safely get to work.
And so, for a shoe rack - a cabinet with parameters 1100*700*250 you will need:
- Chipboard 1.6 cm, size 110*25 cm, 2 pcs.;
- Chipboard 1.6 cm. 66.8*25 cm., 3 pcs.;
- Chipboard 1.6 cm. 52.6*25 cm., 2 pcs.;
- Chipboard 1.6 cm. 31.1*51.8 cm., 4 pcs.;
- Chipboard 1.0 cm. 51.0*14.0 cm., 4 pcs.;
- Chipboard 1.0 cm. 51.0*13.5 cm., 4 pcs.;
- Chipboard 1.0 cm. 51.0*8.5 cm., 4 pcs.;
- Fibreboard 0.3 cm. 69.6*109.6 cm., 1 pc.
List of accessories:
- 4 sets of shoe boots;
- 4 handles;
- 6 pcs. thrust bearings;
- self-tapping screws;
- confirmations;
- Double-sided tape.
For all this work you will need the following tool:
- screwdriver;
- corner, screwdriver, tape measure;
- bit for working with confirmants;
- bit for self-tapping screws;
- drill for confirmation;
- awl.
We proceed directly to assembling the shoe rack. The first thing to do is assemble the frame and install the internal parts. Next we install the fiberboard back wall.
Now, the most time consuming part of the assembly is attaching the opening mechanism. On the sidewalls we mark the places where we will have fasteners and a stop pin, and screw the panels to the sidewalls.
To attach the overshoes, it is also better to use the diagram that comes with the kit.
The next step is to fasten the facades, handles and bearings and the assembly is completed.
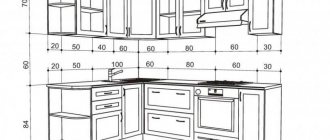
Schemes and drawings of shelves for the kitchen
To make anything, even a regular kitchen shelf, you need a plan. A diagram or drawing is already half the battle. Usually difficulties arise with proportions; you can’t always rely on your own eye, so it’s better to use a ready-made, tested scheme.
For example, do you like this cute country style shelf? Interesting solution, right? Cornice with a decorative pattern in the shape of an apple, back wall assembled from clapboard. If you want the same for your kitchen, use this scheme.
Or another option for a beautiful carved shelf in the same style
This collection contains diagrams and drawings of various shelves and cabinets for the kitchen, as well as methods for attaching the shelf to the wall, assembling the bracket and installing the shelf in the bracket. It will also be easier for you to understand the proportions if you have a ready-made diagram
which you can do yourself
You can see all the variety of kitchen shelves in this gallery.
from beer bars do it yourself to the kitchen
Let's look at how to make a kitchen shelf (rack) from glass beer bottles with your own hands. If you already have four beer bottles (or champagne bottles) and two boards, then consider that you have already done half the work. Of course, in addition to this, you will also need inexpensive fasteners, which can be bought at almost any hardware store.
Choose beer bottles with long necks.
The boards for the shelves are sanded and covered with dark varnish.
Surprisingly, these kitchen shelves made from glass bottles are distinguished by their durability, as they can withstand the weight of an adult.
By placing one such shelf on another you will get a kitchen rack made of glass bottles.
See step-by-step photos of the master class:
The source of the photo could not be determined(((
Save
Shelves and shelves for the kitchen
The kitchen is a room where functionality is the basis for everything. As a rule, it is difficult to find free space for shelves in the kitchen, since all the space is occupied by cabinets. Therefore, the task is to find free space and use it for its intended purpose. Such free spaces can be found within the location of household appliances, such as a refrigerator, for example. As an option, you can make a shelf on wheels that could easily move out and hide back. It is quite narrow and wide, as can be seen in the photo.
There are many interesting ideas that will help you use all your free space economically. If the sink and table are located within the window, then it is quite natural to start arranging the sides. An equally interesting option is a grid on chains from which all kinds of kitchen utensils are hung, although such a shelf can be built if the table is moved away from the wall. You can save space in another way if the zoned kitchen-dining room is equipped with a counter. Above this counter is placed a similar shelf, which will be partially suspended, since one side of the shelf will be attached to the wall, and the other will rest on the counter or will be suspended from the ceiling.
As a rule, all free space above the desktop is covered with cabinets. In fact, this is not the best option, since they do not add lightness to the kitchen interior. The best way out is to create open shelves between the cabinets. As a result, the work area will not look so heavy.
= What can shelves be made from?
| made of wood Example: DIY flower shelves 230 | from metal pipes Example: DIY pipe shelves | from PVC pipes |
| made of cardboard Example: Shelf rack made of cardboard boxes | from paper | from plasterboard |
| from glass Example: Shelves in Art Nouveau style 180 do-it-yourself photos | from old boxes Example: DIY drawer shelves 120 photos | from pallets pallets |
| stainless steel | from glass | from old stairs |
| From bars | from bottles Example: | from driftwood and branches Example: Bookshelf made of branches and driftwood |
| made of bricks Example: | from newspapers Example: Newspaper shelf | From cans Example: DIY kitchen shelves: 456 photos, drawings, instructions |
Drawing up a drawing
It is not difficult to draw up a drawing for the manufacture of a part yourself; even a beginner can do it. If we are talking about a simple shelf, it is enough to determine the width and length of the elements, which are then connected with nails or screws.
Let's say you need to make a small shelf in the hallway. Such a product will consist of only 2-3 horizontal and 2 vertical elements. You can make a drawing of such a product in just a few minutes by making a simple sketch.
In the article you can find photos of ready-made drawings. The indicated dimensions must be transferred to paper or cardboard, and then cut out unique blanks for the plywood shelf with a stationery knife. The drawings, like stencils, will then be laid on the material; you just need to cut out the elements of the future product along the lines.
= Methods for attaching shelves:
| On belts Example: | On brackets Example: Upside Down Bookshelf | On hinges (hidden shelves) or hinged pins Example: Secret door - wardrobe and book shelf |
| On strings | On the ropes | On pins |
| On clamps Example: Rack of 3 pipes from floor to ceiling. | On perforated guides |
= What types of shelves are there:
| Corner Example: DIY corner shelf 230 photos | Wall mounted Example: Wooden bathroom shelf | Mounted Example: Shelves in Art Nouveau style 180 do-it-yourself photos |
| Hanging | Floor-standing Example: DIY floor shelf in 45 minutes | Under the ceiling Example: Making a shelf for books under the ceiling |
| Shelving Example: DIY pipe shelving: 180 photos, instructions, diagrams | Whatnot | Shelf - Invisible Example: Invisible bookshelf |
Save
Save
Materials for making shelves
If we talk specifically about homemade structures, wood is most often used. Moreover, there are many options here.
These can be either ordinary boards or sheet materials in the form of plywood, chipboard or MDF. Some people use leftover OSB (although the material has no aesthetic qualities). Others specially prepare pieces of logs, as well as saw cuts and thick tree branches.
But the most accessible and popular material is boards. You can buy them in the store, or you can prepare them yourself by sawing a log.
You can also “get” boards for free by dismantling old wooden pallets. For many, they have been lying around idle for years.
You can read in detail how to make a shelf out of wood with your own hands on our website in our article.
This is just one of the possible options using boards and bars. Very simple, by the way. So take note.
Another popular material is metal. Most often these are profile pipes or strips. But you can use any rolled metal that catches your eye.
Metal structures are durable and can withstand significant loads. However, to work with metal you will need additional tools in the form of a grinder and a welding machine. However, sometimes you can do without welding by using bolted connections of parts.
Shelves can be made from other materials. For example, made of glass or plastic. In the first case, you will have to sweat a little, because working with glass is quite a task.
It’s not for you to cut wood “by eye” or cook metal according to the principle: “Oh, it’ll do just like that!” This requires accuracy, patience and sometimes even pinpoint precision in the glass cutting process.
With plastic, of course, everything is much simpler. It will also be much easier to make shelves from wood. Some people prefer to make shelves from cement mortar. But most often these are floor structures or small hanging shelves.
Sawing tools
Cutting plywood at home can be done using the following tools:
- regular hand saw;
- electrical;
- disk;
- electric jigsaw.
It is believed that it is better to use a regular handsaw for the job. First of all, there is no need to spend money on an expensive electric tool. And secondly, when working with a hand saw, the master has complete control over the process, so the likelihood of chipping is minimal. The only disadvantage of a hand saw is the physical effort that needs to be applied to cut plywood.
DIY wine bottle rack
Shown here is a concrete example of how to make a large wine rack for storage in a basement or other appropriately sized room. The dimensions were chosen to suit the height of the basement. The width was determined by two factors: not needing additional support in the center, and the need to remodel part of the basement around a pair of these wine racks (needing faux brick veneer on the wall between the racks).
This is a relatively complex project, so the author tried to share his experience as clearly as possible through step-by-step photos. If you change the size of the holes, the author of the project suggests making a mockup and checking the distance between the shelves using different bottles. You may need to change the distance between shelves. This will also have to be done if you have boards of different thicknesses. Adjust the dimensions for your intended height. In this case, the height is 205 cm, the width is 100 cm and the depth is 25 cm. 7 bottles fit on the shelf. (70 bottles per rack).
You can look at the sketch, if you understand something, don’t judge strictly, it’s just an amateur drawing.
Tools
- Table saw
- Mitral saw
- Electric drill
- Right Angle Adapter
- Roulette
- Drill bits
- Screwdriver for screws
- Clamps
Below, see step-by-step photos of cutting the parts.
And here we show you how to assemble a wine rack. Make a template on cardboard first to speed up the process of marking the spots for the holes. Here the shelf supports are located at a distance of 17 cm. With the first shelf 25 mm from the floor. Using the template and starting from the bottom, mark all the hole locations. Check all joints with a square to make sure they are square. Drive the screws into the shelf support. Start from the bottom and work your way to the top. The thickness of the shelf boards and the dimensions of the holes must correspond to the template. Use spacers to push the front shelf closer to the rear shelf. This ensures that the bottles are in a stable position. Attach the bottom shelves (one or two) first, then one of the top ones to make sure the spacing between the studs is consistent throughout. Then go back and install the remaining shelves. Depending on the floor level, you will need to install a spacer or board under the legs to balance the shelf. This will prevent it from wobbling on uneven surfaces.
Photo source: www.instructables.com/id/Wine-Rack-Tower/
Pallet shoe rack
Unusual furniture and decorative items made from pallets are becoming increasingly popular every year. It would seem like a simple transportation material, but nevertheless you can make a lot out of it, even a shelf for shoes.
Necessary materials:
- wooden pallet;
- Sander;
- sandpaper;
- protective dust mask;
- moisture-proof primer for wood;
- gloves;
- stain or paint;
- brush;
- soft rags;
- Matt lacquer;
- brush.
If necessary, clean the tray from dust and dirt. After this, we process it with sandpaper to remove any unevenness. Brush off all the dust and wipe the tray with a damp cloth.
Apply primer to the entire surface of the pallet. This is necessary in order to protect it from moisture and prepare it for painting. After complete drying, apply a thin layer of paint and leave for several hours.
We cover the tray with matte varnish. After drying, you can apply a drawing or text using a stencil, paint and brush.
If desired, the top of the shelf can be decorated with stones, plants or other decorative elements.
Necessary materials
First of all, you need to prepare the plywood itself. When purchasing material, you should pay attention to the thickness of the plywood. The thicker it is, the better. This indicator depends on the number of layers of veneer. It is not recommended to purchase plywood made of three layers, as it is not reliable. It is better to give preference to products made from 5-6 layers. Of course, such material will cost more, but it is better not to save in this matter.
To make beautiful shelves from plywood, you should prepare paper for the drawing and a stationery knife for cutting the paper drawing, a pencil and a tape measure. It is imperative to have a simple jigsaw for cutting plywood, or a special milling machine.
In addition, you must have:
- hank or drill;
- nails or screws;
- paint and varnish;
- brush, roller or spray;
- decorative elements, if necessary.
How to make a cardboard rack with your own hands
We will conduct a master class on making cardboard shelves with your own hands.
Necessary materials and tools
The only tools you will need are a stationery knife or jigsaw, a glue gun, a simple pencil, a tape measure, and a plastic or wooden ruler.
Cardboard does not contain harmful, toxic or other hazardous substances.
Materials (part optional):
- Cardboard, thick wrapping paper, tracing paper.
- Moment glue, adhesive tape.
- Plastic clips.
- Emery for sanding joints and cuts.
You don’t have to waste time searching for a practical, something you like that will fit perfectly into your interior.
You can speed up the drying of glued structural elements using a regular household hair dryer.
A hairdryer will help dry the cardboard product faster.
Instructions for creating a rack
Let's make the simplest rack from the same type of cardboard boxes. We don't even need a sketch and drawing. No need to take measurements or cut grooves. We already have ready-made storage system elements.
The service life of cardboard furniture will be long if it has not been exposed to moisture and has been correctly processed during creation.
Algorithm of actions:
- Step 1. Take boxes of the same type.
- Step 2. Cut off the lids with scissors.
- Step 3. Connect the boxes to each other. For fastening, you can use glue, tape, or plastic clips.
- Step 4. The lightweight and mobile storage system is ready.
Let's complicate the design a little.
- Step 5. Assemble and fasten smaller drawers. Cut out a rectangular hole in the front of each box.
- Step 6. We get a few more cute drawers for storing shirts, towels and all sorts of small things.
- Step 7. And if we make (or select) boxes in such a way that four pieces fit freely into one compartment of the shelf we previously made, then we will complement the new storage system with drawers. For convenience, they can be signed. It will be easier to find where everything is.
- Step 8. So we made the simplest cardboard bookcase with our own hands.
Some shelves may not be equipped with drawers. We will put larger items here.
Design the finished shelving to your liking.
The ends can be covered with wrapping paper or tracing paper, and then varnish can be applied to all structural elements. Even old newspapers and pages of glossy magazines can become the basis for paintwork. A good decorative option is vinyl film for furniture.
You can decorate cardboard products with your own hands from any materials, it all depends on your wishes and fantasies - there are many options.
Making a glass shelf
Glass shelf
Glass shelves fit harmoniously into any interior, and the installation process does not take much time. To work you will need:
- strained glass;
- hammer;
- electric drill;
- building level;
- aluminum profile;
- dowels;
- adhesive tape;
- ruler;
- pencil.
Not everyone knows how to cut glass correctly, and therefore it is better to order the cutting of blanks in a workshop. There they will also grind and polish the edges so that when installing the shelf you will not cut yourself on sharp edges. You can do everything else yourself.
Glass shelf
Step 1. Marking for fasteners
Marking
The section of the wall where the shelf will hang should be as level as possible. Using a building level, draw a horizontal line on the wall with a pencil. The locations of the fasteners are marked on the line and holes are drilled.
Drilling holes
Step 2. Installing profiles
Holders for glass shelves
Profile for glass shelves
An aluminum profile is applied to the wall surface and the alignment of the fastening marks is checked. Then insert dowels into the holes, attach the profile with one screw and level it horizontally. After this, tighten the remaining screws.
Insert the dowel Insert the dowel Instead of a drill, insert a bracket screw
Screw in the bracket screw
Leave the bracket screw protruding from the wall
We put on the washer
Screw on the bracket
Checking the position
Arranging the shelves
Step 3. Attaching the shelf
The rear edge of the glass shelf is covered with adhesive tape. You can use separate spacers made of tape, placing them where the glass will touch the screw heads. The shelf is inserted into the profile, the edges of the profile are covered with protective caps. If two shelves touch on the sides, their edges are fastened with metal fittings.
How to make a book shelf with your own hands
Furniture manufacturers offer a fairly large assortment of bookshelves, racks and cabinets of various designs and prices. You can buy shelves for books, or you can make them yourself, which is not at all difficult. To make a bookcase, cabinet or shelf yourself, all you need to do is draw up a project, buy the material, have the necessary tools and minimal experience working with it.
The simplest shelf you can make yourself
So, in order to make a bookshelf with your own hands, you may need the following materials:
- laminated chipboard or MDF;
- wood or plywood;
- plastic;
- glass;
- metal.
Related article:
Laminated chipboard is the most common material for making bookshelves
You can use one of these materials or combine them, which will create quite original shelves for books. As for tools and components, you will definitely need:
- tape measure and ruler;
- electric drill and screwdriver;
- Screwdriver Set;
- nozzles for tightening fasteners;
- stainless steel furniture pipe with Æ16 or 32 mm;
- confirmations;
- screws 16×3.5, 20×3.5, 30×3.5 and 50×3.5 mm;
- edge;
- iron or hair dryer;
- PVA glue.
Necessary tools for making furniture
We make our own bookshelf from wood or chipboard
In order to make any furniture, you first need to create a sketch and drawing. We have already written about how to do this using the PRO100 program on the pages of our online magazine in the article “How to make a wardrobe with your own hands.” If it is not possible to use the program, then the drawing can be made on a regular notebook sheet in a box, where each cell will indicate 10 mm. We will show you how to make a designer book shelf using the PRO100 program as an example. As already mentioned, a designer item is something that is made in very limited quantities.
Photo Description of work
First, let's model our rack. This visualization will help you imagine how the finished shelf will look in the interior.
For ease of work, you can divide the sketch into separate parts. At this stage, you can already accurately determine the dimensions, which means choosing the right raw materials and accessories for assembling the shelf.
The sketch shows the basic fastening points
Connecting using cokes (cylindrical wooden pegs) is the most difficult option, since additional devices and maximum care and attention are required. In principle, the same can be said about rafixes and minifixes.
Assembly diagram on minifixes
This method is difficult for a novice furniture maker, since it is necessary to make very precise markings of the joints of two parts. However, the advantages of this type of fastening are that, if necessary, the shelf can be disassembled and assembled many times, and the structure will not become loose over time. In addition, the peculiarity of this fastener allows you to make the connection point invisible from the outside, which cannot be said about confirmations.
Assembly diagram using minifix and additional reinforcement with cokes. On narrow parts, when there is only one fastener on each side, additional fastening is needed, which will be provided by wooden pegs (cokes), completely hidden.
Beginners can master this simplified version of the shelf. And if you have carpentry experience, if you have the material, tools, imagination and desire, you can make the most unusual shelves for books on the wall.
The cost of homemade structures is much cheaper than purchased ones, and you also get the pleasure of knowing that they are made by yourself and are unique.
Related article:
DIY book shelving
Using the same principle as described above, you can make bookshelves. The difference lies only in the dimensions of the structures. Shelving can be made in almost any size and used as partitions, as well as for zoning space in studio apartments. Such book storage systems can be made of wood, chipboard, metal, and even scrap materials (pipes, pallets or logs).
Detailing of the rackThe joints of the parts are marked in red
1 of 4
Watch this video on YouTube
Shelf with closed sides
In many cases, this design is more preferable (for example, for books). Algorithm of actions:
- Make a frame from timber. To do this, you need four supports of suitable length.
- Fix two beams on the wall at a distance the length of the shelf.
- The distance to the depth of the shelf on the ceiling is measured. Using a plumb line they are transferred to the floor.
- External racks are fixed.
- Make markings for the shelves, as in the previous version.
- At the received marks, screw the corners to the bars.
- Place the cut plywood on the corners and secure it with self-tapping screws.
This way you can easily get durable and functional shelves to accommodate a wide variety of items.
Leave your tips and comments below. Subscribe to our newsletter. Good luck to you and good luck to your family!
Peculiarities
The most important specificity of plywood shelves is convenience and simplicity. Pressed veneer can be obtained from both birch and coniferous wood. Various types of plywood can be used to make shelves.
By the markings you can judge what kind of glue was used. Depending on its composition, the sheets are:
- flame resistant;
- moisture resistant;
- susceptible to moisture.
There may be some difference in processing methods. Sanded plywood is quite common. Sanding is done on one or both sides. The last option is optimal.
In the vast majority of cases, plywood is produced using the circular peeling method. But, for aesthetic reasons, in some cases it is more profitable to use material that has been peeled with eccentric torsion of the workpiece. With flat planing, you can achieve a strictly specified type of pattern in accordance with the progress of processing. For the most complex aesthetic effects, veneer is obtained by sawing (this technique eliminates the requirements for preliminary preparation and ensures the production of natural patterns with a natural range of tones).
For work, you can take plywood brands:
- FSF;
- FC (much better than the previous option, but with less moisture resistance);
- FB;
- FBS (with the maximum level of strength and resistance to moisture);
- FBA (all natural material).
How can plywood be treated?
Many people wonder how to process plywood to make the finished product look attractive and stylish. Most often, paint is used to process the material. With its help you can give the product any shade. It is better to choose abrasion-resistant matte paint. In this case, the shelf can be washed, and it will retain its attractive appearance for a long time.
In addition, protective varnish with or without the addition of dyes can be used for processing. Additionally, you may need to use a special wood putty. It is necessary to level the surface of the plywood.
DIY flower shelf-screen
The shelves may be different, but you can always come up with something original. We suggest you make a flower screen shelf with your own hands, a very convenient thing to divide the room space. Moreover, this is not just a mobile partition, but also a flower rack, so it will perform two functions at once.
The dimensions of the screen can be chosen arbitrarily; you can make it, for example, according to this scheme. We will need:
- two 20 mm boards 2.5 meters long;
- 5 pieces of wooden blocks;
- self-tapping screws, clamping screws, beech tenons;
- glue, putty, acrylic paint.
First of all, we make two side frames. Then, in the corners and for the middle shelf, we make holes for confirmations, and at the ends of the bars that will go under the vertical posts, we drill holes for tenons. We also drill holes at the ends of the crossbars and put wooden tenons on glue. We tighten the vertical posts and crossbars with screws, and place the short crossbars on spikes. We seal all the cracks with putty. Then these places need to be sanded (when the putty dries). We prepare the shelves. To do this, we cut off the corners at the bottom and middle shelves and fasten them to the frame with self-tapping screws. We fasten the partitions using confirmations. Then we screw the crossbars under the wheels. All that remains is to paint and arrange the flower pots. Photo source supersadovnik.ru
Shelf-shelf
We present to your attention two ideas for shelving shelves that you can easily implement yourself.
The first one from a 40 mm edged board is extremely simple. The bookcase is assembled:
- made of two boards, beveled at the top by 30° to provide support;
- shelves cut from furniture board.
The height and width of the structure are arbitrary and selected locally. If desired, the bookcase can be fixed in the upper part, and rubber heels can be placed along the bottom of the boards.
The second one is S-shaped. For manufacturing, you can use scrap boards, plywood or chipboard. One section of the structure requires 16 rectangular blanks, for example, 300x150 mm.
The blanks are installed in a certain order, three at each stage.
The first blank is placed on the floor. A second one is attached to it at a right angle, joining them widthwise on the left. The third in width is joined to the first in its length, starting from the far right corner.
The fourth, fifth, sixth are assembled symmetrically, exactly the opposite.
It is very simple to check how correctly the figure has formed: the second, third and fourth boards should form the letter S.
Experienced craftsmen advise first to assemble the structure roughly onto wooden pins and fit the blanks, and when disassembling, number the parts at the end.
Each part is then sanded with sandpaper and they begin to be assembled according to numbering. PVA glue is applied to the joint lines and grooves and clamped tightly, holding it in this state for some time.
The assembled shelf is varnished or painted.
