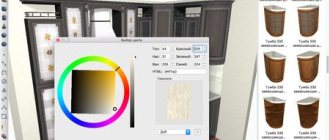
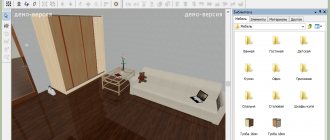
No furniture production can do without construction and design systems for 3D modeling. With them, you can create unique designer furniture with just a click! In addition, many programs also allow interior planning to create a complete picture of how the product will fit into the overall design of the room. Also, software solutions for creating furniture are necessary for working with the customer, because a person always wants to see what he is paying for.
Let's look at the most popular programs from this segment.
VOLUMENIK
Volume is a full-featured software solution for furniture design and interior design development, created and actively used in existing production. Work with furniture in this program is carried out according to a parametric model. This means that every single element in the internal library, whether added manually or designed from scratch, can be easily edited using standard tools. The position in space, angles, dimensional, design and many other parameters can be changed here.
This designer is primarily aimed at companies and enterprises that manufacture and sell furniture. The Volume Manager can be used by sales floor managers, designers, constructors, and managers - for each there is appropriate functionality and a set of specialized tools necessary for work. In the program you can easily create databases and store your own projects in them, calculate costs and cut sheet materials. You can view the finished project not only in schematic form, but also in realistic 3D. The last option is exactly what every client wants to see.
The volumetric unit consists of several modules that are installed on the computer along with the mother design program. These include the Graphic Editor (the main working component), Volume Cutting, updated Databases for 2022 and 2022, as well as an extensive help system and user manual. Speaking about built-in databases, it should be noted that the program initially contains ready-made models of kitchens, cabinets, doors, windows, tables, chairs, household appliances, and many other furniture and interior elements. Among other things, it is possible to create your own scripts. Those who are just starting to master this software can download and use template scripts for their projects, which are abundantly presented on the official website.
Calculation example
Let's look at the details of the cabinet with dimensions of 720 mm high, 500 mm wide and 450 mm deep. Furniture consists of parts, the name of which indicates their location in the structure - bottom, sides, slats, lid, shelf, back wall and facade.
Bottom
Cabinet depth 450 mm. The depth of the bottom is separated from the total depth by the facade, the thickness of which is 20 mm. This means the depth of the bottom is 450 - 20 = 430. The width of the bottom is 500 mm, this is clearly visible in the diagram - no parts separate the bottom width from the total width.
500*430 – 1 Bottom
Planks
The strips are located between the sidewalls, and the total width of the body is 500 mm and the thickness of the plate is 16 mm. From the width of the cabinet we subtract two sidewalls 500 mm -32 mm (16+16) = 468 mm. Let's set the width for the slats to an arbitrary one - the smallest is 60 mm. As a result:
468*60-2 Planks
Sidewalls
Total height 720 mm. The sides are located in height between two parts, namely the bottom and the lid. Accordingly, 720 mm - 32 mm (16+16) = 688 mm. The façade is separated from the total depth by 450 mm -20 mm (façade) = 430 mm. We get:
688*430-2 Sidewalls
Lid
The size of the lid is equal in width and depth to the dimensions of the cabinet. The lid overhangs the facade, so the depth is 450 mm. In order for the lid to well cover the ends (cut of the plate) of the sidewalls, I add 1 mm to the width of the lid. As a result:
501*450 -1 Cover
Removable shelf
The shelf will be removable for ease of use. It is located between two sidewalls, which means its width is 500 mm -32 mm = 468 mm. Because The shelf is removable; we make a gap of 1 mm on the sides. The depth of the shelf is 20 mm. As a result:
466*410-1 Removable shelf.
Rear wall and façade
The back wall and facade are separated from the total height of the cabinet only by the lid, so 720 mm - 16 mm = 704 mm. A technological gap of 3-4 mm in height and width is required. Accordingly, the size of the facade is:
700*497-1 facade=rear wall fiberboard or HDF.
Total:
- 500*430-1 bottom
- 468*60-2 strips
- 688*430-2 sidewalls
- 501*450-1 cover
- 466*410-1 removable shelf
- 700*496-1 facade
- 700*496-1 rear wall
Example of kitchen wall cabinet detailing
It is important for me to see the location of the part in the design and then the process goes smoothly. Moreover, you can always check the dimensions of the parts when the diagram is in front of your eyes. The picture shows a diagram of the assembly of a standard kitchen cabinet.
In this article you will find assembly diagrams with details of standard kitchen modules
- 720*280-2 sidewalls
- 268*280-2 horizons
- 266*260-1 removable shelf
- 716*296-1 facade
- 716*296-1 DVPO
Example of cabinet calculation
Let's complicate the task a little. Let's calculate a cabinet wardrobe with hinged doors, where the internal size will be specified. I recommend that you calculate it yourself and then check it with my details.
Click here to see cabinet detailing
- 2168*500-2 sidewalls
- 900*500-1 bottom
- 902*520-1 roof
- 1680*495-1 partition
- 868*495-1 horizon
- 318*495-5 shelves
- 2180*446-2 facades
- 2196*896-1 rear wall
Even if they made mistakes, it was simply due to carelessness. I admit that technologists make most mistakes this way. Because it is difficult to make a mathematical mistake in such simple actions.
SketchUP
SketchUp is one of the simplest and most intuitive systems for 3D modeling. It is presented in two versions – paid and free. Of course, the paid version offers many more possibilities, but even in the free version you can create many, many interesting projects. SketchUp allows you to create models using simple tools: lines, angles, arcs, geometric shapes. With their help, you can manually draw any interior detail. But if you don’t want to draw, you can also download and upload ready-made models from the official website or the Internet.
In addition to simple tools, this program also has a number of its own features. For example, the Push/Pull tool allows you to build walls simply by dragging lines. In SketchUp, you can go into inspection mode and examine your model, as if playing for a person. This allows you to examine the object from all angles and compare dimensions. And another interesting feature is importing terrain from maps and exporting models to a map. This opportunity is provided to you by Google Earth.
Video tutorial on working in SketchUp
PRO100
PRO100 is a popular 3D modeling program that is distinguished by its simplicity and professional solutions. With its help, you can create high-quality projects and sketches in the shortest possible time. You can make changes directly in the presence of the customer, as it will take very little time.
Video tutorial on working in PRO100
PRO100 has a standard library with a large number of objects and materials, but in case that is not enough for you, you can create your own materials from a photograph or draw. You can create new furniture from existing elements or by downloading additional libraries from the Internet.
One of the features of this product is that it keeps track of the materials spent, so at the end of the project, you can generate a report that will indicate all the costs. Unfortunately, this is only available in the full paid version.
Also, here you will find many modes that will help you display your project in the most successful way. You can choose one of seven projections that will show the model from different sides and from different angles. And also select drawing mode, photorealism, shadows, transparency and others.
KitchenDraw
KitchenDraw is a powerful professional 3D modeling system. It is mainly created for designing kitchens and bathrooms, as well as kitchen furniture. In the program you will find a large set of elementary objects with which you can create from scratch any element of the required size and design.
The special feature of this product is the high quality image. In KitchenDraw you'll find a Photo Realistic mode that turns your drawing into a vibrant photograph. Another interesting point. In KitchenDraw, you can inspect your model in Walking Mode. But you can also record your walk and create an animated video based on it for presenting the project.
Unfortunately, this tool is not distributed free of charge; moreover, you pay not for the program itself, but for an hour of using it, which is not very convenient.
Bonus: 3D program for arranging furniture in an apartment
Do you want to plan the arrangement of furniture in the room? 3D Interior Design will help you see how the new furnishings will look in a real apartment, as well as come up with the right layout depending on the size of the room. This is a great assistant for both professional visualization designers and amateurs. A simple and intuitive interface, a ready-made collection of household items and a built-in estimate calculator will help with repairs, redevelopment and simply changing the design of your apartment.
Think about your furniture arrangement now! Download the Interior Design 3D program:
Works great on Windows 10, 8, 7, Vista, XP
Astra Constructor Furniture
One of the most understandable systems for 3D modeling is Astra Constructor Furniture. This program is aimed at medium and small furniture manufacturing businesses. It has a certain set of tools sufficient for comfortable work. A simple and clear interface attracts users. In Astra Constructor you can create a product from scratch using elements of the standard library. You can completely select the fittings and fastenings yourself, as well as create free-form parts.
Also in this system you can edit any detail and this is a huge plus. Despite the fact that Astra Constructor performs almost all actions automatically, you can correct everything: the drawing, the shape of the door handle, the thickness of the shelf, corners and more. Not every program allows you to do this.
How to Design a Very Small Kitchen
In a small kitchen, use every useful inch. Even small rooms can be made cozy, convenient and comfortable.
- If possible, move the dining area to another room. This way you can create your workspace as comfortably as possible.
- Remove doors with hinges that open into the room. Make an arch or sliding structure.
- Make a kitchen set to order or do it yourself. Only individual measurements will give you maximum functionality of the furniture.
- Take your room design seriously. Make a kitchen in light colors without large patterns with light-reflecting surfaces.
If you follow the recommendations, even from a very small room you can extract the maximum useful space.
Now that you know almost everything about the layout, location of appliances and outlets, it's time to take a critical look at the kitchen. You may want to improve and transform something, replace or create something with your own hands.
Basis-Furniture Maker
Basis-Furniture-Constructor is a powerful modern system for 3D modeling. It contains 5 modules: Basis-Furniture Maker - main module, Basis-Closet, Basis-Cutting, Basis-Estimate, Basis-Packaging. Also on the official website you can download additional modules if the need arises. The peculiarity of Basis-Furniture Maker is that with the help of this system you can completely streamline the furniture production process. Each module is designed to perform tasks at different stages of production: from drawing to packaging. This is very convenient for large and medium-sized companies.
Here you will find all the necessary tools, as well as a wide variety of libraries: drawers, doors, fasteners, fittings, materials and others. You can also create your own libraries, but, unfortunately, this is only available in the full version.
Basis-Furniture Maker is a professional system and is quite difficult for an ordinary user to get used to. If you decide to start working with Basis-Furniture Maker, you should watch several training videos, otherwise it’s easy to get confused.
Lesson: How to create a furniture design using Basis-Furniture Maker
Design features of the kitchen set
After you have created a sketch, made accurate calculations, chosen a layout and decided on the material, you transfer the drawings to the workshop. Designs of kitchen sets with dimensions, creation of details, selection of accessories can be left to professionals. In the workshops, wood is cut into the necessary parts.
The sketches are transferred to the workshop for cutting out parts from wood.
Basis-Closet
Basis-Closet is a module of the Basis-Furniture Maker system, which was mentioned above. It is used to design cabinet furniture, such as a wardrobe, cabinet, table, chest of drawers, doors, cabinets and others. Just like Basis-Furniture Maker, Basis-Closet is a paid program and only a demo version can be found on the official website. It contains a small set of elements for design, but it is quite enough for full-fledged work. Moreover, you can add your own components to the library.
The peculiarity of the program is that it works in semi-automatic mode. That is, while the user is working, Basis-Closet automatically makes calculations, arranges fasteners, adds shelves in the specified section... But all this can also be done manually. This is a great time saver, so creating a model in the Basis-Closet takes 5-10 minutes.
Kitchen unit layout options
The layout of the kitchen determines convenience and comfort during cooking and eating.
There are several options for positioning the headset.
Corner (L-shaped) placement
Classic placement of kitchen units in the shape of the letter “L”. This is an option for square or rectangular rooms. The rule of the “working triangle” is followed here, since there is a lot of free space in the middle. Corner placement of kitchen furniture is not suitable for a narrow or very small room.
Corner placement is considered classic and is suitable for square-shaped rooms.
U-shaped placement
U-shaped placement of the headset occupies three walls at once, usually two long and one short. Many household appliances can be placed here, including a washing machine and dishwasher. A large number of cabinets allows you to arrange all the services and kitchen appliances.
In a U-shaped arrangement, the furniture occupies three walls.
Peninsula accommodation
The peninsular planning method is a combination of the L-plan and the island one. Here one long wall and part of the second, short one are completely occupied. In this case, a small protrusion appears. That is, an “island” that is tightly adjacent to the entire kitchen structure of the unit. This is usually a small work desk with a lower cabinet, dividing the kitchen into a work and dining area. But there are other options.
The peninsula layout has a small overhang that is adjacent to the main structure.
Island location
The island layout combines elements of a linear and separate “island”. This is a combination of dining and work areas. One of the walls is occupied by a kitchen unit, and in the middle of the free space there is either an element of the work area or a dining table. The “island” can be of any size, from a bar counter for one to a huge table for a large family.
With an island arrangement, a working or dining area is located in the middle of the room.
Linear method of arrangement
The linear arrangement method is good for small rooms, studios or narrow kitchens. One of the walls is completely occupied by kitchen furniture and appliances. When cooking, a person moves in a straight line from the refrigerator to the sink to the stove. The remaining free space is allocated for a small dining area, folding table or bar counter.
With a linear placement method, all furniture and appliances are placed along one wall.
Double row arrangement
The double-row or parallel design method involves placing the headset and equipment along the walls “facing” each other. In this case, the sink and refrigerator are on one side, and the stove and cabinets are on the other. This option is suitable for a spacious kitchen with large, bright windows.
The two-row arrangement is also called parallel. It is suitable for a large spacious kitchen.
bCAD Furniture
bCAD Furniture is a powerful software package that contains everything necessary for furniture production. This is its peculiarity, since in other similar solutions additional modules must be purchased separately. Here everything is in one: drawings, cutting cards, estimates, 3D modeling, reports - these are tasks for which bCAD Furniture can be successfully used.
The program is easy to learn, and while working it will prompt you if you have any difficulties. Also bCAD works in semi-automatic mode. This means that this system does most of the routine work for you: arranging fasteners, creating drawings and cutting maps, adjusting dimensions... But at the same time, you can interfere with the work of the program and make your own adjustments. Powerful rendering tools allow you to create accurate drawings and photorealistic 3D images using OpenGL. Thanks to this, you can see and demonstrate the project to the customer in advance.
K3-Furniture
K3-Furniture is a powerful set of programs in Russian, with which you can fully automate production in small and large enterprises. Its peculiarity is that each module of the complex is customized for the enterprise that uses it.
The largest component of the system, K3-Mebel-PKM, is a module for the production of cabinet furniture that can be used independently. With its help, you can streamline the production process: from design to product sales.
The module also monitors the correctness of the model construction and automatically places fasteners, creates drawings and cutting maps.
Especially for small businesses, there is a K3-Furniture-AMBI module, which contains all the tools of the K3-Furniture complex, but with already selected settings for small businesses.
Here we consider only a small list of the most popular programs for 3D furniture modeling. We tried to select solutions for all categories: for enterprises, for designers, and for ordinary users who want to make repairs. We hope you will find something of your choice.
We are glad that we were able to help you solve the problem. In addition to this article, there are 12,585 more instructions on the site. Add the Lumpics.ru website to your bookmarks (CTRL+D) and we will definitely be useful to you. Thank the author and share the article on social networks.
Describe what didn't work for you. Our specialists will try to answer as quickly as possible.
