A person cannot do without bed linen. For pillowcases, sheets, and duvet covers, do not make patterns on paper. The drawing is made directly on the fabric. And questions about how to sew a pillowcase from a single piece of fabric or make it from scraps in a patchwork style rarely arise. Any, even the most inexperienced needlewoman can cope with this task - no complicated work with creating a pattern is required! Cutting squares/rectangles from fabric is easy.
This type of bed linen can be made of any type: with buttons, zippers, or wraparound. You can verify the above and try sewing a pillowcase yourself by using the instructions in this article.
A pillowcase is easy to sew; even a novice needlewoman can handle this job.
Choosing fabric for sewing pillowcases
You need to select fabric for pillowcases in accordance with their purpose. If this is a pillowcase for a pillow intended for sleeping, then the material should be soft and pleasant to the touch. Synthetic fabrics that tend to electrify are not suitable. The material should absorb moisture well, since people often sweat in their sleep.
Dense “non-breathable” fabrics can cause inflammation on the face when used for a long time. For bed linen, you can purchase chintz. It is inexpensive, also lightweight, absorbs moisture well and allows air to pass through.
Most often, this fabric has delicate colors in bed colors with small floral patterns. Chintz is easy to cut, the edges do not fray, and the fabric hardly wrinkles. This material has only 1 drawback - after 20 washes the color fades, and after 1 year the material loses strength and begins to tear. A more durable analogue of chintz is calico. It will last longer and will not lose its rich color after repeated washings. Calico does not wrinkle, and wrinkles that appear as a result of long-term storage are easy to smooth out.
The fabric does not irritate the skin, so it is often used for sewing baby bedding and diapers. The disadvantage of calico is the rapid formation of pellets, but they can be easily removed using a special device. Thin fabrics are not suitable for sewing pillowcases for feather pillows. Sharp feathers get knocked out and cause discomfort when resting.
The table shows the names of other materials suitable for bed pillowcases and their short characteristics:
| Textile | Peculiarity |
| Cotton | Resistant to frequent washing and will last longer than chintz. |
| Satin | Smooth shiny fabric, looks beautiful and expensive. |
| Linen | Strong and lightweight, keeps you cool in hot weather. |
| Batiste | Does not irritate sensitive skin. |
| Silk | Expensive and beautiful material. |
| Percale | Dense, soft and breathable. |
| Atlas | Shiny, looks expensive, but wrinkles a lot. |
| Viscose | Smooth texture with matte shine. |
| Crepe | Does not require ironing, wear-resistant. |
| Tencel | Budget analogue of silk. |
| Ranfors | Does not form pellets, does not crumble or shed. |
These materials give a feeling of coolness in the hot season. Pillowcases for winter can be made from flannel or terry. They also absorb moisture well, but at the same time heat up quickly and maintain heat. Sleeping pillowcases can be decorated with soft lace by sewing it over the ears. You can also tie the ears with threads, making them look like petals. This method of decoration is very popular in England. For decorative pillows that will be placed on the sofa as decoration, a rough material that is resistant to wear and tear is suitable. Velvet is considered a good option.
The fabric is pleasant to the touch and can last 2-4 years. In stores you can find a shade suitable for any interior.
If velvet is too expensive, then it can be replaced with velor. It has a short and pleasant-to-touch pile. Such fabrics need to be well looked after. If there are pets in the house, then the pillows need to be vacuumed or cleaned of hair, as small and light debris easily clings to them. The problem of sticky animal hair can be solved by sewing flock pillowcases. The material has short fibers, but does not become electrified and does not catch debris. In addition, it is very durable, pets will not be able to damage it with their claws.
Another option is chenille. This is a dense fabric with short pile and an engraved pattern. Chenille is often used for upholstery. Pillows in pillowcases made of this material will hold their shape well, so they can be used as back support while sitting on the sofa.
What other fabric is suitable for pillowcases on decorative pillows:
| Textile | Peculiarity |
| Teak | Durable water-repellent material. Suitable for sewing decorative pillowcases on a kitchen sofa. |
| Satin-jaquard | Sturdy, printed fabric |
| Jeans | One of the most durable fabrics, holds its shape well |
| Wool | Soft and pleasant to the touch texture |
| Gozhka | A rough material that looks like burlap. Suitable for loft style interiors. |
| Microvelvet | Fabric with short and stiff pile |
| Tricovelor | Velor with knitwear composition. Soft, holds its shape well. |
| Suede | Dense and wear-resistant |
| Scotchgard | Durable material with protective weave underneath |
| Arpatek | Does not fade in the sun and does not shed |
| Eco-leather | Soft PU leather, waterproof and comfortable to touch |
The most popular material is microfiber. This fabric is very soft and pleasant to the touch. In stores you can find any color: plain, with a pattern, from pastel to acidic colors. However, microfiber has a couple of disadvantages: pellets quickly form on it, and the fabric becomes electrified. Sofa pillowcases can be decorated with rhinestones, beads or voluminous embroidery. You can sew a patchwork product from scraps of fabrics of different colors and textures. Tassels made of threads are often sewn onto velvet pillows.
Practical and decorative functions of pillows
Cushions are sometimes called sofa cushions precisely because they are often placed on this particular piece of furniture, but in fact they have many practical purposes.
There are various product models:
- decorative - they are used to decorate armchairs and sofas;
- travel - such products are convenient to take with you into the car;
- in the form of toys;
- voluminous - they are often used as a pouf or armchair.
Some pillows serve both decorative and functional roles.
Of course, in addition to pillows, all kinds of decorative cushions and warm blankets are placed on the sofa. Everything that can provide comfort.
At the same time, pillows should not be excluded either, because these are universal products. There are the following reasons why they should be used:
- sofa cushions create a unique atmosphere of comfort in any room;
- sometimes they are used as an unusual color accent;
- they allow you to add zest to the interior.
Decorative products will best fit into the interior of any style
The presence of small pillows on the sofa encourages anyone to relax. You can choose a model that will “dilute” the interior during the day, and serve its intended purpose at night.
How to calculate fabric consumption?
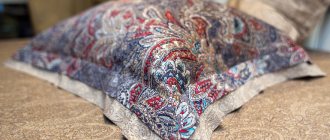
A pillowcase with ears (you can sew a beautiful product only after correctly calculating the fabric consumption) differs from simple pillowcases by the presence of a wide border at the seams, the standard width of which is 5-10 cm. This must be taken into account when calculating the material consumption. Having remembered the calculation formula, it will become easier to buy the required amount of fabric for products of other sizes. The most common sizes of both bed and decorative pillows are 70x70 cm and 70x50 cm.
How to calculate:
- To calculate the length of the fabric for a pillowcase for a pillow 70x70 cm, you need to add up the seam allowances (8 cm), the width of the pillow (70x2 cm), the width of the ear (7x4 cm) and the length of the pocket or flap (25 cm). All values are conditional. If you make the calculation, you will get: 8+140+28+25=201 cm. To calculate the width of the fabric, you need to add the same parameters, except for the size of the pocket: 8+140+28=176 cm. Result: for sewing a pillowcase with ears 7 cm wide, a 70x70 pillow will require a piece of fabric 201x176 cm.
- Calculation of fabric consumption for pillowcases for pillows 70x50 cm: fabric length=8+140+28+25=201 cm. Fabric width: 8+100+28+25=161 cm.
The material needs to be purchased with a reserve, as some fabrics shrink. You should add 4 cm to the results obtained. As a result, for a pillowcase on a pillow 70x70 cm you will need a piece of 205x180 cm, and for a pillow 70x50 cm you need a square measuring 205x165 cm.
Decoration
There are many ways to decorate pillowcases. Decorating product canvases with appliqués is considered the simplest. They can be sewn on in advance, before final sewing.
Decorating a sofa cushion with a voluminous appliqué “Butterflies”
The same should be done when making covers using the patchwork technique. The scraps are cut out, placed on the fabric of the future pillowcase/paper pattern, and secured. You can even sew them by hand later. Depends on the style of the patchwork. When the patches are sewn, the fabric is ready, the fabric is sewn in the manner described.
Decorative pillow decorated using patchwork technique
If the pillow is decorated with satin stitch/ribbon embroidery, this can be done with the fabric already fully sewn, marking the pattern on the outside.
Volumetric applique of ribbons and buttons for decorating a sofa cushion
Such patterns on pillows look very cute, original and do not require much experience. The main thing is patience, because decorating is a very painstaking job that often takes a long time to do.
Constructing a pattern for a pillowcase with ears, depending on the size. Step by step instructions
To make the pillowcase smooth and beautiful, you need to construct the pattern correctly. Beginning seamstresses should make markings on cardboard or thick paper and then transfer them to fabric.
What tools are needed to create a pattern:
- a simple pencil;
- long ruler;
- scissors;
- a bar of soap or chalk;
- textile.
When creating a pattern, you need to take into account possible shrinkage of the fabric and, in addition to seam allowances, add 2-3 cm to the width of the pillow. The width of the ears needs to be thought out in advance. Typically, the larger the pillowcase, the wider the ears.
50x70
The ears are 5 cm wide. The markings are made on a rectangle of paper or fabric 178 cm long and 56 cm wide.
Step-by-step instruction:
- From the left edge (56 cm) mark 2.5 cm above and below. Connect the points with a vertical line. There the fabric will bend.
- Step back 70 cm from the line above and below. Connect the dots with a line.
- Step back from the line and put 2 points every 10 cm.
- Divide the drawn strip into 2 (5 cm each) dotted lines. This is the fold line.
- Set aside another 70 cm and draw a line.
- Set aside another 10 cm and divide in half with a dotted line.
- Now set aside 13 cm. This is the width of the pocket.
There should be 2.5 cm of free edge behind the last line. There will be a pocket hem there. For shrinkage in this pattern, 3 cm in length and 4 cm in width were allocated.
70x70
The ears are 6 cm wide. You will need a rectangle 194 cm long and 82 cm wide.
Construction of the pattern:
- From the left edge, set aside 3 cm for the folds.
- Measure 70 cm and draw a line.
- Next, draw a strip 12 cm wide and divide by 2.
- Repeat steps 2 and 3.
- Measure 25 cm for the pocket and another 3 cm for the hem.
Transfer the pattern from paper to fabric and sew the product.
60x40
The ears are 5 cm wide. You will need a piece of fabric 158 cm long and 46 cm wide.
How to make a pattern:
- Allow 2.5 cm at the hem.
- Set aside 60 cm and draw a vertical line.
- Draw a 10 cm strip and divide it in half with a dotted line.
- Repeat steps 2 and 3.
- Set aside 13 cm for the flap and 2.5 cm for the hem.
In this pattern, 4 cm is allocated for shrinkage of the material.
Features of care when growing pears In memory of Yakovlev
Despite the fact that all pears belong to the same genus, each variety has a certain set of characteristics. Therefore, there are always some nuances in the care process.
Watering
Memory Yakovlev pear is a moisture-loving variety, but this does not mean that the roots should constantly turn sour in water. Overwatering can cause the tree to die. Overdried soil threatens crop failure and poor growth.
The seedling needs to be moistened weekly. Watering is carried out in grooves dug around the trunk at a distance of 30 - 50 cm (the older the seedling, the greater the distance). Pour out 2 buckets of water at one time. It is advisable to divide this norm into 2 doses - morning and evening. It is better to water with water heated in the sun.
Until the seedling has taken root, it is watered weekly
An adult pear is moistened not so often, but with a large amount of water, which is poured into 3 - 4 ring grooves. Watering is carried out 1 – 2 times a month, using up to 3 buckets of moisture per 1 m². The frequency of the procedure should be regulated by the amount of precipitation. If the summer is rainy, water only when necessary.
But most often in central Russia, the summer period does not indulge in rain, so it is important to water the pear during the following periods:
- before flowering;
- after flowering, when the ovary is formed.
There is one more mandatory watering - winter watering. But it is produced only if the autumn is dry. Water-recharging watering should be plentiful - for each year of the pear’s life there should be 10 liters of water.
After watering, it is imperative to loosen the soil in the tree trunk circle. This restores oxygen access to the roots and prevents weeds from growing. To maintain a normal level of moisture in the soil, use mulch.
Mulch helps maintain normal humidity
What fertilizers to use
To feed the Memory of Yakovlev pear, both mineral fertilizers and organic matter are used. Fertilizing begins 2 years after planting, provided that all suitable fertilizers have been added to the planting hole.
Root feeding - table
| Season | What to feed |
| Spring | urea per 5 - 7 liters of water. The solution is applied in early spring to moist soil. These fertilizers can be scattered over the snow in a circle near the tree trunk. When the snow begins to melt, they will be absorbed into the soil. Immediately after flowering, use nitroammophoska - 50 g per 10 liters of water. |
| Summer | In order to stimulate the formation of the ovary and increase the yield, 10 g of potassium sulfate is dissolved in 10 liters of water. |
| Autumn | designed for 1 m². In addition, you can use ash for digging - 140 g per 1 m². |
As an alternative, you can use organic matter. It is applied once every 2-3 years for digging. You can use well-rotted manure or humus - 10 kg is enough for 1 m².
Foliar feeding is carried out in the summer. Their goal is to eliminate micronutrient deficiencies and prevent diseases. To do this, use a urea solution of 60 g per bucket of water or Kemira - 10 g for the same amount of water.
Foliar feeding is best done in the evening
How to determine which microelements a pear lacks - table
| Microelement | Deficiency Symptoms |
| Nitrogen | On young trees, the foliage is pale and unable to develop to normal size. On an old pear, the leaves are yellow, lifeless, and fall off early. Ripe fruits are small in size. |
| Phosphorus | There are not enough leaves, they are small and unnaturally green. |
| Potassium | The leaves have a smoky tint and become dry over time, but do not fall off. The fruits have an unsightly appearance. |
| Iron | The foliage loses its natural green color and fades. |
| Copper | The young pear is stunted in growth and dark spots appear on the leaves. Young shoots may dry out. |
The pear itself will tell you what microelements it lacks, for example, with a lack of iron, the foliage loses its natural green color
Trimming and shaping
Despite its small size, the Yakovlev Memory Pear must be subjected to the shaping procedure. It is carried out in the spring after planting.
- The central conductor is cut at a height of 60 cm from the soil surface.
- The first tier is formed from the shoots that develop the following year. To do this, select 2 - 3 developed branches and shorten them by a third. The central conductor is cut by a quarter. The remaining shoots are removed.
- The following year the procedure is repeated.
Pruning a young pear - video
To prevent the pear from getting sick and to bear fruit well, after the final formation of the crown, other types of pruning are carried out:
- Sanitation is carried out as necessary. If the pear is sick, branches that cannot be treated are cut out. In early spring, remove frozen or broken shoots;
- thinning is carried out in the spring. Its task is to free the thickened crown from non-fruit-bearing, weak or inward-growing shoots. Thus, the illumination and ventilation of the crown increases, which helps to improve the quality of the crop.
Thinning of the pear crown is carried out in early spring, before sap flow begins.
Preparing for winter
The Pamyati Yakovlev variety can withstand severe frosts, so a healthy and well-groomed tree does not need additional shelter. In winter, you just need to insulate the tree trunk circle, collecting a lot of snow on it.
Seedlings are another matter. Frail trees need additional protection. The root system should be covered with a 20-centimeter layer of mulch, and the trunk and skeletal branches should be wrapped in any breathable material.
Unlike an adult pear, a seedling needs to be insulated
How to sew a simple pillowcase with “ears”?
Sewing a simple pillowcase with ears according to the pattern previously described in the article, on a pillow measuring 50x70, can be done according to step-by-step instructions:
- Transfer the pattern to the right side of the fabric.
- From the side of the pocket, bend 2.5 cm along the mark. Iron the fold and stitch.
- Now you need to fold the fabric with the right sides facing each other. 13 and 5 cm, according to the mark. Stitch the edges.
- On the opposite side, fold the material 75 cm. Sew the edges on both sides and process with a zigzag or overlock.
- Turn the product right side out.
- Sew along the edges of the pillowcase so that the ears hold their shape well.
- Set aside 5 cm on each side and draw lines that form a “frame”.
- Sew with a fine stitch.
Wash and iron the pillowcase, then put it on the pillow.
Pattern for a pillowcase with a zipper
A pillowcase with ears (the product can be sewn not only on a sewing machine, but also by hand) with a zipper is a good way to hide the old and already unattractive colors of a decorative pillow.
How to create a pattern for a pillow 45x45 cm with an ear width of 3.5 cm:
- Cut a rectangle of fabric 54 cm wide and 106 cm long.
- From the left edge, retreat 1 cm under the zipper.
- Set aside 45 cm, then mark a strip 7 cm wide and divide it in half.
- Repeat the previous point.
There should be another 1 cm left for the zipper.
How to sew a pillowcase with a zipper
To work you will need:
- textile;
- scissors;
- chalk;
- safety pins;
- zipper matching the color of the fabric.
The zipper can be inserted in 2 ways: visible and hidden. In 1 case, the color of the lock should be matched to the base material. A hidden zipper is almost invisible, so it can be 2-3 tones darker or lighter than the main shade of the product, or simply harmonize with the color of the pattern.
The advantages of such a pillowcase are that sometimes it can be used as a pillow base, that is, you can put the filling directly into the pillowcase, without a pillowcase.
In this case, the fabric should be dense and hold its shape well, and the contents of the pillow should be soft and light. Feather filling will not work as 1 layer of material will not be enough to mask the feathers that are showing through.
With regular zipper
How to sew a pillowcase with a simple zipper based on a pattern measuring 60x40:
- You will need to slightly modify the basic pattern. In point 2, set aside 60 cm and 49.5 cm.
- Next, mark it in the same way as in the description.
- Mark the valve 13 cm.
- Fold the edges along the markings.
- Fold 13 and 5 cm and stitch the edges.
- Fold the back side 54.5 cm and stitch.
- Sew a zipper between the joining edges, stepping back from the edges on both sides by 2.5 cm.
- Unfasten the lock and turn the product inside out.
- Step back 5 cm from each edge and stitch.
The zipper will be on the back of the pillow, this must be taken into account when choosing fabric with patterns.
With hidden zipper
Description of sewing a pillowcase with ears from a pattern measuring 45x45 cm (the construction is described earlier in the article):
- Process the width of the pattern using an overlocker.
- Fold the fabric right sides together so that the processed sections meet.
- Along the joint line at the top and bottom, put 4 cm inward. The resulting segment is the place for the zipper.
- Using safety pins, pin the zipper so that the processed edges of the fabric cover the teeth, but do not prevent the pawl from sliding.
- Sew the zipper with a hidden seam.
- Iron the stitches on the front side.
- Now you need to turn the product inside out and stitch it along the edges, retreating 1 cm on each side.
- Turn the pillowcase right side out through the unzipped zipper.
- Step back 3.5 cm from each edge, draw a square with chalk and stitch along the markings.
The pillowcase with a hidden zipper is ready. You can fill it with holofiber or put it on a pillow.
From the history of pillows
The making of pillows has a long history. The first products appeared among the ancient Egyptians, only they were used not for comfort and coziness, but as a headrest in order to preserve hairstyles, so such objects were made of wood and metal.
Hard wood pillows
The Greeks were the first to start making soft goods. They were the first to learn how to create all kinds of comfortable pillows, and also decorated them with beautiful embroideries.
Such products were also known in Rus'. Craftswomen worked to create unique pillows, embroidered them with characteristic patterns and even gave them a magical meaning.
The pillows featured various flowers, animals and even people's names.
Pattern for wrap pillowcases
A pillowcase with ears (you can sew the product using an old ripped pillowcase as a template) and with a smell differs from an ordinary pillowcase with a pocket only in that the width of the flap is larger. A product sewn using this cut holds its shape better. It is often used for old pillows that have lost their attractive appearance. Which it would be a pity to throw away.
How to sew a pillowcase with ears - pattern for a wrap pillowcase.
How to build a pattern for a pillow with ears, size 70x70, ear tire 5 cm, wrap model:
- You need a rectangle 200 cm long and 82 cm wide.
- On the left, retreat 2.5 cm at the hem.
- Set aside 70 cm and draw a line.
- Retreat 10 cm and divide it in half with a dotted line.
- Repeat the previous 2 points.
- Step back 35 cm, draw a line and leave 2.5 cm for the hem.
The smell should be 2 times less than the width of the pillow (70\2=35), this should be taken into account when creating a pattern for a pillowcase of a different size.
Step-by-step master class on sewing a wrap pillowcase
To work you will need:
- iron;
- safety pins;
- ruler;
- washable marker.
How to sew a pillowcase with ears, wrap model:
- Overlock all cuts.
- Fold the sides 2.5 cm along the markings and steam with an iron.
- Fold in another 2.5 cm, press and secure the fold with pins.
- Use a ruler to measure 3 mm from the edge of the hem, put dots with a marker for reference.
- Sew with a middle stitch.
- Place the material on the table, turning it wrong side down.
- Fold the fabric 35cm and 5cm right side down and stitch along the edges. This will be a deep pocket.
- On the other side, bend the edge by 70 and 5 cm. Sew the edges with a zigzag or process them using an overlocker.
- Carefully straighten the product, align all seams.
- Step back 3 mm from each edge and make marks with a marker. Sew with a hidden seam along the marked line so that the ears do not lose their shape.
- Step back 5 cm from each edge and draw a square with a marker. Sew with a fine stitch along the markings.
A pillowcase with ears (this model can be sewn from any fabric) can be decorated with ribbons in the scent area for decoration. You need to make holes and sew them with a looped seam or insert eyelets. Thread a satin ribbon matching the color through them and tie with a bow. It’s easy to sew a pillowcase with ears with your own hands, the main thing is to create the pattern correctly, taking into account all the sizes and properties of the fabric. To check how much the material shrinks, you need to wash a 10x10 cm piece at a water temperature acceptable for the selected type of fabric.
