3384 0 0
MesterulManole May 5, 2018Specialization: many years of experience in finishing works of residential and office premises, summer houses, country cottages, etc. Hobby: cycling in all its forms
The style of kitchen design is largely determined by the shape of the hood used - there are varieties for modern and classic design
Do you want your kitchen and the furniture located in it to retain its original appearance for as long as possible? In this case, you cannot do without a hood - a special device that draws in exhaust air with soot and steam and redirects it to a ventilation shaft or other similar device. There is a wide range of hoods on sale, but in this article you can learn about those models that can be built into a wall cabinet.
What to consider when choosing
| Illustrations | Factors determining the choice of hood |
| Method of action . Hoods are either flow-through or circulation. The first remove air from the room into the ventilation shaft, and the second drive the air through a filter, clean it and re-direct it into the room. The choice of one modification or another is determined by the possibility or impossibility of laying an air duct. | |
| Material of manufacture . When choosing a particular air purifier model, pay attention to the coating of the bottom panel. It is preferable to choose modifications with a glossy surface, since glass or polished steel is easier to clean from soot. | |
| Lighting . The range of hoods includes models with lighting using halogen, fluorescent and LED lamps. I recommend choosing models that use LED lamps. This backlight heats up less, lasts longer and gives a brighter and more even glow. Due to its high brightness, a hood with LED lamps provides good illumination of the stove even when dirty. | |
| Productivity . Productivity is the volume of air that the device can pass through itself in 1 hour. To calculate productivity, we multiply the kitchen area by the ceiling height and get the volume of internal space. We multiply the resulting number by 12 - the air exchange rate according to sanitary standards, and then multiply by 1.6 - the minimum reserve correction factor. We compare the result with the device performance specified in the data sheet. |
Advantages of modern hoods
Why are hoods so popular among consumers?
- Great designer look. Hoods not only do not degrade the appearance of the kitchen furniture set, but sometimes become the highlight of the interior.
- Versatility. The hood can be used over any cooking surface; a wide range of technical parameters makes it possible to select the best option for each individual case.
- Economical. This does not mean saving electrical energy, but a significant reduction in heat losses. Conventional natural ventilation systems removed air from the room around the clock, which caused the walls to cool. As a result, the temperature dropped noticeably; heating required a large amount of energy. Electric hoods provide the required air exchange rate in just a few minutes, making it clean and free of unpleasant odors. In such a short time, the walls do not have time to cool, and heat losses are minimized.
Built-in hoods fit perfectly into the kitchen interior
These are the main advantages, there are also quite a few additional ones, but they relate to individual models, and there is no point in dwelling on them in detail.
Important. All hoods have one problem - the technical parameters do not meet the safety requirements for the operation of gas appliances.
What is meant? Gas is much lighter than air; if there is a leak, it will rise up and accumulate under the ceiling of the room, and as it fills, it will fall down. Previously, the ventilation holes were located near the ceiling and were constantly open. The gas that entered the room was removed outside, which significantly reduced the risk of explosions.
Through such ventilation holes, gas was easily ventilated from the kitchen
Now there are no such open holes, and hoods are turned on for a short period of time only when cooking. Another problem is that the entrance is located above the hob, which is much lower than the lighting fixtures. If a gas leak occurs at night, then after a few hours it is already located above the chandeliers and lamps. When they are turned on, a spark jumps and the gas-air mixture explodes with enormous force. This explains the frequent destruction of houses.
Combination of hood and ventilation in the kitchen
There is only one way out. For an electric hood, a separate vertical ventilation duct must be provided, and existing natural ventilation systems must not be touched, no pipes connected to them, etc. Unfortunately, very few users agree with such requirements and grossly violate safety regulations.
Types of hoods installed in the cabinet
| Illustrations | Hood shape |
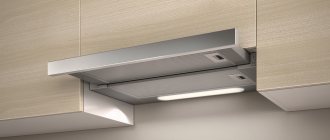
| Flat . The device has the shape of a rectangular box, to which an air duct is attached via a flange. The advantage of this configuration is the rational use of internal volume, since the installed device occupies a small part of the cabinet. Most air purifiers on sale are flat. Therefore, in the instructions in this article you can learn about installing a device with this configuration. | |
| Dome. In such a device, the housing is inclined, as it is made in the form of a truncated pyramid, in the upper part of which an air duct is attached by means of a flange. The difference between a device with this configuration and its flat counterparts is the less efficient use of the internal volume of the cabinet, since the dome takes up more space than the pipe. However, if the cabinet, in addition to the exhaust unit, is not intended to store anything else, this feature is not a disadvantage. |
| Illustrations | Varieties by arrangement |
| Direct . Devices of this type can be assembled and installed in a straight wall cabinet. This is the most common arrangement option, and therefore about 80% of manufactured hoods are straight. | |
| Corner . Such a device has a base made in the shape of a triangle, less often a pentagon. Thanks to this configuration, the hood can be mounted in a corner cabinet, as shown in the photo. Installing a corner unit is as easy as installing a straight one. |
| Illustrations | Varieties according to the method of embedding |
| Kozyrkovaya. Despite the fact that this category of devices is not built-in, it can be mounted tightly in the gap between three wall cabinets. The air duct of the device is routed through the cabinet; as a result, the unit is perceived as built-in, although it is mounted on the wall. | |
| Invoice . The outer part of such an exhaust device is not recessed into the cabinet body, but is placed on top of it. The advantage of the solution is that the unit controls are located on the front panel. | |
| Fully built-in . A fully built-in hood is outwardly invisible; if you look at the front of the cabinet, it can only be seen by looking under the furniture from below. The difference between this arrangement and other varieties is that the controls are not located at the front of the cabinet, but are located below on the exhaust device. | |
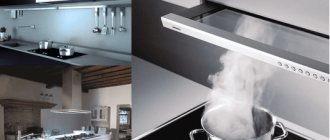
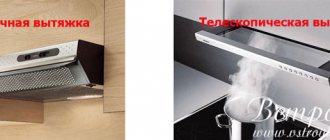
| Retractable (telescopic). This type of hood allows you to attach the unit to furniture with shallow depth. By extending the suction panel, the unit can absorb air over the entire surface of the stove, and not just over the back row of burners. |
What types of kitchen hoods are there?
Before purchasing a device, decide on the location of the equipment
It is important to install the hood above the stove, otherwise it will not be effective. Depending on their location, hoods are divided into types:
- Plane. It has a small size, due to which it takes up little space in the kitchen. Installation of a special air duct is not required. The device has several built-in filters that purify the absorbed air. The main disadvantage of the device is the timely replacement of these filters, and their service life depends entirely on how actively you use the tiles. This option has a low price.
- Dome. Devices from this category are connected to ventilation, which ensures a high level of performance. The housing is large in size, which allows for the installation of large filters. Such devices are in demand in large rooms where large quantities of air need to be filtered. This type of hood is called a fireplace hood; its cost is slightly higher than that of a flat one. This is due to the increased level of aerodynamics and silent operation.
- Built-in. The most common type. The main advantage of the device is the fact that it is installed in a special box, blending into the overall style of the room. This is the best solution for owners of small spaces. To install such a device, it is not necessary to call a specialist. Installation is so simple that you can do it yourself.
How to do this correctly - watch the video.
The choice of hood depends on the size of your kitchen space. For a miniature one, a flat hood is also suitable. A fireplace (dome) is best used in kitchens that have a separate kitchen “island”. And in standard “Khrushchev” apartments, the ideal option is a built-in structure that can be placed in a closet.
How to install a built-in hood in a cabinet: dimensions for installation
Attaching the shelf to the top of the air cleaner housing
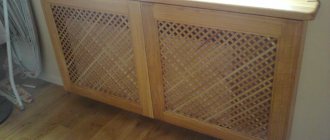
Before installing the hood, you need to determine how it relates to the cabinet. In this case, we are interested in the dimensions, namely width, depth and height. The width of the device must correspond to the width of the cabinet so that the outer perimeter of the device does not extend beyond the sides of the wall cabinet. The same goes for depth; this parameter must match the depth of the furniture.
Now, as for the height, we are not talking about flat models, but about mortise ones, where a small box goes into the cabinet. So, the height of this box should be less than the distance from the bottom of the cabinet to the inner shelf or to the top. If the dimensions of the device and the dimensions of the furniture match, there will be no difficulties with installation.
Recommendations for choosing an air duct
Price remains a significant selection criterion for homeowners; aesthetics and performance characteristics of ventilation ducts fade into the background. Flexible corrugation definitely wins here; it is much cheaper than other options, and fittings are not needed.
We will offer our recommendations on how to choose a ventilation duct for your hood:
- There are two types of channels suitable for external installation: plastic and metal. The former are cheaper, but look worse; they are better hidden above cabinets or behind decorative cladding.
- For hidden installation, you can use any air duct: corrugated, PVC, galvanized. If you don't care about the noise level, use a cheap aluminum hose.
- In a country house, summer kitchen or veranda with a stove, connect the hood with a corrugated pipe. Plastic in such rooms quickly becomes dirty, and it is quite difficult to remove the yellowness.
- If an apartment has undergone expensive renovations, you cannot save money and spoil the interior. Match the steel frame, fittings and grille to the color of the hood. Stainless steel is perfect for a nickel-plated surface, and copper for a golden surface.
Watch this video on YouTube
Dimensions and related issues
This cabinet size must correspond to the depth of the cabinet
When choosing a hood for a cabinet, you may encounter the fact that production standards do not regulate the dimensions of industrially produced kitchen air purifiers. As a result, product sizes from different manufacturers may vary significantly. Therefore, before going to the store, we measure the existing cabinet and compare the dimensions indicated in the passports of hoods in stores with its dimensions.
This cabinet size must match the gap from the bottom of the cabinet to the shelf
On average, the width of household kitchen air purifiers ranges from 60 to 90 cm, and the depth from 25 to 50 cm. The most common height of the built-in unit is 13–15.8 cm, which will easily fit into most wall cabinets.
Purpose of kitchen ventilation
During the cooking process, a whole bunch of dangerous chemicals are released into the air.
Among them are:
Carbon monoxide (CO), better known as carbon monoxide. An extremely toxic substance, even in small concentrations leading to severe poisoning of the entire body. And when the concentration of CO in a person’s blood reaches 5 ml per liter, almost instantaneous death occurs. The main danger of carbon monoxide is that it has neither color nor odor. Therefore, its dangerous concentration can be detected only by a sharply deteriorated state of health - a severe headache accompanied by vomiting. CO is released during any combustion, including when frying food on a stove fire.
- Natural gas (propane, butane, methane) is another dangerous chemical component present in the kitchen. It is commonly used as an energy carrier for gas cooktops. But in high concentrations it can not only cause human poisoning, but also cause fire and explosion. Every year, hundreds of people around the world become victims of gas leaks that could easily have been avoided with an effective ventilation system.
- Carcinogens are volatile substances released into the air when foods are fried or fats are burned in a frying pan. This is the same child that stands in the kitchen while preparing food, and then settles on the walls and ceilings of the room with a greasy coating. Carcinogenic substances, although they cannot lead to immediate death of a person, like CO or propane, are capable of accumulating in the human body. When these substances enter the liver, kidneys, and lungs, they ultimately cause severe pathologies, including cancer.
- Water vapor is released when cooking soups or boiling a kettle. By itself, it is absolutely harmless to humans. But in high concentrations it condenses on the walls and ceilings of interior spaces, causing the appearance of fungus and mold. The fungus significantly reduces the service life of finishing materials, and can also affect the load-bearing elements of the building structure. Microscopic spores released by mold into the air cause severe allergic diseases - dermatitis, asthma, chronic bronchitis.
Therefore, it is necessary to equip each kitchen with a ventilation system, in full compliance with the requirements and standards of SNiP and GOST. This will allow you not only to maintain hygiene in the kitchen, but also to preserve the health, and even the life, of the inhabitants of the apartment.
Installation Tools and Materials
The tools needed to assemble and install the hood are available in most home workshops.
To install a kitchen hood you will need:
- Drill with drills with a diameter of 5 and 10 mm;
- Jigsaw;
- Curly screwdriver;
- Spirit level;
- Compass;
- Tape measure and pencil;
- Measuring tool.
Answers to popular questions
Is it advisable to install a built-in hood in a cabinet without an air duct?
Of course, installing an air duct is an additional, sometimes time-consuming job. You yourself must evaluate the need for a device to divert air flow directly into the ventilation duct. The volume of the room, the frequency of use of the stove, the conditions for the flow of outside air - all these are factors that influence the choice of flow or recirculation mode of operation of the hood.
If it is enough for you to get by with returning the purified air mass flow through the exhaust filtration system, then you do not need an air duct.
How to install a built-in hood with a retractable part?
The installation of cleaning equipment with a retractable part is no different from the installation of stationary equipment. It is necessary to ensure that the deployed suction panel completely overhangs the hob area of the stove.
How to install a built-in hood in a large cabinet?
This is done in exactly the same way as when installing equipment that fits tightly between the walls of the cabinet. The only difference is that you need to maintain the exact position of the hood exactly above the stove. The photographs show examples of additional partitions inside the cabinet that strengthen the structure.
What to do if there is not enough power?
Compact exhaust devices often have the disadvantage of low installation power. To increase the performance of cleaning equipment, duct fans are used. They are embedded into the air duct using adapters in any accessible place.
Installation of the channel mechanism is done with the aim of increasing the power of the air flow. That is, the duct and exhaust fans operate simultaneously (in parallel). You can adjust the operating modes of the hood by installing an additional toggle switch to separately turn on the duct fan.
In some cases, the hood body is used only as part of the air duct. A powerful external fan is installed, which dramatically increases the productivity of the equipment from 800 - 1000 m3/h to 1500 - 2000 m3/h.
How to make sure that the hood does not interfere with natural ventilation?
To solve this problem, use a tee with an anti-return valve. The device looks as if an additional pipe with an open hole was cut into the air duct at the entrance to the ventilation duct.
There is a hatch installed in the pipe, which is adjusted so that when the fan is turned on, it covers the inlet. When the hood is turned off, the locking disc returns to its original state and opens the air from the ventilation.
Stages of work
Installation work begins with unpacking the hood kit and preparing the mounting surface
After the hood has been purchased and the necessary tools have been prepared, it’s time to begin installation. The installation steps are as follows:
- Preparatory work - dismantling the cabinet and disassembling it for subsequent stages;
- Cutting mounting holes for installing an air cleaner;
- Installation of the unit and connection to the air duct corrugation and electrics.
Let's consider the above points in more detail.
| Illustrations | Step-by-step description of installation work |
| Dismantling the cabinet . The cabinet is removed from the mounting brackets and placed on the table with the door up. Next, using a regular shaped screwdriver, remove the doors from their hinges, freeing access to the internal volume. | |
Removing the middle shelf. The middle shelf can be removed in two ways:
| |
| Working with the bottom surface of the cabinet . You will have to work on the bottom of the cabinet if the air purifier cuts into it. If the hood model allows for attachment to the side walls, then the lower part is generally dismantled and not used. To remove the lower part from the cabinet, 2 fastening screws (confirmation) are unscrewed from each side, after which the piece of chipboard is pulled towards itself. | |
| Cutting holes for the passage of the air duct. Some manufacturers provide their hoods with a mounting template - a drawing printed on thick paper, which is applied to the bottom of the cabinet and marks are made along the orientation holes for subsequent drilling and cutting. If there is no ready-made template, you will have to take and transfer the dimensions manually. To do this, the distance between the fixing screws is measured and the corresponding markings are applied on the removed bottom wall of the cabinet. We mark the center of the hole for the air duct and draw a circle with a compass and cut out a seat for the pipe. If you plan to install an intermediate shelf, we also cut a hole in it, as in the lower part, for the air duct. Also in this shelf at the back there is a small groove cut for the power cable outlet. | |
| Installation of all elements in the cabinet . The hood is installed with an outlet pipe into the hole and secured with self-tapping screws or screws to the bottom. An air duct is connected to the exhaust pipe using a clamp, which is threaded through the middle shelf. The dismantled cabinet elements are installed in their place, after which they can be fixed with screws. The power cable from the hood is connected to the electrical network. After completing the above work, the hood can be turned on and used for its intended purpose. |
Installation features
The choice of installation location is directly influenced by the design features of the model you like. Wall or ceiling structures are not hidden by cabinets and are installed exactly above the stove, while special masking boxes are often used for the air duct. But the built-in model will require the manufacture of appropriate furniture.
Please note that to install the hood you will need pipes, a socket and electrical cable, boxes, mounting fittings and fastening elements. You can’t do without an air duct - it can be corrugated pipes or a smooth-walled hose.
Corrugated pipes are distinguished by the fact that they can be bent at any angle.
Keep in mind that duct bends greater than 90 degrees are not permitted.
Don’t forget that there are special boxes that allow you to hide the air duct and integrate communications into any kitchen design.
The diameter of the air duct directly depends on the type of outlet in the house, and the length of the pipe is determined depending on the distance of the device, from the opening in the wall or from the ventilation shaft.
If we are talking about installing a built-in hood, then everything must be done in accordance with the installation instructions. The main criteria when installing a built-in device are:
- The sliding panel of the device is always left visible;
- The outlet is always connected to the ventilation shaft.
If such a connection is not possible or it is impossible to lay air exhaust pipes, then you can install a recirculation model - among them there are also options intended for embedding.
Kitchen hood - what you need to pay attention to when buying Repairing a kitchen hood yourself Installing a hood and air duct with your own hands Filters for kitchen hoods - rules for selection and replacement Cleaning the hood from grease - quickly, simply, effectively How to choose built-in appliances for the kitchen
