The hinges tore out of the chipboard (cabinet door) - how to fix it? Details + video version
Nowadays, most furniture, such as cabinets, bedside tables, kitchens, and so on, are made of chipboard. The material is good, quite flexible (there is one for every taste and color). However, it has a big disadvantage. Over time, especially if this is a frequently used door, the hinges can be pulled out by the roots (probably many have experienced this), and the hinge dangles... the sash sags, or even comes off altogether. In general, how can I fix this whole thing? Detailed instructions + video version...
The essence of the problem is that it will not be possible to screw the “screws” back into these torn fasteners. They simply won’t stay there. We need to fix it some other way. For me personally there are only three. I’ll tell you about each one separately.
Regular matches
Everything is simple here, if your broken holes are not large, say, a piece of chipboard has not fallen out, then you can use ordinary matches.
How it works? Just hammer a match into the hole (great if the diameter is not large). And then we screw the screw in there. The match is pressed against the wall and thus the fastening is restored.
However, it is not suitable for heavily loaded doors that you rarely use. If you constantly open or close the sash, it will not last long . BUT as a temporary solution, why not?
Shape Features
For connections, two types of wooden choppers are most often used:
- Round - widespread, but high in cost compared to other parts.
- Square - although the manufacturing process is simple, they are rarely used. To use this type of fastener, you need to cut out installation holes that match the shape of the dowel. The process is complex and time-consuming, while nests for round wooden choppers are made as easy as shelling pears.
Glue + sawdust
The solution is as old as time, and it should be noted that it works well. Perfect if you have a piece of chipboard torn out.
The idea is simple - we take sawdust (you can take it from a chipboard, a piece of which has been torn out), or find it near furniture factories, next to large construction supermarkets (usually there are pieces lying around that no one needs), crush them, mix them with glue (previously we used PVA) this Apply the mixture to the broken areas and let dry. And that’s it, tighten the “screws”. It's holding up well.
However, now there are a large number of adhesives; on the Internet I even saw a guy pouring a lot of glue from a glue gun into broken places. And everything seems to be holding up
I used to repair hinges in the kitchen a long time ago. BUT due to the fact that the sash was used often, it broke quite quickly.
So this is again an option for a while, for constant use (10 - 15 openings per day), this is not the best way.
Wooden “chopik” + glue
I think this method is the best. After such a repair, the door in my kitchen worked for several years, and nothing was torn out again.
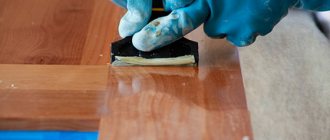
The principle is this: Remove the sash - door, then you need to take a drill and drill out the torn holes.
We take a drill with a diameter slightly smaller than a wooden “chopik”, for example, my chopstick is 9 mm in diameter, and the drill is 8 mm.
We do not drill to the full depth of the door, usually 80% is enough, the main thing is not to drill further, because the drill will come out on the other side of the door, which is not always necessary. To do this, there is a special limiter on the drill, or at the required depth, you need to screw electrical tape onto the drill and not go beyond its limits.
Next we pour glue into the hole, I take “MOMENT” which glues the wood (you can take any other one; there are now dozens of different ones). Well, we hammer in the “chopik”, do it carefully so as not to break the back wall!
Let it set for about 15 minutes. Then in our wooden inserts, I drill another hole in the center, also not to the full depth. This is done in order to tighten the “screw” freely, but do not overdo it. For example, I have a “screw” with a diameter of 4 mm, and I take a drill with a diameter of 2 mm.
I tighten it on the removed door, try it - it holds perfectly! Now you can hang it on the closet .
This third method, I think, is the best for repairing chipboard doors. Moreover, it is suitable for frequent openings.
Now we are watching the video version
This is where I end, I think my materials were useful to you. Read our construction blog, there will be a lot more useful.
Source: remo-blog.ru
How to arrange a connection between furniture parts
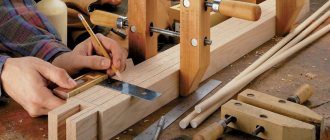
The procedure for attaching parts to a wooden nail is not complicated. By following the instructions below, you can connect the parts and assemble the furniture without much effort. The assembly diagram looks like this:
- Holes are drilled in the parts to be joined if they were not made at the factory. The diameter of the recesses should be slightly larger than the diameter of the chopper, and the length should be 1-2 mm longer than the dowel. The presence of gaps in this case is by no means a disadvantage. They prevent fasteners from jamming and help compensate for temperature and humidity deformation.
- The protruding part is filed down if necessary.
- Using a mallet, hammer a dowel into the hole so that its surface is slightly below the plane of the part. If you need to connect the furniture frame, then the dowel is driven in half. The protruding part of the wooden furniture chopper is smeared with glue and, having laid the end part of the furniture or facade on top, it is seated on the mount.
At first glance, it seems that this technique does not provide reliable fixation of the structure, but in practice it turns out that when using high-quality, well-dried dowels, furniture, log houses and timber are durable and stable.
Dowels, dowels, choppers, metal fasteners are types of fastening elements used for reliable connections. Without their use it is impossible to imagine the house-building industry and the furniture industry.
In carpentry and joinery work, a variety of types of fasteners are used: these are staples, dowels, wood grouse, wooden dowels, and many other products. Each of them has its own scope of application, and therefore in our article we will provide an overview of those parts that are not used as often as common nails or self-tapping screws.
How to quickly disassemble and correctly reassemble a cabinet in another place?
Moving always involves transporting furniture. To avoid the inconvenience of moving and transporting cabinets, it is easier to disassemble them and then reassemble them in a new location. This procedure is also necessary when renovating a room. A modern wardrobe is easy to disassemble - the fasteners can be removed quickly. But furniture made during the Soviet era has outdated fittings and will require some skill.
Let's talk about the features of disassembling cabinet and built-in cabinets with your own hands. We will tell you how to pack disassembled furniture parts, as well as how to properly throw away an old wall with the least expense and in accordance with the law.
How to disassemble an old Soviet cabinet?
Wardrobes of the 70s and later periods of the last century were assembled mainly on eccentric ties, wooden dowels and screws. If you need disassembly and subsequent reassembly for moving, follow the instructions:
Stage No. 1: Shelves, drawers, handles
- Prepare the tools: rubber hammer, set of screwdrivers, screwdriver, chisel.
- Clear the floor near the cabinet so that it can be placed.
- Remove the shelves that rest loosely on the shelf supports.
Stage No. 2: Fasteners and mezzanine
Depending on the type of fasteners, remove them with the appropriate tool:
- The connection on the eccentric coupler is dismantled by turning a screwdriver inserted into the cross slot of the eccentric counterclockwise. The cylinder is removed by prying it off with a flat screwdriver. You can then quickly separate adjacent panels of the cabinet body.
Stage No. 3: Back wall, hinges, frame
- Use a chisel to pry up the plywood back wall and lift up the nails. Press the wall back down and remove the nails with pliers.
- Remove the plywood and the connecting strip, if any.
- Remove the fasteners in three corners of the box. Remove the released panels.
- Now disassemble the remaining fastening.
- Place the bottom with the support frame facing up. Remove the frame by unscrewing the screws.
- Also disassemble the mezzanine.
- In the Soviet wall, carefully remove the glass doors, freeing them from the hinge clamps. Then remove the loops from their sockets.
- All of the above also applies to Estonian-assembled furniture.
During disassembly, place the removed accessories in bags. Include sheets of paper with marks of parts belonging to them.
Disassemble the corner cabinet without changing the position of the cabinet. Due to geometric features, such furniture is stable and does not need to be tipped over to the floor.
Popular fasteners
Visit the online store of a large manufacturer, take a look at the catalog of furniture fittings that relate to fasteners. An impressive list of products will open before you. Surely the following products will be in the first positions:
- Screws, screws, confirmations;
- Corners;
- Eccentric couplers;
- Intersectional fasteners;
- Shelf supports.
They are most often used for the fixed connection of furniture components.
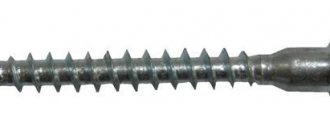
Single-element fasteners - self-tapping screws, screws, confirmations. The latter, just like ordinary screws, are a rod with an external thread and a head with a specific slot. However, the rod with a blunt end and a countersunk head is a key feature of the products. And it is screwed into a pre-made hole. It is characterized by strong fixation and the ability to assemble and disassemble simple interior items without problems.
Angles (corner bars) are metal plates bent at right angles. Responsible for the strong connection of two parts at an angle of 90 degrees. Be sure to include through holes for screws.
Eccentric ties provide hidden fixation when there are no traces of fasteners on the front surface of furniture, such as a table top. They consist of two elements: an eccentric and a rod.
Intersectional couplers also require two parts: a cylinder with an internal thread and a screw. They are used to connect entire modules and individual sections of the headset to each other.
To fix the shelves, special accessories are provided; they are called shelf holders. They are available in metal, as well as with plastic elements or completely made of plastic for glass shelves. In the form of dowels, “spatulas”, miniature corners with a rod.
How to disassemble a wardrobe?
Before you begin disassembling a wardrobe with sliding doors:
- prepare packaging material for transporting disassembled furniture. These are bubble or simple polyethylene film, PSBS (foam plastic), corrugated cardboard, foam rubber and tape. Make room for disassembling the wardrobe body in a horizontal position;
- drag the cabinet into a spacious room if it is located in a narrow corridor. To avoid damaging the surface of the floor covering, place an old sheet or other material under the furniture supports. Pushing the body from the side, pull the material of the cabinet in the desired direction;
- you can use the old method of moving furniture: place potato halves under the legs, cut side down - the cabinet will easily “move”;
- After the preparatory work, proceed to disassembly.
Step-by-step instructions for disassembling a wardrobe
- Remove the sliding doors. Push the curtains up and move the lower door wheels out. Remove the supports from the top guide bar.
- Place the doors separately on the floor.
- Using a screwdriver, unscrew the stoppers and closers in the lower guide rail.
- Remove the upper and lower guide bars.
- Unscrew the bottom and side roller mechanisms with a screwdriver.
- Remove the duralumin frame of the door panels (horizontal and side profiles).
- If you have to reassemble the wardrobe, you do not need to follow steps 3 - 6.
- Using a wrench, remove the confirmations and remove the shelves.
- Also empty the interior cabinet of drawers. To do this, unscrew the screws of the ball guides.
Dismantling a built-in wardrobe concerns only the filling and doors (sliding or hinged design). Dismantle the compartment facades in the same order as in the previous case. Remove swing doors from the vertical posts of the opening by unscrewing the awnings. Dismantle and remove the cabinet filling in the same sequence as when disassembling the wardrobe. Now all that remains is to pack all the pieces of furniture for moving or move them to another room in case of renovation.
Confirmat
The most common and easiest to use type of furniture connection is the confirmat, which allows you to fasten several parts together at right angles .
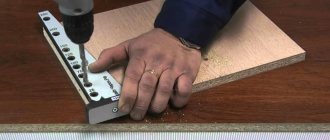
In order to tighten furniture elements, you should drill 2 holes:
- the first - under the head of the confirmat (in one piece),
- the second - under the threaded part (in another part).
As a rule, such fasteners are used to connect parts made of solid wood or chipboard (chipboards), and dowels are used in combination with it, acting as guides.
In addition, there are different types of fasteners, so after installing it you will need to use special plugs to hide it from prying eyes and give the furniture an aesthetic appearance.
How to pack a disassembled wardrobe for moving?
For high-quality packaging you will need sheets of cardboard, film for painting, tape, foam rubber or polystyrene foam. You can pick up empty used boxes from any store for free. So let's get started:
- Cover all panels and shelves with corrugated cardboard to prevent abrasions on the laminated surface of furniture parts during transportation.
- Fold long slabs first, then smaller panels.
- Cover glass or mirror sheets with bubble polyethylene film or foam strips.
- Wrap all stacks with two layers of covering polymer film for painting work. Pre-wrap the ends with foam rubber or corrugated cardboard.
- Secure the plastic cover with tape along both the length and width of the panels.
- Wrap drawers and cabinet bodies with film with foam or foam padding at the corners.
- Place bags of accessories in one box.
- Do the same with packing the back walls.
- Now, all this can be taken out and put into transport.
What is the correct name for the cap? Wooden nails: traditional types of fasteners
Carpentry and joinery work cannot be done without the use of fasteners. They differ in types, accessories, type of fastening and area of use. Types of fasteners:
- bracket;
- dowel;
- capercaillie;
- nog;
- wooden chopstick;
- dowel and other products.
The use of these parts is not as common as the use of nails and self-tapping screws, but when faced with such forms of fasteners, the master must understand how to work with them.
How to properly throw out a closet?
If the furniture is so decrepit that you decide to throw away the cabinet, then there are two options:
- Take out the entire wardrobe.
- Disassemble the cabinet for disposal.
Take out the entire wardrobe
You can move the cabinet without disassembling it by renting two lifting belts and inviting an assistant. That's what movers do. Carrying bulky furniture using belts is not particularly difficult. The technology can be mastered in a short time. If your home has a freight elevator, this will make the task much easier.
You can’t just put old furniture near the entrance or trash can. There is a specially designated place for bulky waste in each locality. Usually this is a solid waste landfill or simply a landfill. Residents of private houses were luckier. Burning waste in your own fenced area is not prohibited.
Disassemble the cabinet for disposal
In this case, arm yourself with a pry bar and a hammer. You can tear the doors out of their hinges by pressing them away from the body with a mounting spatula. Insert a pry bar into the cracks and separate the panels. Using a hammer and spatula, remove the filling elements. Collect everything disassembled into bags and take it to the garbage container site. Make sure this is not prohibited by your building code. Otherwise, use a waste removal service.
Installation methods
Such products are inherently designed for the most durable connection of different furniture elements. However, their installation is not as simple as it might seem. One important nuance must be taken into account - fastening will not succeed if the holes prepared in advance are displaced.
Before making or assembling furniture using dowels, you need to familiarize yourself with the proven diagram:
- At the end of the canvas, points are marked where the holes for the rods will be located.
- Using a drill, drill a hole in the furniture half the length of the dowel. The same must be done in the covering tabletop.
- A rod is inserted into the end - its upper part should protrude to a distance that corresponds in depth to the hole in the covering element.
- The dowel is lubricated with glue, then tightly fixed in the required position. Experts advise pouring glue directly into the hole and only then installing the fastener. This will allow the composition to be distributed more evenly over the entire surface.
- The top part is carefully placed on the protruding dowel. For the best fixation, it is recommended to lubricate the second hole so that the glue secures both sides of the rod.
Preparing holes for dowels
Dowels must be driven in as carefully as possible
Additionally, you can attach the part with glue
Do we know what this element is?
When we say “fastener,” we mean that it is used to firmly fix some parts that can only be separated using aggressive methods. Such reliable products are screws, bolts, construction nails, etc. But there is another category of fasteners that work for stabilization and positioning, without at all interfering with the disassembly of connected parts in a certain direction. An example of such a group is a dowel. This is a small cylindrical product, sometimes with notches on its surface.
Most often you can see this product in furniture; you've probably had to assemble at least a bedside table with your own hands. Some parts and hinges are attached with screws, but before that the main parts of the structure are assembled on the basis of wooden pegs, for which there are already factory holes. This is a furniture dowel; as a rule, it is made of wood, because it fastens parts also made of solid wood or its derivatives (chipboard, MDF). Sometimes plastic dowels are involved in furniture assembly.
How to make a wooden dowel with your own hands
If necessary, dowels and dowels can be made at home, but production will require a lathe. The process of making wooden fasteners is as follows:
- For work, take a harvest of wood of the selected species. The block must be of high quality, without cracks, wormholes, knots, or irregularities. Use quality seasoned wood. When drying, the parts can become deformed and crack, as a result of which the cross-section of the wooden furniture chopper changes.
- Place the workpiece on the lathe and begin removing chips, gradually reducing the diameter.
- Having reached the required section, remove the chamfers and cut the workpiece.
Note! In factory conditions, the length of the dowels is up to 200 centimeters. After processing, the workpiece is removed and cut into fasteners of the required length
Furniture dowel - production and parameters
External simplicity does not mean that this fastener is made using a handicraft method. Woodworking machines are used for turning dowels; there are even special dowel cutting machines. The fact is that their sizes are clearly calibrated in mass production, and for those cases when urgent minor furniture repairs are needed, a metal template is used, which has many diameters. Having chosen the one you need, you punch a wooden blank through it, thus making dowels with your own hands. As for plastic fasteners, they are cast in special molds.
To ensure that such a cylinder holds better in the hole, corrugations are applied to its surface. They can be longitudinal, transverse, helical or complex (mixed). You can also find such corrugations on plastic. The diameter of the dowel can be 4-30 mm, and the length can be 1.5-20 cm. You can, of course, make the product yourself at home according to the given parameters, but this is quite a troublesome job to get a round cylindrical piece of wood. All sizes are available for sale, and the price, of course, is quite affordable. It’s another matter if you need more exotic types of this mount, we’ll talk about that below.
Making dowels
You can make dowels at home quite simply. They will have a horizontal helical cross-section applied to them, which will allow such fasteners to reliably fix the parts being connected. A minimal set of tools is used for this; the process does not look labor-intensive.
As a form, you can use dies for cutting threads, called dies. The set usually has several diameters, which will allow you to choose the most suitable one. A wooden blank is pre-made, made in the form of a rod with a diameter slightly larger than the future dowels.
The die is fixed in a vice, and the workpiece is fixed in a conventional drill. The limitation of the dowel diameter is the maximum capabilities of its cartridge. It is not recommended to make workpieces that are too strong, as they may break from twisting during the grooving process. The workpiece is completely passed through the lathe, which leads to its turning to the required diameter and the application of a notch.
After this, it is enough to cut it using a hacksaw or jigsaw into fragments of the required length and the wooden dowels for the timber, made by yourself, are ready. The process is quite fast and allows you to save a lot of money, since you can use wood scraps and trimmings to make them.
Elements for timber - features of use
When building a wooden house from timber, dowels for the log house are used to secure the logs, and sometimes the only one. They are significantly larger in size than furniture ones; you need to order them or make them yourself, and you often need to make holes for them yourself. If some other fastening is planned, and this method is only a way of orientation and insurance against mobility in a plane perpendicular to the axis of the dowel, then you can do everything yourself.
Installation sequence
When assembling furniture, dowels allow you to create strong connections. But the main problem is the exact alignment of the holes on individual parts. Otherwise, they simply will not be able to connect, so measurements must be taken with special care.
The most common use of dowels is to secure a tabletop to a table base. If we take this as an example, we get the following sequence of actions:
- Holes are made at the end of the base parts. With exact matching they perform drilling and table tops, to a depth of approximately 2/3 of the total thickness of the material. The dowel axes must completely coincide; it is recommended to check this before starting to connect the elements.
- A dowel is installed in the base part, and its length is selected in such a way as to fully correspond to the depth of the hole in the tabletop. If it is larger, the material will either not come together or damage will occur at the contact point. With a shorter length, the reliability of the fastener decreases.
- If you plan to create non-separable furniture, wood glue is used at the time of joining. It can either be applied to the dowel itself, or pre-filled into the holes.
- The tabletop is placed on the base and fixed with a weight while the glue hardens.
What is a lamella?
There is another interesting option for such fasteners in construction - a flat dowel. In wide circles it is more often called lamella, which is how it can be found in stores. Its essence is that it is not cylindrical, but really flat, it is also attached using specially made grooves, and often sits on glue. The holes are made, of course, not with a drill, but with a special router. It is used in cases where the possibility of twisting of parts relative to the axis of the dowel cannot be allowed.
In general, this connection will be the same as in the case of a round fastener, quite reliable, resistant to cutting, and, moreover, allows the installation of very thin parts. True, you need to be more careful when assembling. Since it is best to glue with water-based glue, and due to the thinness of the fastener, its deformation will be significant, you should not hesitate, it is important to quickly place the lamella in the hole. You can, of course, use synthetic adhesives, but very few assemblers choose this option.
Corrugation of the side surfaces of the dowel
Dowels (either wooden or plastic) can have longitudinal grooves on the side surface - grooves, either straight, located along (parallel) to the cylinder axis, or helical.
The riffles serve to allow air to escape when installing dowels into the part. Since wooden elements are most often placed on glue, this improves adhesion and speeds up hardening.
Types of corrugation on the side surfaces of dowels (in the figure on the right - from top to bottom):
| Corrugation of the side surfaces of dowels |
- straight corrugations - corrugation for dowels for universal use. The most common option.
- helical riffles - located at an angle from the vertical axis. Makes it difficult to loosen.
- complex corrugations - (in this case, screw and transverse corrugations) corrugations for dowels intended for reinforced adhesive connections. Designed for structures subject to high loads that require a strong connection.
- transverse riffles - secures different parts as much as possible. Not recommended for use in cases where furniture may need to be disassembled.
- smooth dowel - made completely without corrugation and allows you to resist the shift of structural elements due to exposure to moisture and temperature.
Some types of plastic dowels have “roughness” on the side surfaces, i.e. they are equipped with projections. This surface prevents the dowel from falling out when disassembling furniture, securely fixing it in the main fabric.
Dowel connections - should I use glue?
Assembly using dowels is possible in two options: dry or glued . Each case has its own characteristics. If we have ready-made parts with holes, then we don’t need to drill anything ourselves. All that remains is to arrange the parts in the required order, then drive a dowel into one of them, tap it a little so that it fits in firmly and is located in the hole, and then put the second part on it, and again knock on the part from above so that the second end entered firmly. This connection does not hold the parts in tension, only in shear, so the fastened structure should be immediately placed in the desired orientation, and not upside down or otherwise.
If installation is carried out without glue, then such an assembly can be disassembled after some time. If there are no such plans, but you want to feel a little more confident about the strength of the fasteners, then you can put the dowels on the glue, and the notches on its surface will improve this technique.
You should not fill the holes with glue so that the product will squish there, it is enough to lubricate the end on one side, and then also treat the other end. Moreover, if there are several fasteners located on one side of the part at once, then first install all the dowels with one end into the holes, after lubricating them with the composition or dropping a drop into the hole. And then coat the protruding edges with glue, let them thicken a little (literally a minute or two) and attach the second part, carefully aligning the holes on it with the protruding ends of the dowels. Lightly tapping the mounted part will better distribute the glue and strengthen the structure. Remember, it is not dismountable; if you want to dismantle it, you will only have to break it.
Source: remoskop.ru
How to arrange a connection between furniture parts
The procedure for attaching parts to a wooden nail is not complicated. By following the instructions below, you can connect the parts and assemble the furniture without much effort. The assembly diagram looks like this:
- Holes are drilled in the parts to be joined if they were not made at the factory. The diameter of the recesses should be slightly larger than the diameter of the chopper, and the length should be 1-2 mm longer than the dowel. The presence of gaps in this case is by no means a disadvantage. They prevent fasteners from jamming and help compensate for temperature and humidity deformation.
- The protruding part is filed down if necessary.
- Using a mallet, hammer a dowel into the hole so that its surface is slightly below the plane of the part. If you need to connect the furniture frame, then the dowel is driven in half. The protruding part of the wooden furniture chopper is smeared with glue and, having laid the end part of the furniture or facade on top, it is seated on the mount.
At first glance, it seems that this technique does not provide reliable fixation of the structure, but in practice it turns out that when using high-quality, well-dried dowels, furniture, log houses and timber are durable and stable.
Dowels, dowels, choppers, metal fasteners are types of fastening elements used for reliable connections. Without their use it is impossible to imagine the house-building industry and the furniture industry.

