How to properly install handles on kitchen facades
A kitchen set assembled with your own hands, and this is not so difficult to do, requires the installation of handles on the kitchen facades.
It would seem that there is nothing complicated here, drill holes and screw the fittings onto the screws. But, as practice shows, very often screwed handles begin to interfere with the full opening of furniture doors, this is especially noticeable on corner facades, or blocking of neighboring cabinets or cabinets occurs. Therefore, before installing the handles, you need to try them on. By the way, it should be noted that handles in the form of rails or brackets can be positioned in different ways: all horizontally, all vertically, or combine the installation. So, if you are ready to install handles yourself, then prepare the following tools:
- Drill with a drill 4 or 5 mm in diameter.
- Pencil and ruler (wooden or metal).
- Square.
- Screwdriver.
Calculation of markings for handles
It will be very convenient if you first make a template from cardboard with precisely drilled holes for fastening. That is, by applying it to the facades of the kitchen set, you can avoid long operations associated with setting the fit dimensions of each handle.
We install furniture
Installation of wall-mounted modules
We begin assembling furniture by installing its upper part, since the assembled lower module with the installed tabletop may interfere with the installation of hanging elements.
First, we apply markings on the wall for mounting wall cabinets:
Distance from countertop to cabinet
- We measure the height of the tabletop and add 50 to 60 cm to the resulting figure, depending on our height. This will be the height of the lower edge of the hanging modules.
- From the line thus obtained, we set off the distance to the attachment point of the wall cabinet and draw another line. It is on this that we will fix the fasteners.
After marking, we proceed to install the fasteners:
- If we are going to hang the cabinets on hinge fastenings, then we drill holes in the wall with a diameter of 8 mm into which we hammer plastic dowels.
- We screw locking screws with hooks at the ends into the dowels, after which we hang the cabinets.
- An alternative way is to hang the modules on a special metal bus. To do this, specially shaped fasteners are attached to the cabinet itself, which cling to a metal profile fixed to the wall (see photo).
Mounting the module on the bus
Mounting to a tire is considered more reliable, so if possible, use this method, especially since the price of the tire itself and the mounts is low.
When the installation of the modules is completed, we hang the facades and align them with adjustment screws.
Bottom assembly
The floor part is assembled a little easier:
- At the first stage, using a jigsaw or a hacksaw with a thin blade, we cut holes in the back walls of the cabinets for the passage of communications. We treat the edges of the cuts with silicone-based sealant, protecting the furniture from getting wet and deforming.
- We install the cabinet in its designated place, level it, and then connect it with furniture ties to the adjacent cabinets.
When all the cabinets are in place, you need to install the tabletop:
If necessary, we cut the countertop panel to the size of our kitchen, and then install a protective end cap.
Installing the countertop
- We attach the countertop to the cabinets, and on its lower surface we mark the location of the sink.
- Having removed the tabletop and laid it on a table or workbench, we make a “hole” for the sink. The easiest way to do this is to drill several holes with a drill and connect them with a jigsaw.
- We install and secure the sink to the countertop, treating the joint with silicone sealant.
Sealing the sink
- We place the countertop with the attached sink on the kitchen cabinets, align it horizontally and flat, and then fix it on the kitchen modules. To do this, you can use special fasteners, or you can simply drive the spikes on the tabletop into sockets drilled in the walls of the cabinets.
- We mask the joint between the table top and the wall using a special plinth.
https://youtube.com/watch?v=L2k16fmPnvc
This completes the assembly of all furniture. You can connect the sink to the water supply and sewerage system, install household appliances and begin operating the kitchen as normal.
If you carefully study all the above recommendations, then you should not have any questions about how to properly install a kitchen set. This means that you can cope with this work without turning to the experts for help - and thereby provide yourself with not only a legitimate reason for pride, but also significant savings!
There are many handles, but there is only one facade
Handle selection
Large kitchen front handles
Kitchen fronts with comfortable large handles
- We should not forget that handles for kitchen facades are not so much a decorative thing as they are functional, and the condition of the kitchen facade itself may also depend on its choice. This can be confirmed by any housewife who has to open and close cabinet doors many times a day.
- In order to frequently open the cabinet, the handle must not only be comfortable - it must be a single whole with the facade so as not to come off it (the price of the handle in this case does not matter at all).
Kitchen handle decor
Classic kitchens with brace arms
And if the façade panel is made of glass, then a poorly held handle can cause the door to crack and even cause injury (glass cuts).
This facade handle is very convenient
Advice. As has already been noted, functionality comes first for kitchen handles, so when choosing them, it is better to abandon decorative small devices that are held on by a single screw. The advantage of large handles, such as in the photo above, for kitchen fronts is that they are fixed to the panel in several places.
Kitchen handles in modern design
Modern orange kitchen with comfortable handles
Installation of handles
- Making templates for marking . When installing handles on kitchen facades with your own hands, it would be nice to make templates for marking. Keep in mind that there are a lot of doors and cabinets, and you will need to maintain symmetry during installation, otherwise, even if the handles are very beautiful, all your work will look clumsy.
When you have a template, you can install handles on all facades at once, even before hanging them. In addition, using a template, hinges are also installed on the doors, where every millimeter of distance is extremely important.
- Take a piece of plywood or OSB . Of course, it is not necessary to make a template with a ruler and a rod; you can simply use a piece of plywood or OSB with 90⁰ angles and make holes there in the right places. In the future, you will simply need to attach this template to the edge of the facade and drill it without preliminary marking.
- We adjust the puck . For wooden kitchen facades, you need to adjust a washer under the bolt on the back side so that it does not push through the array and the handle does not become loose. Also, a washer is required for glass panels so that the load from the fastening is distributed over a larger area, which will reduce the risk of cracking.
Accessories for kitchen facades in the Art Nouveau style
Advice. Installing handles on kitchen fronts involves drilling the panel, and if it is made of solid natural wood or MDF, the back side can break off, especially if you need to make a hole of a large diameter. To prevent this from happening, you can use a step or core drill, or make the sharpening angle of the conical drill sharper and drill without much pressure.
If we use some type of cutting drills to install handles on kitchen facades made of natural wood or MDF, and everything is clear here, then what about glass? No instructions will help you with this, because any glass is a fragile material under a certain degree of physical stress (some more, some less).
- We use special drills . For glass panels of a kitchen facade, you can use special drills with diamond coating on the working part, that is, on the tip. When drilling a hole, it is very important to place the glass on a level base and sand is best for this purpose.
- We do burning with liquid tin . There is another way to make a hole in a glass panel for a handle, this is burning with liquid tin. The method is fail-safe, with a 100% guarantee that the glass will not crack. To do this you will need regular sifted sand and soldering tin.
- Mark the facade panel and pour 20-30g of sand in the place where you need to make a hole. Then, using some kind of rod (pencil, wire), make a funnel of the required diameter in the sand at the drilling point and pour molten tin into it. After a few seconds, the solder will cool down, and you can shake off the sand and remove the frozen mass along with the glass stopper - the hole is ready.
And here is the result
Useful tips
Usually the handle on the door to the children's room is placed a little lower to make it easier for children to use the door. However, children grow quite quickly, and replacing doors every 3-4 years is neither economical nor practical. In addition, high-quality interior structures are not cheap, and no one wants to constantly drill new holes to reinstall fittings every time. In some cases, it makes more sense to install a push door handle and then tie some beautiful decorative cord to it - this way you can solve the problem of opening the door for a small child. After 5 years, the lace can be removed - the child will grow up and will be able to freely reach the door handle.
When for some reason the area for the fittings specified by the manufacturer is completely unsuitable, it is necessary to move the door handle lower, higher or sideways. Here you should take into account the standard width of all frame slats of a paneled door structure (its size is 100 mm). It is for this reason that it is strictly forbidden to drill holes in such a sheet.
You should also take into account the fastening features of the door structure. Sometimes the interior door is specially raised. For example, this is necessary when it is necessary to increase the intensity of ventilation or, conversely, to install a decorative threshold. This upward shift must be taken into account when calculating the height indicator for future fastening of door handles.
The distance from the handle to the floor should not change and can only be one meter.
Fittings that match the style - what is it?
The fittings must be reliable, practical and highly decorative. You can't choose these particular rhinestone handles just because they made an impression on the exhibition stand - you need to thoughtfully evaluate the overall style of the kitchen and choose the appropriate solution. There are not many basic recommendations here:
- For furniture in a classic style, bronze or porcelain handles are suitable.
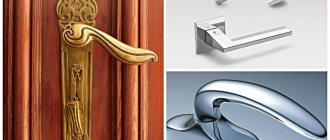
- Are you looking for an option for a high-tech kitchen set? You cannot do without modern railings - these are original brackets, straight, laconic and very comfortable. Railings are installed on plastic or aluminum facades, and they can be mounted both vertically and horizontally.
- Bracket handles are also simple in shape and are suitable for horizontal or vertical placement. As a rule, such options are not overloaded with carvings or rhinestones, and therefore are ideal for “modern classics” and modernity. The most common colors in which staples are produced are wood, bronze, aluminum, chrome, satin, and gold.
- For kitchens in Provence or vintage style, artificially aged fittings or classic handles with porcelain inserts, looking like aristocratic antiques, are chosen.
- Unique handles with Swarovski crystals will become a masterpiece for a unique brilliant interior. By the way, kitchen facades can also be decorated with rhinestones. However, you shouldn’t “strew the entire kitchen with diamonds” - it will be enough if only the handles are decorated with rhinestones. By the way, they go well with laconic painted surfaces.
Push-to-open pressing mechanisms
The mechanism allows you to open and close doors and drawers by lightly pressing a certain area. The secret lies in a special built-in sensor.
The good thing about the mechanism is that there are no fittings, which means periodic maintenance is simplified and repairs are reduced to zero. And even with full hands, you can easily open the drawer with just one touch. The appearance resembles a single canvas without unnecessary reliefs and gaps.
The main drawback is the facade being soiled. As a result of constant touching, you have to wipe the doors from time to time to remove fingerprints. Accidental pressing causes drawers and doors to open. Remember that the Push-to-open system will not allow the adjacent drawer at the top or bottom to open until the previous one is closed.
How to choose the right handles for a kitchen set so you don’t cling to them later
Receive one of the most read articles by email once a day. Join us on Facebook and VKontakte.
It would seem that what to say about such a trifle as the handles on the kitchen set? Despite its small size, this is a very important element of furniture, on which not only the harmony of the design as a whole depends, but also ease of use. In modern kitchens there is a trend of getting rid of handles. Those who are not yet ready to give up door handles should listen to the advice of designers when decorating their kitchen in order to end up with a stylish, safe and ergonomic interior.
What can affect?
The difficulty of making a decision in a particular case is influenced by several factors, which will be discussed below.
As it turned out, there is no specific standard for the height at which handles should be attached to interior doors. They just need to be installed in such a way that there is no inconvenience when opening or closing the interior door. Therefore, for each door, the mounting location must be selected individually, taking into account all the features of the opening and the leaf itself where the door handle will be mounted.
The exception is ready-made models of door structures with already produced and applied markings for each element of the fittings. In this case, all that remains is to secure all the necessary elements in a special sector.
With a budget door or a homemade design that was purchased at retail, the issue of installing a door handle will be decided by the owner himself.
Why you shouldn't neglect details
If you analyze what each family member touches most often in the kitchen, it will immediately become clear why such a tiny piece of furniture as a door handle is so important. It is the reliability, strength, size and convenience of the location of the handles on the furniture that determines whether the cooking process will be quick and painless, or whether you will still have to suffer trying to open the right drawer, trying not to get another bruise.
But this is not all the troubles that can arise from an illiterate choice and location of handles. If you are not ready to give up traditional kitchen furniture, then you must remember that handles determine the overall impression of the kitchen and the harmony in the interior.
In order not to make a mistake with the choice, the authors of Novate.ru have collected advice from professional designers who will tell you how to choose the most suitable fittings for a kitchen set, so as not to disturb the harmony and aesthetics, while not forgetting about ease of use.
Summary
If you watch the video in this article, you will see that all masters install handles at a standard height, unless otherwise specified. And this is the most correct decision.
We believe that a different solution to the question of at what height door handles should be placed is only worthwhile if there is a person with disabilities in the family. Children grow quickly; you don’t have to adapt to them.
Regardless of the modification, each door is considered a complex structure with its own individual elements that perform specific functions. When installing the block, all component parts are equipped with fittings; each individual product has its own special place. You need to decide at what height to install the door handle.
What to consider when choosing handles for a kitchen set
When decorating the interior, you have already made a choice in favor of one style or another, therefore such a design element as a handle should fit into the overall picture, but not in any way in opposition. If, for example, your preference is high-tech style, obviously, you should not buy wooden handles - even the most elegant and beautiful ones will look ridiculous. It is in this case that chrome fittings are suitable, shiny, smooth and always metal.
Carved wooden handles will decorate a kitchen decorated in Provence, classic (in some cases), eco or rustic styles. But on modern, shabby chic or Hollywood style furniture, fittings with rhinestones or elegant forged curls would be appropriate.
How not to overdo it
When choosing the shape, material and texture of handles, it is worth remembering that despite the apparent insignificance of their size, they still attract attention. And if you overload the facade of furniture with large decor, then you can nullify all efforts in organizing a harmonious interior and reduce the cost of even the most luxurious set.
This is especially true for modern pieces of furniture that have laconic, smooth facades. It is worth remembering that a large number of handles or their irregular shape, texture and color can break the continuity of even the most streamlined and smooth lines.
Calculation of a drawer using an example
How to calculate the dimensions of parts for drawers in a niche 400 mm wide, 500 mm deep and 600 mm high. Let there be internal facades, the gap is not 3, but 4 mm for each (2 mm on each side), taking into account an edge 0.5 mm thick. The bottom is attached with an overlap.
It is most convenient to enter formulas in Excel tabular form, indicating the names of the parts and their size (length and width), quantity.
Which form to choose
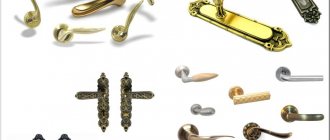
Despite the apparent monotony, the modern market can offer a lot of options, among which you will find the model of fittings that you like. Despite the fact that in stores you can find handles in the form of shells, drops, funny animals and even cutlery, the main forms are: handles-rings, handles-buttons (in the form of “buttons” on the legs), handles-brackets or handles -rails, sink handles, handles in retro style and built into the facade.
Important: When choosing accessories, you need to pay special attention to the safety of the product. To avoid injury and damage to clothing, do not choose handles with sharp corners and sharp bends. When purchasing, you should carefully inspect each unit to ensure there are no chips, cracks, nicks, etc.
In addition to the aesthetic component and safety, the priority should be ease of use, ergonomics, reliability, stability, reasonable compactness, functionality and ease of maintenance.
Unusual design options
Some choose simple and functional ones, others choose beautiful and elegant ones. Designer handles for the kitchen can be themed: for example, in the form of cutlery, tree branches or even insects. Or simply unusual, as in our gallery - when the handles perform not just the function of opening doors, but are also the main detail of the interior.
The photo shows a non-standard version of furniture fittings
Among the popular models today are touch pens. They are equipped with LED backlighting that lights up with a light touch. They are made of special plastic, which diffuses light and creates a translucent effect on a light, glossy facade.
Decide on the material
As noted earlier, the fittings must match the style, which means that the material of the product is selected within this framework and from a practical point of view. As a rule, the choice of handles is not a big problem, because various materials are used for their manufacture, starting with the most common ones, such as wood, plastic, brass, acrylic, various alloys, as well as ceramics, glass, bronze and even silver. Despite such diversity, you need to remember that the kitchen is an area with high humidity, and in some places temperature, as well as a lot of physical stress on the hands, so it is more worth being guided not only by fashion, but also by practicality.
Designers advise choosing metal fittings because they are more durable and reliable; the only thing is that you cannot make a mistake in choosing the color. As a rule, handles in the kitchen are installed to match the plumbing fixtures, or in bright contrast. Moreover, these can be both glossy and matte variations. For example, glossy steel on a dark matte background or dark matte bronze on light glossy facades looks elegant.
Quality and quality again
The material is everything. The strongest and most durable kitchen handles are made from metals of various alloys. You can find out what metal is used from the specific markings on the product:
- • Zamak (an alloy of copper, magnesium, aluminum and zinc).
- • Znal (a simpler mixture, it contains only aluminum and zinc).
The most durable handles are made of metal
Semicircular handles for kitchen furniture
- • Galvanic. The thinnest metal film, applied using galvanization, reliably protects the handles from corrosion, gives them a magnificent appearance and increases wear resistance.
- • Spraying. Fittings with a regular paint finish are very cheap. Although outwardly such pens look no worse than their analogues, they will not last long. Especially in kitchen conditions of high humidity and temperature changes.
Metal fittings for kitchen cabinets
Coated fittings
If you wish, you can opt for kitchen handles made of cozy wood, lightweight plastic, attractive acrylic, beautiful glass, stylish leather. Such fittings will provide excellent and long service.
Built-in handles for kitchen cabinets
Stylish leather loop handles
Warm and cozy round wooden handles
Size matters. The size of the handles plays an important role in determining quality. Small assistants with fastenings on one screw are not entirely practical (they are mainly used in cabinets with a small load). Large handles, attached in several places, are much stronger and more reliable.
Star shaped handles for small cabinets
Asymmetrical kitchen handles
Correct location
Choosing the “right” pens is half the battle. They still need to be correctly positioned and securely fastened. In addition to the fact that the fittings are positioned so that they do not touch another handle or interfere with opening a door or drawer, they should be placed at a height that is convenient for all family members, especially those who devote the most time to cooking. You also need to pay attention to aesthetics. Even if it is more convenient to use vertical brackets, you need to remember that they will visually break up the horizontal lines of the entire headset. In this case, it is better to choose handles that do not contrast with the overall tone of the headset and place them as close as possible to the edge of the door.
Very easy to use railing handles that are positioned horizontally. Such models can become a full-fledged decoration when decorated in a high-tech, loft or minimalist style.
Handle-buttons are almost completely invisible if their color and texture are perfectly matched to the tone of the headset itself. But they are not very practical in the case of massive furniture. In fact, every shape and arrangement of handles has a right to exist, the main thing to remember is that in pursuit of non-triviality or pretentiousness, you should not forget about practicality, safety and how you will keep such a work of art clean.
Cleanliness in the kitchen is no less important than the choice of fittings. And those same handles, only on a gas or standard electric stove, cause a lot of trouble for housewives, because they (and not only) are constantly covered with a greasy coating. And in order to get rid of this scourge, it is worth knowing how to quickly, effectively and effortlessly remove this corrosive fat.
Did you like the article? Then support us, click
:
We make the hole for the hinge using an end mill. Before drilling, you need to make a small indentation using a center punch or an awl. In order to prevent the cutter from moving from the center.
The thickness of the facade is 16 - 18 mm, so it is necessary to ensure that the groove is no deeper than 12 mm and that the cut is uniform.
Door frame installation
During installation, it is necessary to ensure reliable fixation of the mounted structure in the door frame opening. To do this, wooden wedges can be used, driven between the lintel and the top of the opening.
Related article: How to paint a kitchen: choosing paint for the kitchen
The hinge rack should be fixed to the wall only after strict vertical alignment, which is done using a level. Use a few self-tapping screws. Make sure that the structure is installed properly by hanging the canvas. The door should not open or close under its own weight. Only after achieving the required result should the door frame be finally secured in the opening.
After this, remove the door from its hinges again. The space between the structure and the end of the doorway should be filled with foam.
To avoid damage to the door frame pillars, seal them around the entire perimeter with masking tape. To prevent the foam from bending the posts when it swells, install spacers in the opening. Be sure to place soft material between the jamb and the spacer to prevent dents or other marks from forming on the surface of the door frame. After hardening, but not earlier than twenty-four hours, remove excess foam. At the same time, remove the tape.
Types of handles: from massive to “invisible” models
When you choose furniture sets, you will notice that even the handles of one model can be of different types and colors. Some manufacturers offer facades that are decorated with different types of fittings. Your task is to choose the appropriate option, since manufacturers offer a wide range of kitchen accessories: handles, plinths, etc.
There are several types of pens.
- Buttons - such models can be found on many facades. Knob handles are universal due to the fact that they are small in size and made from different materials. How to recognize a “button”? Such a model will be attached to the facade with its low leg, and the “head” plays a decorative role. The button can decorate a kitchen set in a classic, Provence or Renaissance style. The button might blend in imperceptibly with the shade of the façade.
- Pull handles are a popular type of cabinet hardware. They can have an arched or straight U-shape. Their main feature is brevity and simplicity. The staples are made of metal with a chrome-plated copper or gold finish. The simplest ones are aluminum handles-brackets, which are installed on modern-style headsets. Bracket models made of shiny metal, as in the next photo, are best suited for the Art Nouveau style, but Provence and Empire style should not be decorated with these details.
- Handle rails are no less popular fittings, which are installed, most often, on sets in modern and modern styles. What do the roof rails look like? Everything is very simple - it is a straight crossbar, which is attached to the headset using two bracket holders. The ends of the crossbar can protrude beyond the holders, or they can immediately go into them. There are rails that have a cylindrical shape and carved tips. Such fittings are best suited for classic and rustic-style kitchens.
- Profile handles - they are also called “pattern models”. These products are a piece of aluminum profile that is attached to the side, bottom or top of the facade. Such aluminum handles have one feature - “invisibility”. Due to the fact that the profile is tightly attached to the facade, it is not noticeable and does not protrude above the surface. Aluminum finishing is suitable for sets made in modern or modern style. But for the Provence, loft or Renaissance style, you should not select such fittings.
- Mortise handles – this fittings will appeal to connoisseurs of laconicism and minimalism. Such products cut into the plane of the facades. That is, the mortise handles completely merge with the surface of the furniture. Mortise models look best in modern and loft style interiors. Since they look original, it is better not to choose mortise handles for interiors with an abundance of colors and decor.
In the photo below you can see another interesting type of handles - built-in. They are similar to mortise ones and are used on facades that are richly decorated. In this case, the fittings become an inconspicuous but functional addition.
In fact, all handles are divided into two types - overhead and mortise (hidden). The former will become an external decoration, and the latter will become an “invisible” addition.
If you need furniture handles that will attract attention, take a closer look at drop models, wide rings, and retro sinks. For solid wood facades and Empire style kitchens, models in the form of rings and shells are ideal. They look bulky, but emphasize the pomp of the interior.
Design
Let's return specifically to my kitchen. As I already wrote above, the choice of the concept of my set was influenced by a washing machine, the main feature of which is the vertical loading of laundry. That is, unlike most washing machines, my “working” plane is the top plane, and all the rest can be hidden from the eyes of an outside observer. This is how the idea of a corner kitchen was born, where the sides of the corner are cabinets and the top is the machine. This arrangement is the most rational and provides maximum functionality.
In the photo above you can already see a new window installed without a window sill and in a reduced opening. The old opening, in my opinion, was too large for such a room, and I refused the window sill because I planned to fit a tabletop in its place. At the same time, electrical wiring was done and socket blocks for household appliances were installed. Later, tiles were laid on the floor and walls, and wallpaper was hung. I approached the final design of the headset with the following picture.
I started drawing the kitchen in AutoCAD because I wasn’t trained in any PRO100, and I didn’t set myself such an initial goal. Although I will not hide that if you master this specialized program, then in the future it will, based on your finished dimensions of the cabinets, itself carry out their detailing and even suggest the optimal fastening element. My AutoCAD drawing turned out to be much simpler, but at the same time quite visual.
Editor's note: for design, you could also use the online designer on our website. No special knowledge is required to use - just take it and draw.
Let's go over the main points regarding the cabinets I got:
- I decided to place the floor row on decorative aluminum legs, with the ability to adjust them in height. In my opinion, aesthetically it looks better than a solid base, and besides, there remains (albeit limited) access under the cabinets (for a mop or rag, for visual inspection for leaks from the water supply or sewerage system). The presence of decorative legs must be taken into account when further detailing the cabinets (see detailing).
- The facades of cabinets 1 and 5.6 (in fact, this is one cabinet, like 2.3, I just thought in its original form that it would be two cabinets, and already left the numbering as is, so as not to change) will open upward using gas elevators.
The facade of the drying cabinet (2.3) will open upward using the Aventos HF system.
- The doors of cabinets 4 (above the washing machine) and 8 (under the sink) will be hinged on regular door hinges with a closer.
- An oven will be built into cabinet 9, so it will be hollow, with only a small drawer underneath for storing baking sheets and a grill grate.
- Cabinets 10.1-10.3 are three identical cabinets with drawers, which will be secured with intersection bolts. Why drawers and not just shelves? The fact is that the contents of the retractable drawer are easy to glance at. To get to things located in the depths, you don’t have to carry out archaeological excavations. Shelves often turn into a “cemetery” of dishes and supplies, which the owners simply forget about.

