Shelving is an excellent storage option. They are much cheaper than cabinets, and do not require any skill if you want to make them yourself. Racks are actively used to equip various storerooms and workshops.
This storage system corresponds to modern fashion trends and can be used to store items in a room for any purpose. There are various ways to make a convenient rack yourself.
Types of racks
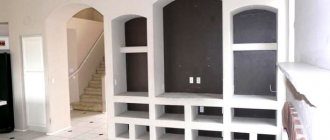
A rack made of boards or metal is used to store various items. Thanks to the open shelves, it looks more “airy” and does not take up much space. This makes the shelving unit an indispensable item in small spaces.
Before you start making a rack, you should choose what it will be like. The structures are divided:
- By size. Shelves can be large (up to the ceiling) or ordinary (no higher than a meter).
- According to the form. Shelving can be along the wall or in a corner.
- By location. The design can be horizontal or vertical.
- By design. Shelves can be of different heights and widths, and may have additional decorative elements, for example, a tall statue running through. Some shelves can be replaced with hangers.
Most often, do-it-yourself racks are made as simple as possible, consisting of a frame and the shelves themselves. This design is universal and can be used anywhere: in the garage, cellar, kitchen, bedroom, etc.
Corner rack Source msk.emp-mebel.ru
Typically, cellar shelving is made of wood and metal, or both materials at the same time (metal frame and wooden shelves). Homemade shelves can be assembled from scrap materials, such as plastic pipes and plywood.
See also: Catalog of companies that specialize in redevelopment of country houses of any complexity
Tree
For shelves, both regular wood and chipboard or DVD are used. This is an easier to install option that can be easily handled by a beginner.
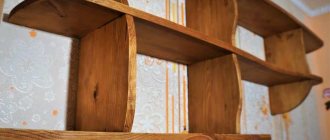
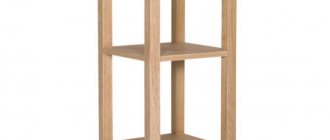
A wooden shelving unit is easier and cheaper to assemble: you can even use parts left over from construction or renovation if they are the right size. The wood itself fits better into various interiors; it can be painted in any color. The boards themselves are easier to process and assemble; no special skills are required; they can easily be given an unusual look, for example, with rounded edges.
However, wooden shelves have more disadvantages:
- They catch fire easily;
- Withstands less weight than metal;
- They may develop mold or rot.
Larch, oak and beech are most often used for shelving. Popular pine and birch are suitable only if the shelves are not expected to be heavily loaded, since both woods are quite soft.
Wooden shelving Source msk.emp-mebel.ru
Metal
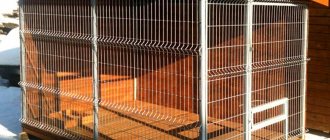
Racks made of profile pipes of suitable size are most often found in offices and warehouses. In a private home they are placed in basements and garages.
The advantages of metal shelves include:
- Durability (several decades);
- Ability to withstand significant loads;
- Non-flammability (this is especially important if the rack is located in a room where a fire can easily break out);
- Easy installation and dismantling;
- Interesting appearance.
The disadvantages of metal shelves may be a higher price. In addition, you will need the ability to solder.
Practical tips for making
In the presented photos you can see a self-made rack installed. It fits perfectly into the environment, suits the needs of the family and is made from affordable materials.
To make such furniture yourself, you need to follow simple tips from our experts:
- Determine the parameters of the room, the purpose of the shelves, their strength, choose the material. Depending on the room: corridor, living room, kitchen or bedroom, the functionality and appearance of the structure will change.
- Creating a drawing. Ready-made diagrams can be downloaded from the Internet, magazines, or, having certain knowledge and skills, you can draw a drawing yourself. The dimensions of the room will be required: ceiling height, wall width, cell depth. Tip: if you make marks on the surface of the walls in full size, then this technique will significantly facilitate the construction of the drawing. Diagrams of shelving shelves and options for their location, various models of furniture can be found in specialized literature.
- Installation of the product: assembly on site or installation of a finished structure. Power tools required (jigsaw, drill, screwdriver), hammer, nails, sandpaper, pencil, material. Wooden beams, chipboard, metal profiles, remains of containers, boxes, crates, plastic and glass panels, bricks, and old books are suitable.
- Decoration of the finished product. Wooden shelves are easier to finish. For colorful decor, we can recommend painting, varnishing, decoupage, colored edges, burning, and curly edges.
Advice: Even if you have a precise eye and this is not the first time you have made furniture yourself, it is better to prepare a schematic drawing in advance. Including all parts, fasteners, and their sizes.
DIY shelves
Assembling the rack is not difficult; all calculations will be simple and understandable. The main thing is to do everything carefully, process the material and connect it correctly.
First of all, you will need to make a drawing of the structure and indicate all the dimensions: length, width and depth, the number of shelves, whether the rack will stand on the floor or will it have “legs,” whether the walls will extend from above, forming an open top. It is also worth immediately considering where the structure will stand - along the wall or in the corner.
Profile rack Source ip-nesterova.ru
Before assembling the rack, it is necessary to correctly determine the dimensions of the shelves. To do this, you need to try on what items will be stored. To do this, just try on the largest object and add a few centimeters to its size.
Diagonal option
This type of wine placement is practiced everywhere. Any person can do it. To do this, it is enough to have some kind of wooden box or knock it down yourself.
When making it yourself you need:
- Cut four identical pieces of wood that are equal in width to the height of the bottle (or slightly less). Ideally, when assembling them, you should get a square.
- Measure the diagonals and cut 2 more pieces according to the resulting dimensions. These are the main elements.
- In the middle of each of them (up to half) a groove is cut with a width equal to the thickness of the wood.
- Insert elements into each other. You should get a design that resembles the letter “X” or a cross. It is placed in a square and secured with self-tapping screws. The bottles are placed in the resulting compartments.
Video description
How to work correctly with a metal profile will be shown in the video:
If the rack made of pipes has wooden shelves, you will need to additionally attach horizontal strips to the shelves on both sides. Thus, the shelf will be an iron horizontal rectangle on which lies a wooden or plywood shelf.
From plastic pipes
This is an interesting, albeit not very aesthetic option. It will require polypropylene pipes and fittings of a suitable diameter (at least 2.5 cm); the shelves are best made of plywood.
The assembly process is simple and similar to installing metal shelves:
- First, the pipes are cut to the required length.
- Then they are fastened together, assembling the frame. It should consist of several elongated rectangles (the base of the shelves) and side supports. It is better to make supports not only in the corners, but also in the center of the rack.
- Small indentations are cut into the plywood so that it does not touch pipes and fittings. To prevent the plywood from moving, it is screwed to the frame.
- Once the rack is installed, the pipes and fittings are soldered together.
A rack made of plywood and pipes is simple, but quite strong and can withstand significant weight. Thanks to its light weight, it is easy to move.
Preparing parts for assembly
The next, no less important stage of work is preparing the parts for assembly:
- The metal profile (or PVC pipes, or other material used for support posts) is coated with an anti-corrosion compound, protecting the surface from rust.
- Blanks for future shelves are cut out of wood using a jigsaw. All sharp cuts are carefully ground with a plane and sandpaper. Moisture-resistant oil is applied to the surface of the wood, the exposure time is maintained, and the remaining oil is removed with a dry rag.
After the oily composition has dried on the surface of the wood, you can begin to decorate the shelves (coating with PVC films or decorative veneer).
Briefly about the main thing
Racks are in great demand both in apartments and in private houses. They are simple, do not take up much space, and due to the absence of walls they seem weightless.
Before assembling the structure yourself, you need to choose the size, shape, type and material. Racks are made of wood or metal (sometimes both materials are used); polypropylene pipes and plywood can also be used.
First of all, it is important to make a sketch and dimensions. Any rack consists of a frame and shelves.
The frame consists of sides, the shape of which resembles a staircase. Shelves are nailed to their crossbars. For greater stability, additional vertical supports are attached at equal distances along the shelves.
Ratings 0
Preparation of the drawing
The most crucial moment in all independent work is preparing the drawing. The following parameters must be displayed on the diagram of shelves and racks:
- Design dimensions.
- Depth of shelves.
- Distance between adjacent shelves.
- The width of the retaining sides (as a rule, their role is played by metal corners).
All available additional parts (hooks, wheels) must be indicated on the diagram in the appropriate scale. Ready-made drawings and designs for interesting shelving can be found and printed before starting work.
Necessary materials
How to make a bookcase with your own hands is clear. You should decide on the materials needed in this matter.
- Assembling a plastic shelf bought in a store is as easy as shelling pears; just assemble the “construction set” according to the instructions and use it with pleasure.
- When working with wood, in addition to the main material, you will need fastening elements (screws, nails, corners). Let us note that wood is a material subject to mechanical damage: the wood dries out, the wood rots, and insects eat it. To protect your piece of art, you should coat it with varnish or wax. To add color, you can use paint or tints.
- If we are talking about metal, then you should study the issue in more detail. In an apartment, an iron shelf can be used quite rarely. There is stainless steel in the kitchen, stainless steel in the bathroom, stainless steel in the hallway. Ferrous metal is only suitable for a tool.
- Glass can be a material for shelves, both individually and in the overall design.
It may have four or more legs with shelves between them. As a rule, it does not have back or side walls.
Those who want to learn how to make rustic things are faced, first of all, with two tasks: aging the wood while simultaneously increasing its decorative qualities and surface strength, and also, as regards rack-mounted shelves, adjusting the junction of branch cuts for the racks.
Working with all these materials requires certain skills and tools. What can we say about more complex materials?
A type of shelving made from overlay planks is household frameless (with sidewalls made of one board each) shelving-ladders.
Use decorative forging, ropes or leather inserts
Material base
Three types of materials are perfect for today’s product: wood, metal or plastic. In addition, you can combine several bases.
It is immediately worth noting that of the proposed materials, plastic is the most difficult to process - insufficiently strong connections, spoiled appearance by cutting or drilling. Therefore, the most optimal solution is to use it with a wooden or metal structure.
In addition to the previous option, you can combine several other ideas. For example, use forged metal and plywood.
Artistic casting will look very good - the main thing is that it fits into the design idea of the room and is organically combined with other decorative elements. So, sweeping forging will not fit into a minimalist style.
