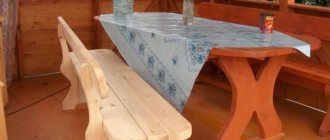
A gazebo is one of the main attributes of country life. Here you can relax, play board games, chat with friends, and have small family gatherings. But for all this to become possible, a table and benches must be installed in it. Garden furniture not only fulfills its main function, but also creates an atmosphere of warmth and comfort.
A small wooden hexagonal table will fit into any gazebo
Types of tables for gazebos
Based on the shape of the tabletop, there are 3 types of tables:
- square (rectangular);
- round;
- polygonal.
Round tables are considered the most popular and convenient. The smooth shape makes them ideal for all types of gazebos.
Several materials can be used in the manufacture of tables: metal, plastic, wood, as well as their combinations. Each option has its pros and cons. Metal tables are durable, but they are expensive and get very hot in hot weather. Plastic options are inexpensive, but will not last long.
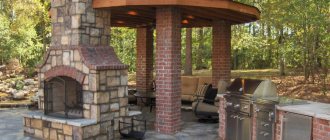
The combination of wooden tabletops or seats with brick bases looks very interesting, especially if the same materials were used in the construction of the gazebo.
Wood is considered the most affordable material for making gazebo furniture. Wood is environmentally friendly, easy to process, and has an affordable price. A wooden table can be bought at any specialized retail outlet, but the owner’s special pride will be furniture made with his own hands.
Advantages of a self-made gazebo table
If you make a gazebo table yourself, then its owner and creator will have several advantages.
- Price. Making a piece of garden furniture yourself will be cheaper. After all, you don’t need to pay the master for services. You can also use improvised means and work with existing tools.
- Appearance. And although there are plenty of gazebo tables on sale today, it is not always possible to find what is required in a particular case. When making garden furniture with your own hands, the builder already has a completed idea in his head, which he will accurately bring to life.
- Dimensions. In the process of developing a table, the dimensions of the finished gazebo, chairs or benches are also taken into account. Therefore, in order not to run around the shops looking for furniture of the right size, it is enough to make the drawing correctly.
The advantages include pleasure from the process. Many summer residents like to make all sorts of useful items for their home, which then become the object of their pride.
There are no downsides to making your own table. It's just a waste of time. And time spent with pleasure cannot be considered wasted.
Preliminary preparation
Approximate diagram of the construction of a wooden rectangular table and bench
Before starting work, you need to consider several important points:
- The size of the table must match the design of the gazebo. If the space is small, then it is better to go with the classic version - a tabletop fixed on a durable stand. If space allows, you can install a table on two supports.
- The shape of the tabletop should be in harmony with the configuration of the gazebo. For example, polygonal or round tables are considered a good option for 6-sided buildings.
- The optimal table height is about 80 cm. But here you need to focus on the average height of family members.
- It is advisable to think in advance whether the table will be portable or stationary and decide on the number of legs.
- The size and placement of furniture should not impede movement within the building.
Portable furniture is a great option for small gazebos. If necessary, it can simply be removed or moved to another location.
Tools
To make a wooden table you will need a certain set of tools:
- electric or chainsaw (you can use a simple hacksaw);
- chisel;
- axe;
- hammer;
- electric cutter;
- roulette;
- sandpaper.
If you have the skills, you can easily make a wooden table of any shape with your own hands.
Some nuances of the installation process should be taken into account:
- Fasteners must be made of stainless materials.
- Nails can become loose over time, so assembly is best done using anodized wood screws.
- To extend the service life, wooden parts must be treated with special antiseptics.
- If the upcoming work is new to the master, then it is better to practice on unnecessary parts in advance.
Wooden portable table
A portable table made of boards is a strong, stable, reliable and lightweight structure. The dimensions of the tabletop must correspond to the dimensions of the gazebo itself.
Assembly steps
Table top:
- Mark the required length of the boards.
- Cut the material.
- Secure the boards.
- Using self-tapping screws, install several guide bars on the back side of the structure.
Legs:
- The table legs are made of the same material as the tabletop.
- The number of supports depends on the size and shape of the table.
- The legs of the structure must be stable.
- When installing supports, the floor level should be taken into account. The slope of the surface must be compensated by different lengths of the legs.
Each element of the future table must be thoroughly polished and treated with an antiseptic!
At the end of assembly, at least 2 layers of varnish must be applied to the product.
What materials are benches made from?
There are three main options - wood, metal and stone. But the most popular are combined models with a wooden seat and a metal body. These are strong, durable and beautiful products, appropriate both on the city street and in the garden.
Tree
Of the mono-variants, that is, benches made of one material, wooden ones are the most common. Almost anyone can make a bench out of wood, especially since there are a lot of models - from simple to super complex, decorated with carvings and figured elements.
Wood is available, inexpensive (especially when compared with prices for metal or stone), and easy to process. There is no need to buy a huge amount of material, because 2-3 good boards are enough for a bench. To make a bench out of wood, you don't need any special tools. It is enough what every summer resident has - a saw and a hammer.
Wood is environmentally friendly, and this is a significant plus. However, you need to thoroughly dry the boards and also treat them with special compounds against mold and mildew in order for the product to last a long time. If done correctly, there will be no “cleaner” material to use for making garden furniture.
Metal
Metal benches are strong and durable, but seats made from this material are not always comfortable. In addition, metal tends to heat up greatly when exposed to sunlight, so it is better not to place benches made of it where there is no canopy.
If the gazebo is decorated with forged elements, they can be duplicated in furniture decor. It is not necessary to master cold forging yourself; it is enough to go to any large construction supermarket and select the desired parts.
Stone
The main advantage of stone benches is their durability, the main disadvantage is the cold. Stone does not conduct heat well, so seats made from it are not recommended for children or adults. On a cold stone bench it is very easy to chill the kidneys and pelvic organs. Even if the stone product is located in the open air, it heats up only during direct sunlight and instantly cools down as soon as the sun disappears.
Combined options
There are two most common combinations - wood plus metal or wood plus stone. Both options are strong, durable, and beautiful. The choice depends only on the owner of the summer cottage. Wood-metal products are lighter, more mobile, and more elegant. Wooden and stone - more solid, more solid, more massive.
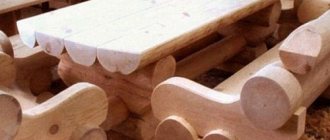
Timber table
For work you will need from three to five beams.
An example of a rectangular table made of natural timber
A strong and reliable table can only be made from even beams that are carefully adjusted to each other.
Stages of work
Legs:
- Measure 4 pieces of timber: two – from 0.5 to 1 meter wide, two – slightly smaller.
- The long beam will become the base of the legs, and the shorter one will lie on top.
- Adjust the material to each other, connect with wood glue or self-tapping screws. For reliability, the bottom side can be secured with slats.
- Cut another beam equal to the length of the tabletop.
- Lay it across the assembled structure.
- Further collection proceeds in the same way as points 1-3, only the shorter beam is laid first, and then the longer one.
- Fasten the parts with wood glue.
- Lay and secure wide thick boards on top.
To ensure that the wood sets as firmly as possible, let the table stand under heavy pressure (for example, under several bags of mortar) for several days.
Finally, you need to sand the sharp corners and sand the surface with sandpaper. Don’t forget about protective equipment: water-repellent compounds and parquet varnish, which will extend the life of the table for several decades.
Treatment
Protective compounds are applied before starting work (fire retardant and antifungal drugs, stain) and as a final stage (varnish or wax).
This allows you to reveal the wood texture and increase the service life of the product:
- This procedure is especially necessary for furniture designed for year-round use in the fresh air.
- After assembling and adjusting the structural elements, the saw cuts also need to be processed.
You can prevent the varnish from peeling if you dry and sand the first layer well, and then apply several more layers. Acrylic varnish creates a thinner transparent layer and dries faster.
Tree stump table - simplicity and originality in one bottle
Table for a summer house made from a stump - an original solution for decorating a gazebo
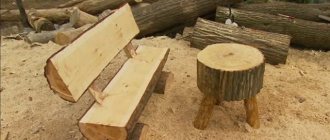
A table for a gazebo can be made from an ordinary stump. This will be an original and environmentally friendly design that will appeal to lovers of everything unusual.
- To work you will need a wide stump. If there is nothing suitable at the dacha, then the material can be found in the nearest forest.
- Dry the workpiece.
- Using a chisel and chisel, remove the bark from the stump.
- Use a plane to level the surface.
- Sand it with sandpaper.
- Clean cracks from dust.
- Cover the structure with varnish or wood paint.
To avoid damaging the floor of the gazebo, you need to use wheels or a furniture stand to install the table.
Such a table in itself is an original decoration for the gazebo, but for additional decoration you can use mosaics or pieces of tiles.
Conclusion
To decorate your vacation, you don’t have to spend a lot of money. Wood, metal, plastic or other available materials are always at hand. Additions made with taste and soul will create a unique image and respectable style.
For a visual example, you are given many options for designing gazebos; the video in this article will tell you about the process, and the final decision on the design depends on you.
Did you like the article? Subscribe to our Yandex.Zen channel
Round table
A round wooden table is one of the most popular solutions for a gazebo.
If the gazebo is small, then you can install a round table on one leg. assembly steps :
- To make a support, you need to take a beam with a cross-section of at least 10 by 10 cm.
- Drill a hole in the lower part of the future leg.
- Clean the recess from dust and coat it with epoxy glue.
- Insert a wooden or metal pin into the hole (it will help keep the table on the floor).
- Drill a hole in the floor.
- Make 4 sawn spacers and fix them to the support using self-tapping screws or glue.
Table top:
- Take a tongue and groove board and assemble a rectangular or square shield from it.
- Drive a small nail into the middle of the structure.
- Build a homemade compass. To do this, take a long thread, tie one end to a nail, and the other to a pencil. Stretch the thread and draw a circle on the tabletop.
- Cut the workpiece.
- Nail 3-5 cross members to the underside of the structure.
- Connect the support and the tabletop.
- Fix the structure to the floor.
Furniture selection
Let's consider several furniture options for garden gazebos. The most popular furniture for gazebos is made of wood. Such furniture is very comfortable, will decorate any gazebo, will serve for a long time, is easy to manufacture, and is inexpensive.
Furniture made from forged elements will look impressive in a gazebo, can withstand heavy loads, but during operation it requires renewal of the anti-corrosion coating, is heavy and is not at all suitable for a budget option.
Elegant wicker (rattan) furniture will elevate the design of a garden gazebo, but it is very labor-intensive to manufacture, it is susceptible to humidity and temperature changes, once worn out, it cannot be repaired, and practicality leaves much to be desired. Doesn't support a lot of weight.
Universal plastic furniture can replace all types of furniture listed above, is hygienic, easy to clean with water with a small addition of household detergent, has a large selection of colors, is light in weight, durable, resistant to humidity and temperature changes, and has a very reasonable price. But in comparison it loses to other types of furniture - there is no such charm.
Choosing furniture depending on its purpose
Gazebos come in different varieties and so do the furniture. But there is a relationship between the first and last designs - they are all designed to enjoy their users' relaxation. And the latter can be a gathering, a meal, reading a book, etc. From here the following furniture emerges:
- Chairs, benches, benches - for sitting;
- Hammock, bed - for lying down;
- Table – for meals, board games and online mode (it’s always more convenient to use a laptop when it’s on the tabletop);
- Shelves, cabinet - for storing various items.
Hexagon table
A table on two legs with six sides is an excellent choice for a small gazebo.
The manufacture of a hexagonal table is preceded by certain preparation. It is necessary to draw up an accurate drawing of the product, make calculations, cut and process the material. Build process:
- Draw a circle on the ground and mark the corners of the future tabletop.
- Using self-tapping screws, secure the outer row of boards.
- Take 6 boards and fix them to each other in the longitudinal direction according to the following scheme: one end is attached in the center, the other in the corners.
- Lay out transverse rows of boards, starting with the outer row.
- Make legs and secure them on the inside.
Gazebo with fireplace and wooden blinds
A DIY garden gazebo on the site can be equipped with a stove and barbecue. How to make this cozy and functional place to relax yourself is described in detail in the step-by-step instructions below.
You need to start work with the construction of the furnace. Work order:
You need to clear a flat area under the stove
It is important to immediately calculate that a gazebo will be erected around the stove. It is important to strengthen the area under the stove with a scattering of broken bricks or crushed stone. Install a frame of logs around the perimeter of the future furnace, reinforce it with reinforcement and fill it with cement or concrete. Next, you should build the furnace walls from brick, as shown in the video.
Next, you need to fold the pipe at the desired height. But it is better to do this after the frame of the gazebo is ready. The gazebo will be shaped like a rectangle. Drawings for such a design are in the photo above.
You need to make a gazebo like this:
Lay the floor joists and cover the ground with roofing felt before doing this.
- Lay the floors and finish the edges.
- Make a frame for the walls from timber and secure it. Install the roof frame.
- At this stage, you need to complete the furnace, fold and remove the pipe.
- Cover the roof with corrugated sheeting.
Cover the walls with clapboard.
Decorate window openings with wooden blinds made from 40 x 10 mm slats.
For this garden gazebo, you can make your own doors from slats and hang them on piano hinges. Inside the gazebo you can make benches and a table from the same boards. If you burn the board with a torch, you will get a stylish beam that can be used for interior decoration of the gazebo and for making furniture.
Post Views: View statistics 1,627
Mobile table
Mobile furniture in the gazebo - compact and light
The advantage of a mobile table is the ability to remove it for the winter (which will extend its service life). In addition, during friendly gatherings, the table can be removed from the gazebo, freeing up space for dancing or other purposes.
The installation of a mobile structure differs little from the assembly of a stationary one.
- Take 2 beams, the length of which is 8-10 cm less than the length of the tabletop.
- Fix the boards with self-tapping screws, making sure that there is a free distance of up to 5 cm to their ends.
- Screw the longitudinal bars to the tabletop.
Transverse and longitudinal bars must be fixed at right angles.
- Make 4 square legs and secure them with spacers.
Photos of original benches (options for cottages and gardens)
Everyone can imagine what the most ordinary bench looks like, but not everyone likes simplicity and most opt for original solutions. Everyone wants to have something that, for example, a neighbor in the country does not have. Almost all summer residents start by decorating their summer cottage or garden plot, and there are also many options here. Alternatively, you can start designing the area by installing a bench, having previously decided on a resting place. After all, a place of rest is not needed later, it is needed now. Therefore, the design of this place should be tackled at the first stages of the process of decorating a summer cottage or personal plot, and only then proceed to the design of the rest of the territory.
As a rule, summer residents are very keen on growing various green spaces and flowers. Especially, there are a lot of them near buildings. Alternatively, you can combine plantings with a recreation area by installing a bench not far from the dacha. In this case, everything will look organic: green spaces, flower beds, and an original bench.
Two flower beds made of boards and a bench between them
There are a huge number of options: from the simplest to the most sophisticated. The simplest option may consist of two wooden boxes in which flowers are planted, and two boards built between these boxes. The boards must be planed and well sanded. This structure can be placed directly next to the wall of the dacha. You can attach a couple of the same planed boards to the wall, which will serve as a kind of backrest. Instead of wooden boxes, you can install concrete cabinets, which can last much longer than wooden elements.
Garden bench-flower bed
It is very simple to build such a structure, and most importantly quickly. As for the boards, you can buy them ready-made or make them to size yourself using untreated boards. But in this case, you will have to work hard, but the bench will not cost anything, and the result will definitely please you. If concrete flowerpots are used, the boards can be secured using metal corners. The only problem is the difficulty of drilling holes in concrete. Under no circumstances should you use a hammer drill, as a flowerpot, even a concrete one, will easily split, especially if it is made independently.
Flowerpots as legs
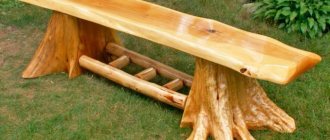
You can not fasten the boards, but instead of the boards put a huge log, which does not need to be fastened if it is installed correctly.
As mentioned above, there are many options, and they are created on the basis of the real possibilities that the owner of the dacha has. Alternatively, you can simply install a bench for relaxation away from flowers and green spaces. After all, it’s no secret that various insects hide in flowers and between the leaves of plants, which in no way encourage rest, but, on the contrary, force you to leave behind the worst memories of your holiday.
A bench made of boards is an interesting option
As a bench, you can use hollow blocks, into the voids of which treated boards are simply inserted, which can serve as seats.
Bench made of hollow blocks and timber
To make sitting comfortable, the sharp corners of the blocks should be rounded. It's good if these blocks turn out to be heavy and large. If the blocks are small, then they can be pinned together into one piece.
How to make a garden bench with your own hands
Watch this video on YouTube
Benches for gazebos
Making a bench for a gazebo is an equally exciting process. If the standard dimensions are observed, it can easily fit 3 people.
Benches in the gazebo save space and help accommodate many guests
Assembly steps:
- Take boards 15 cm wide and 3.5 cm thick (the length of the material should correspond to the length of the wall along which the bench will be installed).
- Process the workpieces with an electric planer.
- Round and sand sharp corners.
- Cut a piece of timber (5 by 5) along the length of the boards.
- Also prepare 2 pieces of timber, each 40 cm long.
- Take 5 bars measuring 30 by 50 mm and cut off the corners of each on one side - you will get supports under the seat.
- Saw off five 50-centimeter bars and trim the corners on both sides.
- Paint and varnish all parts.
- After drying, screw the timber (5 by 5) to the gazebo posts.
- Install 2 supports under the beam.
- Fix the prepared stops on top of the beam after 50-70 cm.
- Place a special spacer under each stop.
- Secure the boards to the supports.
Making wooden tables and benches for a gazebo with your own hands is a great chance to show off your skills and save your family budget. The only thing is not to forget about following safety rules and choosing reliable and durable materials. And then every visit to the gazebo will become a pleasant reminder of your own skill.
Product creation
Drafting
How to make a bench in a gazebo with a barbecue? The manufacture of any product begins, first of all, with design, namely with the creation of a drawing.
Before you begin, you should measure everything carefully. Also make allowance for the fact that wood shrinks over time. The main value that should be indicated on the drawing is the height of the structure. The best option is a bench with a height of 40 to 60 cm. The height can be adjusted only depending on the structure of the gazebo and the preferences of the household.
Typically, partitions or walls in a gazebo with a barbecue are placed around the perimeter of each support, and therefore it is not necessary to make backs for the bench, but if you still want each bench to have a back, try to calculate everything in advance, in particular the angle of inclination and length. If you decide to make furniture from wood, and this is your first time, try to choose the simplest designs. Projects that are not very complex can be completed in one day even without professional skills.
Materials and accessories
So, what tools and materials will we need for our work? What materials to choose? To make a bench that looks nice and is comfortable, you will need to do some work. First you will need to study all the technology. It will not be superfluous to familiarize yourself with a detailed master class on manufacturing, which explains all the elementary models.
The structure will have the following dimensions:
- The length of the back and seat will be 1.6 meters.
- The seats will be located at a height of 0.4 meters.
- The bench should be 0.95 meters high.
- The ideal seat width is 0.5 meters.
A bench with these parameters can accommodate four people. To make a bench for a gazebo with your own hands, you will need some tools and materials, and their list is not that long.
- Boards with a size of 1.6 * 0.15 m. You should select several blanks - 3 for the seat and 2 for the back.
- It would be optimal to use wooden blocks with a thickness of 4 cm as holders.
- Varnish and primer.
- Self-tapping screws.
- Plane.
- Sandpaper.
- Electric screwdriver.
It will be good if you immediately select boards of the appropriate size, and if there are none, you can use an electric jigsaw. All surfaces must be treated with varnish and primer; paint can be used instead of varnish. This will make it possible to extend the life of the structure.
Helpful advice! The bench can be reinforced with beams. In this case, it will be stronger and more durable.
Manufacturing technology
You can make a bench for a gazebo in a few steps. To begin with, you will need to develop a drawing and prepare the necessary materials, and when everything is completed, you can begin.
The work includes the following actions:
- Pre-prepared boards should be planed and sanded. They should be processed so that there are no splinters or irregularities.
- Grooves should be made in the boards that were chosen for making the backrest. To do this, buy such a useful tool as a plane.
- After this, we make supports from strong, high-quality beams, which have a flat part for fastening.
- If desired, you can equip the bench with beautiful carved handrails. To do this, use a jigsaw and cut out patterns.
- Prepare everything for assembly, and for this, the screws will need to be treated with a special agent that prevents corrosion from developing and affecting the metal.
How to assemble a bench?
And this is one of the most interesting stages of making a bench for a gazebo that has a barbecue - assembly. You can already see how the creation of your hands takes on the shape of a semi-finished product. We begin installation with the legs. They should be connected to each other using crossbars, and self-tapping screws are used for reliable fastening. Select the blocks for making the legs carefully so that your bench will be stable in the future. Attach the backrest and seat to the legs.
If the length of the screws is not enough, you should make the holes slightly larger than the screw heads, and on the other side it is recommended to use clamps. At the ends, the legs need to be fastened to each other. As soon as everything is assembled and ready, the structure must be treated with a special compound that will prevent fungi from appearing and developing, and then varnished. When the bench is dry, you can use it.
A little about the metal bench
If it is easy to make a bench for a gazebo from wood, then making the same one, but with a metal structure, will be much more difficult. Its manufacturing process is not without certain subtleties that should definitely be taken into account.
When working, use the following materials and devices:
- Dye.
- Hammer.
- Profile pipe.
- Welding machine.
- Bolts.
- Boards.
- Bulgarian.
If necessary, you can decorate the bench with special bent metal elements, and to do this, use a device such as pipe benders. There is also a variation that is easier to make - a bench without a back. The work is done strictly according to the drawing. The frame should be made of a crossbar, which is placed between the legs. The length should be 1.55 meters. For the back legs and back, you will need to buy pieces with a length of 0.78 meters.
The seat is made from two pieces, which are 0.35 meters long. The front supports are made from 0.39 meter pieces of metal, and to fasten them together, use 0.2 meter long pipes. The legs are connected on each side using 0.45 meter curved strips. The seat is made from three planks, and the back is also made from the same.
When each of the parts is in place, only the assembly stage remains.
This work is carried out in the following sequence:
- Connect the seat and crossbar elements. These elements must be located perpendicular to each other.
- After this, attach bent sections with a length of 0.78 meters to the product.
- Now all that remains is to weld the front supports to the frame, and then connect this to the crossbar and pipe.
- Weld a pad on each leg, and place arcs between the supports.
- Sand the welds, prime and paint.
After this, the bench for the gazebo is considered almost ready. Now all that remains is to attach the boards to the seat and back. Prepare them in advance, process the boards with a plane and cover them with a layer of varnish. As you can see, you can make a bench for a gazebo in a few hours, and there is nothing difficult about it. The main thing is that before starting work, a drawing and materials are prepared, and then you will receive excellent furniture for your gazebo.
