DIY wooden headboard
Looking for bedroom decorating ideas? A headboard can make an important contribution to the decor of a room, no matter its size. If you need instructions on how to make a wooden headboard with your own hands , in our article you will find 17 wonderful master classes with step-by-step photos, following which you can easily make a bed headboard at home . If you have a spacious bedroom, a beautiful headboard can be used to highlight and fill the space. In a small room, this will add a special accent to the bedroom, while saving usable space. You can attach the structure to the bed frame or directly to the wall. When it comes to design, there are an endless number of styles and materials that it can be made from, but in this article we present options on how to make a wooden headboard for a bed . We hope everyone will find something here that suits their taste. You can make your own unique headboard whether you have carpentry skills or just enjoy doing wood crafts as a hobby.
Which style should you choose for your headboard?
This is the very first thing where you should start designing future headboard . In no case should it contradict the overall interior of the room or the style of the bed itself. Let's look at the most popular styles:
- Baroque. This style is preferred by people who want to emphasize their wealth. It includes a lot of gilding, expensive luxurious fabric, and artistic forging. The main atmosphere that this style creates is luxury, wealth, chic and pomp. A soft headboard made of velvet, brocade or other beautiful fabric with gold buttons will fit perfectly into such an interior. Or mirror headboard in a wide beautiful carved frame, painted with gold paint, or a canopy headboard made of heavy, light-proof fabric with gold garters with tassels at the ends. In general, everything that looks expensive, but is not a rectangular wooden headboard.
- Provence . A very light and pleasant style comes from France. This is a beautiful combination of classic style with rustic elements. French country houses are often decorated in this style. Characteristic features are the use of warm pastel shades , preference for natural materials with their natural texture, specially aged elements of wooden furniture and cute floral patterns. Wooden headboards with antique elements or panel headboards made of light light fabrics with an unobtrusive floral pattern are perfect for this style.
- Vintage. Home feature this styles are well visible and clearly defined antique elements, and not just old things, but those that really belong to past eras, precisely from the materials that were used in those times. Collecting decorative elements for this style is sometimes difficult. Color spectrum neutral and includes “faded” shades. For material headboards wood in its natural form, an old mirror, or a soft headboard made of light linen fabric or specially aged velvet are suitable.
- Art Deco. This style is very easy to recognize because predominance in him lines, stripes, broken curved lines and trapezoidal objects. It is characterized by natural rough surfaces, mirrors, stained glass. For an Art Deco style bedroom, it is preferable to use a large mirror, because this style implies a lot of space and light. It can also be used as a headboard. The colors of this style can be colorful, but always muted. Preferred shades brown, white or metallic. The color of the furniture should contrast with the color of the walls, and one of its elements must be of a non-standard shape. In addition to the mirror, a soft rectangular or trapezoidal fabric is well suited as a headboard.
- Loft. This style is loved by many due to its spaciousness. Integral element this style - the presence of rough brick masonry, often white. ABOUT main flowers are white, gray, shades of brown. MaterialsCharacteristics of this style are wood, glass, concrete, brick, chrome parts. This style combines rough finishes that have an unfinished look with modern technology. Furniture simple, concise and extremely practical. Headboard It is better to make the beds made of wood or make them soft, so it will create the effect of incompleteness, especially against the background of a brick wall.
- Eco style differs in use natural materials with preserving their textures. Color spectrum as close to natural as possible - shades of green, brown, yellow. Such an interior has a positive effect on human health, not only physical, but also mental, having a calming effect. Furniture - made of natural wood. The headboard of the bed can be like wooden, and soft, the main thing is to maintain the overall color scheme.
Metal
Metal beds are gaining popularity thanks to today's trendy interior styles: country, Provence, loft, scandi, oriental.
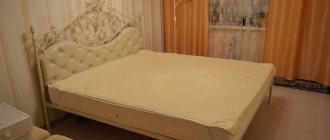
Metal headboards in the skillful hands of a craftsman can turn into a real work of art: openwork forging can make a visually heavy iron back incredibly light, this “cold” material can be transformed into a beautiful firebird or other thematic elements suitable for the interior.
Metal is a very durable material, but in relation to beds it gives it coldness and hardness - you need to be able to fit a metal headboard correctly into the interior, weighing all the pros and cons.
We recommend reading:
How to choose a mattress for the bedroom: by hardness, weight, size. Rating of the best manufacturers and new products
- Ottoman for the bedroom - which one to choose? Review of the best models and new designs (125 photos)
White bedroom furniture - 145 photos of the best bedroom design, as well as options for the perfect combination
We should also highlight brass - brass pipes will transform an ordinary bed into a royal bed. The material is light in weight and visually looks quite “airy”.
Headboard shapes
The impression the sleeping place will make depends on the shape of the headboard itself The simplest shapes are rectangular or slightly rounded at the edges. Semicircular shapes are also often used. But why not give the room a more interesting look and make the headboard, for example, in the shape of a shell or crown , a large flower or a rainbow?
Children will certainly like such bright headboards and will always cheer them up, even on the coldest and cloudiest day.
Even small curves will look more interesting than a regular rectangle. You will need to spend a little more time giving the headboard a custom shape, but the results will be worth it.
I think you have already decided on the style in which your bedroom is designed, if not completely, then in its overwhelming majority, an image of a pleasant headboard shape has probably already popped into your head, then it’s time to get down to business .
Tree
Wood - this is the most common option. The material is environmentally friendly, natural, durable and looks very beautiful. Natural wood for decoration is quite expensive, so you can consider modern analogues that are cheaper in price and not much different, for example, chipboard or MDF.
It is not difficult to work with such materials, so a wooden headboard can be made in various shapes and a variety of decor can be added to it (curly carving, varnish coating, the effect of old furniture, addition of fabric trim or eco-leather, etc.).
Upholstered headboard
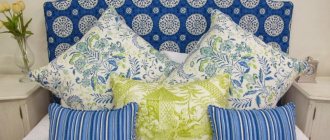
This type of headboard is most loved by many designers because it makes the room very cozy . And if you like to spend a little time reading before bed, then it will be much more pleasant to lean your elbows on a soft, pleasant-to-the-touch headboard made by yourself. To make it you will need a few materials, but enough patience and free time.
You will need a base, upholstery fabric and buttons with a loop of your choice for the front part and the most ordinary buttons with four holes for fastening on the back side, packaging foam rubber, glue, a furniture stapler, a drill and strong threads with a needle. The base must be strong and not necessarily beautiful - it will not be visible. Its length can be exactly equal to the width of the bed, or it can go beyond it, it depends on your preferences. You also choose the height based on your desires. Some people like to fill the entire wall behind the bed with a solid low headboard. It looks very cozy and unusual.
You can use what you have in your home as a base. For example, an old pantry door , the wall of an old closet, a piece of chipboard, several small doors, just wooden boards, in general, everything that would be a pity to throw away, but would be just right here.
as a filler . Why not furniture? Because it's cheaper. To achieve the required thickness, you can lay it in several layers. The piece of fabric should be 20-30 cm larger than the base along its entire perimeter. Place the base on the floor, apply glue, apply foam rubber and trim off all excess around the edges. You can attach the foam rubber using a stapler, as you wish.
We will make a very fashionable soft headboard that imitates carriage upholstery . To do this, you need to make holes in the foam rubber and the base for future buttons. To do this you need to make markings.
If you want to end up with
squares , then place the holes one below the other; if you want diamonds , then in a checkerboard pattern. At equal distances, mark on the foam rubber the points where the future buttons will be located. Using a sharp knife, make holes at the markings in the foam rubber, then using a drill, drill small holes in the very base. 3-4 mm is enough for a needle with a strong thread to pass easily. Before you start drilling, place something under the base to avoid making holes in the floor. Now we take the fabric, a stapler, and begin to fit the headboard. Here you may need a helper to hold the base and hold the fabric while attaching.
Fasten the edges well, do not spare the staples, but do not pull too tightly, otherwise it will be difficult to tighten the fabric with buttons and the headboard will not be as voluminous as we need. Now we take an ugly button for fastening on the back side, thread a needle and thread into it and firmly fix it, to do this you can sew it into all the holes, as if you were sewing it, so it will not slip off when tightened. We pass the needle with a button on the end of the thread from the back side and carefully feel its end on the front part. The needle should come out through the hole in the foam. Next, we thread the needle through the loop of a beautiful button, make one turn of the thread around the button and thread it through the loop again, after which we pull the thread well. The button at the back will help hold the thread, and the front button will press the fabric, creating beautiful folds. If the folds appear too shallow when tightening the thread, arrange the fabric as you like. Now cut off the needle, wrap the remaining thread around the button and tie it several times, hide the rest under the hat. You need to start working from the first hole in the upper corner. Why do we use two buttons ? Because after some time, the tension will weaken a little and the pattern will become less pronounced. To avoid having to redo everything all over again, it will be enough to pull the back button, resuming the tension, and secure it a little lower by a piece of the freed thread with a stapler. The back of the headboard can be slightly transformed by covering it with any fabric or thin plywood. When the headboard is ready, you need to hang it. To do this, you can use special hinges that are attached to self-tapping screws screwed into the wall. You can make the headboard an attached one; to do this, at the first stage, you need to attach the legs of the desired height to the base, and then simply lean it against the wall.
An important point - when you tighten the fabric on the base, form small folds with your hands on top of each hole in the first row, otherwise they may not work out, which will slightly spoil the look of the entire product.
How to choose wood
Before you start making a bed, you need to choose the wood from which the furniture will be made. All breeds are conventionally divided into two groups:
- Soft;
- Solid.
Soft breeds include:
- Cedar;
- Pine;
- Tuyu;
- Spruce;
- Alder;
- Aspen;
- Lipa.
Hard rocks include:
- Birch;
- Ash;
- Oak;
- Beech;
- Nut;
- Maple.
Each group has its own number of advantages and disadvantages. Wood of only one specific type has some characteristics. A brief description of popular materials for a do-it-yourself wooden bed is given below in the corresponding table.
| № | Name | Breed | Characteristics of the material, advantages and disadvantages |
| 1 | Alder | Soft | It is a popular material due to its low price category. When drilled, alder cracks, so when making furniture from it, it is not recommended to use nails as fasteners. Main advantages: low price, resistance to high humidity (does not absorb water). |
| 2 | Pine | Soft | Low price category. Disadvantages: wood is easily cracked and cannot withstand heavy loads. Advantages: antiseptic properties, air disinfection, not susceptible to wood pests. |
| 3 | Linden | Soft | It is susceptible to the negative influence of external factors; it is adversely affected by sunlight, high humidity and dry air. Linden is used to make interior parts of furniture because it is resistant to mechanical damage. |
| 4 | Oak | Solid | Oak furniture is durable and wear-resistant. Easily withstands heavy loads and is resistant to adverse external factors. Furniture made from this type of wood is elite. The main disadvantage: the high price category, which makes rare oak accessible only to a few. |
| 5 | Ash | Solid | Ash is susceptible to mechanical damage, does not bend under weight, and does not tend to deform over time. It is expensive, but the durability of the material justifies the high price. Requires protection and regular treatment from wood bugs. |
| 6 | Birch | Solid | During fastening of elements, the material does not crack. It has high strength, but an average price category, which makes birch popular. The main disadvantage is the need for special treatment against fungus, which easily infects the array. |
| 7 | Beech | Solid | Beech is a dense material. When properly treated, beech furniture lasts a long time. Changes in temperature and humidity have a negative effect on wood. The material is capable of deforming under the weight of human weight. Belongs to the middle price category. |
Wood hardness
Wood species
Wooden headboard
Wood is a universal material that suits any style. It is very easy and pleasant to work with, and it always looks appropriate and natural. Let's make a wooden headboard with an antique effect . For this you can use anything - just wooden boards, maybe you have saw cuts of various sizes, maybe an old wooden door or unnecessary pallets. We will make burnt wood , you can also paint it, you can simply open it with varnish, you can paint it and then partially sand it with coarse sandpaper, you can draw a pattern or an unobtrusive design, or use a stencil... We will tell you the theory , and you improve it to suit your own version.
Let's take three
boards from an old floor in good condition. Knots, small cracks or chips are not a hindrance, it’s even more textured, the main thing is that they are even and can fit snugly against the wall. First, let's tidy up the appearance of each board separately. We will need a gas burner . With its help, it is necessary to burn the surface of the wood, which will lead to its darkening. You can do it completely, or just the edges, as you like. It should look something like this:
After aging, open the boards with clear varnish . Read the composition carefully . Not all are suitable for internal use, as they contain resins that emit harmful substances. It is better to give preference to water-based , it takes longer to dry, but is completely safe. Open the boards on all sides in two layers, this will extend the life of your headboard. If you decide to decorate the wood with a pattern, then apply varnish before opening it and make sure that it does not smear. When the boards are dry, you need to fasten them together. For this you can use wooden planks or a metal profile. Using small nails, nail the boards to the planks or profile from the back side.
Select nails so long that their points do not go right through and come out on the front side.
A wooden headboard will have a fair amount of weight, so ordinary screws may not hold it. Anchor bolts are better suited for this . Before mounting, draw a straight horizontal line on the wall so that the headboard hangs perfectly straight.
There are more non-trivial methods for decorating the wall near the bed in the bedroom
Be that as it may, the headboard of the bed can be a decoration in itself, or it can perform its direct function, being simply the frame of the sleeping place. When you want to decorate a room for a night's rest in the best traditions of a luxury interior, professional developments come to the rescue, clearly showing how to decorate the head of a bed in the bedroom. That is, to focus not on the back, but on the wall behind it, but so that overall everything looks like an inseparable composition. So, let's look at the most fashionable trends that luxury real estate designers use when working on first-class bedrooms in different countries of the world.
Paint - laconic but effective
Accentuating a wall with paint is not as easy as it seems. Firstly, the surface must be ideally prepared: leveled using beacons or using drywall, then puttied, and then plastered to the finest grain. And then you should start painting. The paint can be matte, semi-matte, glossy and semi-gloss in its shine, it can be acrylic, water-based or contain special impurities that give an extraordinary effect (reflective, shimmering, chameleon, etc.).
Headboard: accent wall finished with gray paint with a silver sheen and decor in the form of a painting with the brand’s inscription
You can paint the wall near the head of the bed not only in a single color, but also create complex paintings using paint. Good interior design studios offer excellent artists who can create a real work of art right on the wall in the bedroom. You will no longer have to think about how to decorate the headboard if a masterpiece appears on the wall behind it: a reproduction of a painting by a famous artist, almost indistinguishable from the original, a stylized image with the presence of a favorite movie character, a portrait of a Hollywood star of the 30s, an exaggerated plot from mythology, abstraction with imprints of nature or a surreal scene from the animal world.
Wallpaper - a million variations in finished form
If you ask an artist to paint a picture on the wall, it’s too mysterious and unknown, because you don’t always know what exactly the result will be. Here, shades of colors, lighting, and one’s own perception play an important role. That is another option. Simply choose wallpaper that suits your own taste and design vision. Indeed, looking at samples in stores, you can more or less imagine the final composition on the wall in your bedroom. The abundance of wallpaper options will allow you to choose the most suitable one for yourself.
Wallpaper on the accent wall behind the headboard in the bedroom - a delicate pattern with the image of birds
You can still combine them! Sometimes they even come in a series in the same style, which simply fit together perfectly. Let us remind you that the most expensive types of wallpaper are fabric, or more precisely, silk, brocade or velvet. They are difficult to work with, but in life they look simply magical, somehow royal, majestic and soft. Perfect for an expensive aristocratic bedroom. These options are especially good for classic interior styles.
Photo wallpaper on the wall depicting a drawing from a bygone era - pastel colors in a bedroom designed in a modern classic style
Photo wallpaper is another artsy way to decorate the headboard of a bed. A huge image of the raging sea, open arched windows, green summer forest, high winter mountains, ships in the ocean, running cheetahs, picturesque views of temples or the city landscape from a bird's eye view. Photo wallpaper will fit perfectly into art nouveau, modern style, neoclassicism and minimalism.
Frescoes are an incredibly talented type of decoration
You can decorate the headboard near the bed with the help of great frescoes! Indeed, what can cause more delight than a painting built using painting on wet plaster. Again, this is only possible with the help of professional artists. Frescoes are not just a classic type of interior decoration in their essence, but they are also a complex form of art with their own unique advantages. Firstly, they are wear-resistant: after drying, a transparent film is formed on the surface of the canvas, giving the painting durability. Secondly, the image turns out to be more voluminous, and this undoubtedly has its own charm.
Frescoes on the accent wall and decor in the form of pilasters near the soft headboard in the bedroom - a room in white and beige tones
If you still don’t understand how expensive it is to decorate a headboard in a bedroom, then it should definitely be frescoes. However, this type of art is not suitable for all interior styles. Modern trends - it’s better to choose something different, and if the house or apartment is made in classic, Renaissance, Baroque, Empire, Greek or Roman style, then you definitely need to take the opportunity and design the interior near the headboard with frescoes. The result will definitely be an exclusive, sophisticated and unbridled project with its own sophisticated atmosphere.
Ready-made wall panels - modern and very concise
How else can you design a headboard near the headboard?
Wall panels are a great way to decorate an accent wall in a bedroom. Today they are presented in the form of veneered wood and its solid wood, as well as in the form of fiberboard, chipboard, laminated chipboard, MDF, etc. other materials. Moreover, some samples look too majestic and expensive. And they cost about the same. But they are already made in such a way as to fit exactly into the interior. All products have certain dimensions, if we talk about mass production, but they can also be made to order, which is more suitable for luxury real estate.
White 3D plaster wall panels on the wall in the bedroom near the headboard - eclecticism: modern classic and modern
One of the most popular types of decorative panels is 3D. They are parts that form a three-dimensional pattern (repeating or folding into a whole composition). Three-dimensional panels are made from wood, ceramics, metal, and polymers, but gypsum options look best. There are also exotic versions of volumetric panels, differing in the material of manufacture. These are bamboo, reed, stone, etc.
Natural wood panels - a classic of naturalism
Whatever one may say, decorating a headboard in a bedroom with natural wood always looks great. A panel on the accent wall directly above the back, made of valuable species of wenge, cherry, apple, beech or pear, will add a piece of princely wealth to almost any interior style. Such variations are especially good for English classics or chateau. And if the board surface is covered with a thin layer of varnish, decorated with refined carvings or has a patina on the surface, the effect will only be greater.
Natural dark brown wood panel behind the headboard in a modern bedroom
If the bedroom is decorated in a country, chalet, eco, ethnic, Scandinavian, Provence, eclectic or shabby chic style, then preference should not be given to perfectly polished wooden surfaces, but to something simpler in terms of material processing. Some antique barn boards with simple carvings or no decor at all will look good. Wood always brings a piece of coziness to the decoration.
A facing stone surface is the best choice for an aristocrat
Perhaps the best option for an elite bedroom is to make a headboard near the bed from natural stone - marble, granite, onyx, travertine, quartzite, dolomite, etc. This is not just a durable project, it will never lose its beauty, even after many years . An especially good option is if the panel is made on a family estate that is passed down from generation to generation. In such a house, the decoration should be monumental, strong and very expensive.
Stone panel made of light marble on the wall behind the head of the bed in the bedroom - a room in light shades
In addition to its quality, the stone looks impeccably beautiful! Firstly, a panel made from, for example, onyx or marble, has its own unique natural pattern: all the lines in it are smooth, refined, and original. A professional designer will help you choose the best sample from ready-made options or create a layout for making custom panels. The facing side of the stone sheet can be either glossy or matte, processed to a perfectly even smoothness, or have various convexities on the surface that create a stronger three-dimensional effect. Stones are great friends with such interior styles as: art deco, oriental, loft, neoclassical, eclectic, chalet, etc.
Stucco molding on the wall near the bed - yes, if the style is classic, eclectic or ultra-modern
The stucco patterns on the walls near the head of the bed look royal: rich and stately, giving the home a special touch of majesty. It looks best in large rooms with high ceilings, although miniature bedrooms with discreet thin stucco can look stunning with the right interior composition. Such decor is most harmoniously combined with the following styles: Empire, Art Deco, Baroque, Gothic, Greek, Egyptian, classicism, modern, renaissance, Roman, rococo and, of course, eclecticism. However, some trendy design project in a modern direction can also be enhanced with stucco, for example, when white patterns are applied directly to a concrete wall.
Plaster stucco with a complex floral pattern in white on the sides of the headboard in the bedroom is a modern classic
What types of stucco decoration can be present on the wall, because there are so many types? Bas-reliefs and high reliefs are well displayed above the head of the bed - decorative sculptures protruding above a flat surface and representing abstract or complex paintings; columns and half-columns - artistic elements, often with finishing tips; moldings (baguettes, fillets) - long flat strips with the front side having a 3D relief; pilasters are architectural vertical elements consisting of a capital and a base, similar in proportions to a column, only in section.
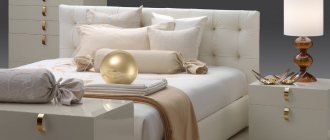
Soft design of the headboard - more tactility and comfort
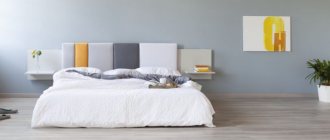
A headboard near the bed, made of textiles, leather (natural or eco-friendly), suede, velvet, or, for example, brocade, is a very good alternative to solid bedside headboards or even, on the contrary, a good support for them. Soft panels, canvases or panels near the bed in a hard or fabric case not only look great on the wall in the bedroom, but also give an additional feeling of comfort and, as a bonus, reduce sound insulation, which is very important for such a room.
Textile headboard with wooden details made of natural wood - a strict classic style in the bedroom
A soft accent wall near the headboard can have a 3D effect, be made in a loft style and look like a concrete slab, have a strict geometric shape, etc. It is most often found in monochrome or has a fabric pattern on the front side, even a photograph. Surfaces made of various materials complement such styles as: modern, neoclassical, ethnic, Venetian, Indian, kitsch, pop art, modern, etc.
Hanging headboard
A very unusual solution that you can easily implement. The idea is to attach various elements to a frame located above the bed. As a frame, you can use a piece of chrome pipe or a wooden plank, or even a handle from an old wooden mop, the main thing is that its length is enough to cover the entire width of the bed. You can use anything as hanging elements This headboard is a pleasure to lean on. And the pillowcases are easy to remove or wash. These could be small wooden circles with pictures painted on them, metal disks with various emblems, or your collection of favorite items. Pillows with beautiful ties the most comfortable To make such a headboard we will need: a pipe, chrome-plated or blown with powder paint, end caps in the color of the pipe, 2 pieces, wall mounts, 2 pieces, pillowcases and small pillows.
To reduce the cost of the process, you can not buy ready-made pillowcases and pillows, but buy pieces of fabric and sew everything yourself.
You can also make your own pillows. To do this, you need to buy white bed fabric and filling. In any sewing store, padding polyester or holofiber is sold by weight. Let's imagine that we decided to sew ourselves. It is necessary to make a pattern for the future pillow with a margin of a couple of centimeters on each side for the seam. Fold a piece of white fabric in half, attach the pattern, trace the contours and cut it out. Before you start stitching, baste the workpiece; this will protect you from uneven edges and distortions during sewing. Leave one edge not sewn to the end by approximately 10 cm. Turn the finished pocket inside out and stuff it with filling through the hole left. Choose the desired volume yourself. At the end, you need to sew the pillow up to the end using a linen seam or by hand. Our pillow is ready.
Now let's sew pillowcases from the selected fabric . The principle is the same, only on one side you need to add loops or ties to which the pillows will be attached to the pipe. To do this, sew not very wide strips of fabric from the inside out, folding them in half. Turn out the resulting tubes and iron them, giving them a rectangular shape.
Make
a pillowcase pattern using the existing pillow pattern, adding another 2-3 cm around the perimeter. When you sew the pillowcase, don’t forget to insert our ribbons folded in half at one end, these will be the future loops. For ease of further use, a hidden zipper can be sewn into the edge opposite the loops. This will make it easy to remove the pillows. Choose the number of pillows, their size and colors according to your own imagination. Ready-made pillowcases can be decorated with embroidery or buttons, rhinestones, sequins or various stripes.
When all the sewing work is done, make a marking on the wall to guide you when attaching the pipe. Screw one mount to the wall, thread a pipe through it, and close the edge with a plug. After this, put the cushions on the pipe and only after that screw on the second fastener and insert the edge of the pipe there. This only applies to pillows with loops. You can tie pillows with ties at any time. Enjoy the look of the work done.
Reproductions, paintings and photos
If you are not ready for major changes in the bedroom, then a large-format painting or photograph placed above the headboard can serve as an accent point. What will be depicted on it is up to you. It’s not bad if the colors and tones intersect with the overall interior, bedside tables or niches. If the bed is wide, then you can use modular paintings or one large one.
Headboard – mosaic
This colorful headboard will add freshness to your bedroom and enliven the entire interior. The two main questions that arise in your mind now are what to make the mosaic from and what to attach it to. We suggest using a wooden frame and plywood sheets as a base, and for mosaic pieces using tiles , which you probably still have after the renovation.
First, let's make the base . This will require flat boards. Our frame will have three windows for subsequent placement of plywood with mosaics laid on it. If you don’t have any suitable boards, buy already sawn boards at a hardware store. You will also need window beads or thin corners. You need two long boards, this is our top and bottom, and four cross boards. Calculate the width and height of the future headboard yourself. You can simply open with colorless varnish , cover them with stain of the required color, or paint them.
Lay your boards on the floor, measuring the same distance between the transverse partitions. Mark with a marker where fasteners need to be made. Nail the frame together with long nails, pre-drilling small holes to make the process easier. After the frame is ready, measure the resulting windows; these will be the dimensions of the plywood with mosaic. Saw off the plywood using a hacksaw.
Now let's start with the mosaic. Place the tiles on the fabric and beat it into small pieces with a hammer.
It would be good if there were several types of tiles in different colors.
Now start laying the pieces on the plywood, leaving 5 mm free along the contour. This can be a random arrangement, or a design you come up with in the form of lines, curls or flowers. When the drawing is completed and you are satisfied with the result, carefully take one piece at a time and apply glue to it. You can use liquid nails so you can stick all the pieces. You will definitely have gaps between the mosaic elements. They can be filled with tile grout. Once everything is dry, gently wipe your artwork with a damp cloth and then a dry cloth.
Now it's time to connect the frame and mosaic. This can be done very simply using window beads. On the front side of the headboard, fill a frame of glazing beads around the perimeter of each window so that they protrude 5 mm inside the windows. This will support the plywood. On the inside, apply a little glue to the glazing beads and attach the plywood with the mosaic. Once you have glued all three pieces, lay the frame face down to let the glue dry. Your headboard is ready. Installation can be done in the same way as with a wooden headboard.
Bamboo
The unusual back will be made from bamboo trunks coated with varnish or paint. You should not adhere to strict symmetry when forming a composition: slight disorder will add naturalness to it. Bamboo is a rather active element of the interior, so it is recommended to use it in laconic interiors so as not to overload the decor.
Instead of whole trunks, you can use their halves, as well as natural wallpaper made from bamboo fiber.
Drawing the headboard
Why not? This is the cheapest way to make a headboard. If you do not have the talent of an artist, you should not immediately discard this method. Now you can buy all kinds of stencils of any size and with any design. All you need to do is transfer the drawing to the wall. The stencil must be securely fastened to the wall so that it does not come off during the process. This can be done using tape. The drawing should be placed evenly on the wall. For the case of a stencil, paints in cans are ideal . To prevent paint from getting on the bed, cover it with a special film.
After filling all parts of the stencil, let the paint dry a little and carefully peel it off the wall. This unusual method will allow you to show your imagination and individuality to the maximum, both in the choice of colors and in the choice of the design itself. This can be anything from a castle in the air to a simple repeating pattern. In any case, it will be very unusual and original.
Mirrors
Using mirrors for the headboard is an unusual idea. They allow you to expand the space and add light. Place the mirror above the bed, framing it with a beautiful frame, or attach several panels directly to the wall, imitating a panel.
Headboard – photo frame
Do you have a lot of family photos that capture the happiest moments of your life? So why should they collect dust in an album, let's use them as the headboard of your bed. There are several ways to arrange a photo. You can buy the required number of ready-made wooden frames of the same or different sizes, and then glue them together and glue them to a plywood base, or you can make a wooden frame with the required number of windows of any size. Or you can use an old window frame as a frame, just modifying it a little.
Let's
look at the most difficult method - with a frame made of boards. There is no need to use thick and massive boards for the entire base. We suggest using larger boards around the perimeter, making one large frame, as for a mosaic headboard, and making the windows from thinner boards. At the first stage you will get a wooden rectangle.
Now you need to decide on the size of the photo, it is better to choose a larger one, it will be less cluttered and it will be more clear what is shown. Let's assume that we have chosen the A4 format. Now you need to turn your rectangle face down and fill it first with transverse and then longitudinal strips in increments equal to the size of the photo. You will see windows in which we will then insert photos. To keep them on something, you need to nail a sheet of thin plywood to the last planks.
The frame is ready, we turn it over and use glue to attach our photos in the windows to the plywood. You can leave the headboard open, or you can cover it with unbreakable glass. This way, less dust will accumulate and you won’t ruin the photo. Looking at such a headboard, you will always fall asleep and wake up in a good mood.
Video description
The video clearly illustrates all the stages of creating a carriage tie on the head of the bed:
The fabric is stretched and then stapled to the backside. The excess edges are then trimmed off. Then buttons are sewn to the holes. To do this, use the longest possible needle and the strongest possible thread. Usually, before fastening, the buttons are covered with the same fabric that is used for covering. But if you replace them with large rhinestones, you get a unique object that looks like jewelry.
Rhinestones instead of the usual buttons Source 2gis.com
After the front side is completely ready, its back part is carefully covered with technical fabric (base or spunbond).
A finished bed with a carriage frame always looks great in the interior. This method of creating soft wood cladding is designed for a long period of use. Even under high operating loads, the cladding will not wear out and will not lose its attractiveness.
New reading of an old classic Source hausdekor.ru
Headboard - panel
This type of headboard will not only make your bed more cozy and comfortable, but will also decorate the wall behind it, plus it will be pleasant to lean on. We suggest making soft printed panel with your own hands . The panel will be a square or rectangle, consisting of small squares covered with beautiful fabric, to which we will give a little volume with the help of filler.
The manufacturing technology is very simple, having mastered it, you can use not only squares, but also rhombuses, triangles, hexagons as elements for panels, and make not just a rectangle, but any shape you like. So, we will need two sheets of plywood of the desired length and height - one for the base, the other for cutting. Scraps of fabric of different colors, foam rubber for stuffing, glue, furniture stapler, hacksaw.
To give you an idea of the size, let's look at the technology for making panels measuring 160x100 cm. Our squares will have a size of 20x20 cm, so we need 8 squares in length and 5 in width, for a total of 40 pieces. Mark one sheet of plywood and cut it into 20x20 cm squares, now cut the foam rubber into 40 pieces of the same size. Using glue, glue the foam rubber onto the plywood squares. After this, cover each square with a piece of fabric and secure the edges with a stapler. The fabric should be 5 cm larger on each side, that is, our flaps have a size of 30x30 cm.
When all the squares are ready, you need to
secure them on a second, whole sheet of plywood. To speed up and facilitate this process, you can use liquid nails. Make sure that the lines are straight and the sides of the squares are adjacent to each other without gaps. The finished panel can be attached to the wall using hinges and self-tapping screws. By the way, such soft squares can be inserted into old window frames. Maybe you still have old-style frames that are divided into many small rectangles.
Wall drapery
A popular type of headboard is wall drapery, soft columns up to the ceiling or a solid panel.
In fact, there is no headboard as such, but the space is emphasized and a balanced composition is created. The bedroom will be twice as cozy and comfortable.
- Drapery materials are glued to the wall, just like regular wallpaper.
- The main thing is to ensure the correct tension.
- Otherwise, the method is not complicated and it is not even necessary to invite specialists to carry out the work.
- Draping the wall can also be done using a slatted method.
Lace headboard
The most delicate and delicate type of headboard that can be. It will fit very well into the interior of a bedroom in light colors. Making such a headboard will be very simple, especially if you yourself know the technique of artistic knitting, and maybe your grandmother or mother can help you with this. We will need crocheted lace or lace fabric, fabric for the base and the base itself. If you want a flatter headboard, then a sheet of chipboard or an old shelf from a wardrobe is sufficient in thickness; if you want a more voluminous and soft one, then you also need foam rubber.
Let's make a soft lace panel. We have a door from an old cabinet with a thickness of 12 mm. Glue 5 cm thick foam rubber onto it and trim off the excess along the edges.
Our lace is white, so to make it
stand out better and be more noticeable, you can use dark gray linen fabric as the fabric for the base. Just like when making a soft headboard, you need to cover the base with fabric and secure it around the perimeter with a stapler. Now let's carefully secure our lace on top of this. Then you can modify the headboard to your liking. You can add some rhinestones or bows. You can not use foam rubber, but make the headboard flat, then it will look more like a panel. In any case, the lace will look very original.
Preparation of tools and materials
Necessary materials:
- Plywood cut to size. For example, for our children's single bed with a soft headboard: 100 cm wide and 75 cm high.
- Two strips of plywood or furniture chipboard 1.5 cm thick, about 9 cm wide and 60 cm long.
- Two strips of 2 cm chipboard, about 4 cm wide and 60 cm long.
- Thick and dense foam rubber, cut to the size of a large piece of plywood - 100x75 cm.
- Thin foam rubber or batting is 15~20 cm wider and longer than thick foam.
- Decorating fabric of your choice, matching the overall style of the bedroom.
Tools:
- Electric drill.
- Cordless screwdriver or regular screwdriver.
- Level, tape measure, pencil.
- Screws of different lengths.
- Furniture stapler.
Return to content
Headboard – canopy
This headboard will create a more intimate and cozy environment for your sleeping area. To make it, you will need fabric, a base for attaching it, hooks for holding curtains and decorative decorations to your taste. The fabric can be completely different, both heavy and dense, and light and transparent. Focus on the interior of the room. The length of the fabric also depends on your preference. It can reach the floor, or it can barely reach the bed. You have decided on the fabric, its length and width too.
Let's start
making the base.
You can attach the base to the ceiling, if it is not a suspended ceiling, you can attach it to the wall. We will mount it to the wall. As a base, you can use a small pipe, a decorative hook for hanging flowerpots, or you can knock down a square or triangle from small planks. If the fabric is heavy, then the base must be strong. We chose weightless tulle, so the base will be a wooden square that matches the color of the bed. We knocked small wooden planks together on the sides using small nails. We attached one side of the square to the wall using self-tapping screws. Now we place the fabric on the base, forming beautiful waves. You need to attach decorative curtain hooks to the sides of the bed, collect the tulle using beautiful garters and secure it to them. This way, there will be a square above your head that can be decorated with beautiful beads or hanging angel figures, and tulle will fall from it in beautiful waves and end on the sides of the bed. This headboard will create a very romantic look in your room.
Mirrors and glossy backrests
Mirrors and the glossy surface of the backrests will be appropriate in small rooms, because they can visually increase the space.
Mirrored headboards come in different varieties: they may have an engraving or design on them; it may not be a pure mirror, but aged or tinted glass. You can use a single large sheet, or you can use small mirror pieces from which you can assemble a pattern, honeycomb, mosaic, etc.
Headboard with shelves
The most practical type of headboard, which is quite easy to make yourself. The material you can use is an old cabinet or an old countertop. If you don’t find anything suitable in your house, you’ll have to spend a little money and buy sheets of laminated chipboard and a special tape that covers the ends. One sheet should be enough for a medium-sized headboard, since chipboard is quite large. to make the markings correctly and cut the sheet with a minimum amount of waste. The same place where you will make the purchase can help you with this; they usually have their own small sawmill and cutters.
After you have the rectangles of the required sizes cut, you will need to assemble the entire structure together, having previously covered the ends with a special laminated strip. This is done very simply using a regular iron. Heat the iron to maximum temperature, apply the tape to the end of the sheet, you can cover it with a thin cloth on top, and iron it several times until it sticks, trim off the excess. This way you should finish all the edges except those that will be adjacent to the base of your headboard.
Now you need
to mark the location of the shelves on the base and the distance for the mounting holes.
When the work is done, drill small holes in the marked places, attach the shelf and use a marker to mark a dot on its end through the hole in the base, so you will be sure that the holes will line up exactly when assembling. To attach the shelves, you can use self-tapping screws, which must be screwed into the back of the base. If you don't want to bother with a screwdriver and screws, you can use special glue. This way the work will be completed much faster, but remember that such shelves should not be overly loaded. They should serve as a location for decorative objects or lamps, but not books or massive figurines.
Modern and classic: weave headboard
Interior styles of a modern person - lack of decor, practicality, coldness, functionality. Therefore, a bed with a high headboard in the case of hi-tech or minimalism style is, first of all, a competent use of usable space. And therefore - shelves and niches in black, chocolate, gray shades of chiseled shapes. Nothing extra.
Dark headboard for a bed in neoclassical style
As an option - mosaic or decorative tiles from the latest collection of a well-known manufacturer. In this case, you can choose not only tiles for the back, but also pencils, borders, and panels. Bold and unusual, only for an innovator!
A non-trivial idea - a headboard covered in leather, an eco-friendly version of a good quality substitute. It is stylish, catchy and accentuates attention, adding charisma and sophistication to the room. The rest is restraint and complete harmony with other pieces of furniture.
Gray upholstered headboard for bed
White headboard for bed with black frame
Mirrored headboard
Such a headboard will help to cope with the problem of a narrow room, because everyone knows that mirrors visually expand the space, and if you choose mirror panels that will reach the ceiling, you will make the room visually taller. In addition, the mirror reflects the sun's rays and additionally fills the room with light. It is preferable to choose a mirror that covers the entire width of the bed and is not too narrow. old dressing tables for this Remember, there were those with three doors, with a large middle mirror and slightly smaller side mirrors? To revive an old mirror, you need to make for it .
To do this, you need to glue the mirror onto a sheet of plywood and leave 10-15 cm of free space around the perimeter. This is where we will attach the elements of our frame. For these purposes, you can use shells, beautiful multi-colored pebbles, large beads, bows, artificial flowers, and you can lay out a mosaic with the same broken tiles.
Use those decorations that you like and that will complement the overall interior of your room.
To make the work go faster, use a hot glue gun or liquid nails for fastening. Remember that a mirror, especially a large one, is a very heavy object, therefore, the fastening must be reliable. Use anchor bolts as in the wooden headboard example. Or fasten the bottom of the mirror to a special metal frame that is attached to the wall, and just hang the top by the hinges on the self-tapping screws. To avoid injury, if you have restless sleep, it is better to purchase unbreakable mirror panels and protect yourself, they will weigh less.
We hope this article will help you create the headboard of your dreams and inspire you to new ideas and endeavors.
The article was written for the site.
Tags: Apartment design, Bedroom
Stucco molding
An excellent option for serious and heavy Baroque, Empire and Romantic styles. It is enough to use rectangular or round elements, painting them in accessible and simple colors: silver, gold, bronze. If desired, you can make several small frames behind the bed.
Varieties
Wooden frame
Wood is, first of all, a natural material; a product made from it will not only be durable and beautiful, but also environmentally friendly. The wooden frame does not become loose over time, does not creak, and looks beautiful and neat when combined with other furniture. Wood is more pliable, easier to process, has a beautiful texture, and there are many ways to decorate it. The production of such a frame does not require special equipment, as with a metal base, so it is technologically simpler to manufacture it. In addition, the paint on the metal base peels off over time and, despite all the treatments, the iron is susceptible to rust. Almost every owner has experience working with wood; the difference will only be in scale.
In addition, if you choose high-quality wood, it will be more durable than fiberboard and chipboard, not even to mention its higher aesthetic value.
Metal carcass
Despite all the beneficial properties of wood, metal frames have also become widespread, primarily due to greater mobility and lower weight. Metal beds are very durable, elegant and beautiful, but if it is an intricate design, then it is not suitable for every interior. In order for a metal bed to fit beautifully into the interior design, you must have the minimum skills of an interior designer or try to get advice from a designer. But if you solve this problem, the result is worth it! A successful design solution for a metal bed will improve and ennoble the sleeping area! Painting such a frame requires special attention, because if the technology is not followed or you are inattentive, it will begin to rust. The durability of the product also depends on the correct choice of metal and its high-quality finishing. The metal frame is lighter, but does not look as impressive as wood and does not have its beneficial properties.
Materials for making a bed
In order for the bed to serve for a long time without various breakdowns, you should choose high-quality durable materials. This is especially true for the manufacture of children's beds, as well as products intended for the recreation of people with large weights.
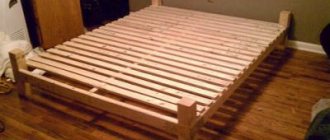
Sidewalls, legs and main supporting elements are made from wood. The diagrams show that the footboard and headboard of the bed are often made of laminated chipboard or chipboard covered with material, since these elements do not bear additional load.
For an aesthetic appearance of the back, it is better to choose laminated chipboard or MDF, the colors and textures of which now have many options. An interesting option involves making this bed element from scraps of boards left over from previous carpentry work. This technology requires some skill and is not suitable for beginners.
The head of the bed can be made square, rounded, the edge of the material can be processed figuratively, perforations or wood carvings can be added, decorated with soft upholstery, etc. For beginners, it is better to choose the simplest version of a flat rectangular backrest.
In the drawings of beds from home craftsmen, there are options for making structures from laminated chipboard. This is acceptable when choosing a durable material with a thickness of 22-25 mm or using 16 mm laminated chipboard, but exclusively for covering the bed elements. The cost of a bed made of laminated chipboard is often higher than the cost of the same wooden components.
Information on how to make a durable wooden bed with your own hands often contains advice to use the following materials:
- Board or chipboard with a thickness and width of 30 and 170-200 mm, respectively, for the manufacture of drawers.
- Chipboard, board or MDF to create the back and foot of the bed.
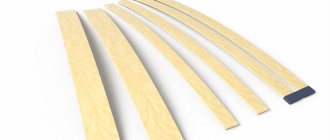
- Board 100-120 mm long and 20-25 mm thick or plywood 100-120 mm long and 10-12 thick to create lamellas. It’s easier to make flat lamellas yourself, because making bent ones requires special skill.
- Beam 75x50 mm for stringers or spar. When assembling the bed, it should be placed on its edge.
- Beam made of pine or other suitable wood with a cross-section of at least 50x50 mm for making legs. Choosing such a material will ensure the necessary structural strength and save the bed from unpleasant squeaks.
- A wooden board for making ribs with a width and thickness that is half the size of the frame parameters.
- Phosphated screws 5-6 mm black. To determine their length, you need to subtract 100 mm from the boards of different thicknesses used in the work.
- Nails 60-70 mm.
- Steel corners with additional stiffening rib.
- PVA glue or wood glue.
- Wood putty.
- Primer and/or stain.
- Wood varnish.
- Brushes of different sizes.
Before cutting purchased wood materials, you should carefully measure the size of the mattress that will be placed on the bed of the bed made according to the sketch. It is necessary that it does not “fidget” as a result and allows the bed linen to be tucked in due to a small gap of 3-4 mm at the sides and headboards of the bed.
From the anecdotal history of beds
The famous Soviet submarine captain Alexander Marinesko once started an affair with a very temperamental Swede from... mmm... a public house in the city where the flotilla was based. The fame of the hero, who in the Kriegsmarine from cabin boys to grand admirals was seriously considered to be the sea devil himself with a team of werewolves, did not particularly impress the lady. But an enthusiastic adoration for Captain Marinesko flared up in her when, during the next rendezvous, the bed collapsed under them.
The fact is that the craft of that person was hereditary. So to speak, a family tradition along the female line. And she inherited the bed from her grandmother. We will try to build a crib worthy of such a couple.
From timber
A bed made entirely of timber will cost more than one made from planks or laminated chipboard; its manufacture will require special tools and a carpentry workshop. If you can do all this, you will end up with a lot of benefits:
Connecting timber bed parts
- Square and round timber, when dried along the length, almost does not warp, which facilitates the selection of material.
- You can, without fear of loss of strength of the product, use hidden dowel connections, see fig. on right.
- The bed will give a solid, prestigious look to even a very simple interior, pos. 1 in Fig. below.
- Possibility to make a bed with floating bedside tables, pos. 2. In amateur conditions, only a massive timber frame will give them reliable support.
- The opportunity to fully express yourself creatively in any variety of rustic or country design, poses. 3-5.
- And not only in rustic styles: a bed made from scraps of small timber, pos. 6 is labor-intensive, but fits into any interior, and a connoisseur will appreciate it on a par with antiques.
Homemade timber beds
Deciding on the view
In the modern world, there are many models of beds, so that it is sometimes difficult to decide what is suitable. We propose to classify existing species according to certain criteria.
| Criterion | Kinds |
| Age | · children's room; · teenage; · adult. |
| Size | · single; · one-and-a-half-sleeping room; · double; · king size. |
| Number of tiers | · one-; · two-; · three-tiered. |
| Availability of additional storage systems | · with drawers; · with shelves; · with wardrobe. |
| Mechanism type | · transformer; · folding; · with lifting mechanism. |
| Headboard type | · soft; · continuous; · with gaps; · high; · understated. |
| Material of manufacture | · tree; · metal; · wood-based materials. |
| Form | · rectangular; · round; · square; · in the form of any objects (car, ship, castle, etc.) |
| Type of support | · legs; · solid. |
Now, in accordance with this table, you can choose the bed model that suits you and make it yourself.
