What is a door frame for?
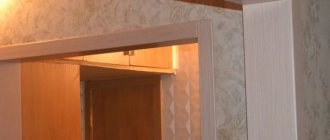
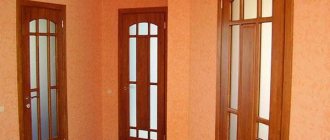
The door frame is a part of the structure in the doorway that ensures the correct installation of the door. In appearance it resembles a frame. Without door frames it is impossible to install interior doors.
Metal hinges are attached to the door frame, on which the door will be mounted, as well as a mortise plate for a lock or latch. The condition of the entire structure with a wooden door depends on how well the frame is made and how well it is installed.
Door frame ensures proper door installation
When measuring the frame, you need to take into account the weight of the door leaf, which will bear the load on the door frame.
The door frame consists of three parts - two side and one transverse. If necessary, you can make a threshold. Although now neat metal thresholds are installed on floor coverings, which can be purchased along with laminate or linoleum.
To make a door frame yourself, you should start by taking the necessary measurements and selecting the material.
Door jamb: measurements and choice of material
Let's start with the fact that you need to choose the right timber (lut) in the store. It should match the width of the wall into which the box is inserted. Luts come in different types, with different coatings and in all suitable sizes.
The materials from which the loot is made also vary:
If you buy it in the same place as the door, you will be offered an identical loot, which will be no different from the door. Door manufacturers often launch the production of wooden blanks for door frames. For the front door, it is better to choose a frame made of solid oak - it is more reliable and durable than MDF.
Before you start making the door frame, you need to take measurements
If suddenly the width of your wall is not standard and none of the proposed options are suitable, take a beam slightly narrower than the wall, and the remaining width can be compensated for by a good-quality board.
When the materials are ready and the tools are available, we move on to making the box.
Making a box begins with taking measurements. If desired, you can draw a drawing. Measurements are taken after the old frame has been dismantled and the opening has been repaired - the unevenness in the wall has been puttied. First you need to take measurements of the height of the future structure and the width of the doorway. It is not advisable to exceed the size of the loot, as this will make it more difficult to file off the extra pieces.
Painting
Painting slopes is highly complex and involves a large number of wet processes. At the same time, this finish goes well with the main covering of the hallway walls, giving the room harmony and eliminating contrasts. Performed according to the following algorithm:
- Before installing the door, the slope is prepared for finishing.
- A layer of plaster is applied to the surface of the end of the opening in the wall until the plane is completely leveled.
- The installation team carries out the necessary production operations to install the front door.
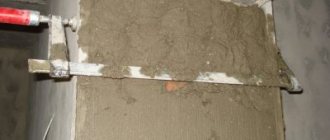
Plastering the slope
- Upon completion of the installation of the structural element, the door leaf and frame are protected with film or masking tape from splashes of paint on the door.
- The master applies finishing putty to ensure a smooth surface of the slope.
- Before painting, the end of the wall is treated with a penetrating primer, which significantly improves adhesion.
- At the final stage, paint is applied, which is evenly distributed over the slope area with a roller.
Painting the slope with a roller
- If it is necessary to refine an element in hard-to-reach places, brushes with different working widths are used.
After applying the paint, you should wait for the standard period indicated on the packaging with the finishing material, and then check the quality of the application of the composition. Considering the risk of frequent mechanical contact of clothing or parts of the human body with the painted slope. When choosing a material, increased attention is paid to its wear resistance.
How to make a door frame yourself
To make a box of standard sizes, you will need three purchased timbers. Two of them will go to the racks, one will be cut into the upper crossbar and threshold.
The threshold may not be installed, in this case the required length will be cut from the whole beam, and the rest will go to waste.
The height of the racks is not difficult to determine; they can be the height of the entire opening in the wall. However, no less than the height of the door with upper and lower gaps (2-3mm), as well as double the thickness of the door at its thinnest point. If the frame does not have a threshold, then the thickness is only of the top crossbar in the thinnest place (where it is embedded under the door). But then the gap from below should be increased to at least 20 mm.
The process of making a door frame with your own hands
The length of the top crossbar should include the width of the door with two small distances (2-3 mm each). Similarly with the threshold (if you decide to install it).
In order to connect all the parts of the box together, it is necessary to make several cuts on the upper (lower) crossbar. You need to remove a small piece from the thick part of the loot. To do this, it is better to place all the parts on the floor and combine them into the future box.
When docking, it will become clear what exactly is preventing a tight connection. When sawing off excess pieces of loot, it is important not to damage the coating of the box.
Subsections
- Entrance metal doors - up to 10,000 rubles.
- Entrance metal doors - from 10,000 to 20,000 rubles.
- Entrance metal doors - from 20,000 rubles.
- Entrance doors ARGUS
- Entrance doors with thermal break
- Entrance doors with sound insulation
- Entrance doors to the apartment
- Slopes for entrance doors
- Door painting colors
- Metal finish
- Laser cutting
- Glass and forged finish
- Economy MDF panels
- Milled MDF panels
Wooden door frame: installation of a finished structure
Once the box is assembled, you can begin installation. You need to have a hammer, self-tapping screws, a hammer drill, polyurethane foam and wooden wedges on hand.
Progress:
- We insert the box into the opening. If the box has small gaps with the opening, then you are very lucky.
- If the loot has a special removable bar behind which you can hide the bolts, then this is a second success.
- In this case, we level the box, put wedges between the wall and the box so that it does not wobble, and use a hammer drill to drill a hole through the hole into the wall.
- There should be at least 3 connections on the posts, and 1-2 on the lower and upper crossbars.
- After this, fill the gaps between the box and the wall with foam. After drying, cut off the foam at the base with the wall and install the door and trim.
There are cases that after assembling the box, it does not fit tightly in the opening - there are gaps of 2-3 cm or more.
The door frame installation process can be carried out after it has been assembled
In this case, the installation is a little more complicated:
- You need to get wooden wedges 2 mm thick.
- Before inserting the frame, you must insert the door into it. It is not necessary to secure it with all the screws in the hinges, but it should still stand in its place.
- We place the box together with the door in the opening. Secure with wide pegs to level.
- Make sure that the box is not only level, but also does not fly out or sink over the edges of the wall.
- We close the door from the outside and secure it with wedges around the perimeter. We pay special attention to the middle of the racks and the top crossbar.
- After installing all the wedges, we fill in the gaps between the core and the wall with polyurethane foam.
Blow out the foam carefully so that when it dries, it does not expand the container so that the doors then cannot open and close freely.
Before blowing, for better adhesion of the foam, get rid of dust using water or a primer.
After the foam has completely dried (about a day), we cut off the foam, remove the wedges from the door, and check the work. The final touch is to attach the locks and platbands.
How to decorate the slopes of the entrance door inside the apartment: finishing options
The building materials market offers different options for designing slopes. Therefore, you can choose the most suitable finishing method in terms of price and performance characteristics. Each method has its pros and cons. They differ in strength, degree of decorativeness, cost and complexity of implementation.
Options for finishing the doorway in the apartment, jambs:
- plastering;
- coloring;
- registration of additions;
- wallpapering;
- installation of sandwich panels;
- parquet finishing;
- laminate cladding;
- fastening plasterboard panels;
- decoration with natural wood;
- finishing with MDF panels;
- cladding with PVC panels;
- finishing with natural or artificial stone;
- use of stucco;
- use of lining;
- tile finishing.
Each option for finishing slopes has its own characteristics. You need to familiarize yourself with them before finishing the doorway of the front door after installing the block, in order to correctly select the option that is optimal in all respects.
Plastering the doorway
Plastering a doorway in a brick house is the best option in terms of price and decorativeness. Such finishing of slopes always looks attractive and impressive. It is resistant to various types of damage. Apply plaster in two layers. The first is rough, and the second is finishing and is done with decorative plaster. There are compositions that are a mixture of plaster and stone chips. This plaster on the end of the wall looks quite impressive. But it doesn't come cheap. You also need to understand that plastering slopes belongs to the category of dirty and labor-intensive work, which requires certain knowledge, skills and experience. Therefore, plastering should be trusted to professionals. It is important to consider that the plaster coating must be properly cared for so that its decorative qualities do not deteriorate.
Using paint
Painting is the simplest and cheapest option for finishing door slopes after installing the door. Also suitable for decorating arches. Water-based paint should be used. With its help you can create a durable and easy-to-maintain coating. Before painting, carefully level the doorway and seal all cracks. This work is simple and not particularly time-consuming. Therefore, you can do it yourself. Depending on the surface material and the characteristics of the paint, it may be necessary to apply the composition in 2-3 layers.
Decoration with additions
The extensions are planks made of wood or MDF. They completely cover the end part of the doorway. The additions look presentable. They are simply installed. You can do the installation yourself, spending a little effort and time. The extensions last quite a long time. This material is sold in construction stores. You can also make accessories yourself. The slats are telescopic, regular, or with an edge at the end. It's better to use the first option. Telescopic products have special grooves. Therefore, they are mounted very simply without screws and nails. The seam is almost invisible.
Wallpapering
An inexpensive and simple option for finishing slopes is to decorate them with wallpaper. This material is used to decorate not only the opening, but also the door leaf. It is better to use thick, washable wallpaper. Then there will be no problems removing contaminants from the slopes. A good option would be to cover the opening with the same wallpaper as the walls. To attach the canvases, use special adhesive compounds or prepare your own glue based on flour.
Using sandwich panels
Sandwich panels are an excellent option for finishing door slopes. They consist of three words: polymer plastic, polystyrene insulation and decorative coating. They are moisture resistant and durable due to their multi-layer nature. Provide good sound and heat insulation. This material is offered in different colors. There are products that perfectly imitate leather, stone or wood. Sandwich panels are inexpensive.
Parquet cladding
Parquet boards are an excellent option for framing entrance door slopes. The products are easy to install. Therefore, you can attach them with your own hands, without having any special skills in carrying out repair and construction work. Parquet is offered in different shades. Therefore, the material is selected to match the interior tone. The parquet cladding looks presentable.
Laminate coating
Laminate is often used to finish door slopes. This is due to its versatility, affordable cost and good performance. Laminate is suitable for doorways of any depth. When connecting laminate panels, almost invisible seams are formed. Laminate slopes are quite cheap. But they don't look particularly attractive.
Plasterboard finishing
Cladding slopes with plasterboard is a rather labor-intensive process. But this material is one of the most in demand. It is important to understand that simply installing plasterboard strips is not enough. They need to be puttied and then painted or wallpapered. Plasterboard sheets allow you to get a flat and smooth surface. Therefore, they are ideal for uneven doorways. But it must be taken into account that the coating is not particularly durable and must be periodically restored or replaced.
Decoration with wood
Finishing slopes with wood is an expensive method. But this option for decorating the opening looks expensive and solid. Goes great with wooden doors.
Wood is an environmentally friendly material. Slopes made from it are easy to attach and last a long time. But they need additional processing to protect them from moisture and insect damage. As a rule, wood is varnished. The coating needs to be updated periodically to maintain an attractive appearance and extend its service life.
Installation of MDF panels
MDF slopes are easy to manufacture. They go well with iron doors. They look very attractive. To trim slopes with MDF panels, you do not need special tools. But they are not suitable for lining shallow slopes.
PVC panel finishing
Plastic panels are an ideal option for those who want an attractive finish without spending a lot of money and effort. But plastic cladding does not last long. All because it is unreliable. True, PVC panels also have their advantages. They are not afraid of moisture and are very easy to care for. To remove dirt, simply wipe the surface with a damp cloth. You can wash PVC panels with household chemicals. It is not difficult to secure the plastic strips to the end of the wall yourself. Such work can be performed even by a person without experience and skills in its implementation.
Finishing with natural or artificial stone
Natural or artificial stone is ideal for finishing wide or narrow door slopes and the end part of a non-standard shaped wall. This is a non-standard, but very beautiful option. Any stone is very hard and highly resistant to impacts and other mechanical damage. But this material is expensive. And to finish the slopes with them you will have to turn to professionals. After all, such work is complex and requires taking into account a number of points. To save money, it is better to use decorative stone.
Application of stucco
Stucco can hardly be called a popular material. It has high performance qualities and excellent aesthetics. Polyurethane stucco molding is especially often used for finishing slopes. It is simply attached with glue and looks luxurious. The stucco molding is offered exclusively in white. But the product can be painted in the required colors.
Cladding
Beautiful slopes are obtained using lining. This material is inexpensive and is an excellent alternative to natural wood. It is often used to decorate doorways. But installation is difficult. It is especially difficult to attach such material in small corners. Therefore, it is better not to decorate the doorway of the front door with your own hands, because when decorating it yourself, you can make serious mistakes. You should trust the work to professionals. But when choosing such a product, it is worth considering that the lining swells from moisture and can be affected by pests. Therefore, its surface is additionally treated with special compounds with protective properties.
Tile framing
An interesting option for decorating the entrance doorway inside with your own hands is to decorate it with tiles or mosaics. Clinker tiles are often used for these purposes. There are options that perfectly imitate brick, granite, marble or other natural, expensive and beautiful material. But to decorate the end part of the wall with tiles, it is necessary to carefully prepare the slopes. Products should be glued onto a flat surface. You also need certain knowledge and experience to perform high-quality finishing.
Making a door frame yourself
It often happens that the door frame is not included with the door, or is included, but is sold unassembled, or it is available, but does not fit your doorway - not all types of door frames are suitable for the openings for which they are intended . Or you are simply confident in your abilities and want to save money by making the box yourself. And there is nothing impossible about this. But still, before you make a door frame, check the availability of the necessary tools and materials, which will be discussed below.
What are slopes made of?
The classic way to finish a doorway is to plaster it. This method is still relevant today. The slopes are reliable, they are difficult to damage, there are many finishing methods: paint, wallpaper, attach any other finishing material. The only disadvantages include high labor intensity. There is one more point: it will be difficult to achieve a perfectly smooth surface without the necessary skills, but it is possible to level it with wallpaper.
A well-plastered slope is beautiful and durable
Taking dimensions of the future door frame
You can buy the bars for the box ready-made or make it yourself, it all depends on your desire, skills and available tools.
If you are making a box from scratch, you need to start by taking dimensions. You can do this in two ways:
- On the finished door.
- Along the doorway.
If you are using a door to be installed as a basis, measure its sides first, adding 5 cm to each. Then measure the top and bottom of the door, also adding 5 cm. Calculate the results and you can start cutting.
Preparing for cutting and making parts
It’s better to start with bars intended for the side parts of the door frame. The prepared bars are placed on the floor, at the same level, so that the grooves are on top. On them you need to mark the upper and lower boundaries of the door, taking into account the thickness of the threshold. Then the bars intended for the upper and lower parts of the door are applied, on which marks for the future cutting line are also made.
After this, you can cut the blanks for the box. First, to avoid mistakes, it is advisable to cut the workpieces with some margin. After this, they should be tried on, and only then a more precise adjustment of the parts should be made.
Preparation of the side surfaces
Then, on one of the side parts, which will be located on the hinge side, you need to mark the places where the hinges will be located. This is done by attaching this part to the side surface of the door. The depth of the groove is made equal to the thickness of the hinge sash. The recesses for the hinges are cut out very carefully so as not to damage the door leaf. This is easy to do with your own hands using a chisel and a hammer, while specialists usually use an electric cutter.
Next, you need to insert the loops into the recesses prepared for them in this way, and using a drill, make recesses for the screws on the side surface. Moreover, the diameter of the recesses should be smaller than the diameter of the screws that will be located here. Then, using self-tapping screws, the hinges are attached to the door leaf.
A latch lock is installed on the other side surface of the door.
DIY box assembly
The most convenient way to assemble the door frame parts into a single whole with your own hands is on a floor covered with cardboard or paper. The actual assembly of the box consists of connecting the prepared parts with self-tapping screws. But first you need to very carefully align one of the corners of the box, and drill a couple of holes from the side of the transverse bar into the end of the longitudinal part with a drill or screwdriver. This is done to prevent damage to the door leaf by self-tapping screws in the future. Next, self-tapping screws are screwed into the prepared holes. Thus, two screws are screwed into all corners of the box (at right angles).
Do-it-yourself door frame installation
After the manufacturing and assembly of the box is completed, you can begin installing it in the doorway, for which you will first need to “try on” the made box. Check the verticality of the box using a plumb line, and the perpendicularity of all corners. It is quite possible that you will first need to adjust the box, which consists of eliminating gaps using wedges or polyurethane foam.
After this, the box is attached to the slopes using dowels. Don't forget to make sure that there are no "adjusting" wedges or slats visible anywhere. Only after this can the door frame manufacturing process be considered complete. Then all that remains is to hang the door leaf on the hinges and attach the trim.
In general, assembling a door frame with your own hands is not as simple as it might seem. Still, for this you need to have some experience. But if you are still determined, first you should study well the theory of this process, and study useful photo and video materials on it.
Source: dveridoc.ru
Tile
Porcelain tiles are used for finishing floors and walls in areas with high humidity or sanitary requirements. When installing this material along the entire plane of the walls of the space being used, the door slopes are formed automatically to create the overall style of the interior.
The tiles on the frame of the doorway are arranged in the same way as for the main part of the wall. For fixation, tile adhesive is used, which is applied to the surface with a notched trowel.
Installation of porcelain tiles on slopes
The seams between individual tiles are secured using spacer plastic elements - crosses. After the solution has dried, the gaps between the ceramic elements are filled with grout. Matched to the interior color.
In the corners, the tiles are cut at 45 degrees with a tile cutter, or the craftsman uses a plastic corner.
How to make a door frame with your own hands
A door frame is considered to be a frame consisting of bars and folds. The box should be strengthened using special bolts, but steel plates can also be used.
To prevent any irregularities during installation of the frame, experts advise using a level and plumb line. On stone walls, the box should be attached directly to the wood plugs using nails. If the walls consist directly of slabs, then the structure will be held in place by brackets.
Sandwich panels
Sandwich panels made of a veneered surface with a porous filler are an almost ideal barrier against the spread of extraneous sounds. In addition, finishing structures have a low thermal conductivity coefficient and retain the heat of the room. Fastening of such materials is carried out similarly to PVC products, using liquid nails.
Installation of sandwich panels on slopes
Considering that the thickness of the element is 15 mm or more, their ends will be noticeable on the wall during operation. In such cases, experts recommend using additional platbands made of the same material as for interior paintings.
How to make a door frame with your own hands
To understand the process of creating a door frame with your own hands, you will need to become more familiar with a number of features of this work.
First of all, you should take the dimensions with maximum accuracy. There are two known measurement methods:
- starting from the doorway;
- pushing away from the door that was installed.
For example, to determine data on an installed door, you should first measure the sides and add 5 cm to the results obtained on each side of the door. Now you will need to measure the threshold, as well as the top of the system, thinking about the space for the allowance. All that's left to do is to calculate the footage in detail and begin the sawing process.
Having folded the beams onto the floor, you should mark the upper and lower limits of the future door. Here it is important not to forget to also add the thickness of the threshold. They should be laid taking into account the level, with the grooves facing up. Of the beams applied to the crossbar and threshold, certain notches should be made in order to make the sawing line visible.
Now you need to cut the materials prepared for collection. After this, you should adjust it to the required dimensions. A special slot for future loops is made in one blank using a chisel and hammer.
To continue creating a door frame with your own hands, you should use self-tapping screws, as well as nails, in order to strengthen the future structure. Now you should carefully hang the hinges and qualitatively strengthen the doorway, leveling the resulting gaps.
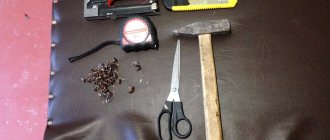
What tools should be prepared for subsequent door assembly:
- roulette;
- plane;
- pencil;
- knife (you should choose a construction knife);
- hammer;
- square;
- hacksaw;
- screwdriver
A set of screwdrivers of various configurations, as well as a crowbar, pliers, and small nail pullers will be very useful in this case.
To punch the necessary holes in the concrete, you need to use a hammer drill, and to prepare materials for the door, you need to use a miter saw. A lot of useful things can be done using an electric router - with it, in a short time it is possible to make holes for hinges and locks. If you have a set of cutters available, the work will “boil” even faster. A woodworking machine will not be superfluous if the owner has a desire to make the door frame with particularly high quality.
Wallpaper
When finishing slopes with vinyl wallpaper, the work should be carried out in conjunction with the interior design of the entire space. Wallpaper is glued after surface preparation - plaster, putty and application of adhesive.
After finishing, you should make sure that there are no air cavities, and, if there are any, remove defects by piercing the bubble with a needle and then smoothing the material.
Wallpapering slopes
When operating such slopes, special attention should be paid to the outer corners, since it is in these places that scuffing from mechanical stress can appear. As a rule, all corners are equipped with plastic overlay corners.
