We have already become familiar with the features of installing suspended ceilings with the “Starry Sky” effect. Now let's see what types of stretch ceilings there are. Sky with clouds. These decorative ceilings will help create a cozy, calm atmosphere in your home. They will allow you to relax after a busy day at work. They will decorate both the children's room and the living room.
Stretch ceilings in the form of the sky have a great variety of manufacturing options. Using a variety of shades, you can achieve the effects of sunset and dawn, rainy and clear skies - it all depends on your imagination and your capabilities.
Features of the use of ceilings in the interior
The peculiarity of the living room is that this room is “multifunctional”.
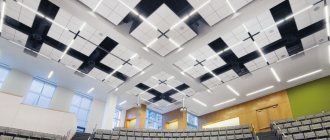
Here we relax, meet guests, eat, and so on. Accordingly, special requirements are imposed on the appearance of the hall. Based on the purpose of the room, suspended ceilings with 3D patterns for the hall should have versatility and functionality. Any photograph that organically fits into the overall interior of the room and emphasizes the color of the style and its individuality is suitable. The effect can be enhanced by using various lighting elements: placing emphasis on the necessary objects, shading others. The flight of imagination and creative thought in this case is not limited!
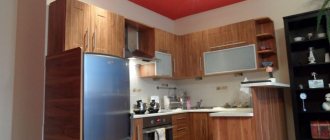
The kitchen has limited dimensions. You need to understand that the image often reduces the visual size of the room. Therefore, stretch ceilings for the kitchen with a pattern should be chosen more carefully. You should not order the application of complex geometric patterns; it is better to give preference to simple one-component figures.
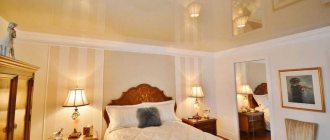
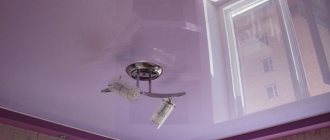
The optimal solution for kitchens and other small rooms is the use of glossy ceilings, which significantly expands the visual volume of the room.
Drawings and pictures on stretch ceilings
It is quite possible to apply an image to a suspended ceiling - this service is in demand due to its low price and rich possibilities for decorating the design of the room.
For designers, stretch ceilings with printed images open up rich spaces for imagination. To decorate any interior, you can choose an image that would look great from above. This can be either a small picture or a full-size picture covering the entire ceiling area.
Once manufactured, artistic ceilings do not emit odors, so they can be installed in residential areas. With such ceilings, the room will sparkle with new colors and will be noticeably transformed.
Any image can be applied to a suspended ceiling. You can choose a simple floral motif, decorate the ceiling with a family crest, or post a photo of a loved one. A stretch ceiling with your design is an individual and unique design find.
Where to use such designs
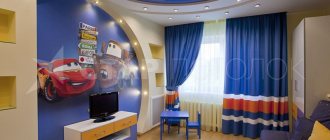
The best place for such decoration would be a children's room. Children really like the image of clouds and the sky above. In addition, such drawings on the ceiling create a more relaxed atmosphere and help improve the child’s emotional state.
At the same time, the canvas can be supplemented with several built-in LEDs and at night the sky will shine with many lights imitating stars. There is even a special version of this type of finish called “starry sky”, but it is not always suitable for children’s, as it is quite dark, and the sky-colored canvas looks light even at night. The twinkling of the “stars” will relieve children from night fears, and will also allow them to fall asleep faster and more soundly. Similar stretch ceilings depicting blue skies are shown in the photo below.
For living rooms, such designs will not be the best option, unless your interior is designed by a professional designer who takes into account all the nuances of such design
It is important to very accurately select the color of the walls, select suitable pieces of furniture and take into account many other details. A person without special experience cannot always cope with such a task.
In the kitchen, a “blue sky” ceiling would be appropriate. It creates a good mood before the work day when you pour your coffee and improves your mood even on the gloomiest rainy day
It is important to pay enough attention to detail - place bright accents in the form of additional decor or pieces of furniture in different bright colors
Many people think that this type of finish will look good in the bathroom. This is only partly true: if your bathroom is large and has high enough walls, then everything is in order. However, if you cannot boast of a large bathroom, then it is better to refuse such decoration - the small dimensions of this part of the house will seem even smaller due to the peculiarities of the pattern and color.
The same can be said about corridors with hallways - there is not much space here, and the design changes the overall perception of the room and visually, it will seem a little lower. The solution may be light walls or the use of a canvas depicting the sky in multi-tiered structures.
Cloud decor for children's room
Fold a sheet of white A4 paper three times.
Then we bend and fold the sheet of paper folded in three in half, as shown in the photo above.
Drawing the outline of the cloud
Draw the outline of half the cloud on the paper so that the middle of the cloud falls on the fold line of the paper. Cut along the contour.
Glue along the fold line
Glue the cloud fragments along the fold line. The cloud is ready. Now let's start creating raindrops. To do this, we will need white sewing threads of maximum thickness and blue paper.
We cut the required number of threads of the required length. In our case there are three of them. It is recommended to make the threads of different lengths so that at the end of the formation of the craft, the visual impression of falling drops is created.
Cut out droplets from blue paper. For three drops of rain, we make six blanks, two for each drop. This is necessary in order to hide traces of gluing when attaching droplets to the thread.
Glue the threads with droplets to the cloud. The craft is ready.
Attach with tape
Sketchy contour clouds made of large-sized paper, of course, can be considered as an option for theatrical decoration for a children's play. But it's very simple. We offer you an original solution to this issue. In order to build an interesting volumetric cloud, we will need a durable balloon of the required size (it is better to have it in light, neutral colors), glue for ceiling tiles (quick-drying), a spool of white thread, cotton wool, fishing line, and several rolls of white toilet paper.
It is recommended to take a soft, multi-layer option. Inflate the ball to the desired size. Then, we wrap it thickly with threads over the entire area until the gaps disappear. We coat the structure with glue, very carefully, and let it dry. Then, using cotton wool, gluing it, we form the outline of a cloud. After the threads dry, the ball can be pierced and removed.
We will be left with a thread frame. The entire area of the frame and the cotton wool glued to it is glued with large torn pieces of toilet paper until the desired volume is formed. The structure is then attached to a fishing line and suspended at the required height. Your cloud will be even more original and alive if you fill the balloon with helium before installing the craft and do not remove it afterwards.
The process of preparing clouds at home can be divided into several stages.
For clouds, in addition to cotton wool, we will need starch paste. To make a paste from potato starch, take a glass of cold water and stir two teaspoons of potato starch in it. Pour the resulting mixture into a ladle and bring to a boil, but do not boil it. During the heating process, do not forget to stir the starch solution. Let cool. The paste will be ready when it becomes thick enough. Then it can be spread with a brush.
Leave the welded glue to cool to room temperature.
Prepare a bowl or basin that can be used to dip the clouds into the paste. Pour the previously prepared and cooled paste into it.
Briefly dip clouds made of cotton wool, one at a time, into the paste and remove. Spread the glue more evenly over the surface of the cotton cloud with your fingers. If necessary, excess glue can be removed from the cotton cloud by simply squeezing it out.
Leave the cotton clouds soaked in paste to dry for about a day. For uniform drying, try to turn them over periodically after a couple of hours. After drying, the dried cotton clouds can be slightly wrinkled.
In order to decorate the interior of a children's room with clouds, tie strings to the clouds and attach them to the ceiling.
Peculiarities
Decorating a ceiling in the shape of a sky is not a new technique, but despite this, it remains fresh, in demand and relevant. The design in this theme can be varied, from clear blue skies to a ceiling decorated with clouds, branches, birds and other interesting details. If we are talking about the night sky, then the stars and the month often appear in the background.
Such an interior element will perfectly cope with the role of an expressive accent. Such decoration will turn a faded and monotonous design into a stylish and original one. This is exactly the effect modern consumers want to achieve.
Tips for choosing a pattern
To make the sky look more realistic, pay attention to the location of the clouds. A picture with a view from below will do.
And the clouds approaching the viewer distort the perspective and look unnatural.
You should not choose a symmetrical image. This does not happen in nature, and the drawing will also be perceived as unnatural.
Much depends on the room. In a low room, it is better not to make the sky in dark colors, otherwise the ceiling will visually lower; soft blue is more suitable. When choosing a shade, it is necessary to take into account that it will look more saturated in the interior. It is better to keep clouds small; small cirrus is preferable to large cumulus.
The image on the ceiling must be integrated into the interior. To do this, similar shades are used in the setting. The remaining tones should be combined with them.
If the room is richly decorated, it is better to use a laconic design on the ceiling, for example, a light blue sky with two or three airy clouds. A bright image with many details in such a room creates an overloaded design. It is uncomfortable to be in such an environment.
If a painting that occupies the entire ceiling seems too bold a decision, you should think about a small insert. The shape is suitable: round, oval, rectangular, in the form of a cloud or other shape. A kind of window to the sky is placed, for example, above the bed in the children's or dining area. The rest of the ceiling is decorated in traditional white.
Color
Everyone knows that light visually expands space. That is why classic white is almost always a win-win option. But let's face it, white can be pretty boring.
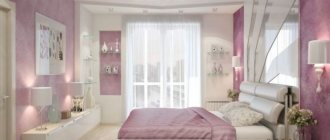
Considering that we are talking about decorating the ceiling for a girl's room, if you choose pink as an additional color, you can't go wrong. Soft purple shades or light blue also look beautiful.
You probably know that cool shades calm and inspire, while warm shades give strength and charge with vigor. Determine which effect you need most and act!
The optimal color scheme for a girl's room is a combination of several warm and calm shades, with small inserts of sun spots in the areas where your daughter plays or studies.
Having mentioned in the paragraph above that a beautiful ceiling can hide space, we will give some advice to those who would like to visually enlarge it, because for a girl it is important that the room is bright, open, so that it is easy to breathe in it and you want to create!
- The glossy shine of suspended ceilings is a great way, because the play of reflections gives additional depth. Simple and without unnecessary investments.
- If your ceiling is already ready, but the wall is not yet, use common elements in the decoration. When the transition from wall to ceiling is not striking, it becomes smooth and visually expands the space.
- Don't use a contrasting border.
- Instead of a chandelier, install cornice lighting.
Among other things, we would like to once again draw your attention to the fact that you should try to select the most environmentally friendly materials possible for your children's room. When you go to a hardware store, be sure to consult with the sellers
Ask to be shown special children's options.
Raise your child in a healthy environment in every possible sense and finally read about the most undesirable materials for a child's room:
Glass comes first. Don't place it just because it can break easily. Do not make mirror elements on the ceiling. One awkward throw of the ball and trouble is guaranteed.
If you decorate the ceiling with hanging elements, do not use natural felt or felt. These two materials are quite strong allergens.
Kinds
Starry sky stretch ceilings are divided into types in terms of design and appearance. In the latter case, we are talking about colors, shapes, and features of the pattern on the film. As for the design, it happens:
- Stretch ceiling starry sky with backlight
- Without backlight
You can illuminate the ceiling in 2 ways, including combining them. The first is to use fiber optics. The second is to use LED strip. The optical fiber works in conjunction with the generator, emerging from it as a beam and diverging to different points on the film. Here the fiber optic threads are pierced through the tension fabric, glued to it and cut flush with the film.
While working, the generator transmits light to the optical fiber. It can be one color, or a spectrum of different ones. It all depends on the generator model. Optical fiber strands cut flush with the film look like stars on the ceiling. For naturalness, they are often placed unevenly, in some places they are collected into star clouds, comets, and galaxies.
Stretch ceiling “Starry sky” with lighting
A starry sky based on an LED strip requires a power supply for it. It's better to take it without a fan. Its noise during operation of the unit can annoy household members. Units without fans are usually low-power. But, it is better to replace a couple of these with one powerful one.
An LED strip, like a generator, is a light source. It remains to transmit this glow to the “stars”. Instead of optical fiber, starpins are used in conjunction with LED strip. These are pins made of light-transmitting material.
They also pierce the film. Starpins hats remain on its front side. The light from an LED strip thrown across the rough ceiling is transmitted to the legs protruding from the back surface. For a uniform glow, it is usually placed in a snake pattern.
A stretch ceiling with a starry sky effect can be illuminated around the perimeter, for example, if the ceiling is two-level. The area with the sky is often made in the center. And the second level near the walls is made monochromatic. An LED strip is passed between the levels.
Without backlight
Also, lighting around the perimeter fits the theme if a floating profile is used. Then the starry sky seems to be suspended between the walls. Light shines through the crack. It is emitted by an LED strip hidden in a special groove in the profile. Due to its glow in the gap between the wall and the film, the effect of the tension fabric being torn off from the walls is obtained.
Now, let's move on to classifying the starry sky by appearance. Much depends on the film used and how it is processed. There are:
- Ceilings made from Galaxy film. These are factory canvases. They are made in colored colors interspersed with sparkles. These sparkles serve as an imitation of stars when light rays fall on them. The galaxy is not necessarily black or blue. There is a beige and pink film with glitter. You can also make a white stretch ceiling starry sky.
- Ceilings with photo printing. A factory-made monochromatic film without any inclusions is taken and printed on an ultraviolet or eco-solvent machine. The first photo printing is suitable for wide canvases, but is more expensive. Using an eco-solvent machine, you can apply a design to a film up to 2.7 meters wide. When making a starry sky, we naturally choose pictures of the Milky Way, the night sky, and cosmic views. These pictures can also be made in different colors, not necessarily realistic.
Stretch ceiling “Starry sky” white
If you strive for the most realistic look, a starry sky stretch ceiling should be made with photo printing, supplemented with fiber optics. If you pierce it with threads in places where stars and their clusters are depicted on the film, you get the maximum effect of presence.
How to choose for different rooms?
In order for this decor of the ceiling area to be appropriate, it is worth considering several nuances:
- Regardless of the chosen topic, you should initially like it. It is impossible to get used to a pattern if the print subconsciously evokes negativity.
- The design must correspond to the temperament and age of the household whose room it decorates.
- The size of the pattern matters: massive patterns that distort reality are unacceptable; they create a pressing effect, causing a feeling of one’s own insignificance (for example, huge birds are excluded).
- It is preferable to use a universal version of the design, which is not tied to the time of year. It is better if the photo print conveys the pattern of the sky with clouds without massive branches with foliage.
- Do not load the room with color if it is poorly lit: this will make the space visually heavier and smaller.
The use of the pattern for different rooms is different:
- For example, a current solution for bedroom design is to imitate the starry sky. This is the case when the print on the ceiling will not compete with the photo wallpaper that accents the headboard area. To create the illusion of space, you can use related tones of the color palette for the ceiling and wall patterns. It is worth considering: the tone of the walls should be lighter.
- It is better not to overload the living room with blackness. The canvas of the evening sky with the first stars to appear looks good here. If you choose something darker for a given room, there is a risk of changing the relaxing atmosphere to a gloomy and sleepy one. If the main color of the interior is light, an overly bright and dark spot will create a pressure effect. To prevent this, you should choose a picture of the sky in the morning or afternoon with sun rays.
For the hallway and corridor, a dark sky view is undesirable. The same applies to the kitchen, if you want to decorate the ceiling with this finish. To create the desired atmosphere, here you can use the simplest view or a partial fragment of the design, playing with the edges of the print through molding or other framing
If you decorate the ceiling area with a smaller pattern and make the contours up to the edges of the walls white, this will visually increase the boundaries of the ceiling, which is especially important in rooms with a lack of space.
Painting with a brush and sponge
What color to make a suspended ceiling in the kitchen: popular and unusual options
If you know how to draw, then you can create a real masterpiece on the ceiling yourself.
You will need:
- brushes;
- paints;
- simple pencil.
Step 1.
Draw a sketch of the future painting on the ceiling with a pencil.
Step 2.
Using brushes and paints, color the drawing and let it dry. Your masterpiece is ready!
If you do not have the talent of an artist, you can create a cloudy sky on the ceiling yourself using a sponge.
Tools and materials:
- blue, gray and white paints;
- roller;
- a simple pencil;
- sponges.
Step 1.
Use a roller to paint the surface of the ceiling blue. It is best to apply the paint in several layers so that there are no poorly painted areas left. It will be heaven.
Step 2.
Now start drawing the clouds. Make pencil sketches.
Step 3.
Add color to the clouds. Dip the sponge into white paint and paint using the padding technique, that is, apply it inside the outline of the cloud and press lightly.
Step 4.
After creating the basic cloud, give it some dimension using a pale gray paint.
Step 5.
Create “clearances” in the clouds using blue paint (sky). Lightly press the sponge soaked in it in several places on the clouds.
An excellent option is to use fluorescent paints for ceiling painting.
Video - Create a sky with clouds on the ceiling
And finally, some tips and tricks that will help you get the job done faster and better.
Monitor the condition of the working tool: after use, dip the brushes in a jar of water to prevent them from drying out. A projector will help you “translate” a sketch of a drawing onto the ceiling. Using this device, project the desired image onto the ceiling and simply trace all the details with a pencil. All that remains is to paint the picture, and the unique ceiling decor is ready
It is important to install the projector correctly so that the image should not be distorted. But with the help of a projector, you can create a real masterpiece on the ceiling without being a professional artist. Choose the right pattern for your interior style
Autumn maple leaves go well with warm-colored wallpaper, and beautiful bright flowers go well with a green or beige room. Butterflies will also look good. In addition, such drawings are quite simple to create; you don’t have to resort to the help of a wizard. Don’t forget to secure the finished work. To ensure that the drawing pleases you for many years, it can be coated with a special protective layer - varnish. The varnish is best applied by spray after the entire design has dried thoroughly. The varnish will also add shine and naturalness to the finished painting. If you have already partially renovated the room, namely, laid a covering on the floor, then do not forget to cover it (the covering) with film so as not to stain it with paint. Not all paint comes off easily. When coloring a large picture, start with large elements and only then move on to small ones. For any room, it is better to choose a pattern that will be brighter in the middle and paler at the edges. It will look organic. However, it is possible that you will want to decorate the room with a pattern around the perimeter - and this is also a good option.
Installation of suspended ceilings with the effect of a starry night sky
Anyone who has an idea of how a suspended stretch ceiling is installed can create a starry sky on the ceiling. However, in this case there are subtleties and nuances that must be observed.
If we are talking about stickers and wallpaper with a luminescent effect, then no difficulties should arise. Such elements are glued to the finished ceiling structure. You can use ready-made PVC film, which depicts a starry sky with a flickering effect.
Much more complex, but more effective, is lighting equipment installed in the inter-ceiling space. A light generator or projector provides shine on the stretched canvas. Each star in your sky is a section of LED fiber optic threads connected to the device. By placing the threads at the required radius over the entire area of the stretch ceiling, you can get any pattern or design - a composition in the form of an entire galaxy.
LED technology allows you to make the stars shine at different intensities, simulating the real position of stars in the sky.
Performance technique
There are two types of design of the ceiling surface with the effect of “stars in the sky” - with a puncture and without a puncture. Both types differ in technological design features. It is based on the work of fiber optic luminous threads, the glow of which is provided by a working projector.
The drawings and diagrams show the design of a suspended ceiling structure with and without a puncture. The main difference is in the design of both systems.
- The first type is suitable for situations where the stretched fabric has a thick base. Optical filaments come out through puncture holes. A sheet of considerable thickness successfully masks sections of fiber optic threads when the projector is turned off.
- The second type is used in cases where the fabric has a thin base, for example, satin. The absence of punctures hides thread cuts when the lighting is off. The entire surface of the starry sky in daylight remains solid and monochromatic, without visible flaws.
PVC film is used as the basis for this ceiling design. Installation of profiles and stretching of the film is carried out as usual, using a gapless harpoon system and a heat gun for this purpose. Lighting equipment is installed in the inter-ceiling space. With single-level suspended ceiling systems, a false ceiling is installed for these purposes, hiding the working projector.
In some cases, the light projector is installed in a plasterboard box, which is mounted around the perimeter of the room in its upper part. This option is traditional and most often used in everyday life.
The light source can be light generators, halogen or LED. Each of them is used in one situation or another. Halogen devices are usually monochrome, while LED devices can be monochrome or polychrome. To create a stretch ceiling in the shape of a shimmering galaxy, an LED projector is usually used.
What wallpaper will suit a white ceiling?
Due to its nature, white tone harmoniously coexists with absolutely any shades. An equally good idea would be to finish the wall surfaces in the same tone, creating a blank sheet of paper, and contrasting rich colors. In the latter case, a light top will prevent the room from becoming small and oppressive.
| Combination | Description | Photo |
| White walls and white ceiling | You can recreate absolutely any design project on a snow-white background. The filling of the room will play an important role. | |
| Black walls and white ceiling | A white tone will prevent the room from becoming gloomy and too dark. | |
| Brown walls and white ceiling | Depending on the materials used, renovations can correspond to different stylistic trends. | |
| Green walls and white ceiling | A white top will brighten the room and tone down the green. | |
| Gray walls and white ceiling | A stylish gray shade will set off the color of the ceiling. A good combination for Scandinavian or ultra-modern design. | |
| Beige walls and white ceiling | Calm and discreet color combination. Often used to decorate classic interiors. |
What else is important when choosing a ceiling in the form of a sky with clouds
- Installing the backlight
The clouds on the plasterboard ceiling are complemented by lighting. The result of light sources correctly installed on a suspended structure is a realistic imitation of the twinkling of stars, the diffused cold glow of the moon or warm sunlight. An LED strip fixed in a niche of a plasterboard box will enhance the effect and give volume to the ceiling and the picture itself.
Look at the photo: how interesting the composition of the night sky with clouds in the shape of a circle looks on the ceiling in the interior of one of our customers:
The eaves lighting illuminates the inner edge of the picture and breaks through the thick clouds to the center, enhancing the effect of the mystery of the starry sky. A chandelier located in the center can play both a decorative and purely functional role.
2. Placement of the drawing in the room
Painting does not always become the compositional center of the interior; in many cases it serves as an elegant nuance. The design is not applied to the entire ceiling; a suitable option for two-level structures is placement inside an ellipse, circle or oval. This kind of false window not only looks original, but also allows you to highlight functional areas in the room: for example, the head of the bed or the lounge area of the living room. Plain walls go well with this design.
3. Detailing and method of application
In small apartments with low ceilings, designers do not recommend using drawings and photo wallpapers with a lot of details. It is better to draw clouds on the ceiling with minimal detail: this will emphasize the design idea and hide the shortcomings of the room. At the same time, the room becomes less enclosed, and the boundary with the ceiling becomes slightly blurred.
Cheap option
If it is not necessary to create a unique stretch ceiling, try using ready-made vinyl sheets with the same type of clouds applied.
Typed clouds from the store
Apart from the cost, this texture has no panoramic limitations; the canvas can be cut however you like. The designers specially selected such clouds so that they could be cropped without damaging the picture.
Important! When performing individual printing, choose the placement of the design wisely; ready-made films can be installed immediately and not worry about the symmetry of the clouds.
This option is not only cheaper, but also faster. However, such a ceiling may not bring the expected aesthetic pleasure for the following reasons:
- The feeling that the design was imposed;
- This stretch ceiling is not unique. You can be upset after installing a ceiling in your living room and then seeing the same one in a hospital or kindergarten.
The main charm of this design is precisely its uniqueness, and it is worth spending time and money for your home to create a unique skyscape.
The whole secret is in the lighting!
To achieve the desired effect when installing a stretch ceiling with a sky image, you need to understand that the main task is to properly think through and install the lighting system. The unique configuration will not only make any room cozy, but will also create a unique, stunning effect of realism.
You can take a ready-made option you like as a basis and consult with the experts. And they will suggest how to profitably decorate your room, where it is better to concentrate lamps or use LEDs of different colors. This can enliven the image and add some zest. And I can also say with confidence that the project turned out to be truly unique.
Peace of the white clouds
Many people prefer the image of white clouds on a blue background to the starry sky. This picture allows you to dream, recharge with summer energy and be in high spirits for a long time. Do you want to create a calm, cozy atmosphere in your home? Then the ideal option for you would be the option with floating clouds. In the evening you can relax, looking at the alluring blue expanse and “white-maned horses”. And in the morning it is much more pleasant to wake up under the open sky. It seems that happiness is just a matter of reaching out! This morning is filled with freshness and positivity. Starting your day with a smile will ensure you achieve success and feel in great shape.
You can make the interior uniform throughout the apartment. Arrange a heavenly ceiling in the bedroom, in the hallway, and in the corridor. Needless to say, children will definitely be delighted by such a fabulous transformation of their room? In addition, we should not forget that such an image has a positive effect on the nervous system and general well-being of the child. By studying the clouds and looking for familiar objects in their bizarre outlines, children calm down and get rid of stress. You can consider the option of depicting the sky with a rainbow. Isn't this the element of a fairy tale that delights people of all ages?
Before you order such a wonderful ceiling, look at the finished works of the campaign and choose the appropriate option for the arrangement of clouds in the sky. As well as their number, saturation and size. Be sure to clarify all your wishes to the master and show the optimal heavenly color on the palette. All you have to do is take a deep breath and wait for the artist’s final work. Soon you will see the miraculous relocation of a piece of heaven right into your home! And with it, comfort and good mood will settle forever!
Interesting:
Pink stretch ceiling - choose light colors!
Translucent stretch ceiling
Palette of suspended ceilings
Stretch ceilings with a pattern - a new breath of your room!
Stretch ceilings with 3D photo printing
Red stretch ceiling in the interior
How to draw a sky with clouds
To create such an image, you do not need to be a professional artist. For painting, accuracy and patience are enough.
Paint selection
For living rooms it is better to use water-dispersed compositions. They are environmentally friendly and easily lay on the plastered surface; they can be mixed with each other or diluted to create a translucent effect. In damp rooms (for example, bathrooms and kitchens) they paint with acrylic.
The desired shade is chosen in the store or obtained through tinting. A small amount of dye is added to the white base (for the main tone - blue to get a blue color). The tinting service is available in all major construction stores. The shade for painting is selected using a computer and then mixed automatically.
You can get the desired tone at home. The paint is stirred with a drill at low speed. But in this case, it is difficult to immediately obtain the desired shade (and also repeat it if necessary). In both cases, it is advisable to purchase paint in excess so that it is enough to cover the ceiling in two passes (this way nothing will show through).
When people talk about the color of clouds, many people think of pure white. But in fact they have more or less noticeable shades. At dawn or dusk, pink or orange tones appear. And on a clear day, sunlit clouds have a warm tint. It is obtained by adding a drop of yellow and red colorant to white paint. The difference is difficult to notice with the naked eye, but the image will be more natural.
Surface preparation
Before starting work, furniture and belongings are removed from the room. The floor and objects that could not be removed are covered with construction film. Remove the remnants of the old coating: paint, plaster, wallpaper, etc. You can slightly soak it and then help with a spatula.
Seal all cracks, joints between slabs and other irregularities
You should not hope that after painting the defects will disappear, because the drawing will draw attention to the surface
Then the ceiling is primed. Choose a deep penetration composition that simultaneously strengthens and reduces paint consumption. After complete drying, you can begin creative work.
Drawing
First, the ceiling is covered with blue paint. Apply paint near the walls with a wide brush, but on the rest of the area it is more convenient to work with a roller. The composition is applied evenly. To create a realistic sky, it is better if the movements are chaotic, rather than in the same direction.
When the paint is dry, apply a second layer, and then the contours of the clouds. This is done with white chalk, which is clearly visible against a bright background, but will then be erased and hidden during the painting process.
The clouds are made asymmetrical, preferably different in size. You can first sketch a sketch on a sheet of paper, which is cut taking into account the proportions of the room.
Clouds on the ceiling are drawn with a sponge, then the edges turn out blurry. A natural or textured one from a hardware store would be better. The pattern partly depends on the texture.
A small amount of paint is poured into the cuvette. Dip a sponge into it and remove the excess (on the edge, rag or paper). Then lightly press it to the ceiling in the right places. The movements should be wet so that the drawing does not smudge. This goes along all the contours. The inside of large clouds can be painted with a roller or brush, a solid color.
Shadows will help make the sky more natural. Clouds are not flat, but have various shapes, which are indicated by shadows. To do this, take a little of the mixture left from the sky and add it to the white. Then applied to the clouds using the same technique. They also go around the edges, then they become translucent.
Quite realistic clouds can be painted using a stencil and a can of spray paint. In addition, this is also an easier method. A cloud is cut out of a sheet of cardboard, but not the whole, but only half, so the drawing will have clear boundaries at the top and blurry ones at the bottom, which looks very realistic. The resulting template is applied to the ceiling one by one and paint is carefully applied from a can.
To master this technique, it is better to first practice somewhere on a rough surface. This method is shown in detail in the video.
Why is the sky blue and not purple?
By the way, if blue light scatters 10 times more than red light, then even shorter violet waves should scatter more than blue ones! The question arises: why doesn't the sky look purple?
Firstly, the emission spectrum of light from the sun is not the same at all wavelengths - the maximum energy in the solar spectrum occurs in green light. Secondly, short-wave violet light is actively absorbed in the upper layers of the atmosphere (as is ultraviolet!), so less violet than blue reaches the Earth's surface.
Finally, the third reason is that our eyes are less sensitive to violet light than to blue light.
Sensitivity curves for three types of cones in the human eye.
We have three types of color receptors, or cones, in the retina of our eyes. They are called red, blue and green because they react most strongly to light at these wavelengths. But in fact, they are capable of capturing light of other wavelengths, covering the entire spectrum.
When we look at the sky, red cones respond to small amounts of scattered red light, but also, less strongly, to orange and yellow wavelengths. Green cones respond to yellow and more strongly scattered green and green-blue waves. Finally, blue cones are stimulated by colors at blue wavelengths, which are highly scattered. If there were no blue and violet in the spectrum, the sky would appear blue with a slight greenish tint. But the most strongly scattered wavelengths of blue and violet lightly stimulate the red cones as well, so these colors appear blue with an added red tint. The overall effect is that when we look at the sky, red and green cones are stimulated about equally, while blue cones are stimulated more. This combination ultimately creates a blue or blue sky.
Interesting examples
When creating an image of the starry sky on the ceiling, backlighting is often used. It allows you to achieve maximum realism and makes the coating especially beautiful.
Blue sky with clouds is ideal for the living room. This design helps create an atmosphere of lightness and airiness.
Sky ceilings are especially suitable for children's rooms.
Many people choose images of the sky with bright accents - for example, with beautiful butterflies.
The glossy ceiling with bright stars looks truly mesmerizing. However, such design is not appropriate in all rooms.
For an overview of the “Sky” stretch ceiling, see the following video.
Do-it-yourself sky on the ceiling: simple tips for the best effect
Do you have a designer or artistic streak dormant in you? Even if you don’t think so, and the desire to create something with your own interior with your own hands has not left you for a long time, why not paint the sky on the ceiling with your own hands?
It's quite simple, fun and economical, you just need to follow the instructions correctly:
- Carefully prepare the ceiling surface, eliminating uneven areas and tidying up contaminated areas, if any;
- Paint an image of the sky on the ceiling with clouds, or the night sky, even vanilla - after all, this is your sky, a real creation;
- Cover the resulting pattern with a protective layer.
The sky-shaped ceiling is perfectly complemented by a small chandelier.
Before starting painting, it is recommended to draw the selected sketch for the ceiling on paper. Then, having securely fixed the ladder, carefully transfer the sketch to the ceiling. If the drawing is life-size, then its reverse side can be shaded with a soft pencil, applied with the shaded side to the surface of the ceiling and pressed through all the lines of the drawing with a pencil or pen.
Then you can begin the most exciting activity by involving the children in this - coloring the resulting image. Finally, to cover the surface of the finished ceiling with a protective layer, it is recommended to use a special acrylic varnish, which will not only protect the design from damage, but will also give it depth and brightness for a long time. This varnish can be applied only after the design has completely dried and at first carefully protect the ceiling from dust.
Upon completion of the project, you will have a homemade, but unique ceiling, the like of which you will not find anywhere else! From now on, your own creation will give you a lot of positive emotions and fun memories, and all these feelings have a very good effect on a person every day.
Kinds
Existing types of suspended ceilings differ in texture. It can be matte or glossy:
- Gloss can visually expand the boundaries of the room in which the suspended ceiling is installed. However, this material is not able to convey the clarity of the picture, since it has a mirror effect. On such a surface all objects that are in a given room will be visible.
- The matte counterpart is more expressive. It’s more pleasant to look at: all the colors are conveyed as clearly as possible, the drawing is not blurred, and there is no mirror effect.
Today, there are a lot of design techniques for decorating a ceiling with a picture of the sky. This can be a canvas with photo printing, using fiber optics, LEDs, mixing photo printing and fiber optics, imitation of stars using Swarovski crystals. An interesting version of the design is a stretch ceiling with an image painted with luminescent paint.
Hanging panels
This stylistic device involves a complex technical design. The panel can be manufactured in a factory; it is installed assembled. The main component of this design is a special disk made of a particularly durable composite, on the surface of which airbrushing or full-color printing is applied.
The disk has built-in fiber optic threads, due to which, when turned on via a remote control, the radiance of the stars is transmitted. Sometimes, to complete the experience, a sound module is installed into the structure, due to which cosmic sounds are transmitted. The remote control allows you to adjust the intensity of the glow and the background tone.
Backlit
This type is a suspended ceiling with an LED strip that is installed inside. During the work, it shines through the canvas, so against the general background the effect of shining stars and sun rays is created.
A canvas with a light background glows brighter, and due to the backlight, the print looks realistic.
With photo printing and fiber optics
This design is the most labor-intensive and expensive. For production, textiles are used on which an image of the sky is printed. Then the optical fiber strands are fixed. The lighting elements are attached externally through special holes. The arrangement of the threads is arbitrary, as is the thickness used.
The mixing of threads looks especially beautiful, allowing you to create the effect of stars of different sizes shining against the sky at night. This approach to decorating the ceiling area can be carried out using an emitter with a powerful lamp or individual lamps of different colors. They use LEDs that shine at the ends of the threads, they are attached to the required length. The total number of such threads can be 130-150 pcs.
With luminescent paint
This type of stretch ceiling is budget-friendly. Transparent paint is applied via photo printing to the film coating. During the day, such a sky is practically unremarkable. In the evening and at night, the surface transforms: the ceiling is literally dotted with twinkling stars.
This stretch covering can decorate a child's room.
With Starpins pins and Swarovski crystals
This option is created on the basis of PVC canvas with or without a pattern, as well as using an LED strip, which usually illuminates the pins.
During the installation process, the film coating is pierced in places where the glow is needed, then the canvas is stretched and pins (plain or colored) are inserted. The light from the tape hitting the pins makes them glow. Lenses require strands of fiber optics. This is how they create the effect of diffused radiance.
Is it possible to glue luminous wallpaper to the ceiling?
Glowing wallpaper on the ceiling is an original and modern novelty from designers. This wallpaper is perfect for a child's room, bedroom or living room.
Glowing fights come in 3 types:
- Silver. Silver threads are added to the composition of such wallpaper; they play the role of lighting conductors, which can be controlled remotely. Such wallpaper looks very expensive and elegant.
- Fluorescent. A distinctive feature of this luminous wallpaper in the picture. This three-dimensional format makes the image realistic and alive.
- Phosphorous. The best option for a children's room, thanks, in some way, to the sloppiness of the design. It is applied to the canvas by mixing phosphor with acrylic paint.
Glowing wallpaper in daylight doesn't really stand out. But in the dark they obediently flicker with a romantic light. Such wallpaper will look more impressive in a spacious room with high ceilings.
Important nuances
So, such an original ceiling can become a real decoration of the room or completely ruin the entire planned design project. To prevent the latter from happening, we advise you to consider the following points:
In salons you can find ready-made film with photo printing or order a print according to your sketch. The first option is more profitable, the second allows you to create a unique canvas
But here it is important to choose a high-quality source code - it is better to look for it in special catalogs or entrust the development to a designer. Try not to use too saturated shades of blue - they will appear darker indoors and you won’t get a bright, bright sky. The clouds should be positioned as if you were filming them from below, rather than moving towards you. Otherwise, you will have to forget about naturalness. If you have a very small room with high walls, choose a different design
You don't want to get a well effect, do you? And, of course, you will need to make sure that the ceiling matches the other elements in the interior. An elementary rule that many people forget about.
As you can see, there is nothing complicated. Let's move on to the most interesting part - the photo gallery we collected.
How to choose?
When choosing the most suitable covering with the image of the sky, you need to take into account not only the purpose and general design of the room, but also its size. For a small room, sun rays and snow-white clouds are suitable. Such images can visually increase space. To visually make the room larger, you can also choose an image of celestial bodies or sunset. You can achieve the effect of lightness by using three-dimensional images.
To visually raise the ceiling, make a pattern on the walls a continuation of the image on the ceiling covering. This technique makes the interior especially interesting, and the overall design becomes as harmonious as possible.
It is recommended to take into account the lighting features in the room. Coverings with stars and a dark night image are suitable in cases where there is enough natural light in the room. Clouds in a blue sky are a good option for a fairly dark room. This image will make it lighter.
Accommodation Tips
Installation of a star ceiling can be carried out with or without puncture of the canvas. In both cases, a baguette is pre-installed around the perimeter of the ceiling, onto which the canvas will be attached. It is preheated using a heat gun and partially attached to the baguette.
If provided by the design, punctures are made according to the applied markings and optical filaments or LED wires are brought out. After the canvas is completely fixed and cooled, the joints of the ceiling and the wall are decorated with plinths.
For the most comfortable perception of starlight, it is recommended to mount from 3 to 5 optical threads per 1 m², depending on their diameter. This is an average of 100-150 stars.
Whatever form the “starry sky” flooring project was implemented, the main thing is that it was executed with high quality. Then he will delight you with his appearance for a long time. To do this, you need to choose reliable manufacturers with a proven reputation.
Tips and Tricks
And finally, some tips and tricks that will help you get the job done faster and better.
Monitor the condition of the working tool: after use, dip the brushes in a jar of water to prevent them from drying out. A projector will help you “translate” a sketch of a drawing onto the ceiling. Using this device, project the desired image onto the ceiling and simply trace all the details with a pencil. All that remains is to paint the picture, and the unique ceiling decor is ready
It is important to install the projector correctly so that the image should not be distorted. But with the help of a projector, you can create a real masterpiece on the ceiling without being a professional artist. Choose the right pattern for your interior style
Autumn maple leaves go well with warm-colored wallpaper, and beautiful bright flowers go well with a green or beige room. Butterflies will also look good. In addition, such drawings are quite simple to create; you don’t have to resort to the help of a wizard. Don’t forget to secure the finished work. To ensure that the drawing pleases you for many years, it can be coated with a special protective layer - varnish. The varnish is best applied by spray after the entire design has dried thoroughly. The varnish will also add shine and naturalness to the finished painting. If you have already partially renovated the room, namely, laid a covering on the floor, then do not forget to cover it (the covering) with film so as not to stain it with paint. Not all paint comes off easily. When coloring a large picture, start with large elements and only then move on to small ones. For any room, it is better to choose a pattern that will be brighter in the middle and paler at the edges. It will look organic. However, it is possible that you will want to decorate the room with a pattern around the perimeter - and this is also a good option for ceiling decor.
Artistic painting of the ceiling
Ceiling painting
A drawing created according to all the rules and treated with varnish will easily last for many years. Even the most inexpensive finishing option will remain on the ceiling for at least 10 years, provided proper care is taken. The drawings on the ceiling really do not like tobacco smoke, since paint and putty easily absorb all odors and micro-particles of ash, so try not to smoke in the room with the drawing. It is recommended to periodically renew the protective layer of varnish.
Which wallpaper to choose for a room with low ceilings
Wallpapering an apartment with low ceilings is not a problem. Modern design solutions and technologies allow you to visually hide all the shortcomings of the room, making the space more voluminous and comfortable.
What to emphasize:
- Finishing ceiling material. A good solution would be glossy wallpaper, a suspended ceiling or a mirror. Due to the reflective coating, the height of the room will visually increase. The illusion fully compensates for the lack of wall height.
- Color palette. The winning ceiling option would be light, cool shades of white-gray, pearl, and light blue.
- Interior items. In the case of low ceilings, surfaces and objects in the room in blue and green colors will help to visually enhance the space.
To illuminate the ceiling, it is better to choose spotlights. And along the main wall or along the entire perimeter, place several sconces with lampshades facing up.
Non-woven ceiling wallpaper - what is it?
Non-woven ceiling wallpaper is a fairly simple and high-quality material. Due to their thickness, they are good for hiding imperfections and surface unevenness. Finishing the ceiling with this material occurs much faster than other types of wallpaper. They do not stretch or deform during operation and after drying. Such wallpaper can also be used for painting.
Non-woven wallpaper comes in two types:
- On a non-woven basis. These two-layer wallpapers consist of a non-woven base and an outer vinyl layer of a certain texture and color.
- Fully non-woven. Their distinctive feature is strength and durability.
Non-woven wallpaper is hygienic and does not cause allergies.
