Modern interior items very quickly go out of fashion or lose their attractiveness, but purchasing new ones is not always possible. This raises the question: how to repaint chipboard furniture with your own hands so that the product acquires an attractive appearance? This is not always easy to do, because the result is influenced not only by the correct choice of materials and technology, but also by the accuracy of the process.
The nuances of repainting furniture chipboard
Painting old furniture with your own hands is considered a difficult and risky procedure. The fact is that for the manufacture of interior items (cabinets, chests of drawers, kitchen modules) processed materials with a decorative layer are used. Therefore, it is necessary to correctly determine the type of coating in order to draw up a work plan.
Chipboards used in furniture production can be of the following types:
- Lacquered. Wardrobes, beds and dressing tables made more than 30 years ago are made from this material. Now this furniture is being produced again. The manufacturing technology is that several layers of varnish are applied to the decorative base. Parts processed in this way are used for facades or visible parts of the body. It is very difficult to repaint varnished products; it is much easier to polish if there is damage.
Lacquered products are the hardest to repaint - Laminated. This is a modern option that is used everywhere; furniture made from chipboard is very popular. The principle of obtaining such a surface is that the film is rolled onto a chipboard base and, under the influence of a heat press, creates a reliable and durable layer. It is difficult to repaint such material due to the fact that it is impossible to completely remove the coating, because it has adhesion to the base. This must be taken into account so as not to damage the parts being processed.
Laminated boards are coated with a polymer on top, which complicates the restoration process - Laminated. Such products are created by gluing decorative paper onto a chipboard, so the coating is unreliable. It is recommended that such elements be allowed to be repainted only after the top layer has been removed and a significant part of the glue has been cleaned off.
The paper coating can be easily peeled off the plate, after which the product is ready to apply a new decor - Veneered. The basis of the material is chipboard; veneer is glued onto it under pressure. Painting of such interior items is carried out using a limited number of compositions - these are stains and varnish. The veneer surface must be prepared carefully so as not to damage the decorative layer.
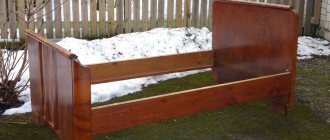
Furniture covered with natural wood veneer belongs to the elite class
There are other types of slabs, but they are not as common.
Preparing for coloring
Before you start painting, remove the door from its hinges. In the event that you only need to slightly update the paint layer, this is not necessary. Painting doors in an apartment with your own hands begins with preparing the workplace. The door removed from its hinges is laid horizontally on suitable supports at a height of at least 50 cm from the floor. Ordinary stools are successfully used as supports, on which boards the width of the door leaf are placed. The supports must be covered with a non-slip, lint-free, dense fabric. The door is processed first on one side, then turned over to the other. The first stage of work is removing the layer of old paint. For convenience, all fittings (handles, hinges, etc.) are first removed, and a small amount of cotton wool or rags is placed in the holes. To remove a layer of old paint, use a solvent, a stiff wire brush or sandpaper.
How to paint old furniture
To paint boring or defective interior items, you need to select a composition suitable for these purposes. The main recommendation when choosing is to refuse cheap options.
Paint for chipboard furniture should be selected taking into account the characteristics of the composition:
- Oily. Preference should be given to well-known brands. A significant disadvantage is the unpleasant and toxic fumes, and the drying period of the solution is quite long. This mixture must be laid in thin layers, which is why the material is used infrequently.
- Acrylic. A modern version of water-dispersed paints. The composition has many positive qualities, which makes it in demand. But when working with laminated chipboard, it is necessary to purchase a solution with increased adhesion and not dilute it with water.
- Alkyd. This option is much preferable to the oil option. The product is suitable for painting furniture, but the work is carried out in well-ventilated areas due to the specific smell of the composition.
Of the three proposed, the best is acrylic paint, oil paint is affordable, and alkyd enamel is considered the golden mean
On a note! To tint or decorate small areas, spray paint is used. For example, a bedside table will require one or two containers.
Chipboard can also be repainted with other types of compositions. Stain is used only for tinting veneered material. The varnish serves to secure the decorative layer; it can act as an independent composition, but this will require complex preparation of the base. For work it is better to use a quick-drying variety.
A mandatory element of the coating is a primer; the composition must have good adhesion.
No decorative coating can be applied to chipboard without primer.
Required Tools
Preparation for the process must be thorough. To work you need the following tools:
- Putty knife;
- Knives – carpenter’s and stationery;
- Screwdrivers;
- Construction hair dryer;
- Brushes, foam rollers for canned paints;
- Scissors.
A hacksaw may be useful to trim the cracked ribs of the slab. They also need to be sanded with sandpaper.
How to paint chipboard
Painting chipboard furniture includes two main stages:
- preparatory stage;
- painting work.
On a note! When deciding to paint laminated chipboard, it is worth considering that the end result, even if all the nuances are observed, does not always meet expectations.
It is convenient to paint chipboard from an aerosol can, especially if you need to make a pattern using a stencil
Tool selection
Various tools can be used for work:
- Spray gun. Due to the fact that furniture parts made of wood-based material have a flat base, this particular device is the best option. When spraying, the paint can be applied more evenly. The main problem with using such a tool is the correct selection of the distance. In case of erroneous calculations, drips and sagging are formed.
- Roller. This device is most often used at home. Painting with a roller is not always easy, since the applied layer must have a small thickness, otherwise sagging will become noticeable. To paint furniture, use tools with a medium-length fur coat.
- Foam sponge. Suitable for tinting and painting well-primed elements, it allows you to obtain a uniform coating, but subject to extreme care.
When restoring old furniture, you can get by with an affordable tool.
Brushes are rarely used for this process; their main purpose is decoration. They allow you to create an antique effect, but if a base layer was previously applied to hide the base.
On a note! When repainting an old table or chest of drawers, the joining of parts is taken into account: the new layer should not lead to the appearance of distortions and protruding areas.
Preparing the base
Step-by-step preparation instructions:
- Furniture is disassembled or only parts that need to be repainted are removed. It is problematic to carry out high-quality painting of parts without removing them. If you have no assembly experience, it is better to number the elements on the reverse side and draw up a diagram.
- The fittings are carefully removed, even if they are not located on the side to be painted. Its elements will complicate the process.
- The work site is prepared, everything unnecessary is removed.
If you don’t have a sander at hand, you can get by with sandpaper on a wooden block - The part is placed on a flat area. The front side is treated with sandpaper; for this you can use a hand block. Power tools are used very carefully. It is necessary to remove a small layer and create roughness on the surface to improve adhesion. Care must be taken, as chipboard is easily damaged.
- Dust and dirt are removed.
All details are processed in this way.
If it is not possible to completely disassemble the old furniture, then before painting the floor is covered with polyethylene
Repainting
Coating of fragments with paint is carried out according to the scheme:
- A primer is applied to the element. It is recommended to perform at least two treatments, each time waiting until the product is completely dry.
- The coloring composition is being prepared. It is stirred well and tinted if necessary.
- The mixture is poured into a convenient roller container. The instrument is soaked in the solution and the excess is squeezed out.
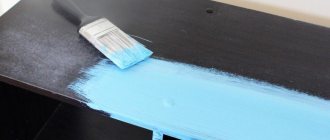
- Painting starts from the middle. The mixture rolls out well over the base, the movements should be parallel, and a thick layer should not be allowed to be created. The first layer is the base; you need to wait until it dries completely.
- Then the main coating is applied according to the previous principle.
- When using a spray gun, you will need to dilute the composition used. To select the optimal distance, training staining is carried out.
Regardless of the type of composition, the surface is painted in 2 - 3 layers.
If the part will experience constant exposure, then an additional layer of varnish is applied.
What paints should I use?
High-quality latex paints are very suitable for painting laminated furniture, as they create a very smooth and at the same time durable surface. ProClassic acrylic latex enamel for painting lighter colors or All Surface for deeper shades.
5. Remove spills and splashes immediately using soapy water or white spirit (according to the instructions for the paint you are using). Clean the tool immediately after use. When using mineral spirits, follow the manufacturer's safety recommendations.
After the paint has completely dried, your updated furniture will certainly delight you for many years to come!
Furniture decoration
Decorating such material is not very easy. There are many recommendations for creating a Provence style, but achieving the effect that is obtained on furniture made of wood, plywood or MDF will not work. This is explained by the fact that chipboard products rarely have the required appearance.
Using simple devices on chipboard furniture you can create true masterpieces
You can diversify the interior in the following ways:
- Paint the countertop or dresser fronts white and other front parts black. For this, paint with a glossy finish is used. The technology is completely the same as described above, but the difference is that three layers of varnish are applied to the parts. The first layer is left untreated, and subsequent layers are sanded and polished.
To work using the Decoupage technique (artificial aging), special paints are used
- Aging. To create this effect, after laying the base coat, apply a darker color of paint with a brush. The movements should be sweeping and slightly uneven; a diluted white compound can be applied on top. Everything is fixed with varnish.
Before repainting chipboard furniture, it is recommended to experiment a little. This will allow you to evaluate the result and, possibly, choose a more suitable decoration option.
Painting process
To paint facades well with your own hands, you should apply the paint in one direction, using a roller or brush. If you decide to use several shades, then you should protect the borders with tape.
Of course, painting the kitchen facade with a spray can or gun will be more accurate, but here you should also take into account the fact that some of the paint will be sprayed to the sides. Firstly, this will lead to waste of paint, and secondly, it may stain neighboring elements. Therefore, if you choose this method, you will need more tape and protective equipment.
To give a more colorful effect, we can additionally apply glisal to the facades. Glizal is diluted with water, adhering to the proportion written in the instructions. Then we use a clean brush to spread the glisal over the painted facade.
To get a patterned textured design, we should resort to the glazing method. To do this, we need a damp sponge, polyethylene and a brush with hard bristles. We apply these elements to the surface on which there is glissal, and move from one such area to another, thereby forming a variety of broken lines, chaotic strokes or bizarre bubbles. After you have finished using the glisal, you should let the surface dry. For this, you will have to wait about a week.
After drying, we coat the surface with varnish. We let it dry and attach various fittings to our facades in the form of handles, glass inserts and other things. Then all you have to do is hang the fittings on the hinges and enjoy the updated kitchen interior.
Thus, without using special efforts and skills, we get an updated kitchen set that has a unique look, and most importantly, made with our own hands and with soul.
Selection of materials in a special store
If you're looking to create a statement piece in your kitchen without a huge investment, consider priming and painting your laminate countertops. Your local supply store can provide you with the best type of paint that you can easily use for this project. Almost everyone advises using an aqua-based acrylic primer. Regular acrylic paint dries to provide the hard surface needed for high-use areas such as countertops, while aqua-based acrylic paint simply cleans up with water and does not have a strong odor. In any case, you need to ensure proper ventilation in the kitchen while painting. Turn on a fan or open a window.
If your final countertop color is black, you may be able to ask your paint supplier to add the color that suits you to the primer. Store employees will know if this is needed. Just explain the nature of your project and the final color you want on your kitchen countertop and let them make the right decision. Make sure your primer and paint are mixed well. You can create this in the store or use a stir stick at home.
I would like to recommend that you purchase as many roller covers as possible. Even if you still have them. Buy as many as you can and return what you don't use to the store later, or keep it for yourself so you can use it for a later project. For smooth surfaces, such as countertops, it is recommended to use polyurethane foam coating. If you follow my advice, then you will certainly succeed.
Work order:
Closet.
At first I wanted to paint it like this without removing the door, but later I realized that it would be awkward. That's why I took the risk. and took it off. It turned out to be easy. True, worries about how to put them back were present until the last moment. In the end, I also screwed it myself; I didn’t have the patience to wait for my husband))).
I took out the integrated lighting fixtures and wrapped them in a suspended state with masking tape. I used this tape to protect the walls around the edges of the cabinet, the floor, and the mirrors on the doors. Prepared the workspace. I decided to paint it. on the bed)))! She carefully covered it with polyethylene. And I never regretted this choice. The bed was large and high, everything fit, there was no need to bend over and crawl on all fours. I prepared approximately equal stacks of books and wrapped them in cling film. They are needed as substrates so that the doors can be lifted and painted as if suspended, the painted edges will not come into contact with a flat surface.
Step 2.
I sanded all surfaces that needed to be painted. You need to sand lightly, without fanaticism, with the smallest sandpaper. Light radial movements. Purpose: to create roughness without removing the laminated layer. If there are dents and scratches, then at this step they need to be puttied. After sanding, carefully wipe all surfaces with a degreaser. It will remove dirt, grease marks, and everything that can disrupt the adhesion of the primer and paint.
Step 3.
Primer. Inaccessible areas were covered with a brush, the rest with a roller. A thick layer is not needed at all; the primer needs to be covered without drips and in a thin layer. The unevenness of color is not terrible, but there should not be any gaps. I didn’t prime the rattan inserts; the paint applied perfectly to them anyway.
Painting them is simple - just roll them out with a roller; with a brush it is more difficult not to go beyond the edges. Wipe off any blemishes immediately with a rag. Any layer was dried, as the manufacturer advises, the acrylic dries “touch” in an hour and, in principle, you can carefully twist and paint the door from the other side.
Step 5
I assembled the closet. I screwed the doors and handles. I removed the masking tape and cleaned everything up. At first I meant to keep the doors open for two days, I was afraid that they would stick. Nothing like that - you can close it right away.
Dresser.
Mirror.
Fundamentally!
Acrylic paints dry quite quickly “touch-free”, but they polymerize for at least a month; with a primer the process can take even longer. The painted product can be used almost immediately (or it’s better to wait 2 days) and even wiped with a damp cloth. But within a month, the coating remains very vulnerable; it must be handled carefully, without scratching or rubbing with force. If shelves or horizontal surfaces are painted, then it is better not to immediately place things on them that could “stick”, wait until the paint “sets”. Although I immediately put everything I needed on the chest of drawers, nothing stuck).
Here you go. The work is labor-intensive, but the result amused me. The paint job ends up looking no worse than the factory paint, no brush marks are visible. It holds up great too. I haven’t tried scratching, I use the furniture as usual. But usually I don’t scratch it))). Although I will conduct an experiment in a month. The room has been significantly updated). As annoying as it may sound, the photos after compression leave much to be desired; in fact, the colors are brighter and cleaner, but this is not so important.
If you also want to recycle furniture and have any questions, write to me and I will answer. And if such a rework seems complicated to someone, I assure you that it is not, labor-intensive - yes, but completely doable without any experience. You can just start with internal, unnoticeable parts, or with small furniture, a chair, for example. The rework took three days. Despite all this, I managed to cook and... suffer from bronchitis + after the cast I still have a slightly wobbly leg. The “disabled painter” managed to paint, which means you can too))).
Decor elements
Often objects made from chipboard are refreshed through decoration. Drawings, ornaments, contrasting inserts, parts of the facade made of fabric or wallpaper - just a small list of ideas for giving a piece of furniture a new look. Other suitable materials include decoupage napkins in Provencal or Victorian style, straws, artificial glass, colored paper, newspaper (magazine) clippings and much more.
The combination of the main color of the facade and the insert or print should be harmonious.
You can enliven the coating with the help of contrasting colors, skillfully selected to match the overall style of the room. Brown tones (all shades of natural wood), yellow and blue, red and green go well together.
You can decorate an old cabinet not only with simple painting, but also with painting. If you know how to draw, this is one of the chances to put your talent into practice and show your imagination.
The facade can be given a vintage look by applying patina or special craquelure varnish. You can choose unusual fittings that make the cabinet more interesting and create the look of noble antiquity.
The craquelure method creates an antique effect.
An alternative to painting is to cover furniture with self-adhesive film. You can find a suitable shade (possibly with a pattern) in any hardware store.
Updated items often become stylish pieces of furniture.
An exclusive look will serve to reconsider the attitude towards a used item as obsolete. Don't rush to send it to the landfill. See what you can do with a cabinet, table or cabinet. Then you won't have to spend your budget on expensive furnishings.
You can combine different styles and not be afraid to experiment.
How to change the color of a laminated countertop and repaint it: take note
If your kitchen countertop is still in good condition, but has lost its attractive appearance, do not throw it away and get a new one. The latest kitchen countertops can be a treasured delight that just isn't for everyone. I will tell you and show you with my own example how easy it is to prime and paint a laminate countertop. If you are curious, then read on.
Sanding the surface of the tabletop
Always sand any surface before painting. So, firstly, your work will look neater. Secondly, it will give you a better outcome. Use fine sandpaper (200 to 220 grit) to remove any bulges on the work surface and back wall. An electronic grinder will make this job much faster. But if you simply don’t have one, and your budget does not allow you to purchase such a tool, then you will have to use ordinary sandpaper. But then you will have to be patient and time.
Use a sanding block to sand the edges of the tabletop, because you simply cannot do this with a machine.
