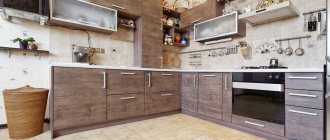
Today, many people have nostalgic memories of old Soviet furniture. Some people still have sideboards, cabinets and shelves made in the USSR in their homes. Against the background of the current abundance of modern furniture, Soviet designs seem scary and miserable. However, the hand does not rise to take them to a landfill. In addition, we must pay tribute, furniture and other paraphernalia from the USSR still serve faithfully to this day. The same cannot be said about modern furniture, which lasts for several years.
Still, there is something special about the designs from the USSR. Such furniture began to be perceived. As an intangible nostalgic value. In other words, antiques. The owners enjoy using it. And if such furniture does not fit into a city apartment, then in a country house it will be just right. In addition, you can always make an upgrade that will breathe new life into old structures.
In this article we will talk about Soviet cabinets. We'll tell you what they were like and what was special about them. Be careful, you can't avoid nostalgic memories.
A little history
After the country made the transition from communal apartments to “Khrushchev”, the need arose to equip its own personal nest. On the one hand, it’s good, because each family could have a separate living space. On the other hand, we had to purchase new furniture. And these are additional expenses. In this regard, after the 60s there was a colossal rethinking of furniture design.
At that time, the most important field of art was cinema. The furniture produced was boring and of the same type, they produced it and released it to the masses. So to speak, so that no one would be offended, because the apartments were no different from each other. And this means that all people are equal. This ideology was fundamentally different from the capitalist one. It included modern furniture with interesting designs, vacuum cleaners, mixers and other “bourgeois nonsense.”
Only in 1962, a decree of the Council of Ministers of the USSR was issued, in which it was said to improve cultural and household goods by introducing the method of artistic design. After this, they began to produce interesting and unusual furniture, which until that time ordinary citizens could not even dream of. The following types of furniture appeared:
· Collapsible cabinet;
· Rack;
· Sofa book;
· Chair-bed;
· Kitchen set of 3 items.
All this could be found in almost every apartment. The surprising thing is that all these household items have survived intact to this day.
Necessary tools for restoring old furniture
Sandpaper of different densities
Types of solvents for cleaning surfaces
Any old piece of furniture is first of all covered with a factory layer of paint and varnish; it is possible that earlier they also tried to change or restore it. Therefore, it is necessary to rid the buffet of any old covering. Coarse sandpaper is needed for sanding and cleaning all surfaces. It’s easy to ruin wood by simply trying to peel off the top layers with sandpaper, which is why a solvent is needed, acetone is ideal
It is applied with a brush over the entire surface, special attention should be paid to the carved parts. Another way is to soak a rag or cloth and cover the sideboard for a few minutes.
The layer of old coating will come off on its own, and the buffet can be cleaned with a simple cloth.
Tools
Multifunctional Household Hand Tool Set
It is better to process furniture in a disassembled state, so you will need a lot of tools. It is possible that the buffet will only require cosmetic repairs. But sometimes you may need to tighten loose doors or secure legs. You need to have a set of screwdrivers and wrenches, a hammer, etc. on hand.
Accessories
Antique furniture fittings for an updated buffet
Updating the sideboard will also entail installing new fittings - handles, fasteners, etc. All this can be easily found in specialized stores or made to order in workshops.
- Additional materials: wax and putty to remove unevenness; primer for surface treatment.
- Brushes, sponges and rollers for painting.
- Paints and varnishes (acrylic and oil paints, varnish, stain).
- Masking tape, PVA glue.
Additional materials for do-it-yourself buffet restoration
The doors of an old cupboard are often glazed, so you will need tape to protect them from paint. You will need glue if the furniture has already begun to delaminate.
Where does the name "wall" come from for some cabinets?
In the modern world, few people use the word “wall”. But fifteen years ago, almost all citizens of the USSR used it. And they didn’t even pay attention to the model. A “wall” was any large and long closet. It was impressive in size and could easily take up half the room. But how many things could fit in it! It was possible to fold clothes, put on the TV, and arrange books. What can we say, some owners also stuffed a tape recorder with other souvenirs into it.
But still, why the “wall”? You might think because such a cabinet occupied the entire wall of an apartment or house. But these are just guesses. But what are things really like?
The first theory sounds pretty funny. In one of the articles about the design of Soviet apartments, the historian said that the closet was nicknamed “the wall” because for a long time the inhabitants of the USSR were “put against the wall.” And this is such an irony of the past. This explanation seems unconvincing. It’s unlikely that many people remembered the difficult fate of their homeland when they called the closet a “wall.” And even more so, they didn’t think about the fact that once upon a time someone was put against the wall. So let's move on.
The second theory sounds more convincing. It all started with "Helga". It was a cabinet from the 50s-60s, which was produced by the German Democratic Republic. From there he entered the USSR. A little later we managed to get a license and manufacture “Helga” here. Such a cabinet became the first furniture of its kind in the Soviet Union.
For many people, such a cabinet became a real discovery. Just imagine, in the post-war period, some managed to move from the village to the city. And the first piece of furniture that the owners immediately rushed to purchase was a wall cabinet. It was so attractive that everyone dreamed of buying one for home. The closet was spacious and stylish at the time. It was even once mentioned in one of the Soviet films.
This cabinet had a compartment for kitchen utensils, things, books and much more. The owners were so proud of such furniture that they even compared it to the Great Wall of China. Like in China there is a Great Wall, and in the USSR in
Each house has a Little Wall. Over time, this began to be called not only a cabinet similar to “Helga”, but also any other. Because of this, the meaning of the word has been lost. Nowadays it seems more and more that a closet is called a “wall” because it stands against the wall. But what an original story it was!
The first decades after the October Revolution
From the very first days, the country's leadership began to requisition apartments from the bourgeoisie and populate them with people from the slums. But there wasn’t enough housing for everyone and compaction was taking place. In those days there were no standards designed for one person. The party decided to relocate all those in need from dugouts and huts, and its orders were unconditionally carried out.
Interior of a communal apartment of the 20-30s of the last century Source Yandex.Collections
Since the authorities immediately abolished living rooms, dining rooms and offices, only the bedroom remained for the people. Sometimes it housed a family of up to a dozen people and there was only one style of decoration - from one place to another. A simple iron bed, a wooden chest from the village and an openwork armchair in the Empire style, which was left in the room after the bourgeoisie, could easily coexist in the room. And the oak parquet floor was covered with a rough path.
Sideboard functions
The original function of the sideboard was to store dishes and other kitchen utensils. For example, a tea set, glasses and glasses, glasses, a crystal set and much more. In addition, not all cabinet doors were made of wood. The place intended for the sideboard was glassed. This was done so that one could admire the beautiful dishes and show off to the guests. A unique museum right at home. In addition, the sideboard was used only on holidays. The rest of the time it simply served as a decorative item.
A little later, books, candlesticks, and photographs began to be placed inside the sideboard. Most often, such furniture was made low so that you could easily reach any thing. But there were sideboards of impressive dimensions. USSR cabinet dimensions : height - 150-160 centimeters, length - 135 centimeters, depth 35-45 centimeters.
They produced sideboards where the lower part was made entirely of wood. Dishes for regular use and other things were stored there. Some types of sideboards even had a specially designated area for a minibar.
Table
Initially, this item was used for sharing food. But since the too bulky item did not fit in the kitchen, it was installed in the living room, where it, along with the chairs, occupied half the usable area. We used this table several times a year when guests visited the house. But by the end of socialism, a table-book was developed, which was laid out on holidays, and on weekdays it turned into a cabinet and did not take up much space.
Large extendable table for eating in the living room Source grand-italia.ru
Folding table for small apartments Source gmarketmebel.ru
Kinds
Sideboards with open and glazed shelves are suitable for storing dishes and souvenirs. There are cabinets with one or two sections, up to two doors and different levels of shelves. There are models with a designated space for a minibar. There you can place alcoholic drinks, a tray, a corkscrew, glasses and glasses.
Modern models have spotlights that visualize the location of the dishes inside. They also give the room a cozy, dim light. The sideboards have an upper shelf or mezzanine. It is designed for storing things. The doors are opaque and made of the same material as the entire cabinet.
Sewing machine
It was not present in all houses, but those who had it were terribly proud of it. A foot-powered machine was an indispensable item in the household. It was possible to repair things on it, sew new ones, and when it was folded, it turned into a desk.
Sewing machine in the interior of a Soviet apartment Source maxni.ru
Desk with a sewing machine tucked inside Source au.ru
What does a modern sideboard look like?
In the modern world, cabinet furniture is especially popular. Cabinets from the USSR era with several sections are presented in different compositions. To produce cabinet furniture, the following materials are used:
1. Chipboard;
2. Medium density fiberboard;
3. Solid element made of wood;
4. Metal parts;
5. Glass;
6. Veneer.
The shelves of the sideboards are so strong that they can even withstand a TV, home theater, stereo system and other equipment.
Vintage sideboards for the living room (10 photos)
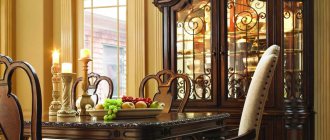
A bright sideboard can become the heart of your living room. Use the upper open shelves to store your favorite tableware, porcelain collection or luxury alcohol. The lower shelves are useful for tablecloths, sofa cushions and other accessories. Candlesticks, decorative vases and photo frames will look great on the dividing tabletop. But unlike the kitchen, here it is better to avoid an excessive amount of things and limit yourself to only your favorite items.
Also read: An alternative to a sideboard and buffet - a showcase cabinet in living room design
What was the sideboard made of?
Manufacturers of sideboards use different materials to increase service life and durability. As a rule, it is made from solid wood. Glass doors can be decorated:
· Multi-colored mosaic;
· Drawings;
· Thread elements.
Glass, plastic or wood were used to make sideboard doors. There are different methods of sliding: both with a sliding wardrobe and with simple doors.
In Europe, the following trees were used to make sideboards:
1. Oak;
2. Cherry;
3. Mahogany;
4. Beech.
It is worth noting that such material costs quite a lot on the market. A sideboard made from such wood was not only strong and durable, but also stylish. In Russia, birch and similar materials were most often used. This is how interesting and unusual the USSR cupboard was.
Overlay decorative elements
So, the moment came when the buffet began to take on a new look. For this stage I needed:
- mounting adhesive Moment Installation Instant grip MP-90;
- super-strong assembly adhesive Titeseal;
- screws;
- screwdriver
I wanted to decorate it with carved elements and paint it with chalk paint. I already had some elements in my stash, but some had to be made to order. The ones I had were made of oak, so I had to order the missing elements also from oak, although it turned out to be a little expensive. But what can you do for your “beloved child,” and the buffet has already become my brainchild, with which I not only managed to become close, but also fell in love with it. ))) I glued the decor using two types of glue: Glue Moment Installation Instant Grip MP-90 I really liked. It is quite thick and it is enough to apply it only in a few places on the decorative element. This is a very strong adhesive and immediately holds the glued object in place well. Small objects were glued with one glue, but large objects were glued with two glues and also secured with screws. For example, on elements such as “grape leaves” I first applied Moment Installation Instant Grip MP-90 in several places in order to fix them well on the door, in other places I applied Titeseal glue with a gun - it is more liquid and easier to apply. thin curls of a decorative element. Then I additionally fixed them on the inside of the door with three screws each. The size of the screws was selected taking into account the thickness of the door and the cover element. The glue that came out around the edges was removed with a toothpick and a knife. The doors of the chest of drawers are decorated with decorative elements.
Photo 57
Photo 58
Everyone's favorite trellis
Looking at the old cabinets of the USSR , we came to the trellis. This is another type of furniture that was especially popular during Soviet times. I don’t think it’s worth explaining why all women loved this wardrobe. He made their hard life a little easier and more enjoyable. It’s so great to get ready in front of the mirror, try on outfits, do your hair and put on makeup. And then admire yourself. Cosmetics, perfumes and other feminine accessories were usually stored in the trellis. There were three mirrors to view yourself from all sides. It can be considered 3D in the Soviet version. True, they placed the trellis in the corridor, and not in the bedroom.
Many people think that this USSR cabinet was invented here. But that's not true. The word "trillage" is French. It is logical that the furniture itself was invented and brought into reality in France. Based on historical data, the trellis first appeared in the 17th century. But then he had only one mirror. Three is an option for rich people. But in the lower cabinets it was possible to store a chamber pot. Past times were so difficult. But let’s not dwell on the French and move on.
In the 18th century, tables with mirrors began to appear more and more among Russian aristocrats. Then they tried with all their might to emulate France. Thus, the trellis came to our land. So, women's favorite furniture first appeared not among our grandmothers, but among aristocrats.
Surely many have asked the question, why exactly “trillage”? And why does he need three mirrors? There is a logical answer to the first question: “treillage”, because there are three mirrors. But what to do with the second question? There are several guesses on this matter.
First: historically, the trellis belonged to the wealthy nobility. First in France, and only then in Russia, this furniture was a luxury item. Ordinary people had access to a trellis with one mirror. But I wanted something richer and more fashionable. Therefore, people tried with all their might to get a trellis with three mirrors. Somewhere on a subconscious level it was deposited that the more mirrors, the richer.
Second: Soviet women did not need to give themselves meter-long hairstyles, as was fashionable in the 18th century. But they often sewed their own clothes. And tall mirrors that reflected the view from different sides were an irreplaceable thing. A wardrobe from the USSR era can be seen in the photo.
Forties of the last century
During the war, many people were happy with a bunk in a barracks. And after the victory, the majority, due to a lack of housing destroyed by shelling, continued to huddle in communal apartments. The happy owners of apartments created a Soviet interior from what they managed to get hold of and were happy about it.
Interior of Soviet apartments of the 40s Source Yandex.Zen
The standard furnishings of the room included a bed with an armored mesh, a large wardrobe, a round table and several chairs of different sizes, depending on the number of residents. Few had a sideboard, a leather sofa and a desk with a lamp. And only a select few could afford a “Stalinist Empire style” with high-quality carved furniture and trophy luxury items.
A house on the main street of the city, built during the reign of Stalin Source photoshare.ru
USSR kitchen cabinets
The kitchen cabinets were not unusual in design. Rather, they all looked the same: monochromatic. Moreover, it was impossible to buy them. Just get it.
Among the kitchen cabinets of that time, there were several types:
1. Chipboard. Such furniture was distinguished by the fact that it was quite strong and heavy. If the sash fell on your foot, then brilliant green was indispensable. At best, a bruise, and at worst, a fracture or scar;
2. Accessories. Such furniture was not fully thought through. It was almost impossible to adjust it. The assembly was on the corners, so it was not possible to make the façade of the furniture even. There was always at least one irregularity that was difficult to hide;
3. Tabletop. This piece of furniture was quite durable. It was possible to cut bread and other products on the countertop, but nothing happened to her;
4. Drawers and doors. These were ordinary boxes in niches, which were sometimes removed with effort. The sagging door could be adjusted.
Necessary tools for restoring old furniture
- Sandpaper and solvent
Sandpaper of different densities
Any old piece of furniture is first of all covered with a factory layer of paint and varnish; it is possible that earlier they also tried to change or restore it. Therefore, it is necessary to rid the buffet of any old covering. Coarse sandpaper is needed for sanding and cleaning all surfaces. It’s easy to ruin wood by simply trying to peel off the top layers with sandpaper, which is why a solvent is needed, acetone is ideal
It is applied with a brush over the entire surface, special attention should be paid to the carved parts. Another way is to soak a rag or cloth and cover the sideboard for a few minutes. The layer of old coating will come off on its own, and the buffet can be cleaned with a simple cloth.
The layer of old coating will come off on its own, and the buffet can be cleaned with a simple cloth.
Multifunctional Household Hand Tool Set
It is better to process furniture in a disassembled state, so you will need a lot of tools. It is possible that the buffet will only require cosmetic repairs. But sometimes you may need to tighten loose doors or secure legs. You need to have a set of screwdrivers and wrenches, a hammer, etc. on hand.
Antique furniture fittings for an updated buffet
Updating the sideboard will also entail installing new fittings - handles, fasteners, etc. All this can be easily found in specialized stores or made to order in workshops.
- Additional materials: wax and putty to remove unevenness; primer for surface treatment.
- Brushes, sponges and rollers for painting.
- Paints and varnishes (acrylic and oil paints, varnish, stain).
- Masking tape, PVA glue.
Additional materials for do-it-yourself buffet restoration
The doors of an old cupboard are often glazed, so you will need tape to protect them from paint. You will need glue if the furniture has already begun to delaminate.
Drying oven USSR
The dry-heat oven was used for various purposes. Thanks to it, it was possible to sterilize anything in a heat-resistant chamber. Such cabinets are reliable and durable. It consists of several parts:
1. Heating chamber;
2. Electric thermometer;
3. Tray for drying tools;
4. Cover;
5. Dashboard.
Drying cabinet USSR
I think there are no issues with the drying cabinet. The name alone makes it clear why it was needed. Various items could be dried in it. The drying cabinet significantly saved the time and effort of many housewives.
Openwork
It is difficult to imagine a Soviet interior without tablecloths on the tables. They also covered all large objects. From bedside tables in hallways to TVs in living rooms. For these purposes, each housewife had a whole set of different laces. From small napkins that were placed under vases of flowers on the table, to curtains on the windows.
Tablecloth with lace in the interior of a Soviet apartment Source livemaster.ru
Openwork napkin on the table Source livemaster.ru
Unnecessary junk or luxury item
Many people try to immediately get rid of old furniture as soon as the opportunity arises. Yes, of course, a new modern interior is wonderful, but few people will be surprised by it now. Therefore, think before you take the old sideboard that you inherited from your grandmother to the landfill; perhaps it will become the main decoration in the interior of your home. This is especially true for furniture from the beginning of the last century; today, it is a real rarity into which you can breathe new life.
It is important to understand that restoring a sideboard with your own hands is not such a difficult task, but it will require some time and skills. You can contact restoration specialists, they will be happy to get to work and do everything you need, just call
But such pleasure will be very expensive, and the process of professional restoration itself is quite time-consuming. Advice, roll up your sleeves and try to do this work yourself. This will not only cost you much less, but it can become a very exciting activity, help you master some of the skills of a restoration artist and enrich you spiritually.
Where does the process of restoring old furniture begin?
Restoring an old sideboard requires studying some issues related to the history of the product, especially if it is antique. You should first try to determine in what time, era it was made, from what materials, conduct an examination for damage, possible loss of some elements, in a word, look at the future masterpiece with passion.
You may need to order the manufacture of some parts from wood craftsmen, but it is worth paying attention to one fact. Restoring a Soviet sideboard will not require any deep knowledge or special skills from you; there can be many design solutions; sometimes it’s enough to change the color of the product and buy vintage handles, and the thing will sparkle with new colors. When we are talking about truly unique antique furniture from a famous master, made from valuable types of wood with special virtuoso execution, then it is still better to give it to specialists for restoration, since without any knowledge you can simply ruin an expensive thing
If you decide to breathe new life into an old sideboard yourself, you need to properly prepare for this. Perhaps the restoration requires some non-standard solutions, parts made from special valuable types of wood, the advice of a knowledgeable, reputable cabinetmaker will not hurt you.
Buffet as a designer find
In order to make a unique, inimitable piece of furniture from an old sideboard, you need the eye of an artist - a designer and hands that grow from where it is needed. There are a huge number of techniques for restoring old furniture, ranging from partial restoration and refreshing the color to completely changing the appearance. The method of decoupage, painting, mechanical aging, varnishing, gilding, and many other methods that entirely depend on your taste preferences can be used here.
Many designers, taking antique pieces of furniture to remodel, completely change the color scheme, adjusting it to the overall look of the room, using new handles, inserts, adding details and all kinds of decorations. The main thing here is not to overdo it and not slip into bad taste, which is the sin of many amateur craftsmen when they first turn to this activity.
Several ways to remake
There are several approaches that can be used to significantly restore and transform old Soviet-style furniture.
The "antique" method
- For this method you will need, among other things, craquelure varnish. Your sideboard will be noticeably different from what it was before and after the restoration. Here are the step-by-step actions and their descriptions:
- Clean the old coating using sandpaper; if necessary, you can use spatulas. As a rule, they are required when an old sideboard has several layers of oil paint.
- After cleaning, coat the surface with craquelure varnish. The effect of a cracked surface will appear.
- Wait until the surface is dry and cover it with paint or clear varnish. Cracks will show through the paint and create the illusion of a cracked surface.
- With paint, the effect is even more enhanced. Replace the handles with vintage ones, and your sideboard will delight you for many years to come.
Example photo before and after remodeling
Decoupage method
For this method, buy additional decoupage napkins, PVA glue, and white paint. Choose napkins depending on the theme and taste. They can be very diverse, from floral themes to scenes from the life of high society.
Step-by-step description of the work:
Treat the surface of the sideboard with sandpaper and cover all defects, chips and cracks with putty. Cover the finished cleaned surface with stain and let dry. You can walk around the corners of the sideboard with a wax candle for an aging effect. Cover the surface with paint either white or pastel colors
Let it dry. Using a metal brush, carefully brush the surface, giving it an “old” effect. We cover the napkins with PVA glue and glue them onto the sideboard doors, smoothing them out from bubbles. We dry it with a hairdryer for speed. We coat the entire product with varnish. Replace the handles with new ones in the Provence style
Your new wardrobe will amaze all your guests with its beauty. If you need to replace the glass, you need to change them, choosing something in the style of your new sideboard.
These are just two processing methods, but there are many more. Restoring furniture that has already seemingly served its purpose is a very exciting activity. It will allow you to save your budget, gain interesting skills, and bring a lot of pleasure from the work process and the final result.
