Furniture eccentric screed is one of the types of fasteners used in furniture production. It allows you to hide the places where parts are attached, which has a positive effect on the design of products. Another advantage of an eccentric tie is that it allows you to repeatedly assemble and disassemble furniture without losing the strength of the connections, for example, during transportation. However, for all its advantages, it is more difficult to install than other types of furniture fasteners. Therefore, it is very important to correctly follow all installation instructions provided in this article.
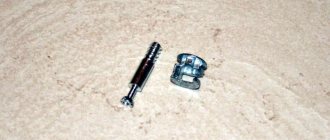
Assembling furniture with eccentric couplers is performed in the following sequence. The coupler consists of two parts: an eccentric and a rod. The operating principle of this fastener is very simple. The rod is attached to one part, and the eccentric to the other. Next, the parts are connected and the eccentric is turned, which fixes the parts. Assembly and disassembly of furniture using eccentric ties is very quick and easy, which is a great advantage of this type of fastener.
Fig.1.
Assembly diagram of an eccentric coupler. This scheme is identical for assembling any furniture and eccentric couplers of any configuration.
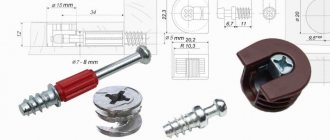
An eccentric coupler can have different sizes of both rods and eccentric. The most common is a 15 mm eccentric. The rod can have sizes of 10, 26, 34 mm. The size of the eccentric coupler is selected based on the application conditions. So, for shelves, a rod with a length of 10 mm is suitable, and for connecting furniture parts, choose 26 or 34 mm.
Installing an eccentric coupler
Let's look at how an eccentric screed is used using the example of a countertop and a cabinet.
An example of the use of an eccentric coupler is a desk, or any case where it is necessary to connect two parts in a hidden way. An eccentric coupler consists of two parts: a rod and an eccentric. The rod is installed in one part, and the eccentric in another.
Fig.2.
To install the eccentric coupler, you need to drill several holes. In one part, a blind hole is made for an eccentric with a diameter of 15 mm and a depth of 12.5 mm (the distance between the center of the hole and the end of the part is equal to the length of the rod), as well as a hole for a rod with a diameter of 8 mm (the distance between the center of the hole and the surface of the part is 8 mm). In another part, a blind hole with a diameter of 5 mm and a depth of 12 mm is made for installing the rod.
The installation of the eccentric coupler begins with markings. Before marking the parts, you need to know the installation size. In the example below, the installation dimension is 26 mm. You can find out the size either on the packaging, or upon purchase, or by measuring the stem. From the head to the beginning of the thread.
Marking the holes for the eccentric coupler
It is convenient to do the marking as follows. It is necessary to place the parts to be connected on top of each other, and mark the location line of the eccentric coupler.
Fig.3.
It is convenient to make markings on both parts being connected at once. The position of the rod relative to the front or rear end of the part is marked on the parts (usually 5-7 cm). On the part in which the eccentric will be installed, mark the center of the hole along the eccentric.
In the photo, two parts are connected at once, so I did the markings at the same time.
Next, on the part where the eccentric will be installed, the center of the hole for it is determined. In the photo above, this is a horizontal serif. The length of the segment is the installation dimension equal to 26 mm.
Hole drilling tool
After the markings are made, it is necessary to drill all the holes. The holes on the tabletop are made with a regular drill with a diameter of 5 mm. It is convenient to use special wood drills. Using a similar drill only with a diameter of 8 mm, a hole is drilled in the end of the mating part.
In order to make a sample for the eccentric, a special Forstner drill is needed. These special drills come in different diameters, so for high-quality installation of the eccentric, you should purchase a drill with a diameter equal to the diameter of the eccentric.
Fig.4. The hole for the eccentric is made with a Forstner drill with a diameter of 15 mm
Here it is important to accurately observe the depth of the hole. Traditional hole depth 12.5 mm
You can maintain the depth of the hole using a drilling depth limiter.
Using this drill, we make a hole with a depth equal to the thickness of the eccentric, which is about 12.5 mm.
Fig.5.
After the hole for the eccentric is ready, drill a hole with a diameter of 8 mm for the rod. The order of drilling the holes is important, so drilling a hole too deep for the rod will not allow the hole for the eccentric.
Examples of using an eccentric coupler.
Fig.6.
Fig.7.
Fig.8.
Shelf supports
How to choose, operate and repair a furniture stapler
There are a huge number of types of shelf supports. However, they can be divided into two groups: shelf holders for chipboards and shelf holders for glass. In turn, each of these groups can be divided into two types: shelf holders with and without fixation.
The shelf holder for chipboard consists of 2 parts: a rod and a shelf holder.
Increase
Fig. 14.
The screw is installed in the cabinet wall, and the shelf holder is installed in the body of the shelf. To install the shelf holder, you need to drill holes in the shelf and cabinet wall. For most shelf supports, the hole sizes are standardized; they are shown in the figure below. However, when installing the shelf support, you should carefully read the instructions to avoid errors.
Increase
Fig. 15.
It should be noted that shelf holders for chipboard come with or without fixation. The shelf holder with fixation has an eccentric mechanism, thanks to which the shelf will be firmly connected to the cabinet wall. Shelf supports with fixation have one more advantage; shelf supports of this type serve as additional reinforcement of the furniture structure.
Increase
Fig. 16.
Glass shelf holders have a simpler design. They are attached only to the cabinet walls using a self-tapping screw.
Increase
Fig. 17.
Shelf holders for glass without fixation are a rod or an angle. Shelf holders with fixation have a special screw with which the glass is firmly fixed and cannot accidentally fall out.
Increase
Fig. 18.
Screw tie
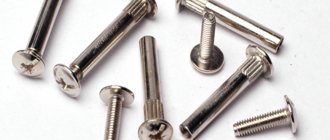
The screw coupler consists of a screw and a barrel. This kit is used to attach the end of one panel to the face of another. For example, for attaching a shelf to a side panel or a headboard to the drawers.
This is a very strong fastening due to the large tightening stroke. The only drawback of this fastener is that the screw head is visible from the front of the panel.
You can, of course, close them with special plugs, but this is also not a panacea. The plugs on the outer panel of the cabinet do not look aesthetically pleasing.
Installation of this type of fastener requires skills. Beginners may encounter such a problem as inaccurate alignment of the barrel holes with the hole in the end of the shelf, and it is not so easy to remove the unwanted barrel from its nest.
But the inconvenience during assembly and aesthetic errors are more than compensated for by the reliability and durability of the connection.
Eccentric coupler
One of the most popular types of fasteners today. All high-quality furniture is assembled on an eccentric screed (minifix). Its operating principle is as follows: an eccentric rod is screwed into the face of the part to which another panel will be attached at the end, into which the eccentric itself is screwed through the end of the other shelf, and then the eccentric turns the rod into itself.
An eccentric tie is always used in conjunction with a wooden dowel, which was described earlier. The dowel provides additional rigidity to the assembly and prevents the fixed panels from moving relative to each other.
Furniture assembled on this screed can be disassembled and assembled an unlimited number of times! There are different diameters of the eccentric itself: 25, 15, 12 mm. More common is an eccentric with a diameter of 15 mm.
Since the eccentric itself is visible on the side panel, plugs are provided for it to match the color of the panel. One of the disadvantages is the weakening of the tie in the event of spontaneous rotation of the eccentric.
To avoid this, some hardware manufacturers have provided notches directed in the opposite direction from its rotation during installation, which enhances adhesion.
Types of eccentric couplers
As practice shows, furniture is assembled and disassembled with great difficulty if all the fasteners in it are metal ties, described above. Let’s say that in order to remove one shelf, you practically need to disassemble half the cabinet. For horizontal parts (shelves), it is more convenient to use eccentrics, which allow you to place horizontal parts in an already assembled furniture box. Their operating principle is the same as that of the previously described eccentric coupler.
The only difference is that the eccentric, located in the shelf, fits onto the rod screwed into the face of the sidewall from above and there is no need to disassemble half the cabinet for this. In some factories, this type of fastener is called a shelf holder, since it is intended only for horizontal parts. Horizontal shelves assembled using these ties further tighten the joint, which increases the rigidity of the entire furniture frame.
Repeated dismantling and installation of furniture on such fasteners does not lead to wear of the connections.
Recommendations
From the above we can conclude that eccentrics are very simple structural products that practically do not fail.
In order for the mixer to work for a long time and reliably, you should follow a few simple tips.
- The extension cords should be clamped very carefully, without applying much force. Otherwise, the device may crack and will have to be replaced.
- If the faucet leaks after installation, you should unscrew the mixer and check the quality of the gaskets. Sometimes you also need to check for leaks where the eccentric is attached to the pipe. If such damage occurs, the seal should be dismantled and completely replaced during a new installation.
- Select the length of the adapter in advance. This will save you time, which you will then spend searching for the right model.
- Be sure to use special lubricants over flax seals. They impregnate the threads much better, preventing water from leaking out through small capillaries. Do not cover the connections with paint, as once it hardens it will be difficult for you to dismantle the eccentric if it breaks.
Eccentrics for mixers are universal adapters. Their use simplifies the operation and installation of many plumbing fixtures. When purchasing such products, give preference to products only from well-known and trusted brands. These conditions guarantee that these eccentrics are of high quality and will last a long time, regardless of the water condition.
To learn how to replace the eccentric, see the following video.
Mounting features
Eccentric furniture ties consist of the following parts:
- stand (another name is a rod, it can be either a self-tapping screw or a screw);
- eccentric;
- futorka (performs the functions of a nut).
Sometimes the kit includes a sleeve, also known as a coupling, to screw the rod not into wood or plastic, but into it. If the diameter of the screed is large, a plastic decorative plug is added to the front side. The bushing increases wear resistance and strength - the metal part is not as loose as a hole made in the chipboard. So it is better to choose fittings with couplings to avoid breakdowns and extend the life of the furniture.
The basic principle of operation is quite simple: a coupling is inserted into a round hole on the furniture, a stand is screwed into it, and an eccentric connects them from the side. If some unsightly detail remains visible from above, then a plug is put on.
Benefits of use:
- If the minifix is already built into the right place, the bushing and eccentric are inserted, installation will not take much time. The only tool you may need is a flathead screwdriver.
- This type of fittings is very wear-resistant and can withstand repeated assembly and disassembly without becoming loose or losing its quality and strength.
- From the front side, the screed is invisible and does not spoil the design of the product; it can only be seen from the inside, and even here, if necessary, a plug is used.
- The ability to fasten parts at different angles (the most common options are 90, 135 and 180 degrees).
- The fastening adds rigidity to the entire structure.
- Reducing the number of spare parts, for example, if you attach the tabletop directly to the sides, drawers will not be needed.
- Long service life and ability to hold heavy weight.
Classification of furniture safes, tips for choosing them. Disadvantages include:
- Relatively high cost. An eccentric minifix is approximately twice as expensive as a regular confirmat. When using a large number of elements, such a difference can significantly affect the final cost of a piece of furniture.
- A single-piece confirmat requires only one drilled hole for installation, whereas a minifix requires three holes. Because of this, installing furniture screeds is somewhat more complicated.
- Working hours. Screwing in a Euroscrew is much faster.
The number of advantages of minifix outweighs its minor disadvantages, especially when it comes to assembling high-quality, durable furniture for your own use.
How to install eccentrics for a bathroom faucet
To understand this process, you need to carry out all the work in stages
First of all, you need to pay attention to the correct relationship between the threads of the eccentric, tap and pipes. Only after this can you begin the tightening process, which is carried out using a wrench or an adjustable wrench.
In this case, special attention should be paid to the sealing winding. It should not rotate along the thread, otherwise the functionality and tightness of the entire structure will be impaired. If you notice scrolling of the flax or fum tape, it is necessary to dismantle it and re-wind it more tightly.
When installing eccentrics, you need to ensure their most convenient location for screwing the nuts of the mixer body
It is also worth paying attention to the level of their location, which will guarantee evenness of installation without distortions. After all this, you can start arranging the decorative reflectors of the mixer
Additional accessories
It should be noted that some manufacturers of plumbing equipment come with a set of special gaskets along with a set of mixer and eccentrics. In this case, there is no need to use additional seals
Important! If the gaskets are made of paronite, it is recommended to briefly place them in cold water before installation. When it comes to rubber or silicone models, such preparation is not required
Recommendations and advice for the master
Before you begin installing the mixer, you need to unpack and assemble the kit into a single unit. This will ensure that there are no manufacturing defects;
Quite often, the eccentrics that come with the kit may not be the right size. Because of this, for correct installation you will have to buy others;
When wrapping a thread with a sealant, wrapping should be carried out only in the direction of the threaded turns;
The eccentric must be tightened manually to ensure that it fits correctly onto the thread. Only after this do they press with a key;
The installation must be thoughtful to ensure comfortable screwing of the nuts of the mixer itself
Particular attention is paid to the accuracy and level of installation, which will avoid distortion
Conclusion
In conclusion, it must be said that an eccentric is a unique connecting element that is used when installing faucets and other plumbing fixtures in the bathroom. As a rule, the use of such elements during installation is provided by the equipment manufacturer itself. If necessary, you can select these elements by length and diameter.
The above shows how to install eccentrics for a faucet in the bathroom with your own hands. Our recommendations and installation tips will allow you to create truly reliable systems with a long service life.
You might also be interested in:
- additional accessories for mounting eccentrics
- how to install eccentrics in the bathroom
- definition of eccentrics
- basics of eccentric installation
- connecting the mixer via an eccentric
- technological features of eccentric installation
Additive for eccentric coupler
Drilling holes, or as they say, adding an eccentric screed, is the stage on which the quality of fastening elements of furniture construction depends. The process of drilling grooves itself is accompanied by difficulties
It is important not only to observe all dimensions, but also to take into account that the groove for the eccentric should not be through. To drill it, you must use a special Forstner drill and a depth stop when drilling.
Doing this kind of work on your own for the first time is not easy.
Required tools:
- router and Forstner drill;
- drill with two wood drills (diameter 5 mm and 8 mm);
- screwdriver or screwdriver.
To install such a connection, you need to drill three holes of different diameters and depths. The mandatory procedure when drilling slots for furniture minifixes is as follows:
- Make a non-through groove in the surface of one of the fastened elements for installing an eccentric. Standard groove dimensions: diameter 15 mm and depth 12.5 mm. Its center is located from the end of the part at a distance corresponding to the length of the rod. It is drilled out with a Forstner drill, thanks to which the eccentric can be placed in the groove without gaps. To accurately drill such a groove, use a depth stop. Otherwise, there is a possibility of damaging the surface of the furniture if the drill goes through.
- Drill a hole for a screw in the end of the same element perpendicular to the groove for the eccentric. If it has a diameter of 8 mm, then the hole should have the same dimensions. The optimal distance between the center of the hole in the end for such a rod and the surface of the furniture element is 8 mm (the middle of the chipboard thickness).
- To strengthen the screw, make a blind hole (12 mm deep and 5 mm in diameter) in the surface of the second mating part.
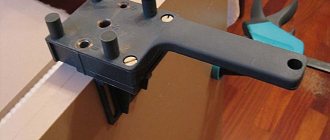
Another way to make grooves for the additive is to use a ready-made jig. It will make marking and drilling easier. When working with a conductor, the following procedure is recommended:
- Install the jig on the part, mark the location of the groove for the eccentric through a special hole in the jig.
- Use a Forstner cutter to make a groove for the eccentric.
- Insert a marking pin into the hole in the conductor. Place the jig on the end of the part and drill a hole for the screw.
- Make an installation hole for the screw in the second part.
Installation of equipment
Installation of new eccentrics is carried out in two stages:
- at the first stage it is necessary to attach the adapter to the pipes;
- at the second stage - connecting the adapters to the mixer.
Attaching the eccentric to the pipes
To attach the device to the pipes you will need:
- keys of appropriate sizes;
- insulating material, which can be linen thread, a special compound, FUM tape, and so on.
Installation is carried out according to the following scheme:
- determining the optimal position of devices for connecting the mixer. At this stage, it is necessary to calculate the number of eccentric revolutions that must be made for correct installation of the equipment;
- fitting of a mixer;
- insulation of threads using the selected material;
Thread sealing with linen thread
- installation of the eccentric.
To protect the eccentric coating when tightening the device with wrenches, it is recommended to use a gasket or union nut.
Attaching the mixer to the eccentric
The final stage - installation of the mixer is performed as follows:
- installation of decorative reflectors;
- installing the gasket. The gasket protects the junction of the adapter and the mixer from leakage;
Insulating the connection between the eccentric and the mixer
- connecting the mixer and shower hose;
- checking the functionality and sealing of the formed connections.
The entire cycle of work on replacing eccentrics yourself is presented in detail in the video.
Thus, replacing eccentrics on your own does not cause problems even for novice craftsmen. The main thing is to choose the right device.
Eccentric coupler: types
Eccentric couplers consist of an eccentric, a stand and a nut (foot). Depending on the manufacturer, they are divided into:
- minifix;
- rondofix;
- rafix.
Photo 1 — ST01-46-1WZN-01 BOYARD
Minifix fasteners
Minifix is used for assembling furniture from laminated chipboard. Most often it is used for “disassembly-assembly” type furniture, which is often transported from one place to another; or for seasonal furniture - tables and sofas for verandas, picnic furniture; or in cases where, according to the design project, there should be no visible fasteners on the furniture or part of it on the front side.
Minifix is a semi-hidden furniture fastener. When assembled, only the eccentric on the inside of the mount is visible.
Photo 2 - Minifix DPLIT 16 mm D=15 mm, BOLT 34 mm without sleeve
Advantages of MF:
- Quick installation. Assembling furniture from parts with already installed minifixes does not take much time. A simple flathead screwdriver is sufficient for assembly.
- Reliability. Such fittings can withstand many “assembly and disassembly” cycles without losing the quality and strength of the connection.
- Aesthetics. The mount is not visible from the front side. The eccentric can be installed in an inconspicuous part of the fastening unit.
Photo 3 - Minifix plastic with screw Ø 25 mm Blum
Disadvantages of minifix:
- The cost is higher than that of the classic confirmat. And in furniture where there are many areas for fastening parts, a large number of minifixes can affect the final cost of the entire product.
- Complex installation technology. If when installing a confirmat it is necessary to make two mounting holes, then when installing a minifix you will need three such holes. Confirmat is a fastener consisting of one element. Minifix consists of three parts.
Photo 4 - Steel fasteners
Fastening accessories for Rondofix furniture
Rondofix in assembly is an alternative version of minifix. Its advantage is mobility and repeated assembly/disassembly without damage to furniture fittings and parts. Installation is the same as for the minifix.
Photo 5 - Fastening accessories for furniture rondofix (rondoRfix)
Rafix eccentric coupler
Let's look at the process of installing an eccentric coupler using the example of a Rafix from the Hettich company. It is easier to install than the minifix, and allows you to mount the shelves on the fasteners from above, which is very convenient and looks neater.
Photo 6 - Rafix VB 35/16 (nickel plated)
For installation we will need:
- drill with a 20 mm Forstner cutter and a 5 mm drill;
- carpenter's square and marking pencil;
- hammer;
- screwdriver.
Photo 7 - Rafix eccentric + screw 6x11
Let's start the additive from the shelves. We set aside a distance of 50 mm and 250 mm from the rear edge (we will then transfer these dimensions to the vertical stand). We draw a perpendicular from the edge of the shelf and set aside 9.5+/-1 mm on it. This will be the center of the drill.
Using a Forstner cutter, we drill blind holes 13 mm deep (be sure to attach a tie to the end and see if the depth is sufficient). We place the tie over the hole, carefully align it (there will be no second attempt) and hammer it in with a hammer or mallet.
We're done with the shelf, let's move on to the second part of the screed. At the level of the center of the proposed shelf, we draw a perpendicular. On it from the back we set the same distances as on the shelf (50 and 250 mm). We drill them out with a 5 mm drill - holes 8 or 11 mm deep (depending on the type of screwed-in rod).
We screw the rods into the resulting holes. We combine the shelf with the stand, insert the rods into the grooves of the eccentrics and wrap the latter. The shelf is pulled tightly into place.
Photo 8 — Messan Raffix Hafele D20 mm white with eccentric + screw D6x7.5 mm
Furniture items
A few examples of furnishing a kitchen combined with a living room:
- 1. Sofa. It becomes an object that zones space. The sofa is placed with its back facing the place where food is prepared. In small rooms (less than 20 sq m) a corner is placed, which is placed against a wall installed perpendicular or parallel to the kitchen.
- 2. Set. According to designers, minimalist models without elaborate details look modern. The service, vases or glasses are placed on an open shelf. You can buy a fashionable display case for them. Furniture is placed near the wall. If the space is large (20 sq. m, 25 sq. m or 30 sq. m), then in the central part you can install an island, which also has sections for kitchen appliances.
- 3. Furniture set. The style should be combined with the design of both rooms. In small rooms, a compact table and chairs made of transparent material or painted in light colors look good. You can add a table with a round top to your living room interior. In spacious rooms, the kit is installed near the wall or in the central part. An elongated rectangular dining table would look good here.
Read here: How to make a bench - beautiful and unusual options for making garden benches (135 photos)
Eccentric coupler: types, application features and mounting options
Eccentric tie, rastex, minifix or clamp - all these words are known to people who make their own furniture. In fact, each of these definitions applies to one type of fastener. In today's review, we will take a closer look at its types, sizes and application features.
What it is
This is the most common type of furniture fastener, which consists of the eccentric itself, a stand and a foot. The latter acts as a nut. All of them are divided into the following types:
- diameter and size;
- the length of the stand itself;
- type of rack fastening (screw or self-tapping screw);
- type of foot.
Similar fasteners are used for products made of chipboard or laminated chipboard using the “assembly-disassembly” type. If you are making furniture for yourself and know that it will often move from place to place, then it is better to use just such elements.
These connections are preferably used during assembly where no traces of fasteners should be visible. Only the eccentric itself will be visible, and then only from the inside. In the future, it can be hidden with an additional plug.
Advantages and disadvantages
The furniture connection has its undeniable advantages, which are appreciated by craftsmen. Namely:
- Rapidity. With its help, you can assemble the product without any extra effort. To work, you just need to prepare a regular flat-head screwdriver.
- This is the most reliable type of connection. Withstands heavy loads. Ideal for frequent assembly and disassembly. At the same time, the quality and strength of the connection is not lost.
- Does not spoil the front side of the product at all. Aesthetics are important when assembling. They will be noticeable only from the inside of the products.
It has good positive qualities, but there are also some disadvantages. Let's look at them:
- High price. In contrast, ordinary confirmations are considered budget elements. If a large number of connections are expected, then the presence of eccentrics will increase its price several times.
- Complex installation technology. Using confirmation is much easier. It only needs two holes. With minifix everything is much more complicated. You will need three of them.
- It is necessary to have precise equipment. Without it, it is difficult to make precise markings perfectly straight. Otherwise, it will not be possible to assemble the furniture.
Such fasteners do not have any serious disadvantages. If you want your products to be strong and durable, then you should choose only such an element.
Variety
There are several minifixes that every furniture maker encounters:
- stock;
- eccentric;
- bushing (plastic or metal).
You can also find double-sided and corner eccentric couplers on sale. But in modern furniture production they are not used, as they are considered inconvenient to work with.
The most popular fastener today is a special eccentric clamp, the rod of which has a thread made for chipboard.
Usage
Eccentric couplers are used in fastening L- and T-shaped elements. Namely:
- tables;
- countertops;
- wardrobes;
- in any furniture elements where drilling holes on the front side is neither possible nor desirable.
In all these cases, the connections must be hidden. The rod is hidden inside the part, and the eccentric is visible only from the inside.
Fastening without bushing
To learn how to use fasteners, we prepare the following tools:
- cutter with a diameter of approximately 15 mm;
- drill 7 mm;
- drill or confirmat 5 mm;
- ruler;
- screwdriver or drill;
- awl;
- pencil for marks.
Before work, remember that when installing on a surface, you need to make three holes.
Now you can start installation:
- The height of the protrusion of the rod head should be 6 mm. In this case, you can install an eccentric on it efficiently. To screw in the rod, make a passage for it with the smallest drill.
- We make two holes in another part. We mark the first at a distance of 34 mm from the edge using a cutter. The second is done exclusively in the center, using a medium-diameter drill.
- We screw the rod into a small diameter hole. We install the second part on it and fix it with a minifix.
Bushing mount
The whole procedure is identical to the first one. You will also need tools and materials for the work. The only difference is that the rod requires a hole of a different diameter. A 10 mm drill is used. The plastic sleeve is secured using PVA glue.
From the video you will learn in detail how to properly install an eccentric coupler with your own hands.
A short overview of the minifix and its installation - Let's make furniture ourselves
Hello.
Today we will talk about interesting fasteners, for which you do not need to make through holes (as in the case of confirmat).
Minifix (also called an eccentric coupler) is a fastening system designed to connect two parts together.
With its help, two parts can be pulled together both at right angles and at other angles (for example, there are eccentric ties of different types that allow parts to be pulled together at different angles, but since they are used quite rarely, we will not consider them).
We will look at the most common type of eccentric tie - tie between two perpendicularly located parts.
The eccentric coupler consists of three elements:
- Plastic coupling into which the eccentric rod is screwed
- The eccentric rod, which, in fact, is the fastening element itself
- A metal eccentric that secures the rod
Connecting using minifixes has both its advantages and disadvantages.
The advantages include the following:
- Fastening with an eccentric tie is invisible (unlike fastening with a confirmat, where the confirmat’s cap is always visible, which has to be covered with a plastic plug).
- This fastening provides for repeated assembly and disassembly of the structure, without loss of connection quality, and with minimal time costs (for this reason, it is often used in the manufacture of serial furniture).
The disadvantages of this type of fastening of parts include:
- Quite high (compared to confirmed ones) cost of fastening
- Difficulties with marking and drilling parts for this fastener
Minifix is installed in different ways.
The simplest is manual installation.
For installation you need:
- Drill
- Drills (7 and 5 mm diameter)
- Forstner drill, 15 mm diameter.
- Square
- Ruler
- Screwdriver
- Pencil
- Roulette
At the very beginning, you need to make a visual mark (limiter) on the drill
Next, you need to make all the necessary holes (instructions for eccentric couplers are usually included, so it will indicate where and what holes to drill).
After everything, we screw in the ties and connect the parts (by the way, the parts can be connected with an eccentric tie, together with dowels, which will act as guides, and the strength of the connection will increase).
But, in such an installation (as shown above), there is one drawback.
Even with minor errors, the connection will not be perfect, that is, the edges of the parts will be offset from each other. This, by the way, is a very significant drawback of this type of connection.
But it is quite easy to eliminate it by using it to mark and drill holes in the parts of the jig (template).
As a rule, such conductors are made at home, but even in this case, the quality of the connection itself (or, to be more precise, accuracy) will be higher, and the time spent on this whole thing will be much less.
Of course, after reading this article, you will think about the advisability of using rather expensive fasteners with such a difficult installation (although, in some cases, you simply cannot do without an eccentric coupler).
Personally, I have never used such ties, and in cases where the visible side of the part cannot be drilled for confirmations, I use ordinary corners.
I'll end here, see you later.
Confirmat
It is a direct descendant of self-tapping screws for a knife screwdriver, who liked to hammer in correctly instead of carefully screwing in. Using the confirmation will not cause problems even for an inexperienced user. It is a self-tapping screw that has an increased diameter and is also not equipped with the usual tip. The furniture confirmat is designed for use with a special hexagonal nozzle. You can't screw it in with a regular Phillips screwdriver. Such fasteners have become especially in demand with the growth in the production of cabinet furniture. The latter is assembled from laminated chipboards using facades or MDF inserts.
With the help of the confirmat, two furniture parts are fastened only at an angle of 90 degrees. If a different angle is required, then fasteners are used, which will be discussed below. Since the confirmat does not have a sharp tip, it cannot simply be screwed into wood. Before assembly, holes are drilled in the parts. Near the head, the confirmat has a slight thickening, which requires the use of a 6 mm drill. For the threaded part you will need a consumable with a diameter of 5 mm. It is most convenient to use special drills for confirmations. They are a small crown or cone into which a 5 mm drill is inserted. As soon as the drill is completely recessed into the material, the cutter makes a slight expansion under the head of the furniture fastener.
Note! The head of the confirmat must fit flush into the furniture. This is done to hide furniture fasteners with special plastic or other covers.
Usually the furniture board is 16 mm thick, so the hole is drilled in the end in the middle. If a hole is drilled in a furniture board from the front, then an indent of 8 mm is made from the edge in order to smoothly join the parts
This is done to hide furniture fasteners with special plastic or other covers. Usually the furniture board is 16 mm thick, so the hole is drilled at the end in the middle. If a hole is drilled in a furniture board from the front part, then an indent of 8 mm is made from the edge in order to smoothly join the parts.
Confirmats can be used in conjunction with other fasteners, for example, dowels. This is done for a more durable joining of furniture parts. It is worth understanding that the fixation of furniture parts can be ensured at the highest level only during the first assembly. If you frequently assemble and disassemble furniture, the confirmators will not be able to fix the parts with the required rigidity. When screwing in furniture fasteners, it is necessary to select the correct force. If it exceeds the required limits, then the confirmat will simply begin to scroll or damage the second part.
Advice! It will be easier for inexperienced masters to reach the confirmation manually.
Those who have been working with cabinet furniture for a long time have learned to feel the tool and avoid deforming parts by excessive tightening.
Non-specialized concepts
This part has a round shape, in which the geometric axis and the axis of rotation coincide.
Application of eccentrics other than plumbing:
- for fastening furniture structures,
- in astronomical studies.
The device allows you to adjust the distance between two bushings. In some cases, it is not possible to complete the process without a device.
How can he help?
During the independent installation of the mixer, you may encounter a problem such as misalignment between the tap pipes and the pipeline. As a result, it is impossible to directly connect one to the other.
Often such devices are included in the kit together with the mixer. It is enough just to study in detail the instructions offered by the manufacturer and carry out the installation normally. If there was no eccentric in the kit, the part of the required diameter can be purchased separately, its price is completely affordable.
Tip: if the device in the kit is not the right length, you have the opportunity to buy an additional adapter that will allow you to adjust its dimensions.
How to install an eccentric
Installation of the faucet fixture is divided into two operations, performed sequentially:
- structure fastening,
- tap connection.
Advice: before starting installation work in an apartment building, make sure that you have shut off the water riser.
We recommend that you first assemble the entire structure without seals and make sure that all mounted connections are not distorted among themselves. For example, if you have too small eccentrics in your kit, you can replace them with suitable ones before starting the main work.
The device consists of two parts – narrow and wide. If you were able to carefully remove the old eccentric from the mixer during installation, replace the seal on its thread. Use hemp or fum tape, making sure that they do not roll around the base during the connection.
Tip: for hemp, use a special paste designed for threaded connections or silicone pipe sealant. As a last resort, use oil paint.
- Screw the long eccentrics to the liner, making sure that they correspond correctly with the thread. Tighten them well using an adjustable wrench or wrench. Make sure that the threaded seal does not turn around, otherwise it will impair the functionality of the structure.
- The instructions recommend installing the eccentrics so that the nuts of the mixer body can be comfortably and easily screwed to them. Make sure that the installation occurs smoothly, without distortions.
- At the last stage, attach decorative screens that will hide the connection point.
Tip: if the kit contains or you decide to install sealing gaskets, you have the option of not using the thread seal.
Material
There are different types of eccentrics for the mixer, but the main thing along with this is what they are made of:
What they are made of and the disadvantages of inexpensive models
Products can be made of bronze or chrome-plated metal. In most cases, inexpensive options from China and Turkey are chrome plated. We recommend not using metal products from the set, but replacing them with brass ones. Despite the fact that they look beautiful, they often “stick” to the threads with rust. Another disadvantage of inexpensive eccentrics is that when they are unscrewed from the water supply after some time, the head has a pipe thread
After this, getting it out of the pipe will be quite difficult and associated with unforeseen costs.
Please note: Choose only solid brass eccentrics. On sale now you can also find yellow products, but made from pressed brass powder. Their price is significantly lower than cast ones, but we do not recommend buying them due to their fragility
There is a high probability that at the moment of tightening the product. Do not forget that when installing an eccentric made of pressed bronze, there is always a danger that if there is accidental pressure on the faucet during operation, it may fall off the wall together with the mixer. The right choice This expert advice is suitable for selecting both an eccentric and a crane. “Weigh” the product in your hands – one of the most basic indicators of quality. Know that brass is a fairly heavy metal. Based on this, take the expensive option in one hand, and the one you want to buy in the other. You should not take the seller’s words on faith at a time when doubts have crept into your mind. The yellow color of the surface may turn out to be a simple coating, under which sintered aluminum chips or cast iron can hide.
Installing a furniture eccentric with your own hands
An eccentric fastener (rastexes, minifixes, eccentric clamp - whoever calls it that) is one of the most common types of furniture fasteners.
Minifixes are good because parts fastened with their help can be disassembled and reassembled many times, without loss of rigidity, which would not happen when using confirmats, where with each assembly/disassembly the fastening will lose rigidity.
There is only one drawback to minifix furniture - it is painstaking work to install it. If you do not have expensive filler equipment, to install it yourself, you need to very carefully mark and accurately drill three different holes in three different planes, which usually takes a lot of effort and time.
This work does not tolerate mistakes in marking. After all, you won’t be able to adjust the connection in the end.
Also, its cost cannot be called completely cheap. The price of a minifix is usually 3-4 times more expensive than a confirmation.
Therefore, it should be used in the most necessary cases.
Advantages and disadvantages
Furniture eccentrics are quite popular among both furniture manufacturers and home craftsmen. And there is nothing surprising here. This part has many advantages:
- Ability to withstand heavy loads. The fastening has a high level of reliability. It tolerates repeated assembly/disassembly of structures without deterioration in quality;
- Long period of operation;
- Increasing the rigidity of assembled furniture.
- Easy installation of a furniture eccentric. Almost every person without experience or construction skills will be able to carry out the installation independently. This work will not take much time. To do this, an ordinary screwdriver is enough (provided that the holes have already been made in the furniture).
Please note that fastening does not impair the aesthetics of the finished product. The eccentric is not visible after installation. It does not leave noticeable damage or defects. It has no serious shortcomings, but we will still highlight a few disadvantages.
- Firstly, the relatively high cost. If we compare a furniture eccentric with other similar connections, its purchase will cost much more. If the manufacture of furniture requires a large volume of such eccentrics, then the final price of the product will seriously hit your pocket.
- Secondly, the connection is demanding in terms of marking accuracy. Without this, it will not be possible to qualitatively connect all the parts. Therefore, you need to approach your work responsibly. Don't do anything by eye! Otherwise, there is a high probability of simply ruining the product.
In general, the furniture eccentric is a reliable, durable and high-quality item. Home craftsmen certainly need to take it into service and use it during assembly.
To technically correctly assemble cabinet furniture and figure out how to install an eccentric with your own hands, you can use video lessons and other educational materials presented on the Internet. In addition, detailed instructions are included with each mount.
