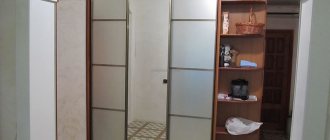
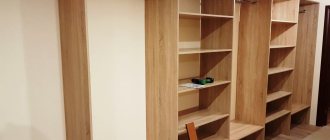
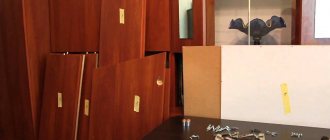
The practicality and functionality of sliding systems is beyond doubt; the only disadvantage of this design of door panels is considered to be high cost. Significant cost savings are achieved when making a wardrobe door with your own hands, based on ready-made or independently drawn up drawings. This type of work is of medium complexity and requires careful planning. The main difficulties arise when selecting components and detailing; if you lack experience at this stage, you should use the help of professionals. All other steps, including assembly or installation, can be done on your own.
Doors for sliding wardrobes: recommended sizes
If we talk about strict restrictions on the size of cabinet doors, then there are none. You can make any length and width. But there are recommended parameters determined based on operating experience:
- The minimum width is 50 cm. Nothing will stop you from narrowing the track, but it will tilt as you move and may even jump off the rails as a result.
- The maximum door width is 110 cm. This requires considerable effort to move it.
- The optimal width is 60-90 cm.
- The profiles are 5.5 m high from the factory, but they are usually cut in half in the workshop. Thus, there is a real possibility of manufacturing cabinet doors of the required height. If the height is high, you just need to pay attention to the rigidity of the handle profile.
- Select the number of sliding doors depending on the optimal width. Choose them so that they do not block access to the contents of the cabinet. Almost no size restrictions
Photo
If you have already mastered making doors and want new feats, we suggest looking at other options:
Preparing parts
Many people, in order to save money, wonder whether it is possible to do without the help of experienced furniture manufacturers and how to make wardrobe doors with their own hands. First, the parts to be installed are prepared. Having chosen the most suitable material (chipboard, MDF or natural wood), having purchased accessories, you can get to work. It will be necessary to create a reliable frame from ready-made parts:
- two side walls;
- Cover;
- at the bottom.
Shelving and storage systems will then be installed on site.
A sheet of the selected material is cut out using special equipment, which cuts out the described parts of the future cabinet with great precision. If you don't have special tools for this, you can get the material cut by professionals. After sawing, the workpieces are processed and covered with end caps to make them more aesthetically pleasing. Below we will tell you how to assemble the doors and get a complete closet at minimal cost.
Hanging structure without filling
The profiles may be different, so they must be measured separately.
What might you need?
To assemble a finished cabinet, you will need quite a few tools. It can be:
- screwdriver;
- drill (in rare cases - usually all holes are made immediately at the factory);
- hammer;
- screwdriver;
- hexagons for furniture.
Hexagon
If you make a cabinet completely from scratch yourself, you will also have to use an electric jigsaw and a number of other tools. If the cabinet is built-in, then care should be taken to have a hammer drill.
If the cabinet is made by hand inside and out, then it is important to first calculate the required amount of all materials and accessories . So, the first step is to take measurements of the room and decide what dimensions the closet itself will have. Next, you will need to draw a diagram of it and mark all the dimensional parameters on it. This will help simplify the task of counting materials and accessories.
Assembling a wardrobe with your own hands is quite easy and anyone can do it simply by following the instructions
For any wardrobe, it is important to calculate the dimensions of suitable aluminum or steel profiles that are necessary for the door to move. Moreover, all profiles will differ in size.
- The vertical profile will be equal to the height of the door (A = H door).
- Horizontal , that is, bottom, is calculated as the difference between the width of the door and the double thickness of the profile itself (L = Ls – 2*Lp).
These are approximate calculations for one door, which means that for two doors you will need twice the amount of profile. You also need to remember to buy ready-made mechanisms for the coupe system itself (rollers, guides), and acquire a supply of wood screws.
Wood screws
Guides for sliding doors
As you can see, fascia isn't everything. You need guides along which the doors will move. There are two of them: upper and lower. They differ significantly in appearance.
Top rail for cabinet doors
Metal bottom rail
When installing the gate, first push it firmly into the top track, lift the gate until it stops and insert the lower rollers into the corresponding groove. The entire structure is shown in the following photo.
Installation diagram
Bottom rollers
Then move to the bottom edge of the piece. The fasteners are screwed into the top hole. In this case, they are simply tightened on both sides until they stop. The rollers are installed. The pressure plate is first inserted into the groove and then pressed down.
Hold the spring and push the roller housing inward. Insert the screw into the hole and tighten it with a hexagon. But not so far, because during installation of the door, this element will adjust the position of the door. When adjusting the system, its angle is raised or lowered.
Filling
After this preparation, begin assembling the fillers. Most often you order door filler. However, sections can be made with your own hands. In this case, the work must be completed flawlessly. The accuracy of marking, observance of right angles, and uniform cutting are extremely important. Otherwise, there will be no guarantee that the elements will fit the finished frame. Incorrectly cut blanks can deform it. Another necessary step is chamfering (depth and width - 2-3 mm).
If the design includes glass or mirror parts, first place a rubber seal around the perimeter. It is placed by pressing a finger into the end of the element. The ends of the sealant are located opposite each other, leaving no overlap. To avoid injury if the element breaks, the protection is glued to the back of the mirror. An ordinary self-adhesive film is suitable for this role. A door consisting of several fragments is assembled using intersecting profiles.
Sometimes it may take considerable force to insert the upholstery. In such cases, the material that will not come out is forced to tap on the back of the hand or with light, gentle blows with a rubber mallet. After the sash is assembled, the final blade profiles are installed equally at the top and bottom.
Component manufacturers
It is not difficult to purchase components for assembling a cabinet door today. Just look at the price list of any specialized store.
Range of profiles
Inexpensive but good component options include Slider-Volkhovets products, complemented by Italian accessories, as well as guides, rollers and other wardrobe parts from Herkules and Rollan. Take a closer look at Framir products - they are quite durable and made of aluminum profiles of the correct geometry.
The leading manufacturers of accessories for sliding wardrobes include the following companies:
- Absolute: provide consumers with lightweight and high-strength structures; There are four types of profiles with different shapes and finishes; another significant advantage of such products is ease of installation;
- Divendoor - fairly inexpensive and elegant steel components for bronze, silver, gold, wood;
- Stanley - reliable products with almost ideal performance characteristics;
- Raumplus: German quality at affordable prices; The warranty covers all components down to the last screw;
- Komandor: another successful tandem of quality and reliability; warranty up to 30 years;
- Ramtrack: In the global market, products from Canada are the standard of quality; This company was no exception; their steel products with durable anti-corrosion coating can be called a quality standard in all respects
Components for sliding wardrobes are less known on the Russian market, but this does not affect their quality in any way:
- Geze Rollan: silent wheels, durable profile, long warranty; but these products, unfortunately, are expensive
- Ducase: the manufacturer claims that their components can last up to 27 years, 100,000 opening-closing cycles; however, these products only have a 12 month warranty
- Laredo: Value for money is almost perfect and they look very decent
Drawing and detailing
Today, wardrobes are popular among tenants of small city apartments and owners of spacious country cottages, because they are highly functional, practical, serve for a long time without breakdown, and also retain their appearance for a long time. Furniture can be adjusted to almost any size, style of room. And to spend a minimum of money on this, make your own furniture. How to make closet doors and what do you need to do to start installing closet doors? Floor plans and details of drawings of the future project indicating where this or that investment will be carried out will significantly speed up the work.
SchematicDrawing
Frame and profile assembly
The location of the door leaf assembly depends on its type. When using glass inserts, the silicone gasket is first placed on the end surface. After this, all elements of the canvas are connected by central frames. Unlike sealant, which is easily pulled out with your fingers, difficulties may arise at this stage; in particularly difficult cases, the putty is covered with a rubber hammer (which is not always possible when working with a mirror or glass). The upper and lower frame profiles are attached to the already assembled sash with similar forces.
The side profile is installed last, starting from the top:
- To secure the frame in the pre-drilled hole, carefully insert the screw, with the tip extending 10-15 mm.
- This tip is inserted into the groove of the top profile of the frame and tightened with a hex key until a distance of 3-4 mm is reached.
- Insert the upper support roller fork into the space created, and then tighten the screw until it stops.
- The process of assembling the cabinet doors is completed by attaching the bottom of the frame at a distance of 42 mm from the edge and attaching the support roller (in the same way, but without careful tightening).
Design, details and assemble your wardrobe with your own hands step by step
Some craftsmen approach the assembly process differently: first they fix the door frame without filling, after checking the work, this structure is partially unscrewed and filled with glass or particleboard flooring. A description of this method can be easily found on thematic resources; the basic rules for assembling and fixing the profile remain unchanged. To avoid mistakes, it is worth installing cabinet doors in accordance with the recommendations of the sliding system manufacturer and clarifying this point in advance.
Fixing the guides
Particular attention is paid to installing the rails directly into the body. These elements are fixed with vertical strips and aligned vertically to the nearest millimeter. First, the upper horizontal rails are fixed, then the lower ones after checking their evenness. Their location depends on the type of side profile. When installing doors with an asymmetrical C-profile, the lower guide moves away from the line of the facade until it coincides with the internal guide of the upper guide. When using an H-profile, all horizontal rails are located in the same plane and aligned with each other.
What can furniture be made from?
You can make a wardrobe to match the style of the room
Sliding furniture will be an excellent solution for storage issues. With its help, you can rationally use space and place a large number of different objects. It is suitable for clothing, shoes, as well as small household appliances and other small goods.
Most people are afraid to do their own assembly at home, so as not to damage the furniture. But if you do everything step by step and prepare the required tool in advance, there will be no difficulties. In addition, you have the opportunity to make a special door design to match the overall style of your room and based on your preferences.
The first step is to purchase material for manufacturing. Its quantity completely depends on the dimensions.
Basic materials for creating cabinets:
- chipboard. One of the popular and inexpensive to produce. A wide range of colors, practicality, ease of processing and reliability are the main advantages. Without experience in creating furniture, it is better to use chipboard. This material is suitable for the production of sliding wardrobes with photo printing;
- MDF is similar in its characteristics to particle board, but is more reliable due to its enhanced performance. The only negative is the low level of moisture resistance. Furniture installed in rooms with high levels of humidity quickly loses its attractive appearance, as the top coating peels off from the base.
- solid wood is ideal for creating cabinet furniture. It is distinguished by durability, durability and interesting design. The price is high, but fully corresponds to the characteristics. If you do not have experience creating furniture, this material will not be suitable, since its processing requires special skills and abilities.
To determine the dimensions of the furniture, proceed from the overall size of the room, as well as the place where you want to place it. The size of the internal filling is selected based on the items intended for storage.
Standard wardrobe size
Standard sizes are:
- height from 1.5 to 2.4 meters;
- depth from 0.6 to 0.9 meters;
- width from 1 to 2.5 meters.
Nuances of installing the structure
Fixing the gate begins with carefully moving the previously installed gates into the fence opening. First, the far leaves are inserted and placed on the rear guides, and then, after checking their movement, the near leaves are installed. When installing rail systems, the work is performed according to a simple scheme:
- The upper part of the sash with pre-installed rollers is located in the grooves of the upper profile.
- The door leaf rises so that the rollers finally fit into the groove.
- The wheels of the lower rollers are lightly pressed with your fingers.
- The sash rises again and is fixed in the lower profile, the roller mechanism is released and finally fixed. Then repeat the operation with the second lower corner.
Installation of roller cabinet doors is completed with adjustment. This is done by using a hex wrench to turn the adjustment screw. By turning it clockwise, the roller comes out and raises the door leaf, and counterclockwise lowers it. Properly installed doors are aligned with the bottom rail. It is also important to ensure that there is no skewing or vertical movement of the side rails.
On the one hand, it is easier to install a hanging system: at least 2 double rollers are fixed in the upper part of a special profile (such doors are more reliable and can withstand more weight), after which the door easily moves in the desired direction. When the number of leaves is more than 2, it is necessary to install a cap - a plastic corner cap attached to the inside of the outer door to control the width of the door opening.
Regardless of the type and configuration of the sliding system, before installing the cabinet door, it is worth checking the geometry of the door opening. . Any deviation from level must be corrected before fixing the rails. This rule should not be neglected, since the denser the cabinet itself, the longer the structure will last.
Installation of system elements
The door opening system mainly consists of the following elements:
- Frame profile
- Top and bottom rollers
- Top and bottom guides
- Side guides
- Seals and decorative elements
- Handles and other accessories
At the first stage of installation, your sliding doors will look like just a pile of spare parts from which you will need to put together a door system. But fear not, as each sliding door kit comes with an installation diagram. Therefore, assembling them will be no more difficult than Lego.
There are no strict recommendations on where to start making cabinet doors with your own hands. Some start by assembling the frame, others by installing the guides. A more practical option is to start with an excellent guide, especially if you don't have a laser level or a full-fledged alternative.
With this technique, the bottom guide is simply cut to size and is not attached to the surface, as it will need to be adjusted at a later stage in the job. But this must be done immediately before installing the doors.
In addition, the door frame itself is assembled; its assembly process may differ depending on the type of profiles you choose and the material you will use for the door leaf. When assembling, be sure to use an angle to prevent the door from tilting. Even if you just want to make wooden furniture on the balcony, the doors should be straight to avoid problems with further use.
Once the frame is ready and the rollers are installed on it, you can begin adjusting the bottom rail. The adjustment is made as follows: a frame is installed on the lower profile and secured in the upper one; in simple words, it is enough to place the frame. Then, using a regular builder's level, you simply need to level the doors while adjusting the bottom profile. What's important is that if you have more than two ports, they are all optional. Simply hang the two side tabs and align the guide with them. Once the guide is in place, a line is simply drawn to act as a mark for attaching it.
At this stage of work, it is important to be extremely careful, since the method of adjusting the profile depends on how the shutters will work in the future.
Once you have installed and adjusted the top and bottom rails, you can also install the side rails.
How to calculate sizes?
There is no need to say that the result of the work depends on this stage, this is clear to everyone. Therefore, the master has two ways to solve the problem. The first ensures quality, the second is more thorny.
- Help from experts. If the doors are for a closet that will take up all the space between the walls, then you can go simple. In this case, owners need to measure the opening, decide how many doors there will be in the closet, and then contact a company that manufactures the doors. It is best to trust an organization that will sell the kit without including the cost of assembling the structure.
- Self-employment. Contacting one company seriously limits the range, since you will only have to choose materials and components from what that company has. Self-sizing, on the other hand, will allow you to source materials from different companies, ensuring that you not only buy what works best for your decor, but also buy it at the best prices.
The second method is more complex, time-consuming and expensive. However, those who are more interested in being able to “choose from many” will probably prefer this solution.
Tool
If you decide to make the doors completely yourself, you will need to prepare the following tools:
- tape measure, metal ruler and angle,
- drill with screwdriver,
- electric hacksaw,
- metal hacksaw,
- Screwdriver for self-tapping screws,
- straight and plumb
- scissors and cutter (construction knife).
Sources
- https://stroychik.ru/mebel/dveri-dlya-shkafa-kupe-svoimi-rukami
- https://mblx.ru/shifoner/razdvizhnye/434-dveri-dlya-shkafa-kupe-svoimi-rukami.html
- https://dom-i-remont.info/posts/mebel/dveri-dlya-shkafa-kupe-svoimi-rukami-sborka-i-montazh-udobnoj-sistemy/
- https://mebel-sovet.ru/shkafy/kupe/616-dveri-svoimi-rukami
- https://made-box.ru/samostoyatelno/dveri-dlya-shkafa-kupe-svoimi-rukami.html
