- October 18, 2018
- Furniture
- Lazko Natalia
Industrially made doll furniture today is, unfortunately, very expensive. Meanwhile, making such toys for your child, if desired, will not be difficult with your own hands from scrap materials. A doll's wardrobe can be made, for example, from ordinary cardboard boxes. There are many simple ways to assemble such toy furniture.
How can I do it?
If you wish, it will be easy to make a cabinet from boxes with your own hands for a doll of absolutely any size, design and design. In any case, making such a toy will not take too much time. For a large doll, of course, you need to make a fairly “oversized” wardrobe; for a small doll, smaller furniture will do. If desired, it will not be difficult to make such a toy of the simplest design with hinged doors. It is also easy to use boxes to glue together a more complex wardrobe, a craft with many shelves and drawers, etc.
At the final stage, such a toy can be decorated, for example, in such a way that it is as similar as possible to adult furniture, that is, it is painted “like wood.” This locker is very suitable for an older girl. A small child, of course, should make a brighter cabinet, decorated with flowers, patterns, cartoon drawings, etc.
The easiest way, of course, would be to make a wardrobe for the doll directly from the box itself. In this case, the main tool when assembling the craft will be ordinary scissors. You can also cut the box into several parts and make a cabinet of a more complex and original design out of cardboard. In this case, of course, you will need more glue.
Performing element assembly
After the preparatory work on cutting out the blanks, you can assemble the product.
To do this, the cabinet frame is glued together from the top, bottom and side parts. The structure can be fixed using the rear part. All elements can be compressed with clamps during the gluing and drying process. Then the shelves are installed. They can be glued or inserted into previously made slots. Shelves should be positioned perpendicular to the sides of the furniture. Then you can insert retractable elements. You can use a stick or paper tube as a barbell. A small cabinet made of cardboard for a doll requires gluing doors, but a product made of plywood must hang on real hinges. A thin strip of paper or newspaper is rolled into a roll very tightly and fixed with glue, this is how furniture legs are made. They can be replaced by small squares made of plywood. As an option for making furniture for a Barbie doll, you can take origami from paper; for this you need to prepare simple sheets of paper and instructions for bending the product in the desired sequence. It can be found on the Internet.
Box selection
Of course, in order to make a beautiful, strong and durable toy cabinet out of boxes with your own hands for a doll, first of all you need to select a suitable material for it. Corrugated cardboard is best suited for this craft. In this case, the design of the toy will be stable and will not weigh too much. You can make a doll closet from one such box, or from several different sizes.
If desired, you can use, of course, not corrugated cardboard, but ordinary cardboard to make such a doll interior item. This could be, for example, a small shoe box or, say, some kind of gift. Sometimes, when assembling doll furniture, even just matchboxes are used.
Design dimensions
The doll's wardrobe differs from the real one only in size. It also has shelves, drawers, and a clothes rail. It is important to consider the location of the furniture. If the doll has its own house, the size of the closet should correspond to it. Heavy bulky plywood structures can only be placed on the floor.
It is also necessary to consider what kind of children's toy the furniture is made for. The height of the cabinet for Barbie and Monster High, which are now particularly popular, will be about 28–30 cm. The largest doll is Anabelle, she will require an option with a height of 40–45 cm. In the latter case, it is recommended to use a boot box or small household appliances.
To establish product parameters, you can measure doll clothes. The section where the bar will be for it should be 3 cm higher. The width of the furniture is calculated depending on the planned number of compartments, as well as the space allocated for it.
Simple patterns and diagrams of cardboard furniture, DIY
For Barbie and Monster High
For Anabel
Required tools and materials
Actually, the answer to the question of how to make a doll cabinet out of cardboard with your own hands is simple. In addition, the materials and tools for making such a craft will need the simplest. In addition to the box itself, to assemble the toy cabinet you will need to prepare:
- sharp scissors;
- ruler;
- a simple pencil;
- high quality glue for paper.
To design such a toy at the final stage you can use:
- paints;
- colored paper;
- napkins;
- scraps of fabric or oilcloth, etc.
It is, of course, best to make such a craft on a flat surface - for example, on a table or on the floor.
The simplest DIY cabinet made from boxes step by step
To assemble such a toy you will need several boxes of different sizes. The largest of them should be placed bottom down on the table and opened. Next, several more smaller ones should be inserted into this box in random order. Thus, inside the cabinet you will get compartments-shelves. Before installing small boxes into large ones, their walls need to be coated with glue. In this case, the doll's wardrobe will be more solid and durable.
There is no need to cut off the lid of a large box when making this craft. It should be cut in the middle so that you get two doors. At the final stage, the resulting cabinet simply needs to be turned over vertically, placing it on its end.
How to make a cabinet with legs
If desired, more substantial furniture of this type can be made for a child, but at the same time a fairly simple design. In this case, you will need boxes to assemble a doll cabinet with your own hands:
- narrow long (for example, from shoes);
- three small ones, the total width of which should be equal to the length of the large box.
You need to remove the lid from the shoe box and cut off the short sides. Also, this element should be shortened by a third. The long box itself needs to be placed on the table and two small ones glued inside it so that they touch the walls. The remaining part of the lid should be cut in half. The resulting doors need to be glued back into the box above the two compartments made at the previous stage so that 1/3 of the cabinet remains free.
Next, the finished toy should be placed vertically on the table. Then you need to insert the third small box, bottom down, into the bottom of the cabinet, without using glue. The result is a large drawer.
Legs and handles for doors
This technology can be considered a very good answer to the question of how to make a doll cabinet out of a box. However, if desired, such a design can also be improved by attaching additional parts to it.
From one of the short sides of the lid of a long box cut off at the first stage, you can, for example, roll up a tube, glue it and subsequently separate several short sections from it. These elements are subsequently glued to the bottom of the cabinet as legs. Handles for the doors of such a craft will be easy to make from pieces of wire if desired. To do this you need:
- cut two short pieces from the wire;
- make two holes in the doors at the same height;
- insert the wire into the holes so that handles are formed on the front plane and screw it on the back side of the doors.
Wardrobe for a doll
If you wish, you can, of course, make such toy furniture with your own hands. To assemble the wardrobe, you need to prepare a fairly large corrugated box. First, it should be cut into pieces so that you get several sheets of cardboard. They will become the material for assembling the craft.
In this case, you can make such a cabinet from a box with your own hands for a doll, for example, according to the diagram presented below. When assembling such a toy, all elements of its design are made double. That is, two pieces of cardboard are glued together at once. At the same time, the elements are additionally “reinforced” by laying wire at the junction. This material will also be used in the future to fasten individual parts of the craft’s structure.
A photo of a cabinet made from boxes, made with your own hands using this technology, can be seen below the list. Actually, the very method of assembling such a toy looks something like this:
- Shelves are cut out of cardboard (two squares per square) and glued together using wire. The latter is laid between the squares in two places closer to the edges. At the final stage, the free ends of the wire are not cut.
- Cut out parts 2 and 3 and mark the places where the shelves will be located in the future. Make two holes on each mark line.
- Attach 3 shelves to the part by threading the wire into the holes made. Glue is first applied to the ends of the shelves. The wire is tightly twisted on the back side of part 3 and glued with tape. The other side of the shelves is fixed to part 2 using the same technology.
- Cut out two more parts 2 and 3 and glue them to the outer part of the resulting structure. First, a wire is laid above and below between the elements, on which the bottom and lid of the cabinet will subsequently be attached. They also lay wire to secure the back wall.
- Glue together part 4 from two pieces and make a blind hole in this wall at the top. The same hole is pierced in part 2 from the outside. Connect both walls of the cabinet, for example, with a kebab stick 12 cm long.
- Cut out the parts of the lid and bottom of the cabinet. Make holes in the resulting elements for the wire. Thread the wire through the holes and secure it. The ends of parts 2,3 and 4 are pre-coated with glue. Glue two reinforcing plates of the lid and bottom.
- Attach the back wall of the cabinet to the wire. Cut out the second element of this part and glue it to the first.
At the final stage, a do-it-yourself cabinet made from cardboard boxes, assembled using this technology, is glued inside and out with bright colored paper. Sliding doors for the toy are also cut out of cardboard and made double. They are secured inside the cabinet by gluing a kebab stick on top of them in the front plane from below and from above. Door handles are made of wire or brackets.
Sketch development
Most often, wardrobes for Barbie dolls are made to be spacious, since she has a large number of things and clothes. Usually 2 compartments are enough, it is also recommended to make several shelves and drawers. You can create a wardrobe for dolls of any design:
- A wardrobe is furniture for storing dresses, it has one or two compartments, a hanging bar, and shelves.
- A regular wardrobe should only have shelves and drawers for clothes, as well as 2 or 3 doors.
- A sliding wardrobe with sliding doors - it can be equipped with shelves, a section with a crossbar, a mezzanine, and a rod for storing clothes.
The design can be open and include a floor clothes hanger or a panel with hooks. The choice of doll cabinet design depends on the interior design of the room where it will be located. It is important that the color of the product is in harmony with the surrounding environment - just like in real life. A closet for a doll's bedroom should be painted in soft colors: pastel, green, beige. If the item is planned to be placed in a mini-hallway, it is advisable that it have mirrored facades.
If the furniture is made of plywood or cardboard, you must first create a drawing or sketch. You will need to cut out the following parts:
- the largest rectangle is the back part, it is cut to the size of the cabinet;
- 2 sidewall parts - according to the dimensions of the height and depth of the product;
- top and bottom - along the width and depth of the cabinet;
- 2 fragments for doors - represent halves of the rear part.
When preparing parts, it is advisable to immediately determine the areas where the shelves will be located. On the sides in these places you need to make grooves for inserting them or holes for attaching the wire. The legs are made from a roll of paper, glued and cut into small pieces.
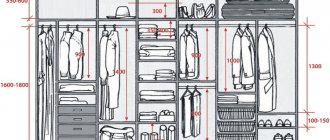
Main cabinet parts
Chiffonier
Regular wardrobe
Coupe
More complex hanger
Also, if desired, you can make a more substantial hanger of a modern design for a toy cabinet. To do this, you will need, among other things, a small box that will need to be painted with bright paint. Next, two double narrow strips of hard cardboard should be glued to the resulting box vertically (along the short sides). At the next stage, you need to stretch a thick wire between these posts. Next, pre-made wire hangers should be hung on it. In the future, you can put some doll clothes and shoes in the box of such a hanger.
Filling the internal space
Now you need to make shelves and hangers so that you can hang clothes in the closet. To do this, you can use thick cardboard or parts of another box.
To make shelves, cut out blanks that are wider and 1 cm longer than the internal space. Excess material is folded in such a way as to form sides. Excess material is carefully cut out at the corners with scissors. The sides are carefully glued to the cabinet walls. It is better to turn the outer side of the shelf down and glue it too. You can make several such shelves.
From small boxes you can make drawers . Handles need to be attached to them. You can use the same technology as for external cabinet doors. Original handles can be made from large beads that are glued to the outer surface of the box.
Beautiful cabinet design: decoupage with napkins
The short master classes presented above, describing the process of making a cabinet from boxes with your own hands, allow you to make, of course, a very interesting toy for a child. To make such a craft, among other things, also beautiful, you can use, for example, a fairly simple technique of decoupage with napkins to decorate it. A cabinet decorated in this way will look no worse than a store-bought one.
This design technique looks something like this:
- the cabinet is painted in the background color;
- the top paint layer is separated from the napkins;
- cut out drawings from napkins;
- attach the drawings to the desired places in the cabinet;
- Glue the drawings with PVA glue or special decoupage glue.
As a result, the glue will saturate the design and it will be firmly attached to the walls or doors of the cabinet. At the final stage, the toy can also be varnished for fidelity.
Decoration
The resulting doll cabinet most often looks ugly and therefore needs to be decorated. It is covered with old wallpaper, napkins, colored paper or fabric on top. You can use the decoupage technique, cover the product with acrylic paints, or come up with a different design, showing your own imagination.
Rhinestones, sequins, sparkles, and foil are used for decoration. Beads will look good as decoration for pens. Girls love to decorate their toys with lace, elegant braid, and flowers.
The cardboard base can get wet from paint or a large amount of glue, as a result of which the structure is deformed.
It is better to cover the internal surfaces with paper in advance before assembling the finished product. The hanger holder, which is made from a stick or long skewer, should be coated with acrylic paint. Hangers can be made from paper clips, and if the doll is large, then from wire. You need to add a mirror to one door, which would look ideal as a piece of foil.
Handles are attached at the last moment. They are usually made from wire, which is bent to the required shape, covered with paper or wrapped with braid. For handles, you can also use large beads, buttons, lotto barrels, and small chess pawns.
Making a beautiful wardrobe item for dolls is not difficult. The simplest version of a locker can be created in literally half an hour. It will also be useful to involve your child in work - this will help develop his imagination and teach him to be neat.
Matchbox chest of drawers
In addition to the closet, you can make such an interior item for a doll from boxes with your own hands. It will not be difficult to make a toy chest of drawers from matchboxes in just a few minutes. To assemble such furniture you will need:
- four matchboxes;
- colored thick paper;
- glue;
- match.
Four boxes for making a chest of drawers will need to be glued in series, placing them one on top of the other. Next, the structure you have learned should be covered around the perimeter with thick colored paper. You also need to cut a rectangle out of this material and secure it to the back of the chest of drawers. The front part of the structure, of course, should be left free. From here the drawers will then slide forward.
At the final stage, you also need to stick a strip of colored paper on the front side of each matchbox of the chest of drawers. If desired, drawer handles can be made, for example, from pieces of matches.
