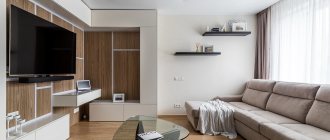
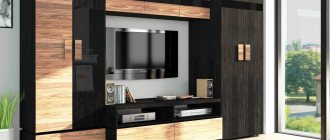
No matter how strange it may sound, shelves in the living room interior are not just a necessary thing, they are also a stylish decorative element. With their help, you can easily place many necessary things in a minimal area. Of course, to do this you need to choose the right shape of the shelf and position it correctly.
Shelves are not only furniture for storing books, souvenirs and other items, but also an excellent wall decoration
Peculiarities
First of all, shelves are a modern solution. The times of massive wardrobes and sideboards have sunk into oblivion; today designers strive to create the most light and free space, which will have enough space to store necessary (and not so necessary) things.
Shelves help shape the interior space and highlight the necessary zones in it.
These criteria are fully met by a variety of shelves and racks, standard designs or avant-garde designs. Moreover, in the living room, shelves play a more serious role than just placing objects. With their help, the overall design concept and interior style as a whole are formed.
If the shelves are used to store books, you can organize a reading corner next to them. decorating it with a comfortable chair and a small table
Today, it is not difficult for designers to find a suitable shelf for any style and color scheme. And non-standard shelves add an interesting twist to the overall picture and make the interior unique in its own way. In this case, there can be one shelf, or several, located at a certain distance, or in close proximity to each other, of the same color or contrasting shades. All these variations are chosen solely at your request; there are no strict rules in this matter.
When looking for the right shelves, it is important to understand how they will be attached
Simple tips for decorating bookshelves
Let’s immediately separate two concepts: a carefully selected library and a certain number of books. This article will discuss storing such a volume of books (no more than 200 volumes) that does not require special library cabinets or shelving.
Regular store shelves serve as storage for books. Often combined with other pieces of furniture. It is these shelving units that can give your space an elegant look when designed professionally.
There are three principles that professional decorators use.
- Maintain a balance between aesthetics and the need to store books.
- Leave free space on shelves.
- Select books carefully.
Shelf design
Interesting fact: it turns out that all the variety of shelf shapes for the living room is based on three main designs. Let's take a closer look at each of them.
When choosing shelves for the living room, you should think about the appropriate type and format of design
Shelving
This option consists of several (from two to the desired number) supports and horizontal shelves attached to them. The base is made from different materials, from drywall to natural wood. Often, in addition to their main function - placing various items - racks are also used as partitions for zoning space.
Floor shelving is characterized by good stability and spaciousness
By the way, the presence of right angles in the design is not at all necessary. The supports themselves may well be located at any angle to the floor, but the shelves do not have to remain parallel to horizontal surfaces, for example, the ceiling.
Wood, metal, chipboard, MDF and glass are used to make shelving
Today, more complex designs are available, for example, inside which there is a place for reading. There are also racks in the form of cylinders or built into a niche. The last two options are also excellent space savers. So if you are planning to decorate a small room, take note of these ideas.
Large shelving can accommodate an entire home library
Corner
Another great way to make practical use of a modest living room area. It is the corner structures that fit perfectly into any interior and are able to hide many objects in their “depths”.
Corner shelves can make the most efficient use of empty corner space
Even light corner shelves are considered quite reliable due to their mounting on two adjacent walls.
You can use either modular (or transformable) structures or triangular shelving sections. Modular options are valued for their “durability”; they cope well with heavy books and albums, while lighter designs are usually used for decoration, souvenirs and small pots with indoor plants.
The design of corner structures depends on the choice of material and accessories
Make active use of modular options. With their help, entire complexes of shelves and racks are created. For standard interiors, wooden shelves are used, and for high-tech or minimalist furnishings, you can use glass, metal and even plastic.
Mounted
Such models are ideal for photographs and little things dear to the heart. They are often placed on free sections of walls.
Wall shelves are found in absolutely all styles
The shape of the shelves can be any - rectangular, square and even round.
The design of shelves on the wall in the living room has the most unpredictable shape and location. Since the weight of the structure is small, it can be hung on the wall at any angle and in any form. Even the use of glass shelves is allowed.
Wall-mounted shelves with lighting will highlight the things that are important to you in a special way.
DIY hanging shelf
If your home needs a lightweight structure to accommodate small items, you can build a simple device from scrap materials, which, due to an individual approach to manufacturing, can become a very original piece of furniture. The easiest way is to assemble a designer shelf with your own hands from belts and boards.
Shelf made of belts and boards
What will you need?
- a pair of edged thirty-millimeter boards with proportions 750x300 mm;
- 4 pieces of leather belts, 75 cm long;
- 4 plastic dowels;
- 4 long screws;
- 4 small-length self-tapping screws;
- drill;
- well sharpened knife;
- ruler;
- level;
Prepare all the necessary tools
Stage I
Getting the belts ready. The end cuts of leather tapes must be perfectly even. If adjustments are necessary, the ends are trimmed with a sharp knife. Each belt is folded in half, the ends are placed on the work table and a through hole is carefully drilled into them with a drill, stepping back from the edge at least 2 cm. It is advisable to mark the location of future passages for fasteners under the ruler. This will eliminate problems with skewed finished products.
Drill holes at the ends of the straps
Stage II
Fixation of belts. Using a level, we mark the location of the future mounting of the shelf on the wall with our own hands. The pitch distance between fasteners should be 60 cm. Dowels are driven into the drilled holes. Now you can attach a belt to them and secure them with a long screw. The end result should be two large loops.
Two large belt loops
Stage III
Shelf installation. A sanded board is inserted into the gap of the hinges. Its surface is leveled horizontally. To prevent a DIY wall shelf from turning into a swing, the wall part of the belt at the edge of the board is additionally secured with a short self-tapping screw. Under the finished element, another identical structure is attached using the same algorithm. This way you can assemble a neat two, three or even four-tier shelf module. Instead of an edged board, a blank made of chipboard or plywood can be used. If it is necessary to introduce an accessory into a specific interior, a shelf on the wall can also be made of glass.
Attach the board to the straps
Shelves and style
Surprisingly, but true, in any stylistic decision there is a place for shelves. Be it luxurious baroque or Provence close to the heart.
The appearance and material of the shelves must match the style of the room's interior
In a classic interior, there is a desire for universal harmony, and the shelves are obliged to “support” this trend. The ideal solution is shelves made of natural wood, always with decoration. Carvings, forged elements or shelf consoles in the form of columns are used as finishing. At the same time, the entire structure should look as complete as possible and be in harmony with other interior elements.
Solid wood shelves are preferred for a classic interior
Miniature shelves with beautiful carved decor will fit perfectly into the classic design.
The ornate Baroque style places its own demands on living room shelves. Bronze, gilding and forged metal are allowed in unlimited quantities. The design itself may resemble a theatrical set for another production. Natural wood is appropriately combined with glass and metal parts.
The baroque shelf is a display of theatrical luxury
A homemade shelf is perfect for country style. And even if this is not the result of your creativity, guests should definitely get the impression that this interior element is hand made; this, by the way, also applies to other items. The ideal material is considered to be natural wood, preferably its aged version.
A country style shelf should look rugged and match the rustic interior.
In a high-tech living room, you invariably get the feeling that all the pieces of furniture form some kind of abstract composition. And this also applies to shelves. A clear geometry of lines, a contrasting palette, a combination of incongruous elements (glass and metal) - all these are characteristic features of the trendy design direction. Metal, plastic, glass, as well as glossy MDF panels and plasterboard are the most suitable materials for decorating shelves in a high-tech living room.
High-tech shelves are characterized by a clear geometric shape and a contrasting color palette
Shelves in other styles:
Shelf in Provence style, painted with light paint with antique decor
Combined shelves in a Scandinavian style living room
The most simple shelf on a brick wall in a loft style living room
Designer shelf in minimalist style
Shelves matching the color of the wall in a small living room decorated in London style
Blueprints
“A functional shelf, hung on the wall with your own hands, must withstand a certain load and not deform under the weight of the displayed objects”
How to make a shelf with your own hands? Where to begin? The key to success is the correct drawing. Even the simplest model should first be estimated on paper. This will help you calculate the dimensions and collect the materials and tools necessary for the work. It must be remembered that a functional shelf, hung on the wall with your own hands, must withstand a certain load and not deform under the weight of the displayed objects. This will be possible only if the step distance between the supporting parts is no more than 90 cm. The softer and more elastic the texture of the shelf, the more often the support brackets should be installed.
Example of a shelf drawing
Recommendations for choosing shelves
Since a wide range of shelves of various purposes and sizes is offered, before purchasing a specific model, decide on the following points:
- Immediately answer yourself the question, for what purpose are you purchasing the structure? What will be stored in it: souvenirs or household items? Light or heavy? Bulk or compact? Knowing the answers to these questions, it will be easier for you to choose the design and material from which it should be made.
- Shelving and hanging structures immediately attract attention, so it makes sense to make them decorative accent elements. Then the ideal location for the structure would be a plain wall, and the shelves should be of a contrasting shade.
- If you choose a shelf solely as a “helper” in placing various items, buy the simplest design with a minimum set of decorative elements (or make it yourself).
- Think about the shelves in advance and take careful measurements so that there are no surprises with the placement of the model later.
- When purchasing a shelf in a store, take the time to carefully inspect it. The surfaces must be free of scuffs and the fittings must be tightly attached.
Shelves play one of the key roles in the living room interior, so you shouldn’t buy the first model you come across. Take the time to find the one that will be most convenient for you and will make your living room unique in its own way.
Classification
“As for materials, in principle, with certain skills, you can assemble shelves with your own hands from almost anything, even a rubber band.”
Before you start creating designer shelves with your own hands, you need to decide what kind of shelves you can make and what to put on them. So, what could these seemingly simplest furniture items be?
They are divided according to their design features:
- to open
- closed.
Open shelves
They are also classified according to the type of installation:
- on the wall,
- hanging,
- floor
Hanging shelves
Classic wall-mounted types of shelves are fixed on one wall surface and often hang over large pieces of furniture such as tables, sofas, armchairs. These can be single specimens or a symbiosis of several elements combined into a single composition. Sets of two or more wall shelves are called shelf modules.
Example of a shelf module
Corner options are attached simultaneously to two adjacent walls. They can be an addition to a furniture set or a separate object, and you can decorate not only internal corners with shelves, but also external ones, if there are any in the layout of the room.
Corner view of shelves
Hanging shelves, including those assembled by yourself, are vertically fixed to the ceiling. They can be supported by cables, chains, belts, racks and other devices. By design, these are usually single, lightweight, wall-less options. There are also folding hanging shelves.
Hanging shelves in the kitchen interior
The floor shelf, assembled with your own hands, can be placed on wheels for ease of movement. Having tinkered with the design, it can also be made transformable, that is, the item can be used in both vertical and horizontal positions. It's comfortable. Such a mobile shelving unit can be placed either in the middle of the room, making it an object for zoning the space, or even pushed into a tight corner where a bookcase would never go. In general, floor shelves are in demand in hallways and those rooms where there is no need to save space.
Using a floor shelf you can zone the space
As for materials, in principle, with certain skills, you can assemble shelves with your own hands from almost anything, even a rubber band. Traditionally they are made:
- made of wood,
- plastic,
- metal,
- glass
Tree and its derivatives
Plywood, MDF, chipboard and other materials are relatively easy to work with. Products made from them look beautiful, because naturalness is always effective. Do-it-yourself wooden shelves are durable in use, especially if they have undergone specific processing.
Natural wood wall shelves
Plastic
A universal material that can imitate any texture. This type of shelf will be relevant in any interior.
Plastic shelves
Metal
It is possible to assemble almost eternal, high-strength structures from it, but metal shelves fit into familiar classic interiors with difficulty. In addition, they should not be used in rooms with a specific climate characterized by high humidity, since the metal is susceptible to corrosion.
Original metal shelves
Glass
Transparent glass generously gives the atmosphere a light effect and makes the room cozy. However, not everyone can assemble a glass shelf with their own hands, especially if the design includes all kinds of cutouts and recesses.
Glass shelves do not overload the interior
If we talk about the permissible load, then everything is simple here too. Wide and deep shelves are ready to store bulky items that are in demand in everyday life, so they should always be within reach. Naturally, they are made from rougher materials. Glass structures are more decorative solutions. You can’t put anything bulky on them, not because they won’t withstand the load, but because the weight will simply look ridiculous on these delicate and sparkling shelves.
Photo of shelves in the interior of the living room
How to make a glass shelf with your own hands
Working with glass is not easy, but extremely interesting. If you don’t want to go to a specialized workshop, where they will quickly cut out structural elements according to the drawing and give them an acceptable appearance, then you will have to take on all this work yourself. You will succeed if, in addition to a good glass cutter, you have at your disposal a belt sander and 120-grit abrasive paper.
Cutting glass for a shelf with a glass cutter
When using a glass cutter when working on shelves with your own hands, usually no questions arise. All you need is a ruler of sufficient length and a steady hand. Preliminary practice will only be needed when cutting glass with an oil tool. Here you need to make sure that everything can be cut as necessary. It is important that when preparing components for various types of glass shelves, no repeated cuts appear on them. Problems will not arise if you learn how to cut through the thickness of glass the first time and carefully break it off, and not recklessly scratch the surface almost to the base.
Carefully break off the glass
The second important point in working on glass shelves with your own hands will be the need to process their edges. Agree, such a household item should not be traumatic. To avoid cutting yourself on sharp edges, the edge of the shelf must be sanded well. In the absence of a special machine, the issue of grinding is solved manually.
Types of glass edge processing
Designers know the secret of how to make a glass shelf with your own hands of really high quality. The process has one nuance. The glass to be ground must be constantly wetted with water. What is it for?
First of all, for personal safety reasons. Moisture prevents glass dust from rising into the air, so you don’t have to inhale it. It should be noted that when glass gets into the lungs, it settles in them as a dead layer, which there is no way to remove. In addition to regularly wetting the surface, remember to wear a respirator.
Water will also help the edge become transparent. Sanding it on a dry surface with your own hands will give a matte cut surface.
The glass being ground is carefully fixed on a flat and hard surface. The work area should not go too far beyond its boundaries.
Glass edge grinding process
How to fix a glass shelf to the wall with your own hands
The issue is resolved in two ways. The glass shelf can be placed on holders or an aluminum profile can be used. Both methods are good and will securely fix the glass structure in a given place, but the holders in this case are more universal. They are ready to hold glass of any thickness. The profile is designed for elements of a specific size, but this fastener also has its own feature. You can mount an LED strip in it, the light of which will add irresistibility to the masterpiece that comes from your hands. They can also be used to frame hanging shelves with your own hands.
Shelf lighting with LED strip
Installing the fasteners is not difficult. After preliminary fitting on the wall, the holder structure is disassembled by removing the base from the upper stop. Next, take a level and mark the installation plane. The dowels will be driven in according to this marking to support the latch. One shelf will require at least two of these holders. In principle, their number is determined by the length of the shelf and the expected load.
Glass shelf mounting option
The most expressive thing is in sight
You shouldn’t put small decorative trinkets on shelves - they will get “lost” among other items. It is better to put small or inexpressive things in boxes or baskets designed in the same style.
Leave a few objects for viewing that attract attention. These can be large decorative elements, plants in a pot or vase.
Order comes first
Open storage areas require a responsible attitude in terms of maintaining perfect order.
Regular dust removal, aesthetic and thoughtful arrangement of items on the rack are necessary. ⦁ Group books or magazines by color and size, give them a common “slope line”. ⦁ If possible, provide separate sections for decorative accessories. ⦁ Give the arrangement of objects a certain logic and rhythm; together they should form a single composition. ⦁ If you need to place books with multi-colored spines on a shelf, you should choose the same covers for them: purchased or homemade, for example, from wallpaper left over after renovation.
