There are many creative ideas used by furniture makers when making their own masterpieces. A bright, original and memorable product that will perfectly decorate a modern interior and create a unique atmosphere is a coffee table with an infinity effect. Making it is not very easy, but it is quite possible if you have some skills in working with wood and glass.
You can place a table with lighting both in an office space or in a country house, as well as at home. LED lamps used in the assembly of such furniture are absolutely safe for human health, as well as for the environment. Such lamps are durable and economical, so using a table with an infinity effect will not lead to increased energy consumption.
The illusion of an endless tunnel is created by using two mirror surfaces and LEDs located between them. The colors of the lamps used can be any, but experts say that red diodes can make the tunnel deeper, since red color is less prone to scattering than other colors.
To control the backlight, you can use the on/off button or a special remote control.
Making a tabletop with lighting from New Year's garland
There is an easier way to make your own table with an infinity effect. In this case, instead of an LED strip, a regular New Year's garland is used. First, a square or rectangular frame is made from bars, then the number of light bulbs on the garland is counted.
Read also: Console cheats for cs go
After this, marks are placed on the frame in the places where the light bulbs will be located. It is recommended to place them at a distance of about 2 cm from each other. At the next stage of work, holes for light bulbs are drilled in the frame of the future table.
How the infinity illusion works
The illusion of an endless tunnel is created by reflecting a light source in two mirror surfaces at the same time.
Due to the fact that light has the property of scattering, the effect of its gradual attenuation is created somewhere in the depths.
Due to the peculiar reflection of light, such tables create the illusion of an endless tunnel. An important condition for creating such an illusion is selecting the correct distance between the mirrors. Experts recommend installing mirrors at a distance of approximately 8 cm from each other.
How to calculate the width of an additional mount for a table top?
For fastening from above, a special frame is made, the width of which is calculated as follows: the thickness of the outer frame is added to the width of the cut gutter with a couple of centimeters in reserve, which helps fix the tabletop using the frame.
The frame is assembled from four wooden blanks and fastened with self-tapping screws. Then, using bolts, they are screwed to the outer frame, capturing the tabletop frame with LEDs. Remember that the holes are drilled in advance to prevent the wood from splitting during operation.
Materials and tools
You can make an exclusive piece of furniture with your own hands. To do this, prepare the necessary materials, tools and follow the step-by-step instructions.
To make a table you will need:
- boards for the frame (wood or particle board);
- mirror according to tabletop parameters;
- translucent mirror. The dimensions should be 10 cm larger than the bottom mirror;
- self-adhesive diode tape, length depending on the size of the table, but not less than 1.5 m;
- materials for connecting the tape: controller, programmer, wires, power supply with USB;
- consumables: sandpaper, glue, screws, metal corners.
Instead of a translucent mirror for the top cover, you can take regular glass and cover it with tinting film yourself.
Computer and desk lamp: rules of coexistence
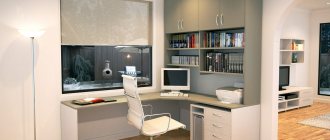
Today it is difficult to imagine an adult’s desktop without a computer. Those who spend a long time with it come to the idea of needing a table lamp on their own with the first sensations of “sand” in their eyes. warn those who sit down at the computer for just a few minutes a day
that even these minutes can have a detrimental effect on vision if the lighting of the workplace is not organized correctly. The light from the monitor itself is not enough; additional keyboard backlighting is necessary even for those who touch-type. Turning off the lights in the room when working at the computer in the dark is unacceptable. Light changes quickly
will call
decreased visual acuity, and swollen and watery eyes will constantly bother you.
The lighting of the computer workstation should cover the keyboard, but not cause glare
on the monitor. The light should be diffused so that fingers running across the keyboard do not create a contrasting shadow. Such lamps are sometimes powered not from the network, but from the computer itself, which allows
comfortable
work not only stationary. The distance to the monitor itself should be five times its diagonal.
Proper organization of the workplace is the key to efficiency and high efficiency. Lighting is one of the bricks in the foundation of the overall labor protection system. Promptly and successfully
Having finished all the things, it’s so nice to devote the saved time to yourself, your loved one. For example, look through the latest news from the WESTWING online club, enriching yourself with new
creative ideas
for home improvement and everyday life.
Preparing hand tools
DIY computer desk: instructions for dummies
To work with wood you need quite a few different tools. The amount of harvested wood depends on the type of table. During the manufacturing process, both hand tools and automated devices can be used. It all depends on your personal equipment. The list will include the following tools:
- Plane. This is a standard tool for any carpenter; it is used to process a wooden workpiece, eliminating its unevenness;
- Chisel. With its help, various holes and the necessary grooves are made;
- Various saws. Used for cutting wood into various workpieces;
- Measuring instruments, and pencils;
- Screwdrivers of different types;
- Sandpaper. Wooden surfaces are sanded with it to eliminate roughness.
Design Features
If you look at the backlit table, you can imagine that in the depths there is a portal to another dimension. To achieve a similar effect, you will need only 2 mirrors of the required size and LEDs that will be located between them. The color of the lamps can be any. The table with LED backlight is turned on using a remote control or a small button. The lamps are economical, durable and safe for humans and the environment. In addition, you can make backlighting from LED strip.
Experts recommend equipping an LED table with red lamps, since this color is less diffused than others.
This piece of furniture can be placed in the country house or in the office. It will look especially beautiful in a home interior - when arranging a living room, bedroom, loggia. Before making a 3D table with your own hands, you should consider some nuances:
- where it will be located;
- room area;
- appointment;
- Will it fit into the interior?
Such an item is necessary for a relaxation area along with a deep chair or hookah. It can be of different heights and sizes. This design will look good in minimalist interior styles. If you attach wheels to a backlit coffee table, you can move it around the entire apartment. In addition, it is easy to care for. The undoubted advantage of making a product yourself is significant savings. In addition, a thing made independently always looks more original and interesting than ready-made options.
Illuminated coffee tables can be purchased, but such items are quite expensive, so it is better to make it yourself. It is worth considering that the mirror surface should not be exposed to sunlight. She is also afraid of high humidity and high temperatures - a glass of hot coffee should be placed on a stand.
Is it possible to make a table with an infinity effect with your own hands?
A similar model can be ordered on the Internet, but it is quite expensive, so it is better to try to make it yourself. Making a table with an infinity effect with your own hands is not difficult, but it will require you to have minimal skills in working with wood and glass, and some skills in working with tools. It is also necessary to understand the principle and diagram of connecting LED strips.
It is quite possible to make such an original table at home with your own hands.
Diagram of assembly and connection of LED cabinet lighting with LED strip
To make furniture lighting with your own hands, you should adhere to two basic rules:
- observe polarity;
- Sections of tape longer than 5 meters must be connected exclusively in parallel.
A basic assembly diagram for a single-color lighting system consists of elements such as an LED strip and a power supply. Sequence of work:
- measure and cut the required length of tape (there are markings on the front side of the strip indicating the places for cutting);
- fix the LED strip at the installation site;
- connect the power supply to the tape;
- install and connect the switch.
Subtleties of table design
Not every craftsman can make a coffee table with an infinity effect. Furniture makers have plexiglass and self-adhesive mirror films in their arsenal, which simplify the design process. Inside the box there are two walls that mutually reflect each other. The one facing the mirror is processed additionally, or translucent glass is purchased, although this material is quite rare.
Don't forget to pay attention to the depth of the tunnel located between the two mirror surfaces. It is determined based on the following indicators:
- distance between surfaces. By multiplying the actual width of the opening by 16, you can get a number characterizing the depth of visualization;
- throughput of translucent material.
Important! A table with a 3D infinity effect, made by yourself, will last longer, and the backlight will work without failures if you choose a power supply with a 50% power reserve as the electronic carrier.
Tabletop assembly procedure
First, a frame (sidewall) of the future structure is assembled from 4 boards using self-tapping screws, then this frame is glued on top of the mirror, on its front side. In this case, the size of the frame must correspond to the dimensions of the mirror.
At the next stage, you assemble the frame with LEDs yourself. The outer diameter of the frame can be equal to or greater than the outer diameter of the frame, but the inner diameter should be 1-2 cm less than the inner diameter of the frame on each side. When the frame is ready, an LED strip is attached to its bottom side along the inner edge. The frame is then attached to the sides with screws. Holes are drilled in the frame through which the wires are routed out.
When all this work is completed, all that remains is to attach the translucent mirror to the frame. It is screwed with special screws. It is advisable to choose screws that can be removed without much difficulty (in case the LEDs need to be replaced). Craftsmen recommend attaching small strips to the edges of the frame, which in height form a single plane with the glass. At the final stage of work, it will be possible to attach an upper frame to these planks, ensuring reliable fixation of the tabletop.
Not every craftsman can equip a table with such a mirror, because this material is quite rare. Many furniture makers use plexiglass and self-adhesive mirror film, which is applied to the bottom surface of the glass (the one that will be facing the mirror).
Mirror-coated glass is also popular, but it needs to be chosen correctly. You can determine whether mirror-coated glass is suitable for making a coffee table with an infinity effect in the following way: you should place a piece of mirror and a piece of glass in parallel, and place any light source between them and visually evaluate the effect.
Another affordable option, which is often preferred by novice craftsmen, is the use of ordinary window glass. But in this case it will not be possible to achieve a sufficient depth of the endless tunnel. In addition, the observer will be able to see everything inside the table.
One of the most important characteristics that you need to pay attention to when assembling a mirror table is the depth of the tunnel. It is determined by two factors:
To ensure long-term operation of the backlight and save energy, it is recommended to use a power supply with a 50% power reserve.
Step-by-step manufacturing instructions
Prepare all tools and materials for work in advance. Find a drawing on the Internet on special forums with the indicated dimensions of all parts. And then we will look in detail at how to make a table with an infinity effect with your own hands.
Create a box
The bottom of the tabletop box will be a sheet of plywood or chipboard. It is necessary to screw 4 boards to it along the outer perimeter, and at a distance of 5 centimeters from the edge there are four more boards. Thus, the boards should form 2 rectangles, one placed inside the other. There should be a small gap between them, sufficient for laying the wires.
When making a box, do not forget to first clean the boards with sandpaper or treat them with a sanding machine.
All parts of the table and its frame must be smoothly sanded. After the box is ready, coat it with varnish and leave to dry.
Selection of mirrors and their installation
Glue the mirror face up to the bottom of the box you assembled. Please note that it must completely match the dimensions of the inner rectangle of the box. Installation of the upper translucent mirror is carried out after placing the LEDs.
The mirror cover is mounted on the table only after all the LEDs have already been placed.
Installing the backlight
Glue the LED strip to the inside of the small rectangle of the box. Lay the wires coming from the LED strip into the gap left between the rectangles. The wires from the lighting can be routed inside one of the legs for a more aesthetic appearance of the entire structure.
The LED strip is glued to the inside of a small rectangle of the box.
Glass fastening
Glue an overlay wooden frame with wide edges. Its external dimensions must exceed the external dimensions of the table box, and its internal dimensions must be smaller than the dimensions of the rectangle on which the LED strip is attached. After making the frame, grooves must be made along its inner edge, the height matching the thickness of the translucent mirror. Place a translucent mirror in the resulting grooves, reflective side down.
The translucent mirror is attached with the reflective side down. You can secure it with glue. Screw the overlay frame with the installed mirror to the table frame using fasteners with decorative heads. That's all, the coffee table with the infinity effect is made by hand.
Rules for assembling the structure
All wooden parts of the table must be smoothly sanded and free from any irregularities in the form of chips or burrs.
Remove the protective film from mirrors and glass only after completing all work. To avoid short circuits, follow all safety rules when working with electricity. Carefully study the diagram for connecting the LED strip to the power supply.
The wood glue you will use to make the table should be waterproof.
When assembling the table, use only waterproof wood glue.
Backlight options
This piece of furniture can decorate any interior, turning an ordinary environment into an original, ultra-modern one. To make the table, different lighting options are used, each of which has a number of features:
- LED bulbs. Suitable for large items. The elements provide bright light, the shade is deep and rich. LEDs last much longer than conventional lamps, burn out less often, and have a higher efficiency. The advantage of such lighting devices is the absence of heating, so installation is allowed in any frame. It is possible to choose a suitable color scheme. LEDs are safe and inexpensive.
- LED strips. Such devices are distinguished by their versatility and practicality. They are easy to use and install, and have a high level of reliability. You can equip the table with LED strip not only from the inside, but also from the outside. It is compact and elastic. The devices are environmentally friendly and consume a small amount of energy. The market offers a wide range. The user can independently adjust the color and brightness of the lighting. Tapes are quite expensive and have a limited length.
- Neon lamps, threads. They provide a soft glow that is distributed evenly, with no contrasting shadows. Controllers help regulate the color and intensity of the glow. Warranty service life – 20 years. The shape of the tubes varies. The products do not create noise during operation and do not irritate the eyes.
Tunnel lighting can be monochromatic or multi-colored. In this case, the light may blink or fall evenly. The color variety of lamps allows you to choose any option for making a table. Red diodes have the lowest degree of dispersion, so they will be preferable: these lamps make the tunnel deeper.
Basic parameters when choosing a gamer table, current designs, colors
It is not always possible to purchase original pieces of furniture in a store at an adequate price, so you can make a table with lighting yourself. The product is multifunctional, since it is used both as a regular coffee table and to create an accent in the interior.
LED bulbs
LED strips
Neon lamps
How to assemble the base and legs?
Having completed the work of constructing the tabletop, all you have to do is put the bedside table on its legs. To do this, choose solid wood with a section width of up to 10 cm. Wires will be hidden in one of the volumetric legs. This move allows you to make the design aesthetic.
Wires are also removed from the countertop, but such a product looks less attractive and at the same time does not differ in functionality.
Having purchased the blanks or assembled the legs, form a through hole with a diameter of up to 5 cm in one of the supporting structures. Grooves are made in the upper part of the tabletop through which the wiring runs. In addition, a corner hole is cut out, which is responsible for fixing the tabletop.
The height of the hole should correspond to the height of the tabletop. Its depth is calculated individually in each case. The main requirement is to ensure reliable fixation of the tabletop. Such grooves are made in each of the legs.
Let's start production
If you decide to take a ready-made frame, then first remove the tabletop. For the bottom, prepare a plywood sheet or chipboard sheet. Now we form two boxes:
- take 4 boards, strip them and screw them along the outer edge of the table bottom;
- Screw another 4 boards, also cleaned, at a distance of 5-6 cm from the edge.
The result will be a design with two rectangles or squares (depending on the shape of the future “endless” table), which are located at a short distance from each other.
Next we proceed to assembly. Take the mirror. Its dimensions must match the dimensions of the internal contour previously made from boards. Glue the glass sheet to the bottom of the inner box, face up.
Do not forget that you need to work with the mirror carefully, wearing protective gloves. Be sure to sand the edges to prevent damage and chipping. The same applies to glass.
Backlight installation
The LED strip is glued to the inside of the inner box. The wires can be laid in the gap between the boxes so that they do not interfere, and the wire that goes to the outlet can be run into one of the table legs. If you are using a microcontroller to create a soft pulsating backlight, install it also in the gap between the outlines of the boards.
Installing the top glass
The easiest way is to buy custom-made glass of the desired size and separately purchase a film of the desired darkening level. You can apply the film coating at home or entrust this task to a specialist.
The glass should have the same dimensions as the outer frame of the table. The canvas is secured to the frame using special screws with a decorative head or countersunk screws. Work carefully so as not to damage the glass sheet. Don't forget to polish the glass .
The table with the infinity effect is ready.
How to make a backlit table for ping pong
This is one of the simplest. Great for parties if you narrow it down a bit and turn it into a console table. Make it the size you need - just adjust the leg height. It will only take you one day to assemble! Everything you need can be purchased at a hardware store. The trick is to make a large one-way mirror from acrylic sheet and window film. This one is easy to make - no electronics knowledge required. You will need an inexpensive electronically controlled Christmas tree garland. Customize your mirror by choosing lights in your favorite colors or ones that flicker or change shades.
Cut the 1×4 boards into two 24" (61 cm) and two 72" (183 cm) pieces. Using the 4 boards, make a 72" x 25-1/2" (183 x 65 cm) rectangular frame using two screws with flat head. Paint the frame matte black with spray paint. Cut a groove approximately 2cm from the end of one 61cm board to secure the cord from the LED lights. Take the end of the wire and tape the LED lights around the inside of the frame, facing the center of the frame. Place the electrical plug through the frame. Drill 12 evenly spaced holes in a clear acrylic sheet aligned with the frame. Very carefully apply the mirror window film to the hidden side of the clear acrylic. Make sure there are no air bubbles. You now have a large one-way mirror.
Using a sharp knife, cut out the window film to cover the recessed holes. Drill 12 evenly spaced holes in a regular acrylic mirror and recess the back side (not the side of the mirror). Use screws (12 pieces) to attach the mirror to the frame so that the mirror surface faces inward. Then attach the window film. Wrap the LEDs on the outside of the frame with black tape, or buy a black box and put additional lights in it to hide them. Hang the mirror on a full-length wall or door to create a life-size portal to another dimension. Or use it as a tabletop - for coffee table or ping pong table! Be sure to use 6 legs and attach with 2 standard brackets. Use brackets that are at least 20cm long, otherwise the table will be wobbly.
Varieties
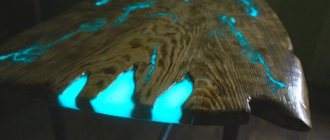
Looking ahead, we note that the luminous elements of the tabletop look very beautiful, but this solution cannot be called practical. The fact is that the glow needs to be viewed in the dark, and when you stay in a dark room for a long time, bright elements cause eye fatigue. Thus, an epoxy resin table with lighting will find its use in creating a special atmosphere in the room. You can demonstrate a masterpiece to amazed guests or find relaxation by watching the play of light, but in all these cases, time is limited. Thus, the scope of application of the backlight has been determined.
In fact, guided by the basic principle of the new movement, designers have developed many projects that are simply impossible to imagine. However, every potential owner of such a wonderful table must imagine all the variety of options, so we will try to fill the reader’s imagination as much as possible so that he himself becomes the designer of his future order.
All epoxy tables in which illuminated elements are found can be divided into two groups. The criterion for separation is determined by the nature of light.
- The first group includes products in which the resin contains a special powder - phosphor. As is known, luminescence produces a glow when excitation energy is converted. There are several types of luminescence. In particular, a substance can release light energy after irradiation with ultraviolet rays, as a result of a chemical reaction, as a result of the passage of an electric current or bombardment with electrons. Photoluminescence has found practical application in the field of construction, that is, the phosphor in question, under the influence of natural lighting, subsequently becomes a light source.
- The second group is represented by products with electric lighting; these can be incandescent lamps or LED sources. One of the features of epoxy resin is its dielectric properties. All elements of the electrical circuit can be filled with the composition, and they will be reliably insulated. LED elements have low power, so the power source is often embedded in resin along with the backlight. Such options are considered “disposable”. Indeed, it is not possible to replace the power supply or LED. More reliable models contain a current converter and are connected to a 220 V network.
What determines the depth of the tunnel?
To make a table with an infinity effect with your own hands, you need to determine how deep the tunnel will be. For this, several factors are taken into account:
- The level of transparency of the film applied to the top of the structure. The glass may be initially tinted. You are also allowed to stick the film yourself.
- If you use an LED table, then in this case the infinity effect will depend on the distance between the mirror sheets.
- Backlight brightness. Its high intensity provides a pronounced illusion of depth.
To get infinity, you need to install the mirror correctly. The more LEDs placed between the reflective surfaces, the more pronounced the tunnel. The main loss of light due to reflection occurs in translucent glass - each subsequent glass becomes less intense. You can increase the brightness if the distance between the LED strips is greater.
LED strips
When making the table, an LED strip is used, which creates the effect of infinity. The most convenient are self-adhesive tapes.
Operating principle
The LED strip consists of two diodes - a single-chip one, which has one color spectrum, and a three-chip one, consisting of three color spectrums (green, blue, red).
The emanations of the crystals are mixed, forming a wide range of colors.
Specifications
- The type of LED is the main difference between all LED strips. The most common LEDs are SMD 3028 and SMD 5050. The abbreviation stands for “surface-mounted device”, and the numbers indicate the dimensions of the LED lamps: 3.0 x 2.8 mm and 5.0 x 5.0 mm.
- Density. The more LEDs there are per linear meter, the brighter the glow from the tape.
- The color of the LEDs can be any. The most popular colors are white, yellow, cold and warm tones.
- Moisture protection. IP 20 - open, IP 65 - moisture resistant, IP 68 - the highest degree of moisture protection.
Advantages
- High light output;
- High strength and vibration resistance of the tapes;
- Long service life (about 100 thousand hours);
- Various tones and shades of lamp glow;
- The inertia of the tapes is low, which allows you to use the highest brightness from the very moment you turn it on;
- The number of on/off cycles does not affect the service life of LED strips;
- Environmental friendliness;
- Safety;
- Budget cost;
- Not susceptible to breakdowns due to low temperatures.
How to illuminate a computer desk using an LED strip, watch the video:
Answers to a reader question
In our locality it is not possible to purchase or rent a milling machine.
In addition, cutters are expensive. How else can you make grooves for glass? A shelf for supporting glass (like a groove) can be easily made without special tools. It is enough to attach a flat strip of glazing bead, a board or a piece of chipboard to the side wall of the frame, stepping back from the top edge by the thickness of the glass.
Do I need to fasten the decorative frame in any way?
The described table model was chosen as the simplest to manufacture. We can say that the frame is a conventional name. The individual planks are simply attached to the base. They do not need to be fastened together, which simplifies the work. It is important to fit the cut corners tightly so that there are no gaps between them. Cashing doors is done in the same way.
How to hide holes for screw heads? Sawdust is mixed with wood glue and the recesses are filled with the mixture. After drying, the surface is treated with sandpaper and covered with paints and varnishes.
Did the article help? Please rate
3 / 5. 2
Andrey Peregubsky
Carpenter-furniture maker
Discussions
How to care?
Any furniture needs to be looked after. If it is a mirror, then it is better to purchase special napkins. Painted legs should be washed carefully, as some cleaning products or acids will corrode the paint.
Before deciding on a purchase, you need to carefully weigh your financial capabilities. You need to take a close look at the interior; perhaps some details of your interior, for example a mirror, will make it possible to refuse any attributes present in the table.
A reverse turn is also possible. The lack of storage space may push you to buy a table with more storage space.
In any case, this table should bring joy and comfort to the house, because joy is the most important thing in life.
