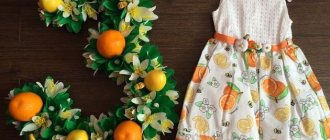
For a children's birthday party or photo shoot, you need props. Napkin numbers have become popular and can be seen at children's birthday parties. Indeed, this kind of decoration at a holiday is beyond competition. They are light, and children can play with them, inexpensive, beautiful and evoke only pleasant emotions.
An original composition of napkins in the form of numbers requires a creative approach. Although their production takes more than one hour, the emotions of the happy birthday boy who received such a number are worth all the time and effort.
See how to make a number, how to decorate it, what materials are needed, and try to make decor from napkins with your own hands using our master classes.
How to decorate a number from napkins
Now that you know how to make a blank for a number, let's try to figure out what and how to decorate it?
It must be said that not only napkins are used for decoration, but also any thin paper - tissue paper, corrugated paper, paper. Choose colors accordingly: soft ones for girls (lilac, pink, white, blue) and bright colors for boys (blue, red, light green).
You can decorate a number from napkins with your own hands in different ways:
- flowers;
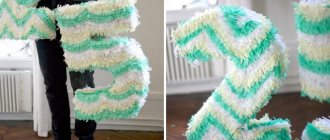
- using the “facing” technique;
- fringe;
- make a figurine figure.
Let's learn how to make decor for numbers.
Corrugated paper decor
The process of making numbers from crepe paper is similar to working with crepe paper, but you will almost certainly have it on hand at home if you have small children. Of course, it is better to use double-sided colored paper.
LIFE HACK: You can glue white office paper and then paint it with watercolors or spray paint.
You can also add colored tape, which will decorate the number and additionally hold the paper.
TIP: If you have thick multi-colored napkins, you can also cut them into fringes and use them for decoration.
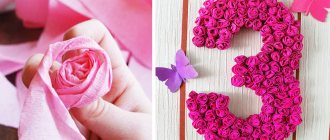
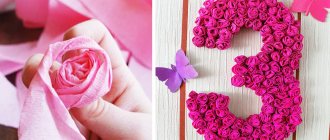
Flowers from napkins
For a large figurine, decorated on all sides, you will have to make about 200-400 small roses. The most common decor is flowers. They are suitable for both boys and girls. Flowers should be fluffy and easy to pick. After all, you will need more than one flower. You can save time by covering the sides of the figure with corrugated paper or paper. Then you won't have to sit on the decor for several days.
Before attaching corrugated flowers, it is better to create a tone for them using corrugated paper
Well, choose the options for those flowers that turn out the most lush: asters or roses.
For a lush aster from napkins, take:
- 3 napkins;
- scissors;
- threads;
- fold the napkins like an accordion;
- wrap the middle with threads to make a bow;
- straighten the petals towards the center, moving towards the edges. Make a bud in the middle by squeezing the paper tightly; Spread the lower leaves to create a convenient area for gluing.
For a rose you need to take 6 napkins and a stapler.
- Fold the napkins into a stack.
- Cut out the petals (several semicircles).
- Unfold the rose, moving the petals.
- We fasten the tip with a corner.
- Let's fluff the flower.
Try making the edge of the flowers wavy by making a zigzag with scissors. A flower with teeth on the edges looks more interesting.
Combine colors. Use napkins of different colors for one flower. You can draw a line along the edge of the napkin with a felt-tip pen.
Trimming
Numbers decorated using the cutting technique turn out to be very fluffy. It’s better to use corrugated paper, but plain napkins also work well.
- The paper is cut into squares.
- Then you place a pencil in the middle of the sheet and press it with paper.
- We apply a stick with paper to the surface coated with glue.
- Having filled the entire surface in this way, straighten the decor with your hands and trim off the excess with scissors.
Trimming method
Volumetric numbers using the cutting method look fluffy and soft
You can also make flowers by trimming.
To do this, prepare:
- plasticine;
- several rectangular sheets of paper;
- trimming stick.
Now let's get started:
- Knead the plasticine.
- Wrap the stick with paper so that most of it remains free.
- Stick it into a piece of plasticine.
- Make 3 petals in the same way.
- Fill the space between them with petals of a different color.
- Cover the middle where the plasticine is visible with a piece of crumpled paper.
Foam blanks are the most suitable for trimming. No glue is needed, the stick pierces the soft material, and the trim remains in it. You can trim the patterns inside the figure and decorate the decor with several diagonal stripes of different colors.
Numbers - figures
Based on a simple number, make a character from a children's cartoon, such as Mickey Mouse.
- Cover the number itself using the trimming technique with red and black napkins.
- Add white paper circles.
- Cut out 2 circles from black cardboard and attach them to the top of the number.
You can style the number in this way to match any favorite cartoon character. Use a suitable color, add details from other materials.
Volumetric figures can be stylized as animals: unicorn, bear, bunny, swan and others
Now that you have learned how to decorate a decorative composition, let’s take a closer look at how to make a number from napkins with your own hands.
Materials and equipment for work
Looking at pictures depicting three-dimensional numbers made from napkins, many people fear that it is impossible to do something similar with their own hands. In fact, they are not difficult to make. The process takes some time, but the birthday boy’s emotions of happiness cover all costs.
Not the last place at the holiday is occupied by external paraphernalia - flowers, gifts, music, surroundings.
Tools and materials required for work:
- Paper napkins. They can be single-layer or multi-layer. When choosing a color, you should focus on the occasion of the celebration, the gender of the baby, and the surrounding interior. It is advisable that the napkins be plain. The approximate quantity is calculated based on the planned number of flowers - 1 napkin will be required for each unit.
- When creating numbers from napkins, you can combine several shades, alternating them with openwork and carved specimens. They will make the composition more voluminous and unusual.
- The threads can be simple cotton. For ease of cutting, you will need scissors or a stationery knife.
- A stapler will simplify the fastening process.
- Glue or tape for fixation.
- To create the base you will need a cardboard blank. You can use an empty box from household appliances.
The decor of the room in honor of the festival can turn a traditional celebration into something special.
Important! To ensure a high-quality connection of elements, it is necessary to select the strongest options.
Master class cardboard figure
Let's make a small volumetric figure from packaging corrugated cardboard.
To do this, take:
- 10 sheets of cardboard;
- glue gun;
- breadboard knife;
- 6 packs of tissues.
Progress:
- Make a number template and transfer it to sheets of cardboard.
- Using a breadboard knife, cut out 10 identical parts.
- Fasten them together with hot glue.
- Make roses from napkins.
- To do this, staple several napkins, cut out a circle, and straighten them to form a flower.
- Glue the roses to the number with hot glue.
A volumetric figure can be made from sheets of corrugated cardboard that are glued to each other
The result is a light and strong figure that will withstand the most active photo shoot. But there are other ways to make numbers from napkins: see the master class below.
First birthday number
For this composition we will make a cardboard base that is hollow inside.
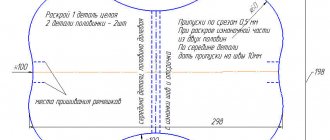
If a unit is easy to build on paper and cut out, then how to calculate the length of the sides? You can do everything by eye, or you can use a mathematical formula:
P = 2(a + b) ,
where a and b are the sides of the figure.
Make some extra space for gluing the parts together.
So, what is the number 1 from napkins made of:
- double corrugated cardboard;
- napkins;
- hot glue;
- masking tape;
- scissors and breadboard knife;
- stapler
- Cut out a number from the template. Transfer to cardboard, cut out 2 parts.
- Calculate the length of the sides of the figure and cut out the sides.
- The figure may expand downwards. Then the sides will look like a trapezoid.
- Secure the pieces together using masking tape. Secure them from the inside with hot glue. Attach the second part of the unit and secure with masking tape.
- The inner part should be strengthened in advance; install tightly fitting pieces of cardboard into it. They will act as stiffening ribs, and the decor will not bend.
- If desired, cover with napkins.
- Fold roses from napkins.
Volumetric figures in the full height of a child look especially impressive at a photo shoot.
Decorate the number 1 for a year with a large flower made from napkins.
Take a knitting needle, wrap a napkin around it, and remove the tube. Straighten it a little and, fastening the ends with a stapler, make a petal. The center of the flower is one corrugated tube, rolled in a spiral.
These flowers look like they are made from balloons.
Add pompoms and a congratulatory garland to the figure set.
Dessert
What's a holiday without sweets? If you present the birthday person with a cake in the form of a date, there will definitely be a lot of positive emotions. Such tasty numbers are usually ordered from pastry shops, but if you wish, you can bake them yourself. The main thing is to cut out the desired shape from the finished dough and decorate it as desired.
Any holiday, especially for children, is a sea of joy and positive emotions. Bright numbers will decorate the room and will be a good gift.
You can create this design yourself from inches of ribbon, paper balls or colorful leaves, sweets and flowers, or you can order it from an experienced craftsman. The result will always be excellent!
Number 2 from napkins: master class
For this photo shoot we will use several techniques. We will make the background by trimming, add a few roses and make a crown.
- The basis of the figure is polystyrene foam 10 cm wide.
- You can cut 2 pieces of 5 cm each and fasten them with hot glue.
- For decoration - 30 flowers from napkins, large pearl beads.
- Yellow or gold cardboard for the crown.
- Additionally: double-sided tape, knife, pencil, scissors.
Do-it-yourself volumetric figure with a crown
Work progress:
- We transfer the pattern of the two to the foam. Cut with a knife.
- We cut the napkins into squares. Wrapping the tip of a pencil, we transfer them to the workpiece and secure it to the foam.
- We straighten the pile and trim it. We cover the side parts with corrugated paper or trim them.
- We make roses from napkins and attach them with hot glue.
- Glue the pearls.
- We cut out a strip of gold paper, make teeth, roll it into a ring, and secure it with tape.
- Glue the crown to the number with a glue gun.
It made a great gift for a little princess. For transportation or storage, wrap the figure in plastic.
Other ideas
In addition to the listed ways to decorate a holiday number, there are many more ways. Here are just some ideas on what you can use to cover a number:
A large piece of fabric. The fabric is glued to hot glue, forming beautiful folds;
- Colored paper or gift wrapping paper. On top of the frame you can make a thematic applique in the theme of the holiday;
- Small photographs;
- Multi-colored buttons;
- Felt;
- Artificial flowers made of plastic;
- Sparkles. The frame should be generously greased with PVA glue and sprinkled with multi-colored glitter;
- Wrap a decorative rope around the number, periodically gluing the rope;
- Small balloons. They need to be attached to a foam plastic frame, piercing the tail of each inflated ball with a tailor's pin. If the frame of your figure is made of cardboard, glue the balls with tape; hot glue will melt the rubber.
A festive number will decorate your home during your child’s birthday celebration, and can also be an excellent gift for an adult birthday boy. It can serve as a decorative item or combine several functions.
You can put a small gift inside the volumetric figure; for convenience, make a “door” in advance through which the birthday person can get the gift. For kids, you can make a festive piñata from a hollow cardboard figure. To do this, just fill the figure with candies and hang it in the yard.
What size should I make the numbers?
For a children's photo shoot, the size of the decor should be child size or slightly larger. Compact numbers are made for the table or candy bar.
Approximate unit sizes:
- height 65–70 cm, width 35 cm, depth 15 cm.
- height 82 cm, width 45 cm, depth - 12 cm
- Flat figurine size: 30 x 40 cm
Focus on the surrounding environment and the height of the child, do all the calculations on checkered paper, and then transfer it to the workpiece.
Even an adult birthday boy will like the numbers decorated with napkins. Make them as a gift in the form of a topiary or panel. Not only birthdays, but also the holidays of March 8 and February 23 can be decorated with decorated numbers.
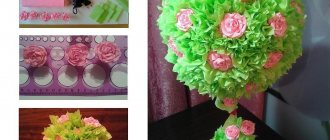
Topiaries with numbers are a great gift for a birthday or March 8th
The number does not have to be all covered with identical rosettes. Use different color shades: delicate shades on the front side, dark shades on the edges. The figure will look even more voluminous.
Make sure that the flowers are held tightly, but do not use sharp skewers to secure them if you know that the child will play with the number. The composition for the holiday should not only be beautiful, but also safe.
Decorations
The appearance and originality of presentation depend on the imagination of the author or customer. On store shelves you can find special decorating kits, different types of colored, corrugated, wrapping paper, napkins, ribbons, etc. An important condition in creating a composition is the compatibility of the base (if any) and design elements. Which material to choose depends on its properties, ease of use, and availability. Before choosing one or another cheese, you need to find out whether it will stick to the base and what kind of fastening is suitable for this.
Napkins
The most versatile tool for crafts. This is due to the large selection of sizes, palette, density, and structure of napkins. They can be folded into a triangle to make a fluffy flower. There are many examples of exactly how to use material on the Internet. It is possible to arrange different shades, sizes and shapes. The airiness of the finished products is good for decorating both volumetric and flat figures.
Paper
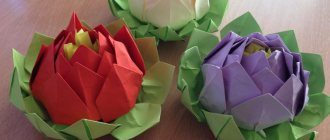
Universal material. Using paper, they make bright gifts that every child will be happy with. The numbers look beautiful, the decoration of which combines velvet and wrapping paper and voluminous products made from corrugated sheets. In decoration, you can use origami, three-dimensional origami, and quilling techniques.
Brilliant gift
Foil of any color will definitely decorate every holiday. It can be used to fully or partially cover the base, create a background, and appliqués.
Ribbons and other beauty
Satin ribbon, tulle, braid, yarn in skillful hands turn into a magnificent decoration for celebrating any date. Original numbers, depending on the color and design, can be given to a child or for a thirty-year anniversary.
Birthday people of all ages will be pleased to receive as a gift a composition of sweets or flowers, made in the form of a significant number.
