Surely every home has an unnecessary thing that is a pity to throw away. Maybe it’s old or just doesn’t fit the interior of the room. To do this, there are many techniques that give life to old things. For example, using the decoupage technique you can decorate a cardboard shoe box.
This article will help you learn how to decorate a box in decoupage style.
What boxes can be used
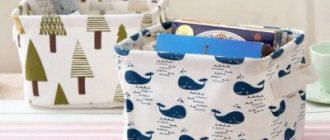
In addition to the fact that decorative boxes designed in-house are an interior decoration, they also help organize free space in the house. This especially applies to apartments whose area is small.
If you put extra things in boxes, then they will be easy to find later. In order to remember what purpose the box is intended for, it can be marked with a specific color scheme. This method will help both adults and children get used to order. This indicates that decorating the box will not only help decorate the interior, but will also instill neatness.
It is important to note that the box cannot be left in its original form, because it will spoil the appearance of the interior. Initially, a style is selected, and then applied to a specific box. There are many options for using the item in question. Depending on the size of the box, they can be aimed at different purposes. For example, storing rings and other jewelry.
If there are kids in the apartment, then the box can act as a place where pencils and other office supplies will be located . The box can also be used to store a phone charger. For each room you can choose your own box design style.
Option for decorating boxes for the kitchen:
It is also useful to read: Comfort in the home with the help of Provence style
Artistic decoupage
This method is suitable for more experienced craftsmen. The essence of this method is to blur the outlines of the picture and the boundaries between neighboring motifs, as well as between the image itself and the background.
An object or furniture decorated in this way can easily be classified as a work of art.
DIY decor of cardboard boxes for storing things
Decoration will be one of the most creative stages of design. In this case, different raw materials and techniques are used. The main thing here is the presence of experience and imagination. There are several options for designing boxes for things. This includes the decoupage technique.
You will need to prepare:
- base;
- adhesive;
- washcloth and brush;
- paints, which can be acrylic or oil;
- scissors and napkins.
Initially, you need to sand the box, then apply paint to it and cut out pictures. The drawing is applied to the plane, after which its location is marked using a pencil. Paint is smeared along the remaining edge; it is worth considering that the image cannot be touched. You need to give it time to dry and glue the image. Next, the background material is used, which is placed on the box and lid. At the same time, there should be no bends.
On the piece of paper there is a box, which is outlined using a pencil. The base is folded inward, taking into account the bend, and excess paper is cut off. You need to paste over the bottom, inside and sides, decorate using beads and rhinestones.
Decoupage with rice paper
This paper, as the name suggests, is based on rice fibers - this gives it high strength and low density. Ideal for decoupage.
An image is applied to the front side of the rice paper, and the back side is roughened for better adhesion. Using decoupage varnish, the design is transferred to a previously sanded and primed surface.
You can buy rice paper for decoupage in stores that sell hobby and creative goods. It comes in different densities and sizes.
Gift box decor
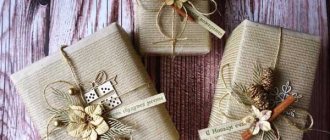
Depending on the size of the gift, you can adapt the size of the box to fit it. The master selects the design depending on the reason for which the box is being created. An ordinary shoe box will do as a base. Here are some examples of packaging creation:
Heart shaped box
To do this, you will need to prepare a template and white paper, scissors, pencil, and glue gun. You will need to print the template on white paper and cut it out and fold it along the line. Take a narrow part and make a cut along the line, which is reflected in the form of an arrow. The templates are cut out on thick paper and cut out, you need to make a couple of hearts and two stripes.
When using scissors, follow the fold lines so as not to cut through. On long parts, many vertical cuts are made, and they are only brought to the fold. Wide parts are glued to the smaller heart so that the cut is on the other side. To make the lid, you will also need to make cuts, only on narrow elements.
They are designed vertically. These elements need to be glued to another heart. At the same time, you need to take into account that the cuts remain on the inside. Next, the box is covered with the resulting lid. The finished version of the box can be used as a gift for Valentine's Day.
Rectangular box
You need to use thick paper, a ruler and compass, a bow, scissors and a pencil. You will also need an adhesive. A pair of circles with a diameter of five centimeters are depicted on paper. Then, with a similar step of the compass, six marks are made on the circle at an equal distance from each other. All marks are connected to each other inside the circle.
You will need to draw lines outside each corner; in one circle they are four centimeters long, in the second they are two centimeters long. Next, the lines are connected to form rectangles. On the right side, draw a small part with a beveled top. Next, the craftsman needs to cut out the resulting parts along the lines; when using scissors, the inside of the circle and parts with a beveled top are outlined.
All figures are bent along the marked lines and glued together, a lid is put on the box and decorated with a bow. It is important to note that for each fake you need to make a lid in three-dimensional form so that it looks original in appearance.
Square box
To design, you will need to use scissors and sheets of thick paper, a ruler and pencil, as well as adhesive and bows. A square is cut out of paper, measuring twenty by twenty centimeters. It depicts vertical lines, as well as a couple of horizontal ones. To do this, step back five centimeters from each edge.
A square should form in the middle. When using scissors, the master makes grooves by running the scissors along the intended lines. However, you cannot cut the paper. The fold is made along the recesses. Next, the paper is cut along short lines and the resulting elements are folded and glued together. To make the lid, you will need to cut a square, the side of which is sixteen centimeters. It depicts a pair of vertical and horizontal lines.
You should retreat about 3 centimeters from the edge. Then they are cut and bent, gluing is done in the same way as described above. The box is covered with a lid and decorated using a bow. Also, instead of a simple lid, you can use a couple of triangles that will fit completely onto the box.
You can also make a pyramid-shaped box. To do this, use a thick sheet of paper, a ruler and scissors, and a pencil. In addition, you will need to use a hole punch and a disk, ribbon or yarn. In the latter case, the element can be replaced with a plate.
A square is cut out of paper, then using 4 lines it is divided into nine parts. You need to make marks in the central part of all sides of the large square. Triangles are depicted inside. A plate is applied to the sides of the triangle and traced. Next, a figure is cut out along the marked lines. The result is a shape similar to a flower.
It needs to be bent along the lines and form a pyramid. Then holes are made in the upper part, where the ribbon is threaded and tied.
It’s also useful to read: Making a large clock on the wall with your own hands
How to make a small mini gift box from paper: template, pattern
Scheme for work
Gift box
Ready box
Template No. 1
Template No. 2
If you are planning to give a loved one a small gift, then you can make a small box for such a gift. It is best to make a similar craft, like the previous one, from thick paper. If you make it out of thin material, then there is a possibility that it will not hold the desired shape, or it will simply tear due to the mechanical impact that the gift will have on its walls.
Yes, and in this case it is extremely important to take the most responsible approach to fastening all the side parts. Since these crafts do not have secret locks, it will be better if you fix everything with glue or double-sided tape. If the first box seems too simple to you, then below we have placed two more quite interesting templates, by printing which you can easily make some pretty cute crafts.
What materials are used for decoration
To prepare the product in question, you first need to prepare a work area. Several criteria will need to be taken into account. Initially, they think about what the future box will look like, select materials and remove everything unnecessary from the table.
To fill a box with something, you need to take into account multiple factors, including the person’s lifestyle and hobbies, who the item is intended for, and design elements.
Lay out on the work surface:
- scissors;
- adhesive;
- pins;
- textile;
- pencil;
- scotch;
- paper;
- decorative elements, for example, rhinestones, beads, etc.
Depending on the external design, you can immediately find out what is inside the box. To give visual effects, you need to use fabric, and it can be new or be scraps of clothing, wallpaper or jute, burlap.
Preparation of the working surface. Basics
There are several points to remember when preparing for the decoupage process.
If you apply adhesive and coloring compounds to different surfaces, they will behave differently: on metal and glass surfaces they are weakly held and flow off, wooden surfaces have a fibrous structure, and cardboard surfaces quickly get wet.
What methods are used
In this case, you can use different techniques. In particular, the design of the box can be carried out using a method associated with printing on cardboard. This method is one of the most relevant.
Depending on what kind of seal is used, there are varieties:
- flexo printing - in this case the image is transferred directly to cardboard;
- laminating - cardboard is covered with paper on which a design is applied;
- varnishing and embossing.
The next method involves using fabric. Currently, it is quite popular to store items in a box, which is covered with fabric on top. This product looks original. This element fits perfectly into the interior, allowing you to increase its coziness and comfort. The fabric can be used both to cover the box and to decorate the lid. The fabric can be applied both from the inside and from the outside.
The scrapbooking technique is the art of designing postcards with elements in three-dimensional form. This method is used to decorate a gift box or casket. The master has the opportunity to show his imagination, because there are no restrictions or a unified design methodology.
This method fits perfectly into the manufacture of such elements for decorating a box:
- ribbons;
- pom-poms;
- voluminous objects;
- beads or beads.
A box decorated with your own hands becomes an expensive gift, an effective decoration, and reliable storage for things and household items. At home, you can decorate the box using different techniques. These items are prepared with your own hands. For example, it will also be possible to paint the product using the stencil method.
For this purpose, a surface of a single color is used. Initially, the master prepares materials, including acrylic paints, which can also be replaced with gouache, sheets of thick cardboard, a sponge and a brush. A design, or rather its silhouette, is cut out of a sheet of cardboard; it is permissible to paint the background of the box with a different paint. Next, the stencil is pressed tightly against the box and, using a sponge with paint, is soaked.
For decoration purposes, you can use a cookie box. It can be decorated with pictures cut out from magazines. Initially, you will need to select magazines and other publications with suitable pictures. For gluing, glue is used, for example, PVA. It is best to fill the entire surface in this way.
Decoration is done by using egg shells. This technique is quite effective, has some positive aspects, including saving time and giving amazing results. You should prepare a lot of shells, brushes and paint, manicure sticks, glue.
The shell is applied in the form of a mosaic to the surface of the box. The stick is used for leveling. The material is covered with another layer of glue on top.
Useful jewelry box
Having prepared the box of the required size, you need to coat it with a primer and paint it in the main color. It’s better not to paint with a brush, but to blot it with a sponge, so the surface will become more impressive. Then you need to take the eggshell, wash it with soap, remove the film and dry it. Then glue small pieces of it onto the surface of the box coated with PVA glue. Also coat the top with glue.
Then apply fragments of napkins to the surface and cover with several layers of varnish. It will be beautiful if the inside of the box is upholstered with knitwear. You will get a stylish jewelry box. This box with soft walls inside can also be used to store Christmas tree decorations. It can also be given as a New Year's gift along with toys to please friends or colleagues.
Features of the decor of New Year's packaging
One of the special features is that when designing, the craftsman takes into account who the box is intended for. If these are children, then they choose images of cartoon characters and colorful pictures. For adults, a more strict, but at the same time festive design is used.
It also takes into account what year is coming, often an animal is depicted on the box, which symbolizes the coming period.
Tips for beginners in needlework
There are a number of tips that it is recommended to listen to when decoupaging boxes with napkins.
For children's rooms, it is recommended to use napkins of cute animals, beautiful flowers or favorite superheroes.
Men prefer designs with pictures of weapons or cars. You can make a beautiful box for a birthday gift.
To please your grandmother, you can make a box with images of family photos.
Drawings with fruit and vegetable still lifes, aromatic herbs, etc. are perfect for the kitchen. To store sewing accessories, use tin boxes with appropriate patterns (for example, fabrics, threads).
Regardless of the chosen design, a box made using decoupage technique will look original and stylish. It can become either a decoration for your home or a gift for loved ones.
Master class - decorating a box with fabric with your own hands
To decorate the box when using fabric, you can use any type of material, including from guipure to satin. Despite what will be put in the box, the person who receives the gift in this design will be impressed. Handmade shows that the craftsman values the recipient of the gift.
The following stages of work can be distinguished:
- the size is initially adjusted, taking into account a couple of centimeters of allowance;
- elements are attached using transparent glue or tape;
- decorative items are applied, for example, beads;
- the lid is trimmed, the fabric is attached in the same way.
Photo of the process of decorating the box with your own hands:
Thus, decorating boxes requires the existence of different techniques. Boxes can be used to decorate a gift or as a decorative element.
Standard method
This decoupage technique is very simple and can be performed even by a child. No special skills are required here. The materials used in the work can be found in every home.
A suitable image (printed picture, paper napkin) is glued to the treated surface with glue or decoupage varnish. But if this is not the case, you can use raw chicken egg white as glue.
It is important to know: the surface must be pre-treated - sanded and primed. To do this, you need to go over it with fine-grained sandpaper. The picture will stick better to a rough surface.
Use acrylic paint for priming. If you use a paper napkin to apply a design, you only need to glue the top layer of the napkin, which is colored, that is, you need to delaminate the napkin.
We recommend reading:
How to make a scrapbooking box for a gift?
Template No. 1
Box of squares
If you want to really surprise your loved one, then make a scrapbooking box for him. To make it, you will need both regular cardboard and special paper for scrapbooking. You will make a durable frame from cardboard, and use paper to give it a festive look. The best part is that in this case you will have a huge field for imagination. Since this box is supposed to be untied, you can decorate it both inside and outside.
Moreover, if you wish, you can even provide places for small gifts in those parts of the craft that will recline. For example, you can make places there for notes in which you write the nicest words. But keep in mind that in order for the congratulatory notes to fit well into the overall style of the gift box, they must be in the same color scheme as it.
How to make a gift box with wishes?
Master class on making a pyramid
Tips for making a pyramid
If you want your gift box to be both packaging and a greeting card, then make it in the shape of a pyramid. In the photo above you can see templates that can be used to make a small pyramid. But if you try to enlarge the scale of the drawing, you will eventually be able to make a pyramid on which you can place wishes.
Remember, in order for such a surprise to look interesting, the scale of the picture must be increased at least twice. Only in this case will you have the opportunity to make pockets on the outside of the product, in which you can later put cute notes. Yes, and remember, these pockets do not have to be made of paper; you can quite easily use, for example, lace for this. Just when you attach them, use a stapler instead of glue.
How to make a box for a women's gift on March 8?
Template #1
Template No. 2
Template No. 3
It just so happened, but for some reason most women associate March 8 with delicate branches of mimosa and scarlet tulips. That is why when making a box for this holiday, you must remember that there must be flowers on its outside. Whether they are drawn or made using appliqué is up to you to decide. The main thing is that your packaging shows with all its appearance that spring is coming very soon.
If you don't want to spend extra time decorating the box, then invest in scrapbooking paper. If you are ready to work a little, then you can download some interesting template on the Internet, make flowers using it and cover the finished box with floral applique. Also, if you wish, you can simply paint it beautifully.
How to make a transparent gift box?
Rectangular gift box
Tall gift box
Triangular gift box
Above, we have already shown you how to make a gift box from cardboard and plain paper, and now you will learn how to make a very cute transparent package. The best part is that you don’t have to buy material to make such a craft.
Since it is made from an ordinary plastic bottle, you only have to buy ribbons and gobbets for decoration. So, take a transparent plastic bottle and cut off the neck and bottom from it. As a result, you should be left with a perfect cylinder in your hands. Then take your scissors and carefully cut it exactly as shown in the picture.
After you're done with this, start bending the material so that you can clearly see all the edges of the future craft. If you can't do this with your hands, then use scissors for this. As soon as you realize that the plastic has become more obedient, you can safely assemble the box. For security, tie it with a satin ribbon.
How to make an origami gift box?
Step #1
Step #2
Step No. 3
Recently, the origami technique has become so popular that even gift boxes have been made with its help. In principle, you can make such a craft from any colored paper, but since you are still making a product for an important holiday, it will be better if you spend money on scrapbooking paper.
In this case, you will not need additional decoration of the inside of the product, as you will immediately make it as it should be. The only thing you have to take into account is that to create a box, the master class for which is posted above, you need to use two square sheets, one of which will be literally 11-12 millimeters smaller. If you do not take this nuance into account, then in the end you simply will not be able to combine the two parts into one craft.
How to make a gift box for lovers on February 14?
Box for February 14
Template No. 1
Template No. 2
Template No. 3
Many people think that making a heart-shaped box is very difficult. In fact, such a product is made according to the same principle as all other packaging. All that will be required of you in this case is simply to find the correct template and use it to glue the box together. We decided to make the task easier for you and therefore offer you a choice of several interesting ideas for gift boxes for February 14th.
If you decide to make the largest and most voluminous one, remember that in this case you will also have to make a product consisting of two parts. One part will act as the gift box itself, and the other will be the lid. Therefore, when cutting out the frame of a future craft, be sure to double-check whether one of the parts is slightly larger in size.
As in the case of a rectangular product, this is necessary so that in the end you can easily put the upper part on the lower part. As for the color of the box, it doesn't have to be red, if you want you can make the heart pink, raspberry or even purple and white.
How to make a wedding gift box?
Template #1
Template No. 2
Template No. 3
Template No. 4
Template No. 5
It’s probably not even worth mentioning that a wedding gift box should be special. And the point here is not in the shape of the product, but in its decor. Therefore, feel free to choose the template according to which you would like to make such a craft, and then begin to think about what the finishing of the finished product will be like.
I would like to say right away that in order for you to end up with something truly festive, the decor should be multi-layered. That is, you can create volume using flowers, leaves or hearts glued to each other and complement all this beauty with elegant curls made of rhinestones and sequins.
It is best for beginning needlewomen to opt for square and rectangular crafts. Such products are not only made faster, but also easier to decorate. Since you will actually have a canvas in front of you, you can first lay out the future picture from the elements, see how all the details will look together, and only after that start fixing them.
How to make a box for a men's gift on February 23?
Template No. 1
Template No. 2
Template No. 3
If there are real men in your family, then you simply must make February 23 a special day. The right gift wrapping will help you create a festive atmosphere. In principle, it can be done quite simply. You can make a box according to any template or master class that we introduced you to, only taking into account the fact that you are preparing a gift for a representative of the stronger sex.
That is, in this case it is best to forget about flowers, curls and all sorts of feminine things. It will be better if you make a gift box from paper with a camouflage print, or simply paint the finished product in different shades of green and brown. If you want to pack a present for an older man in this way, you can try decorating the box with a red star or any other attributes of the Soviet era.
You can also draw it, or print out the template and use the resulting blanks to make the desired applique. Well, if you are a lover of everything new, then try making a box in the shape of a men’s shirt. You can see how to do it in the picture, which is located a little higher.
How to make a gift box for sweets?
Recommendations for making a box
Simple box for sweets
A simple box for sweets
In principle, a box for sweets can be anything. You can, for example, make a cake from boxes that imitate pieces of dessert (we described how to do this in the previous paragraph of our article) or make something simpler, for example, a round or rectangular box. Therefore, choose which shape you like and start making your holiday craft. If you don’t like such products, then try making boxes using the templates located a little higher.
But I would like to say right away that no matter what you choose, you need to pay special attention to the material from which you will make your craft. In this case, it is strictly forbidden to use thin standard paper as it is unlikely to be able to withstand the weight of the sweets. Therefore, it will be better if you spend money and find the most dense cardboard in a specialized store that will not require additional reinforcement.
How to make a gift box with a lid?
Recommendations for making a round box
A gift box with a lid is an ideal packaging for heavier and heavier gifts. If you make it a little larger than shown in the master class, you can supplement the main gift with sweets, boutonnieres made of fresh flowers and cards made by yourself. As you probably already understood, it is best to make such a box from thick cardboard.
If you have the opportunity, purchase it at a specialty store, or go to the nearest supermarket and pick up any paper box there. When you bring it home, lay it out horizontally and place it under something heavy. Leave it in this position for literally an hour, and then proceed to drawing the frame of the future craft. This little trick will help you smooth out any kinks that would probably get in your way when creating your masterpiece.
How to make a birthday gift box?
Template for making a cake
Template #1
Template No. 2
Template No. 3
Birthdays are one of those holidays that everyone looks forward to. It makes no difference how old the hero of the occasion is; on this day he still wants to feel most loved and dear. And what else can take us back to childhood and give us wonderful memories if not a gift packed in a box simulating a birthday cake. It’s easy to make such a craft, the main thing is to show a little patience.
Above you can see a template that you can use to make one piece of cake. If you see that in the end the gift wrap will be smaller in size than you need, then increase the scale to the desired size, just making sure that all proportions are respected in the process. Then make the required number of pieces, fold them into a circle and measure the diameter of the resulting figure.
But based on the data obtained, cut out a round stand on which you will place all the workpieces. If you wish, you can cover its edge with openwork snowflakes or lace. When the stand is ready, fill all the boxes with presents, form them into a cake and secure everything with a satin ribbon.

