The Pax cabinet from IKEA is one of the most convenient cabinets to place in a small room or hallway, as it does not require much space. Pax is able to accommodate many different things, from shoes to clothes that need a hanger. At the same time, it is not capable of spoiling the interior, since it is made in classic colors that match virtually any color scheme.
Wardrobe Pax Ikea
However, assembling Pax without instructions is not so easy, and there are a lot of cases when instructions are missing. For example, a cabinet was purchased through Avito, but the previous owner lost the instructions somewhere and can only explain the cabinet’s structure in words. Unfortunately, under such conditions, it is no longer possible to call an installer from an IKEA company store, and you will have to rely only on your own strength.
Cabinet interior
Creating an ergonomic space using the IKEA Designer program
You need to start repairs with a clearly and competently drawn up drawing.
It depends on him how comfortable and convenient it will be to use the new kitchen. Thanks to the design project, you can decide in advance on the arrangement of furniture, placement of lighting fixtures, sockets, switches, household appliances, partitions, niches, boxes, etc. You can entrust all this work to a professional or do it yourself, drawing by hand. But it is much easier and faster to use a computer program, for example, IKEA Kitchen Planner, which will not only clearly show the plan of the future kitchen, but will also allow you to select the necessary materials for finishing, furniture colors and decor. Special design programs allow you to create kitchen plans with all the necessary dimensions and selection of materials. Thanks to its user-friendly interface, even a non-professional can master the IKEA Planner. But before you start working on a sketch, you need to take measurements and decide for yourself the main points of interior design.
What is a wardrobe designer
An online wardrobe room planner is a program that makes it possible to plan the interior of a future dressing room, recreate the environment in 3-D format and calculate the necessary materials. With its help, you can independently develop a design, arranging the furniture as needed for maximum comfort. The design result is printed and provided to the manufacturer to fulfill the furniture order.
Before sitting down at the computer and designing a dressing room, it is advisable to create an idea. This could be an option made on paper, in which the necessary little things will be taken into account: hangers for outerwear, shelves for underwear and small drawers for accessories. Proper planning of your wardrobe will help you create cleanliness and comfort in your home, organize things rationally and choose a good design.
Online planner features
Such programs primarily help by making the future design as predictable as possible. The likelihood of being disappointed in the finished solution will be very small. This is a great alternative to expensive professional design programs for those who want to save money.
In the IKEA planner you can:
- create a three-dimensional three-dimensional design of a METHOD kitchen online;
- plan a kitchen set from modules with different contents: with drawers, shelves, open fronts, pencil cases, etc.;
- experiment with styles, layout;
- completely furnish the kitchen, right down to the choice of accessories and lighting.
Some items are not for sale because... used only for decoration to “revive” the project (for example, indoor flowers);
- calculate the cost and receive a specification where the price of each product will be indicated;
- save the project on your device, print it and place an order immediately.
Peculiarities
Swedish IKEA sliding door systems have their own distinctive features:
It is possible to assemble the door yourself from separate double door frames with guides and a set of different panels made of different materials in several color variations. To diversify the design, you can combine 2 sets of panels in one door system: make a different design for each leaf, or arrange the panels in a checkerboard pattern.
Frames with PAX guides for IKEA sliding doors are available in three color options:
They are made of aluminum.
IKEA systems and series
IKEA kitchen furniture is produced in series. Each series provides modular assembly. You can easily find the desired design and suitable fittings by looking at it.
The series are also grouped according to style: modern and classic.
The most popular classic options: Budbin, Sevedal, Hitarp, Laksarbi.
Budbin - new models for creating elegant classic interiors.
Sevedal kitchens are ideal for arranging a small kitchen, as they have laconic modules.
Among the modern ones, Brokhult, Weddinge, Ringult, Tingsrid, Fledi and others are in demand.
The Ringult series headsets are more suitable for big fans of minimalism.
Until 2015, IKEA produced frame kitchens - Faktum. Now only modular systems Method are available for sale. They have standard sizes, are more versatile and easy to install.
The Method system has two height options - 60 and 80 cm. The modules can also be installed on different legs.
We prepare the cabinet parts for standing connection:
1. We install the screw cylinders on vertical panels, glue thin felt rollers to the bottom of the same panels (safe movement of the floor structure), and remove the baseboard along the length of the cabinet to attach it to the wall.
2. Insert cams and plugs into the horizontal shelves.
3. Insert the plugs into the front plinth and install the leveling feet on the bottom shelf.
4. Prepare the back wall of the cabinet, drill holes for nails with a 1-1.5 mm drill, 5 mm from the edge.
5. Hold the panel vertically and insert the base.
6. Insert the bottom shelf, close the locks
7. Insert the top shelf holding the structure and close the locks.
8. Attach the second vertical panel. The wood dowels and rods on the panel should fit into their holes on the shelf.
9. Carefully place on the back wall and nail the vertical panel and bottom of the cabinet (Ikea has several sets of pieces for the back wall of large cabinets, 4 small ones or 2 pieces of fiberboard).
10. Nailing. The hardest stage is over. The article is ready. Pax furniture frames are attached to furniture straps.
11. It is recommended to drill out an Ikeevsky cabinet with heavy doors to the wall. The cabinet frame must be level! Distortion of the geometry of furniture when attaching it to the wall is not allowed!
Also according to Ikea instructions for assembling a Pax cabinet.
Frame dimensions in PAX
Although IKEA claims that this wardrobe system allows you to build a closet for almost any room, the PAX's size and capabilities are still limited.
In the catalog you can choose only 2 types of height and 2 depths:
- Height: 201 or 236 cm;
- Depth: 35 or 58 cm.
Narrow cabinet 35 cm deep
Full size, frame depth 68 cm
The width is also not so simple. There are three standards in total:
I wanted to install PAX not only in the room, but also in the hallway for coats. But precisely because of the width, we had to look for other options for arranging the corridor.
Corner
The PAX system allows you to assemble a corner or U-shaped wardrobe option. To do this you need to purchase a special module.
Unfortunately, IKEA does not yet have beveled frame options. And, in my opinion, it looks more beautiful at a right angle. However, a corner cabinet with a trapezoidal shape may be more convenient to use.
Doors: hinged and sliding
Sliding ones save space, but from personal experience I can say that dressing with such a wardrobe is inconvenient: while one half is open, access to the other is closed.
But in a small apartment or in a narrow corridor, there are no other options except compartment doors.
But among the swing design options there are more of them.
Internal filling
A special joy is the internal layout and storage organization. For this I am ready to endlessly praise IKEA.
Everything is thought out to the smallest detail:
- shelves can be installed at any height convenient for you;
- built-in lighting (to get dressed normally, you don’t have to turn on the lights in the whole room and wake up the family, this is superhuman in relation to the husband sleeping in the room, who got up for work an hour or two later);
- clothes rails (fixed and retractable);
- retractable trouser hanger,
- pull-out shelves for shoes;
- removable baskets;
- boxes, hanging bags;
- drawers and drawers;
- and many many others.
This is a paradise for lovers of order and functionality!
Open wardrobes PAX
A large dressing room is every woman's dream. And with IKEA's open storage system, you can get closer to your dream by placing a mini version of it, for example, in your closet. Or under the stairs.
And if the size of the bedroom allows, you can build a partition from plasterboard, arranging the space behind it.
Placing an order
Two days later I received a letter with the detailed composition of my kitchen and prices. After printing this document, I could have gone straight to the checkout counter at IKEA and paid for my purchase, but I decided to make a few changes to the project, so I looked in the kitchen department at the store the day I placed my order. I arrived on a weekday afternoon and was only second in line. My project was checked again, all the parts needed for installation were added, and it was printed for payment. Be sure to review the product listing for errors. Something can be optimized: seeing that the decorative overlay panels made my pencil case twice as expensive, I changed the color of the case to black and did without panels at all. If it later turns out that your order contains extra parts, you can return them without any problems.
Preparation
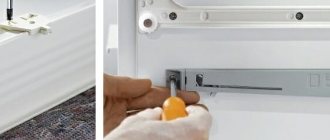
So, the disassembled wardrobe is already in the apartment. Check the package to see if all parts of the future furniture are in place. In particular, you need to check the number of connecting elements:
- There should be one screw for each hole in the frame or door.
- All double holes must have a corner.
- There must be at least four legs.
- It is necessary to check the presence of metal pins and “hats” on them (they are necessary for attaching the supporting structure).
- Also, to fasten the back wall you need nails; there can be from 15 to 30 of them. If you don’t have nails, you can buy them yourself, choosing short ones of medium thickness.
After all the components have been checked, you need to make sure that you have all the necessary tools at hand: screwdrivers, a hammer and components. Please note that if the assembly is vertical, a stepladder is required.
Assembly instructions
Homestyler
Homestyler helps you create your dream home or apartment, from the first sketch to detailed drawings, and decorate it with a real selection of products. Create a plan, choose the best furniture from a list of 200 brands, and at the end take a virtual tour of the rooms and enjoy the result. The model can be viewed from all sides and you can even turn the lights on and off to fully feel the atmosphere in the interior.
In addition to the online planner, Homestyle also has a free mobile app. Just upload a photo of the interior there and start creating. On the downside, it’s unlikely that a beginner will understand this planner right away. The interface language is English, which complicates the process even more.
Assembling the Pax wardrobe in a vertical position. Assembling an Ikea cabinet.
Each assembled product is accompanied by fairly clear step-by-step instructions. The manufacturer approached the problem quite seriously - safety measures were observed when the buyer himself created a large item. The manufacturer’s diagram indicates the required number of people performing the assembly, the mandatory fastening of large-sized furniture to the wall, the area or size of the space required to assemble the structure.
But our internal room dimensions do not always meet European standards; the lack of an assistant and many other unforeseen circumstances will not prevent us from creating our own interior.
Let's consider a fairly common problem of low ceilings. For example: let's take the Pax modular wardrobe system - a beautiful and reliable design; cabinets with a height of 236.4 and a depth of 58.0 are in greatest demand. The instructions give recommendations that installing furniture in a house is possible with a ceiling height of at least 250 and two mechanics are required; the cabinet frames are assembled horizontally.
It is also possible to install the Ikeevsky Pax cabinet in a vertical position (we only give practical advice), with a ceiling height of at least 237 for a cabinet with hinged doors, 240 for a sliding wardrobe without recesses in both cases, and two people will perform this action. Our dimensions are indicated for the entire perimeter of the furniture, since the furniture consists of frames connected to each other, so the curvature of the floor and ceiling should be minimal.
We prepare the cabinet parts for standing connection:
1. We install the screw cylinders on vertical panels, glue thin felt rollers to the bottom of the same panels (safe movement of the floor structure), and remove the baseboard along the length of the cabinet to attach it to the wall.
2. Insert cams and plugs into the horizontal shelves.
3. Insert the plugs into the front plinth and install the leveling feet on the bottom shelf.
4. Prepare the back wall of the cabinet, drill holes for nails with a 1-1.5 mm drill, 5 mm from the edge.
5. Hold the panel vertically and insert the base.
6. Insert the bottom shelf, close the locks
7. Insert the top shelf holding the structure and close the locks.
8. Attach the second vertical panel. The wood dowels and rods on the panel should fit into their holes on the shelf.
9. Carefully place on the back wall and nail the vertical panel and bottom of the cabinet (Ikea has several sets of pieces for the back wall of large cabinets, 4 small ones or 2 pieces of fiberboard).
10. Nailing. The hardest stage is over. The article is ready. Pax furniture frames are attached to furniture straps.
11. It is recommended to drill out an Ikeevsky cabinet with heavy doors to the wall.
The cabinet frame must be level! Distortion of the geometry of furniture when attaching it to the wall is not allowed!
