Today, most consumers do not know how drawers move, how the fronts open and on what. But in fact, this is very interesting and this is exactly what we will tell you about in this article.
All of the above actions are carried out thanks to the fittings. One of the leaders in this market segment is the Dutch company IKEA, which mainly specializes in furniture production.
IKEA furniture fittings imply the presence of many auxiliary accessories and mechanisms that are widely used in both kitchen and room furniture. It is worth noting that the fittings (and in particular, sliding and lifting mechanisms, shelf holders and others) have not only a functional, but also a decorative purpose. However, let’s not get ahead of ourselves and consider all the furniture elements of this category in order.
It is worth noting that IKEA does not manufacture sliding mechanisms, hinges, closers and other spare parts, but purchases them from such a proven and reliable supplier as BLUM.
Furniture hinges
One of the main elements of furniture are hinges that allow you to fix the cabinet door and open it. Such fittings were first invented in Italy after World War II and had an opening angle of 90 degrees. However, over time, furniture hinges have changed significantly not only functionally, but also externally. Today, the main criteria by which furniture hinges differ from each other are:
- opening angle;
- installation depth;
- load level;
- the material from which they are made;
- installation method.
Furniture hinges used in IKEA furniture, depending on the model, have an opening angle ranging from 90 to 270 degrees, which are mounted either in a standard way (using fasteners) or in a quick way (implying the presence of a special strip with a latch). In the photo catalog below, you can view the most popular models of IKEA furniture hinges.
Large hinge for door
Large hinge for door
| Album | IKEA furniture hinges |
Small hinge for door
Small hinge for door
| Album | IKEA furniture hinges |
Furniture hinge
Furniture hinge
| Album | IKEA furniture hinges |
Furniture hinge
Furniture hinge
| Album | IKEA furniture hinges |
Furniture hinge
Furniture hinge
| Album | IKEA furniture hinges |
Furniture hinge
Furniture hinge
| Album | IKEA furniture hinges |
Hinge installation
Installation of a 26mm hinge begins with assembly. There are quite a lot of types of accessories. The most popular are overhead fasteners. They are attached directly to the body.
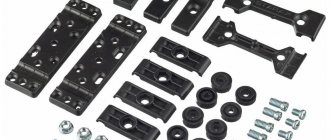
The hinge structure consists of a cup, a mounting plate and an arm. The cup is attached to the door, and the bar is attached to the cabinet. The shoulder acts as a connecting element between the bar and the cup.
Required materials and tools for installation:
- Screwdriver or electric drill;
- Level to adjust the correct position;
- Roulette;
- Marker, screwdriver, screws;
- Milling cutter.
Marking
In order for the fittings to last a long time, it is important that marking and installation are carried out with maximum precision. If mistakes are made at the marking stage, the doors will have serious flaws, distortions, cracks and other defects.
Mark the holes for the hinges. You need to make an indent of 7-12 cm from the edge of the facade. The number of hinges per door may vary. But between the fasteners it is necessary to maintain a distance of 50 cm. The number of hinges depends on the size of the doors.
You need to make an indent of 2.1-2.2 cm from the side part. The fittings should not be located where the shelves are installed. Taking into account all the features, it marks the optimal location for attaching the hinges. It is marked with a small notch using a self-tapping screw.
Cup cutout
Compliance with the installation sequence is the key to durable and reliable fastening. After marking, you should make holes for a furniture hinge with a cup diameter of 26 mm. A drill is used for this. Some people find it more convenient to use a screwdriver. Doors must be placed on a hard and level surface. Drilling is carried out in accordance with the previously made markings.
Cup Cutout Features:
- The optimal depth for holes is 1.1-1.2 cm. A deeper insertion leads to the formation of cracks.
- To avoid damaging the doors, you should use a sharp cutter.
- To eliminate damage, you need to hold the tool vertically, corresponding to the drilling axis.
- It is important not to rush while working, otherwise the hole will be made sloppily.
After making one hole, you need to move on to the next. Then you need to place the cups in the holes.
Fastening to the facade
Then install furniture hinges into the holes made. Using a level, their correct location is corrected, otherwise the door may skew. The fastening must fit tightly to the facade. After adjustments, make marks for the screws and screw the hinges to the facade. Then comes the most difficult stage - hanging the door.
Door installation sequence:
- Marking for loops;
- Installation of a platform for fixing fittings;
- Hanging the door;
- Connection of two hinge parts (on the door and cabinet body);
- Adjusting the correct position.
An extremely flat surface is required for hanging. The side of the cabinet where the strip is installed should be placed horizontally. It’s much more convenient to work this way. Adjustments can be made with the cabinet in a vertical position.
Retractable mechanisms
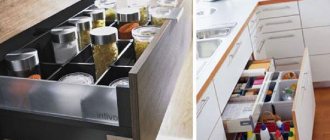
You simply cannot do without this type of IKEA furniture fittings. Using this element, smooth and silent opening/closing of kitchen drawers is ensured, which cannot but please housewives who spend a considerable amount of time preparing various dishes. Such mechanisms can be mounted both internally and externally.
Forvara drawer low
Forvara drawer low
| Album | IKEA pull-out mechanisms |
Forvara box medium
Forvara box medium
| Album | IKEA pull-out mechanisms |
Maksimera drawer low
Maksimera drawer low
| Album | IKEA pull-out mechanisms |
Maksimera drawer medium
Maksimera drawer medium
| Album | IKEA pull-out mechanisms |
Maximera high drawer
Maximera high drawer
| Album | IKEA pull-out mechanisms |
Wire basket
Wire basket
| Album | IKEA pull-out mechanisms |
Retractable internal elements
Retractable internal elements
| Album | IKEA pull-out mechanisms |
Hose holder
Hose holder
| Album | IKEA pull-out mechanisms |
A feature of modern fittings of this type from IKEA is that they are equipped with special shock absorbers that begin their work a few seconds before the drawer is completely closed and ensure its smooth closing.
It should also be noted that retractable mechanisms can be used in beds or sofas that have a drawer located at the bottom.
IKEA closers and dampers
Today, most consumers from around the world have already appreciated the benefits of using IKEA door closers in kitchen furniture. Such fittings allow you to slow down the speed of movement of the cabinet door when closing it, which prevents it from hitting the body and, accordingly, extends the life of the furniture. Also, such elements are often used on shoe cabinets and ensure their silent and smooth closing.
Door hinge stopper
Door hinge stopper
| Album | IKEA door stops |
Door hinge stopper
Door hinge stopper
| Album | IKEA door stops |
Often, in combination with closers, manufacturers install dampers, which can be either a regular rubber pad or a modern miracle mechanism.
On which drawer guides can door closers be installed?
It is unlikely that it will be possible to select and install closers on drawers with conventional roller or ball guides and a fiberboard bottom. Because the main options are designed for fastening with partial capture of the bottom. That is, the bottom must be rigid enough for fastening, and screwing in self-tapping screws in fiberboard is not the best idea.
You can get confused with reinforcing the fiberboard bottom to attach the door closer, but this option is more for “advanced” craftsmen who are already familiar with the operation of a particular mechanism.
You will have to be content with mortise shock absorbers (dampers), which will “dampen” the impact of the facade on the body. This is the most budget-friendly equipment option. It fits any type of drawer slide. In this case, the facade must be an invoice (cover the ends).
Installing dampers is easy. For small drawers, one shock absorber installed on the left or right side is sufficient. For wide ones, it is better to provide two, installing symmetrically on each side. This way the drawer will close more evenly, without distortion.
For internal facades, only overheads are used. They are screwed onto the inside of the cabinet, recessed to the thickness of the drawer front. Be careful in your choice: the damper capsule itself should not be larger than 12 mm - otherwise, when screwed into the area of movement of the box frame, it will interfere.
Other IKEA fittings
In addition to the above furniture accessories, IKEA offers its consumers the following types of fittings:
- silicone edges;
- guide systems;
- lifting mechanisms;
- front fittings.
You can find all these elements in the photo catalog presented on the manufacturer’s website. However, I still want to say a few words about each of them.
Silicone linings are installed around the perimeter of the drawers and prevent dust and grease from getting inside. Also, this type of IKEA fittings serves as a kind of shock absorber, preventing the destruction of furniture edges under various mechanical loads.
An equally important role is played by guide systems, which are used not only in kitchen furniture, but also ensure smooth and silent closing of drawers located at the bottom of a bed or sofa.
Also, this type of fittings, such as lifting mechanisms, is gaining increasing popularity among consumers. Thanks to such elements, the cabinet door can be opened upward and fixed at any point in the movement path.
As mentioned above, IKEA fittings are used not only to make furniture more functional and practical, but also to give it a unique design. The latter is ensured through the use of IKEA front fittings, which include door handles, legs (attached to the table and allowing the tabletop to be easily removed), linings on the facades, as well as other decorative elements that give the furniture a respectable appearance.
Assortment of closers for metabox drawers
For example, for the Metabox system, the manufacturer Blum offers additional Blumotion door closers. You can buy them at any time. Installing a closer on a drawer is quite simple: just remove the boxes themselves from the runners and secure the closers between the guides. Detailed instructions help to correctly install closers in a drawer, calculating all the necessary distances.
The principle of how to install Blum closers on a drawer is easier to understand from the video.
By the way, virtually any metabox can be equipped with closers . Overhead mechanisms with this function are offered by different manufacturers: Boyard, Amix, FGV, Blum and others. Some of them are quite interchangeable. The main thing is to carefully check the basic technical data before purchasing:
- The design of existing boxes,
- Depth, height of the side walls of the metabox
- The size of the gap between the side wall of the metabox and the body of the cabinet.
If all the calculations for your box coincide with the instructions for calculating the metabox parts of the selected system, then in 99% all additional accessories, including the door closer, will suit you perfectly. You can install the door closer on a drawer using the general diagram of the instructions. It is different for each mechanism and is included in the package. For example, for the SlowMotion Zeta door closer from FGV (Italy) it is like this.
A complete set of fittings (metaboxes + closer) for one drawer looks like this.
IMPORTANT! Since shock absorbers of this type are attached to the bottom of the metaboxes, it should be understood that they do not fit under the bottom drawer of a standard kitchen kitchen.
There is simply not enough space between the bottom of the drawer and the bottom of the cabinet itself to install them. Therefore, the box itself is twisted higher (with a corresponding twist of the facade).
Legs and supports for tables from IKEA
Adils table leg
Adils table leg
| Album | IKEA furniture legs |
Finvard Table support with shelf
Finvard Table support with shelf
| Album | IKEA furniture legs |
Geir Leg Support
Geir Leg Support
| Album | IKEA furniture legs |
Gerton Adjustable Leg
Gerton Adjustable Leg
| Album | IKEA furniture legs |
Hilver Conical leg
Hilver Conical leg
| Album | IKEA furniture legs |
Krille Leg on Wheeled Support
Krille Leg on Wheeled Support
| Album | IKEA furniture legs |
Lalle leg
Lalle leg
| Album | IKEA furniture legs |
Nipen table leg
Nipen table leg
| Album | IKEA furniture legs |
Shunne Leg
Shunne Leg
| Album | IKEA furniture legs |
