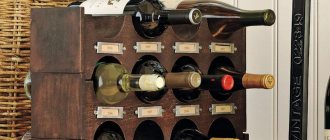
Not so long ago, shelves in rooms primarily served functional purposes and only to a small extent design purposes. The explanation for this phenomenon is simple - there was very little furniture, it was possible to buy an ordinary bedside table only through an acquaintance. There was nowhere to place household items, so wall shelves were used instead of shelves in closets.
There was a catastrophic lack of space for various trinkets; only the most experienced housewives managed to place a small number of beautiful objects on them. Another problem is the unsatisfactory appearance of the products; in those days, few manufacturers paid attention to such a trifle as appearance. It was necessary to fulfill the plan in terms of quantity, not quality.
Today the situation has changed dramatically; shelves are more decorative than functional. They are made from various materials and using the most modern technologies. Designers have developed a large selection of specific original solutions: shelves can be large or small, heavy or light, made of natural or artificial materials. Depending on the type, the issue of fasteners is also resolved.
DIY fasteners for shelves to the wall
Types of fasteners
The classification is made taking into account the location of fastening devices on the shelf.
Shelf fasteners differ not only in appearance, but also in location
Hidden
Due to hidden fixation, it is possible to save free space on the wall and fill it with other necessary elements. The hidden fastener is completely invisible, it is mounted on the back of the shelves, and can be installed on vertical or horizontal parts. There are hidden elements located inside the shelf frame; before installing them, it is necessary to carry out special preparatory work.
- Suspensions (hanging loops). Traditional fastening, used for shelves made of natural wood, OSB boards, plywood, chipboard, etc. Not suitable for glass, plastic and metal products. The hinges are fixed into specially made recesses, their dimensions do not protrude beyond the perimeter of the shelf, and after fastening they become invisible.
Concealed hangers
- Consoles (rods). A more modern type of shelf fixation, used for the same materials as hinged hinges. Secret holes are drilled in the shelf frame into which rods (consoles) are inserted. The fasteners are metal, the outer surfaces are covered with plastic, and in terms of strength and reliability it falls into the middle category. The fact is that as a result of drilling a hole, the thickness of the load-bearing element is reduced by two or more times, and this has a negative impact on mechanical stability.
Concealed fastener made of metal plate and rods
Concealed fastening with timber
Open
These elements are always noticeable; thanks to original engineering solutions, it is possible to redistribute the loads and increase the stability of the shelves. If in the above listed options for hidden fasteners, the loads act only on the dowel or console, and they are pulled out of the wall due to the moment of rotation, then the corners and brackets do not work that way. They remove most of the load from the dowels and transfer it to the wall due to the curved stop. The original design of the brackets becomes a real decoration of the interior; such fasteners can be used for all shelves without exception, including glass ones.
The brackets also perform a decorative function.
Briefly about the main thing
Plumbing fixtures are often secured by hanging them on walls.
The choice of fasteners is determined by the nature and condition of the base, the characteristics of the washbasin (material, size, load).
The equipment often comes with its own fasteners, but they are usually optimal for brickwork.
A lightweight sink can be secured to the base using dowel nails or bushings with a threaded rod onto which a plastic washer and a tightening washer are threaded.
A heavy vanity is secured using mounting brackets or brackets in addition to studs with anchors.
If the base is complex due to its condition, but the fixation needs to be carried out to the wall, then you can get out of the situation using a frame structure.
Ratings 0
Dependence of the mounting method on the wall material
The physical characteristics of building materials have a significant impact on the optimal technology for fastening shelves. Modern industry produces many options for fasteners for various types of partitions, the correct choice of which is an indispensable condition for ensuring stable fixation.
Table. Types of fasteners depending on the wall material.
| Wall material | Brief description of the features of shelf fixing technology |
Concrete, brick | These are the most durable materials that can withstand maximum loads. The shelves are fixed to concrete and brick with plastic dowels or metal anchors. |
Tree | In terms of strength, it ranks right after brick and concrete; such walls are suitable for hanging heavily loaded shelves. For fastening, ordinary nails or wood screws are used. The amount of work is minimal, reliability is guaranteed for many years of operation. |
Foam concrete | A modern building material with low thermal conductivity, used both for facade walls and internal partitions. Foam concrete has a porous structure and low mechanical strength. To hang shelves, you must use special plastic or chemical dowels. But even special fasteners cannot ensure reliable fixation; it is not recommended to heavily load the shelves. |
Drywall | Interior partitions are made from it or interior walls are lined. This material is respected by designers, but civil engineers have an extremely negative attitude towards it. The first ones really like the opportunity to create unique elements, the ease of work and the versatility of using the material. Engineers do not respect them due to their extremely low physical strength. Only decorative shelves with minimal weight can be hung on such slabs. Special dowels are used to attach hanging shelves. |
Shelves in a modern interior
In any house, if a person lives in it, there are always a lot of different jars, bottles, maybe books, souvenirs, photo frames and much more. And in order to keep order in the house, it is recommended to put each thing in its designated place. And often a wall shelf acts as such a place. It usually serves two functions - it is a convenient stand for something decorative or useful, and it can also be the highlight of a certain design.
Wall shelves in the interior
Depending on the room in which the shelf is installed, it can perform a very different role. So, in the kitchen there may be a set of spices on it or some elements of utensils. In the bathroom , a shelf is a must-have for arranging various bottles and bottles. A shelf is also needed in the bedroom , where you can place on it various things you need before going to bed. Of course, these interior elements are also in the living room - books, flowers, and souvenirs can be placed on them. Often they are able to significantly save space, as well as overcome clutter in the room, because from now on everything will be in its place. That is why this piece of furniture is absolutely irreplaceable, despite the fact that there may be many wardrobes or chests of drawers in the house.
Wall in the form of shelves
On a note! The shelf is appropriate and functional in absolutely any interior, regardless of its style. The main thing is to choose the right and suitable option and place it in a place where the shelf will look organic and as part of the interior.
Black and white shelf
Moreover, it is important to choose not only a shelf that suits the style, but also one that you will like and look aesthetically pleasing when hung. When creating certain styles, it is important that the fastenings on it are invisible. In general, there are several variations of fixing shelves on the wall.
Wood shelf
Step-by-step instructions for attaching a shelf to hinges
A traditional and reliable method of hanging shelves, it can be used on all types of walls, but with the above-mentioned weight restrictions.
Step 1. Determine the exact location of the shelf on the wall. For clarity, it is better to apply it and move it to different places, so you can choose the optimal placement.
Select the optimal shelf position
Step 2. Carefully mark the selected location on the wall. Do this with a thin ordinary pencil; using felt-tip pens is not recommended.
Mark the attachment points with a pencil
Practical advice. Place the marks so that they are not visible after attaching the shelf.
There are two ways to hide them:
- draw on the bottom or on the closed sides;
- during precise marking, raise the position of the shelf a few millimeters above the line, the horizontal elements of the product will cover it.
Step 3. Place the shelf on the table and accurately measure the distance between the hinge holes. This is a very important operation, make no mistake, measure only along the axis of symmetry of the element.
Measure the exact distance between the holes of the fastening loops
Step 4: Use a bubble level to mark the wall. Check all dimensions again.
Check the location of the level marks
Step 5: Start drilling holes. This must be done with a drill in hammer drill mode with a drill bit tipped. The diameter of the drill must match the diameter of the plastic part of the dowel.
Carefully drill holes in the wall
Practical advice. To reduce the amount of dust, it is recommended to secure a paper bag with tape near the hole. Place it as close to the drill as possible, due to this all the dust will fall into the bag and not onto the floor.
The depth of the hole should be 1–2 cm greater than the length of the dowel. The fact is that it is impossible to completely remove construction dust from it; it will not allow the plastic element of the dowel to be completely installed. Hammering it with great force is not recommended for two reasons. Firstly, with a high degree of probability he will still not sit down. Secondly, it is very difficult to get a deformed plastic element later. You have to increase the diameter of the hole, and then take special measures to reduce it.
The depth of the hole in the wall should always be slightly greater than the length of the dowel
Step 6. Insert the plastic parts of the dowels into the wall and screw the screws into them. Leave a gap between the cap of approximately 5 mm, it is necessary for the passage of the hinged loop.
Insert the dowel and screw in the self-tapping screw
All that remains is to hang the shelf in place and the work is completed. As mentioned above, this method is used for all types of shelves except glass.
Installation of shelves on corners
Pros and cons of wall installation
All flat-panel TV models come with stands for installation on a flat surface. They are made in the form of supports, secured with screws on the back of the panel body or inserted into special grooves. This is very convenient for those who are replacing old equipment with new ones: you don’t need to think about where to put the purchase, just screw the legs to it and install it in place of the old “box”.
But most owners of flat panels prefer to mount them to the wall, since this installation method provides many advantages, especially relevant for small spaces.
- Saving space - no need to take up space with a TV stand.
- Saving money - a standard hanging mechanism (bracket) costs less than the same cabinet.
- Convenience of using the TV due to placement at a comfortable height and anywhere in the room.
- Safety of operation - the absence of unnecessary furniture that you can trip over or hit, as well as hanging wires that are hidden in grooves, boxes or behind the panel itself.
On a note! Maximum comfort and safety of using the device is ensured by a pre-planned layout of equipment and power outlets.
The wall installation method also has its disadvantages. First of all, this is the inability to move equipment to another place without the need to mask holes in the wall left by fasteners. The second drawback is the lack of a horizontal plane for installing a game console, Wi-Fi receiver and other gadgets connected to the TV. For them, you will have to consider the possibility of mounting a shelf next to the TV.
How to install shelves with hidden mounts
This method appeared relatively recently and is used only for shelves made of thick and durable materials: natural wood, OSB boards, plywood, etc. The shelf is hung on metal pins fixed to the wall. You need to have a wood drill and a pobedit-tipped drill for drilling holes in the wall. Hanging is only possible on brick or concrete walls. Even hollow bricks create difficulties; in such cases, it is necessary to use chemical compounds to fix the elements in the voids. It is not recommended to fix it to foam concrete walls, and it is prohibited to fix it to plasterboard walls.
Step 1: Prepare your tools. You will need a hammer, open-end or adjustable wrench, drill with hammer drill mode and measuring tools.
You will need very few tools
Step 2. Mark the location of the holes on the shelf. In our example, the wall of the shelf is thick, glued together from two laminated OSB boards. Due to this, the strength and thickness of the product have significantly increased; a hidden fastener Ø 12 mm can be used. How to correctly mark drilling locations?
- But on a flat surface, place the shelf on its edge, with the side attached to the wall facing up.
- Using a construction square, draw lines perpendicular to the plane on both sides of the shelf. The distance from the edges is approximately 10 cm, specific values may vary slightly depending on the width of the shelf.
Draw perpendicular lines at the end of the shelf
- Make marks for the center of the hole with a slight offset from the gluing line. Keep in mind that the maximum load is on the top plane, if possible leave it wider.
- Place a level along the edge of the shelf and make marks along the edges of the shelf and on the front side. The second marks indicate the location of the holes.
Mark drilling points on the lines
Step 3. Choose a place to fix the shelf on the wall, always take into account the existing interior of the room and the characteristics of the objects placed on it. If these are flowers, then you need to monitor the lighting; for books, the amount of light does not matter. Using a pencil, very carefully place dots on the wall along the edges of the shelf. You can draw thin lines, but then when drilling holes, you need to lift the shelf a little and cover the marks.
Determine shelf location
Step 4. Place a level against the wall and find a horizontal position. Transfer the location of the mounting holes to the wall.
Using a level, mark drilling locations for fasteners
Important. Check the position several times, then correcting mistakes is very difficult.
If the actual location of the hole is very different from the required one, you will have to drill it again. At the same time, it is not so easy to properly seal an old hole; an experienced builder will always see a defect.
Step 5. Drill two holes in the shelf for the fastening rods. First find out their length, make the holes a little deeper. Be sure to keep the drill in a strictly vertical position. If it goes slightly at an angle, then it will be impossible to insert long rods into the bar. The greater the depth, the more the hole deviates to the side, and the rods are made of steel; they cannot be bent. This is a very unpleasant situation; you will need to move the holes in the wall and shelf, and start all the work over again.
Holes are drilled in the shelf strictly at right angles to the surface.
Step 6: Drill holes in the wall. The algorithm of work is the same.
Drilling holes in the wall
Practical advice. To reduce the amount of dust, you can use a household vacuum cleaner. Remove the nozzle and place the pipe as close as possible to the hole to be drilled. Turn on the drill only when the vacuum cleaner is running. It is inconvenient to hold a drill and a pipe at the same time on your own; you need to use the services of an assistant.
Step 7. Insert the fastener into the holes and tighten it tightly; if the elements do not fit in completely, then hammer into the end. When screwed, the plastic parts increase in diameter and provide a secure fit. You need to use keys; it is impossible to create the necessary torque with your hands.
Screwing rods into the wall
Step 8. Place the shelf on the pegs and check its position using a bubble level. If it is in a horizontal position - great, if not - correct the defect. The task is long, nervous and thankless. There are several practical tips on how to fix a marriage with minimal loss of time and nerve cells.
Secure the shelf and check its horizontalness
- Carefully inspect the position of the shelf, make a preliminary plan for eliminating the defect. Decide where it is better to make new holes: in the wall or shelf. Think about what this will give you and how it will affect the arrangement of elements.
- Choose the option that will not only correct the position of the shelf, but will also be least noticeable. Now there is no need to reckon with time, the main thing is that the new holes are hidden.
The situation can only be corrected by drilling new holes - in the wall or shelf
The final decision depends on the geometric appearance and size of the shelf, but most often it is necessary to drill new holes and shift the distance between them. Arrange them in such a way that the old ones are covered by the back elements of the shelf.
Old holes will have to be filled with putty and the shelf hung so as to hide the defect
Hidden installation is considered more labor-intensive, but the shelves look much more impressive. The main thing is to do everything with the utmost care so that no marks remain on the wall.
Wooden shelf with hidden fastening
Hidden fastening has two significant disadvantages: low strength and the likelihood of the shelf being pulled out by children or awkward movements. The first problem can be solved simply - increase the number of rods. And the second requires the use of special hanging technology. Which one?
How to hang modular paintings evenly
Modular paintings are narrative canvases made from several elements. Step-by-step algorithm for placing on the wall:
- Determine how the modules will be located relative to each other, reproduce the composition on the floor.
- Mark mounting locations on the wall. The optimal distance between parts of the canvas is 2-3 cm.
- Secure the products using Velcro, nails, bolts or any other convenient method.
Mounting a modular picture on the wall
Important! Some versions of modular fabrics are equipped with threads to connect elements. Take this into account when attaching.
Instead of canvases, you can place posters on the walls. We invite you to familiarize yourself with the ready-made diagrams of their location.
Original alternative shelf mounting
For hanging, you need to buy eccentric ties; they are often used for assembling furniture.
Eccentric installation diagram
Step 1. Mark the location of the eccentric couplers. The circles have standard sizes, the diameter of the elements is 15 mm, the length of the rod is 34 mm.
The locations of fasteners are marked on the shelf
Step 2. Using a Fortsner drill, drill out the seat. This tool makes a perfectly even technological hole, which allows you to fit the eccentric without side gaps and increase the strength of the connection.
Drill holes according to the markings
Important. Carefully control the depth, do not damage the front surface of the shelf.
A minimum of two elements are required per product. But in practice, this quantity is not enough; experienced furniture makers recommend increasing it to three or four.
Finished holes
Step 3. Make markings for drilling holes for the rod; they should be located in the center of the seats.
Mark the location of the rod with a pencil
Step 4. Drill holes, the axes of symmetry should be parallel to the side surfaces of the shelf. Insert the eccentrics into place; they will fit into the correct holes with a slight tension and will not fall out.
Insert eccentrics into the holes on the shelf
Step 5: Make marks on the wall. If the shelf has several horizontal parts placed at different levels, then this makes the process much more complicated. Taking all measurements using only a tape measure and a level is very time-consuming and difficult. In hardware stores there are special devices - pins, metal elements: one part is inserted and centered in the hole of the shelf, and the sharp end makes marks on the wall. Install them on the shelf, decide on the location of fixation and lightly hit the outer edges with a hammer to make marks on the wall. It is strongly recommended to use these devices in all cases where it becomes necessary to drill several perfectly coaxial holes in two adjacent planes. Their use virtually eliminates the possibility of error and saves a lot of time.
With the help of furniture tattoos it is convenient to make marks for holes on any surfaces
Step 6. Prepare holes in the wall and insert metal rods into them.
The rods are inserted into the holes in the wall
Step 7. Remove the marking cones (pins) from the shelf holes, insert the shelf and firmly tighten the eccentrics. If the shelf is large and there will be a lot of heavy objects on it, then the number of fixation points must be increased.
The shelf is firmly held, and the fasteners are completely invisible
Where to put the wires
A power cord running from the TV to the outlet and a dangling antenna cable not only spoil the interior - they create a dangerous situation. By accidentally pulling the wire or tripping over it, you can damage the connectors or even drop the equipment on the floor. And if there are small children and animals in the house, they are at risk of injury from electric shock.
To prevent this from happening, the wires must be hidden. Ideally, you should think about this during construction or renovation, immediately deciding on the location of the TV and placing the socket behind it. For the antenna cable, you can cut a channel in the wall or hide it behind plasterboard cladding.
If you bought a new TV when all the repair and finishing work has long been completed, use decorative methods to disguise the wires - lay them in cable channels, under moldings, in chrome tubes. The choice of “case” depends on the style of the interior.
Another way is to fix the wire on the wall in several places and disguise it as a tree or vine, attaching elements of artificial plants or decorative stickers to it and to the wall itself.
Another practical idea is to hang the TV on the opening facade of a homemade structure in the form of a niche with shelves.
Prices for cable channels
Cable channels
Video - Methods for masking wires
Fastening glass shelves
This is a separate type of furniture, has its own differences and requires completely different fasteners. The main disadvantage of glass is fragility. Fastening elements must provide reliable fixation and at the same time minimize the forces on the glass. We will not consider the design differences of glass shelves; they do not have any effect on the fastening technology; it is recommended to use the same fasteners for all.
The design of glass shelves does not affect the choice of fixtures
The fasteners must meet the general requirements - eliminate point loads. The glass is inserted into special horizontal slots in the brackets, the clamp is made with small bolts. The bolts themselves have sharp ends; with slight pressure the glass cracks. To prevent such phenomena, special elements are used.
- Plastic insert. The dimensions correspond to the parameters of the brackets, fits into the technological slot and is adjacent to the glass on both sides. The main task of the insert is to increase friction between glass and metal and increase the reliability of fastening the glass shelf.
There are plastic inserts inside the holders that protect the glass from damage.
- Metal plate. Placed between the bolt and the plastic insert, it evenly distributes the point load over the entire mounting area.
The metal plate takes the main load
The fastener is fixed to the wall under a level; the technology is no different from that described above. Plastic spacers are placed on the end of the glass, in this position the shelf is carefully inserted into the bracket installed on the wall.
Shelf holders are screwed to the wall with self-tapping screws
Important. During installation, the tightening bolts must be loosened. Unscrew them until the end is level with the plane of the fastener.
First, unscrew the tightening bolts on the brackets
Next, you need to lift the shelf up a little; a gap will appear at the bottom. This is where the metal plates are inserted and the bolts rest on them. While tightening, they lift the plate up and it presses against the plastic inserts. And they, in turn, clamp down on the glass shelf.
The holders are screwed to the wall, the glass is inserted and the fasteners are clamped.
This mount, by the way, has one unique advantage - you can change the position of the shelf, move it slightly left/right. To do this, you just need to loosen the clamping screws a little, install the shelf in a new place and tighten them again.
Video - Do-it-yourself fastening for shelves to the wall
Shelves on the walls are always needed at bar counters. They are used not only as one of the furniture attributes for glasses, tea or coffee. These are important elements of the decor of the bar area, emphasizing the individuality and design. You must be able to professionally and reliably hang them on interior partitions made of various building materials. How to make a bar stool with your own hands so that it fits harmoniously into an existing style? There is an excellent article on our website with detailed recommendations.
How to choose a fixation type?
This is not an easy task, since when choosing a method for attaching shelves, several factors must be taken into account. And they are the ones who will influence the final decision.
- The thickness of the wall itself on which the shelf is fixed. This is one of the main factors to consider when choosing a mounting option. The fact is that it is not always possible to use, for example, a hidden pin fastening. It is better to avoid it if the wall is made of soft materials such as plasterboard. The thickness of the partition should not be less than 10.5 cm if it is made of concrete, and less than 25 cm if it is made of brick. If the wall does not meet these parameters, then it is better to choose another fixation option. In relation to drywall, a shelf can be hung using a hidden fastener only if the wall thickness is at least 10 cm, and only light souvenirs and nothing heavy or giving a serious load will stand on the shelf.
Brackets for mounting shelves in the wall
- The thickness of the shelf itself and its weight also have a serious impact on the choice of fixation method. So, the shelf should not be too soft or damp. If you plan to place only light objects on it, then you can choose a shelf with a thickness of at least 3 cm, and if you plan to place heavy elements and possibly an increased load, then the shelf should have a thickness of at least 4.5 cm and no more than 6 cm.
Relationship between shelf depth and load on each mensolo holder
Important! You can choose the right mount only if you know the answers to the questions: “What will stand on the shelf?” and “Which wall will the product be fixed on?”, only then can you make the right choice.
It is also important to estimate the number of fasteners in advance. So, if the shelf is shorter than 1-1.5 m, then a couple of fasteners are enough. If the length is greater than the specified parameters, then it is better to increase the number of fasteners in order to evenly distribute the load on the product and the wall. Moreover, again, the number of fasteners can vary greatly depending on the thickness of the shelf itself and its quality.
The free space above the sofa is organically filled with shelves to match the walls
Loose sand walls of old houses. Fastening methods.
June
2017
19
The sands of time flow and with this flow everything around us turns into sand. Today we’ll talk about “sand walls” in old houses, in fact, of course, this is not a squeak, more often it is either “shingles” or experimental materials based on gypsum, asbestos or other silicate-containing materials mixed in various proportions with various fillers to reduce the cost construction. This approach was popular not only during the construction of “Khrushchev” buildings, alas, and now in our time we often see unjustified ways to save money, I’m talking about modern partitions made of gas and foam blocks, because primarily these materials are intended for insulating external walls, but some for some reason they consider foam and gas blocks to be suitable materials for the construction of partitions. But now we are not talking about modern methods of constructing partitions, but about modern life in the conditions of old Khrushchev walls and partitions. The best way out of the situation is to demolish such a partition and rebuild it from solid brick, but when there are no funds for repairs, and life goes on, then you have to proceed from the current realities. But the reality is that old walls don’t hold up, dowels fall out of them, shelves and cornices tilt and fall. How do you attach a curtain rod or TV bracket to a sandy wall where you can't be sure it won't drop your plasma or the curtain rod won't fall on a child clinging to the curtain?
