Installing hinges on the door is an important stage in the installation of the door leaf and frame. On the one hand, this process does not cause any problems, since it comes down to installing the hinges themselves and securing the door leaf, but on the other hand, it requires time, as well as patience and the availability of the tools necessary for installation. Before you install door hinges yourself, think about whether you can achieve high quality work. It is on the correct installation of hinges and doors on them that their further operation largely depends.
Installation of door hinges on the leaf
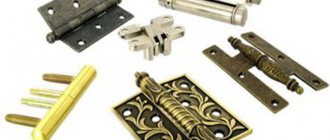
Types of door hinges
Features of the installation of certain loops will depend on their type. Hinges are classified according to structural features and fastening into three main types:
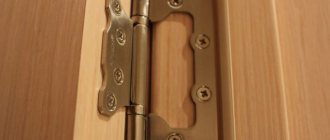
- Invoices. They consist of two identical parts fastened together. One part is fixed to the door frame, the other to the leaf. There are also universal loops that are a single unit. Installation of overhead hinges does not require special skills and is the simplest and most accessible to everyone.
Overhead type door hinges
Mortise. They are characterized by a more complex and time-consuming installation, which requires special equipment and skills to work with it. The complexity of installation is compensated by the wide distribution of mortise hinges, as well as their reliability and durability.
- Screw-in. They are fastened using threaded pins - they are screwed into the door leaf, thereby securely fastening to its surface. Usually installed in the amount of three pieces per door, they differ in the number of fastening pins.
Three types of screw-in hinges for doors
There are also hidden door hinges, which are highly complex to install, but guarantee excellent security and safety of your home.
Tips and possible difficulties
There is a variety of universal type hinges, which are supplied only in a one-piece version. This greatly complicates the installation of the canvas and an inexperienced installer may even need outside help.
If the markings on the door leaf were initially made incorrectly, this will lead to a change in the location of the canopies and, accordingly, damage to the door leaf. You should be especially careful when marking for mortise hinges. If they are inserted incorrectly, there will be no turning back.
Also remember that if you did not initially calculate the number of hinges and the weight of the door, the structure will quickly become loose and become unusable. On average, the weight of a door varies from 2.5 to 8 kg. Accordingly, both the type and number of canopies directly depend on this value. The maximum door height is 2.2 m and most often two hinges per structure are sufficient.
Preparing the necessary tools
The installation process is unthinkable without a set of certain materials, tools and equipment necessary for the job. So, before starting installation you should prepare:
- door hinges.
- screwdriver and set of screws.
- pencil (necessary for marking).
- a set of wooden wedges for leveling the structure.
- building level.
- hammer and chisel.
Once you have made sure that the work area has the tools and materials listed above, you can begin installing the door hinges.
How to evenly screw hinges to a cabinet door?
Installing fasteners on cabinet sides and doors is a complex process. The aesthetic appearance of the furniture, the balance of the doors, the correct opening and closing, the absence of cracks and distortions depend on the correct installation. The better the installation, the longer the item will last.
Before starting work, you need to prepare a set of tools and materials:
- pencil;
- screws and screwdriver;
- drill with pads;
- self-tapping screws;
- ruler.
The choice of fasteners depends on the material and thickness of the doors, the massiveness of the door leaf. For loose materials, fibrous materials or glass, special types of fastenings and fixing methods are used.
Usually 2 fastenings are needed. If the sash is very large and massive, then three or more hinges are used. An additional hinge is needed if the door weight exceeds 9 kg. In this case, for every 5 kg. One mount adds weight. Maximum quantity – 5 pieces.
Before installing the hinges, carefully check the product and determine the position of the shelves. Fit the doors to the sides. Making a sketch will help. This is necessary so that the fastener does not fall into the place of the shelf.
Make the markings with a sharp pencil or thin chalk. 10 cm or a little more depart from the upper and lower edges. Otherwise the door will become loose.
From the edge of the door to the center of the hinge, mark about 2.2 cm. This value is for standard fasteners.
Installation of fasteners:
- Drill holes for cups. It is better to do this by placing the part on a horizontal surface and fixing it. A hole depth of 1.2 cm is sufficient.
- Cups are inserted into the holes and screws are screwed into the door part. It is important that they fit straight in, otherwise the door will not be installed correctly.
- The strike plate on the side can also be installed in a vertical position by marking the location of the connections.
- The overhead parts are made “deaf”, otherwise they will creep apart during assembly. They should not have distortions or gaps.
- Connect the sash and side frame. In this case, it is better to use outside help for better installation.
When installing parts on glass doors, special care is required. For glass, special fasteners are used. Holes are drilled on the side of the cabinet. The glass is fixed using special clamps.
For cabinets made of chipboard, it is better to choose wide hinges, since the material of the product can crumble
During installation of the fasteners, their alignment is required. Any distortion will affect the normal operation and appearance of the cabinet.
After installing the fasteners, it is recommended to lubricate the hinges by dripping machine oil onto the mechanism. At first, opening/closing may be difficult until the hinges are developed. Over time, the sashes may sag, so they will need to be tightened.
Correct marking
Installing door hinges by eye is unacceptable - even a small error can lead to distortion and deformation of the door leaf and structure. Marking is done with a pencil as follows:
- Attach the hinges to the intended installation locations. Hinges should be placed with a minimum distance of 20 centimeters from the edges of the door (top and bottom).
- Trace the hinges attached to the door end with a pencil, then set them aside.
- Using a chisel and hammer, make the indentations in the marked areas necessary to install the mortise hinges.
General view of the cutout for the door hinge
Pay close attention to the thickness of the recess. If it exceeds the thickness of the hinge, the door will rest against the frame when closing. Ultimately, this will lead to deformation of the door leaf and problems with opening and closing the door.
Before installing hinges on the door, you need to mark the door frame. This operation will require skill and patience to correctly determine the location of the loop:
- Place the canvas in the box and secure it with wooden wedges in the way it should be in the installed state. To level the door leaf, use a building level.
- After aligning the canvas, mark on the frame where the door hinges come into contact with the door.
- As with the door leaf, use a hammer and chisel to make the required number of recesses for installing door hinges.
The alignment of the door leaf in the frame should be carried out not only vertically, but also horizontally. Incorrect vertical installation will cause the door to open spontaneously, and horizontal installation will make it difficult to close.
A hinge already embedded in the doorway
Features of working with furniture hinges
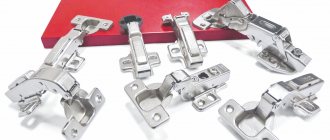
Furniture hinges are divided into several types:
- invoices;
- loose-leaf;
- semi-overhead;
- heel;
- inverse;
- gallery;
- pianos and others.
Most often, four-hinged overhead hinges, the so-called “frogs,” are used. They are suitable for most designs with hinged doors.
For cabinets, overhead canopies with cup bases are often used. They are attached with self-tapping screws. The “shoulder” structure is placed in this base and attached to the side panel and door.
Some types of furniture hinges are used exclusively for classic models, where style plays an important role. For simple wardrobes, overhead and semi-overhead awnings are preferred.
Correct installation of door hinges
Installation of mortise hinges
Inserting hinges into an interior door is the most complex procedure possible, so once you master it, you can easily install overhead and screw-in hinges. The installation procedure for mortise hinges is as follows:
- Sink the hinges into the recesses made in the previous stages of work on the door.
- Using a screwdriver, make holes in the wood for the hinges.
- Take screws of suitable diameter and use a screwdriver to secure the hinges on the door leaf.
- Place the door in the doorway and secure it with wooden wedges.
- Sink the loops into the indentations made, then repeat steps 2-3.
Attaching hinges to the canvas
During installation, carefully ensure that the door is level in the frame and does not move during installation. Before hanging the door on its hinges, carefully level it in the doorway using a building level (as when marking).
Installation of overhead hinges
This is the easiest method to use, which does not require insertion and preliminary preparation of the door and door frame (without creating recesses). The simplicity lies in the design of such hinges and in the installation features - you don’t have to think about how to weld the hinges and secure them as firmly as possible in the socket.
Installation is similar to installing mortise hinges, however, the parts are not installed in special recesses, but are simply screwed to the end of the door and frame using screws. As in the previous case, it is important to maintain the correct position of the door leaf in space throughout the installation of the hinges.
Overhead hinges are simply screwed on
Common mistakes
- Incorrect determination of the door opening/closing direction. This is an important initial stage that needs to be treated with great care.
- If you mix up the parts of the detachable hinge, the part with the rod will be at the bottom and the door will not be able to hold on.
- Marking on the hinge beam without taking into account the upper gap. If you do not provide a gap of 3 mm and measure 20 cm from the top of the counter, then the door will rub against the top bar and close with difficulty.
- A too tight fit of the hinge cylinder to the door leaf leads to poor closing of the door.
- Screwing in self-tapping screws without first drilling a hole for them. In this case, the canvas may crack and split.
- Installing the loop and fixing it with self-tapping screws at the location of the knot. You cannot screw screws into a knot, because the wood in this place may crack. If a knot is found on the canvas, then the loop is slightly moved to a safe place.
If you follow the recommendations and pay attention to possible mistakes, even a novice master can install a mortise hinge.
Why choose homemade ones?
Many people refuse industrially manufactured fittings in favor of homemade ones for several reasons. Such products:
- Withstands significant loads. What is relevant for garage doors and solid doors;
- They have the required size. If the parameters of those manufactured in industrial conditions are standardized, then when producing in-house, the size that is required is chosen;
- They have a high level of reliability, since the fittings produced for themselves have a high level of strength compared to those produced in the factory. You can always choose a material with high mechanical properties and greater thickness.
