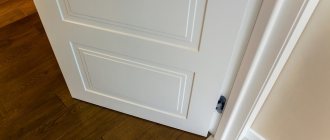
Quite often, installing a door handle causes difficulties for novice home craftsmen. At first glance, the work is simple, but there are important nuances that you need to know. Next, we will try to give you step-by-step instructions so that you can clearly understand how to install any door handle on an entrance or interior door.
Self-installation of door handles is not a difficult task, but certain nuances must be taken into account
General selection rules
The average person usually buys accessories solely based on external features, in other words, whether they like it or not. But to choose the right door handle, you need to consider several factors.
- The first and perhaps the main point is the material from which the fittings are made. If the handle is wooden, then you need to pay attention to the type of wood; pine, linden or spruce are not suitable; high-quality handles are made from oak, beech or species of similar strength.
- Those who prefer metal should take handles made of steel, copper or brass. The price for models made of alloys will pleasantly please you, plus they look quite decent, but such fittings last no more than a year.
Advice! You can distinguish a low-quality alloy from real metal by weight. Steel, brass and copper will be orders of magnitude heavier than any cheap alloy.
- The next point you should pay attention to is the type of door leaf. Handles can be attached using through pins or self-tapping screws. You can install any fittings on metal and solid wooden doors, but for hollow frame doors it is advisable to use handles with through fixation on studs; self-tapping screws in a thin wall of the door won’t last long.
Choosing a handle on a socket is much easier, because most models differ only in appearance, the device and main dimensions are the same
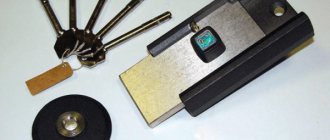
- Most mistakes are made when choosing a handle for an already embedded lock. If the handle is based on a socket, then there are no problems with it, but models with a solid bar need to be selected carefully; the most important parameter here is the distance from the keyhole to the handle shaft; if it does not match, you will have to buy a new handle.
When choosing a handle on a bar, the main parameter is the distance from the central shaft of the handle to the keyhole
Preparing the box
And finally, the last step in installing the door handle is installing the latch mate in the frame. To do this, you should smear the tongue with oil, close the door and try to make a mark on the jamb with the tongue, while making several “open-close” movements with the newly assembled door handle. Next, we apply the trim that will be screwed to the jamb, and trace it along the contour, including the inner hole.
Using a drill, we drill a hole for the “tongue” of the latch, and deepen the rest of the part using a chisel and chisel to a depth of 1-2 mm, depending on the depth of the plank. Now all that remains is to fasten the bar with two screws. We mark the center of the holes for the screws with an awl and use a drill to make holes of the required diameter. Next, use a screwdriver to attach the strip to the jamb.
Return to content
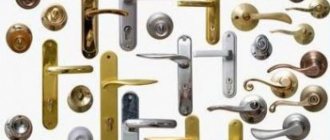
Types of door handles
With the huge assortment that the market now offers, it is impossible to list all the models; a separate article on the website is devoted to this topic with a detailed analysis of the types of door handles, it is located “HERE” . Now we are talking about installation, so we will briefly list the types of fittings.
| Photo | Recommendations |
| Overhead handles These are the simplest models. The overhead handles are screwed to the base with several self-tapping screws. Such fittings are made from all possible materials, but are installed mainly only on interior doors or utility rooms. | |
| Through handles Initially, they were developed exclusively for interior doors. The principle is simple: a single through hole is drilled in the door leaf, through which the handles are screwed on both sides using a threaded pin. | |
| Knobs and rotary models Knobs differ from traditional L-shaped handles only in their shape; they are made in the form of a ball. Otherwise, these are the same rotary mechanisms. Such handles only come complete with a mortise lock. There are no capital models here, so they are mounted exclusively on interior or internal office doors. | |
| Handles on the bar Here we are dealing with a universal mechanism. The handles on the bar imply the presence of a lock. But this lock can be either light or heavy-duty; accordingly, such fittings can be installed on any door. |
What are the mistakes?
The main mistakes are often associated with putting repaired entrance doors back into place:
- Tight fit of locks. When reinstalling the mechanism, you need to make sure that the crossbars have a small gap. Otherwise, if the door settles during operation, the locking mechanism may stop opening or closing normally.
- Distortions of the canvas. If, when opening the door, it touches the floor, it means that the installation was carried out in violation of the technology. It will have to be removed again and then installed back, following the installation rules.
- Loose closure. The first possible cause is the installation of a new seal on the door or door handle. This defect will be eliminated on its own during operation, when the seal becomes less elastic. If the problem is that the locking tongue is in the wrong position, it needs to be adjusted, then the sash will close tightly enough again.
- The appearance of a creak . After disassembling and reinstalling the canvas, the appearance of a squeak may indicate loose hinges or sagging of the canvas. To eliminate the defect, it is recommended to lubricate and tighten the door hinges.
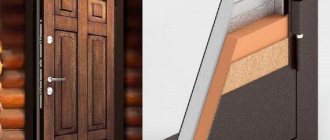
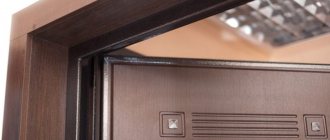
The main function of the front door is to protect the home from the entry of strangers, cold air and noise from the outside. To extend its service life, it is important to carry out preventive maintenance and repairs in a timely manner. The skills to independently disassemble a door structure will help you keep it in working order for as long as possible.
Where is the door handle installed?
In an apartment or private house, the handle can be installed anywhere; there are no clear dogmas here, there are only general recommendations.
- If you decide to screw on one handle, then it is better to attach it at the same height as all the other handles in the house. Otherwise, you risk disrupting the harmony in the interior.
- When choosing the height for installing all the handles in the home, you should take into account the average height of the household. According to the rules, the handle should be slightly below the elbow of a standing person.
- It is advisable to leave about 30 - 40 mm horizontally from the edge of the door leaf to the edge of the handle, so that when closing the hand from the inside does not cling to the frame
The minimum distance from the edge of the door leaf to the edge of the handle is 30 mm
Important! The installation height of a handle or a lock with a handle according to GOST 6629-88 is around 1 m from the floor (plus or minus 100 mm). This requirement must be observed, especially if you are installing the handle in an administrative or office building, otherwise problems with the fire inspector will not be avoided.
According to GOST 6629-88, the door handle should be installed at a height of about 1 m from the floor
Tools
In order to install a door handle in an interior door, we will need the following construction tools:
- screwdriver;
- hammer;
- chisel;
- bit;
- drill with a set of drills and a feather drill;
- tape measure, square, pencil.
Feather drill set
We will consider the installation process using the example of Apecs door handles, which are very well known on the Russian market. The handle material is brass, which is the most popular today. Ease of processing, relatively low price, pleasant to the touch - these and other advantages have become to the taste of both manufacturers and customers.
Below we offer step-by-step instructions on how to install a door handle with a latch, but without a lock. It should be noted that installing a round door handle is practically no different from installing a standard oblong one, so you can safely get to work in any case.
Return to content
How to screw a doorknob yourself
We've briefly figured out the theory, now it's time to talk about how to embed a door handle. Often, models designed for interior and entrance doors differ in the thickness of the metal and fasteners, but the instructions themselves are generally similar. First, let's try to replace the handle with the bar on the entrance doors.
How to replace the handle on the bar
On handles with a bar, in addition to the distance from the central rod to the keyhole, you should pay attention to the number and location of fastening pins. There are only 2 options - a strip with 4 fasteners and a strip with 2 fasteners.
Modern models of door handles with a strip can be fastened with four or two through studs
Advice! In order to avoid mistakes and other annoying misunderstandings when choosing, it is best to remove the old handle, go to the market with it and choose a model with a similar arrangement of fasteners and keyhole.
To remove the old handle, you do not need to disassemble and remove the lock completely; here you just need to take a screwdriver and unscrew the fastening screws. These screws are located on the inside of the door leaf.
On the entrance doors, all handles are fixed only from the inside of the room with two or four screws (depending on the model)
If you unscrew the mounting pins from the inside and the handles still cannot be removed, inspect the base of the handles themselves. In many models, the handle is additionally fixed to the central rod using a hidden screw, this screw is usually located at the bottom at the very base, you need to loosen it and then everything will come off.
Advice! Now we sell fittings with built-in armor lining. The price of these models is about a third higher than regular ones. But by purchasing such a handle, you get additional protection for the lock from being knocked out.
You shouldn’t skimp on models with armor lining, because such a little thing can save your home from burglars
To insert the structure into the door, you need to screw through the studs onto the outer trim. The photo below shows a model with two studs, but as already mentioned, there are also strips with four mounting studs.
The mounting pins are first screwed to the outer escutcheon of the lock.
Next, the central rod is inserted into the outer cover. In new kits, the center square rod is usually longer than necessary. The fact is that the thickness of entrance doors varies and manufacturers use a rod of maximum length.
You will need to measure the thickness of the doors and add to it the depth of insertion of the rod into the handles on both sides, and then cut off the excess using a grinder or a hacksaw.
The installed central rod must be immersed in both pads to the maximum possible depth
After the studs are screwed on and the rod is cut and inserted, a rubber seal must be placed on the inside of the trim. Some craftsmen recommend strengthening the contact with silicone sealant, but I think this is unnecessary.
Advice! The set of door handles may include plastic or rubber seals. So, try to buy accessories with rubber gaskets, they are much more reliable.
Rubber gaskets under door handles are considered much more reliable than plastic ones.
Then everything is extremely simple. Insert the outer cover with the studs, seal and central rod into the corresponding holes and, attaching the counter handle on the inside, secure everything with screws.
Some models of door handles provide additional fixation of the central rod using a hidden screw, most often it is made with a hexagon
How to screw a handle on an interior door
There is no particular point in talking about how to screw on a simple overhead handle with self-tapping screws, everything is extremely simple. First you need to choose a location, and then attach a handle and screw the screws into the corresponding holes.
Installing a latch or a full-fledged lock into an interior door is a little more difficult; here you will need a set of tools and certain knowledge. The entire process of inserting such locks with photos and videos is shown in detail “HERE” , and we will focus exclusively on attaching the handles themselves.
Important! If the lock embedded in the door has a rotary mechanism with a central square rod, then you can install any rotary handle on it, and the design of the model does not matter much, because the cross-section of the square is the same everywhere.
The instructions for installing the door handle are quite simple. First you need to remove the decorative trim. In L-shaped models, it is unscrewed, and in the knobs on the side there is a small hole with a locking tab. You need to take a special key or just some sharp object and press this tab, after which the decorative trim will be removed.
If the decorative trim is fixed using a hidden tongue, then a special key must be included with the handle to remove the trim
In all models of handles, a base washer with holes for self-tapping screws is hidden under the decorative overlay; it is this washer that is screwed to the door leaf and serves as the basis for the entire structure. You need to attach it to the doors and screw it with self-tapping screws. The handle and decorative trim are put on afterwards.
Important! The L-shaped handles on the square stem are secured with a hidden screw. This screw is located on the side or bottom; to unscrew it or, on the contrary, to fix it, use a small hexagon, which should be included in the kit.
A small hexagon for fixing the handle on the rod should be included in the kit.
As already mentioned, the decorative overlay is put on and fixed last. In L-shaped handles it is screwed onto a supporting washer, and in knobs it is latched using a hidden tongue.
If the decorative overlay on the handle is round, then it is screwed onto the supporting washer; the curly overlays are snapped into place using a hidden key tab
Practical tips on how to disassemble the front door. Algorithm of actions
When using an entrance door made of metal or plastic, a situation may arise when it needs to be disassembled. Disassembly may be due to the need to replace insulation, repair the lock, fittings, or other objective factors. This will require patience, tools and certain skills. Below we discuss in detail the algorithm of necessary actions and give practical advice from specialists on the job.
Design Features
Lever handles have to be repaired, so it is important to know their structure. The design differs little between different models. List of main elements:
- a handle that you have to grasp with your hands;
- a socket or a rectangular plate in the form of a platform that closes the mechanism and fixes the assembly to the door;
- a decorative trim with a tight or threaded fit that covers the fastener;
- a return spring that throws the handle back after pressing;
- travel limiter and locking ring;
- rotary mechanism with tongue and lock;
- a square that allows rotation of the latch and response handle.
Sequential steps when replacing
There is a simple rule when disassembling complex structures. It is necessary to remember the sequence of actions, and it is better to photograph everything on your phone. This will help you put everything back together correctly.
Replacing the handle begins with the door swinging open and the key being removed from the iron door. Next, the open canvas must be secured to avoid unexpected slamming. To do this, you can hammer small wooden wedges under it on both sides.
To remove the swing arm itself from the guide, you need to remove the fixing bolt. The recessed part is hidden in the center, under the curve of the handle from below. You can unscrew it using a hexagon.
We begin to free the plates from the screws. Unscrewing the clamping bolts, we sequentially remove the linings on each side of the door.
The square rod is taken out and compared with the one purchased. If the new one turns out to be shorter, then installation in place of the old one is allowed. You just need to check that the edges of the rod are intact. After this, the plates are returned to their places so that the locking mechanism can be turned.
On either side of the canvas, install one of the handles, placing it on a square. The same operation is repeated on the other side. Next, tie it with screws. After this, the rotary arms are fixed with hidden bolts.
Upon completion, you need to check the functionality. Press the handle and watch how the pawl slides behind the pad. Then the lever is released and checked how easily the latch returns to its original position. If you lubricate the insides of the lock with machine oil during assembly, the operation of the unit will improve and its service life will be extended.
Repair instructions
A sticking handle should be lubricated with oil or another special liquid. The cause of the breakdown may be dust or dirt getting between the moving mechanisms. If the handle falls off, you need to remove the retaining ring. In most cases it is bent or broken. Then it is necessary to replace it, since the old one is no longer suitable for use. If the tetrahedral clamping screw breaks, the entire mechanism must be replaced.
Door hardware of any type can be repaired, and repair recommendations are easy to follow on your own.
