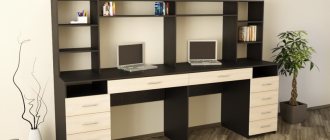
Many parents think about a workplace for their child. The decision to buy and assemble a computer desk needs to be approached quickly and thoroughly, especially if the future schoolchild is already growing up at home.
It will not be an extra saving for the family budget if you refuse to buy a workplace for the child, but think about how to assemble the table yourself. Moreover, if you approach the matter correctly, there will be no significant differences from furniture production in a specialized factory.
Common assembly errors
To assemble furniture with your own hands, you need to pay attention to some secrets and nuances that will help you avoid frequent and serious mistakes.
It is these annoying mistakes that can reduce the quality of the product, its service life, appearance, and sometimes even ruin the items. It is important to consider the following:
The first aspect that no instruction will tell you about, but which all assemblers know about, is working with an assistant. An extra pair of hands and eyes will never be superfluous; Often computer furniture is made of MDF. This is a soft material and is easy to damage
Therefore, instead of a drill, it is better to use an ordinary screwdriver; When installing the cabinet frame and drawers, it is important to check the corners. They must be strictly 90 degrees
Furniture should not be skewed. This is easy to check by level; the loops must be tightly “planted”; when attaching the back wall to the box, it is best to use self-tapping screws instead of nails; The computer desk has holes that are covered with plugs. These small parts are easily lost, so it is recommended to glue them to the surface; When using a screwdriver, you can accidentally scratch the furniture. If there is a protective film on the elements, it is better to remove it after finishing work.
Assembling computer furniture requires leisure. Strict adherence to the instructions and accuracy will help to carry out the installation work efficiently.
Use a screwdriver instead of a drill
Glue the plugs
Work with a partner
Computer furniture assembly technology
First, you should lay out all the parts on the surface where the furniture will be assembled. This could be a floor covered with a protective film, or a special podium. It is recommended to clean the parts from dust. If we are talking about installing a computer desk, then it is more rational to start with a “box”, that is, assemble the bottom of the table (stand), side walls and tabletop. In this case, the structure will become stable. Before starting such work, it is important to check whether the frame will have guides along which the rollers of the drawers “slide”. Once the frame is ready, you can start working on the shelves and then move on to the drawers.
The technology for installing furniture frames comes down to two simple rules:
- Without rigid fastening of the frame, the structure will fall apart like a house of cards. It is necessary to strictly fix the angles at 90 degrees;
- Any horizontal surfaces about a meter long sag without supports. Therefore, partitions that support, for example, a tabletop, should be mounted together with the frame first.
Assembling computer furniture is not as complicated a process as it might seem at first glance. There will be no errors if you strictly follow the diagram and drawings.
Lay out the parts on the floor
Assembling the box and other large parts
Creating a drawer for a computer or guides for it Installing a back wall
Collecting boxes
We attach the guides, and the already assembled drawers to them
We install shelves
Installing the keyboard stand
Connecting all the large parts
Materials used
You can use different materials to make your own round table. This should include:
Chipboard and fibreboard are well suited to make a budget option. Despite the cheapness of this design, with proper care it will last a long time.
Using a tablecloth, you can hide the material used, and it will look no worse than a product made from natural wood.
Coniferous wood provides the opportunity to make a high-quality product at minimal cost. Such wood is easy to process and can last for a long time.
Solid wood in the form of oak or beech will allow you to make a truly high-quality product that will become the real pride of any room.
Such a table will have a decent appearance; it amazes with its massiveness and grandeur. You will have to try a little when processing this solid wood, but the result will not be long in coming.
This design emphasizes the status of the owner and his family members.
There really are a lot of options. There are also modern solutions to the issue using plastic.
Wood
Before you start making the structure, you should decide which wood to choose. Below is a table of comparative characteristics of different types of wood.
| Tree type | Advantages | Flaws |
| Birch | strong material, does not crack or chip | For indoor use only, will not last long outdoors |
| Beech | light weight, can be processed manually | has a tendency to rot and requires additional processing |
| Oak | beautiful color, pattern, high hardness | expensive. Oak is difficult to work with due to its hardness |
| Spruce | has a beautiful texture | many knots require very painstaking processing. Even with a sander it is difficult to achieve a perfect surface |
| Maple | beautiful light shade, exquisite texture | To make the color last longer, treatment with special oil is required |
| Alder | light, durable, elastic, homogeneous mass | does not have a beautiful texture; wormholes are common in dry areas |
| Nut | beautiful texture, wide choice of colors, high hardness, reasonable price | Lightens with prolonged exposure to sunlight |
| Pine | easy to process, accepts impregnation and primer well | changes color over time, the wood rings become covered with a light coating |
You should not focus solely on the hardness of the wood; this is not always the key to a high-quality and durable product. Universal structures are made from alder or spruce that can be used both indoors and outdoors.
In cases where price is a secondary issue, oak is usually chosen. If you need a budget option, use not wood, but chipboard or MDF.
How to assemble a corner computer desk with your own hands: drawings and diagrams
Do-it-yourself assembly of a homemade corner computer desk is practically no different from the option described above. The difference lies in the presence of 1 or 2 cabinets with drawers, an add-on for a monitor or documents, a large tabletop with a curved cutout opposite the user’s chair and a retractable keyboard board.
Main dimensions of a corner computer desk made of laminated chipboard
Drawings of a computer desk with dimensions and cutting of parts
The dimensions shown in the figure are approximate (except for the height and depth of the cabinets) and you can change them in accordance with your requirements and preferences. It is best to mill the tabletop and fill it with a plastic “T”-shaped edge. It will protect the ends from moisture and deformation. Also do the detailing as in the previous version with a straight table.
Sketch of a computer desk for PC with dimensions
How to assemble a computer corner desk: step-by-step instructions
The most difficult and dusty work is cutting, sanding and milling the tabletop. First, we mark the outline taking into account the width and depth of the cabinet with drawers and the stand for the “system unit”. We make a hole in the corner of the tabletop for the cable channel. We stuff a “T”-shaped or regular PVC edge with a thickness of 2 mm around the perimeter.
Marking a corner table top
Once the tabletop is completely ready, we can begin marking and drilling the remaining parts. It is better to immediately number the parts in accordance with the detailing - this will make it much easier to assemble the table. Next we proceed according to the following algorithm:
- We assemble the drawers and install the halves of the guides on them.
Scheme for assembling drawers and installing guides - We assemble a cabinet for drawers, which consists of 2 sidewalls, a shelf, 4 ties (top and bottom) and a back wall made of fiberboard (filled last after installing the facades and connecting them into a single structure).
Dimensions for installation of roller guides - In the same way we assemble the section for the system unit.
- We make a corner support post, which we connect with wide drawers to two already assembled functional blocks.
- We attach furniture corners to the cabinets, supporting structure and drawers.
- We install the table frame at the place of use, taking into account the necessary gaps and deviations. We attach the tabletop to the structure, mark the place where the planks with guides for the keyboard board are attached, and mount it to the inner surface.
- We insert the drawers into the cabinet and check their movement. If the guides stick or knock, we check what the reason is; it may be a misalignment. We correct installation defects and if everything is fine, then we proceed to install the facades and countertops. Lastly, we fill the back wall of the cabinet with drawers.
- We assemble the monitor stand and add-ons (if provided). That's it, the table is ready and you can start using it.
Monitor stand
GOOD line (Z)
Prices
HEIGHT: 450mm, WIDTH: 1200mm, DEPTH: 450mm
Submit Comment
At the initial stage of assembling furniture, the instructions for which are included advise assembling the product with a 6-sided wrench. With time. Once you have acquired assembly skills, you can use a screwdriver.
First, take the sidewall and hammer in the shelf holders. You need to score on both sides.
Next we attach the bottom to the sidewall. Fastening of parts is carried out using confirmations.
Next, we attach the second sidewall and connect it to the bottom.
Important! Make sure the bottom and sides are level. If you are unable to fasten the parts evenly, then by adjusting the confirmator (up/down), you can achieve the desired result.
Then we attach the strips and drawer.
D0%B2%D0%B0%D0%BF%D0%B0%D0%BF.jpg" /%
Now you need to attach the back wall. You can fasten it with a furniture stapler, but I use furniture nails. They hold up better and are cheaper.
Before fastening, measure the diagonals of the bedside table on both sides with a tape measure. If the diagonals match, then you can start fastening. If not, then it needs to be leveled, since the facades cannot be adjusted correctly.
You can align the diagonal like this: grab one corner of the fiberboard and align it along one side until everything comes together.
Next, screw on the lid. We fix it with 3*30 mm screws.
D0%B0%D0%BF%D1%80%D0%B0%D1%80%D0%BF%D0%B0%D1%80.jpg" /%
Once the lid is screwed on, you can insert the shelf. It must be installed before you hang the facades, otherwise it will not fit.
After this, we insert the hinges into the sockets, align them and fasten them with 3*16 mm screws.
Now all that remains is to hang the facades and screw on the handles.
At the final stage, we put plugs on the confirmations, nail the nail legs into the ends of the sidewalls and adjust the gaps.
In this example, I used the option of attaching the shelf to shelf holders to buy a washing machine with a tank. But, if you wish, you can make it non-removable as it is easier to draw a plan for the placement of electrical equipment. To do this, you need to screw the shelf onto the confirmations.
If you choose this option, then pay attention to the fact that the distance between the shelf and the lid will be less than 20 cm. Thus, you will not be able to tighten the lid, especially if you use a screwdriver. He just won't get through. The only way out of the situation will be to remove the shelves, which in turn will affect the amount of time spent.
In conclusion, I would like to note that assembling cabinet furniture with your own hands is not difficult at all and anyone can do it on their own at home.
DIY TV stand
The bedside table for TV equipment is the first piece of furniture that I made with my own hands. I found it from a friend. I also took the main dimensions from him. I then reworked a few of them and this is what happened. By the way, I don’t recommend making a bedside table the way I did, from ordinary non-laminated chipboard. There are a lot of problems. The figure is a rendering from Autodesk Mechanical Desktop.
And here you can get drawings of the bedside table in DWG format.
Material.
I did this out of ignorance, and because of the theoretical saving of money, I made it from ordinary 16mm chipboard. This is where my mistake was. But I realized this later. As a coating, I used thick Whatman paper painted with black gouache. The top was covered with countless layers of matte varnish. The ends were covered with end-edge. I used wooden dowels as connectors for parts. The wall of the bedside table was made from fiberboard painted with the same black gouache.
The internal shelf and doors are made of 4 mm glass. The bedside table stands on 4 furniture turning casters. It remains to mention a liter jar of PVA glue for stickers for gluing parts, clamps for a glass shelf, fine and even finer sandpaper for sanding chipboard and varnish, and a set of handles and magnets for attaching doors. I also glued on a golden flexible profile as a decorative finish.
That's all I needed. Well, of course, the drawings, as I already said, are in DWG format.
Here's how it was done
1. Marking and cutting chipboard
I went to the store and looked at what sizes there were. I don’t remember what size sheet I chose. The optimized cutting of the sheet can be seen in Fig.
First, I marked the part and cut it out with a regular wood saw. I didn’t mark everything at once, but one detail at a time. when sawing, about 3 - 4 mm is spent on cutting buy wallpaper for walls photo. So I sawed along the outside of the marking. Due to inexperience, the saw wandered and of course the cut turned out to be far from even. You probably noticed that in the cutting of the sheet, arcs were not drawn on 3 parts of the bedside table. This is because I cut out the rectangles first, and then used a metal saw to draw out the arcs. The metal saw lends itself perfectly to this bending radius. I transferred the arcs to the part using tracing paper. On the plotter, I first drew an arc on tracing paper (sheet 3 in the drawing archive).
2. Processing of parts and preparation for sticking whatman paper
After cutting, I received parts with uneven ends. The ends were completely not perpendicular to the planes. At first I suffered for a long time trying to align each part separately. I came to the conclusion that it is easier to take all the same parts and tighten them with clamps from a device for inserting hinges. Next, I took a long (400-600 mm) smooth and straight block, wider than the width of all the fastened parts. After that, I stuffed the skin onto this block and into the front. I monitored the plane using a long level, and traced the ends along an iron corner.
After preparing the ends, I started working on the planes. The chipboard I took was not of very good quality. It was still standing in my garage basement and was a little damp. Therefore, the surfaces had to be sanded. I filled a flat block (you can use a special grater) with fine sandpaper and sanded it. When the surface became smooth, I took a not very wet rag and wiped the surface. When it was dry, I sanded it again, and so on 3 times. I did this so that when applying the glue, the pile would not rise.
3. Drilling holes for dowels to fasten parts.
I drilled holes at this stage for various reasons. I was afraid that when drilling at later stages it would be more difficult to disguise an unsuccessful hole (for example, chipboard would crumble or a piece of paper would break out, or I would drill holes in the wrong place altogether). It is also more difficult to make visible markings on a painted or varnished surface.
To be honest, I don’t have and never had a marking map. I drilled everything as I went. I was guided by the rule that the hole should be no closer than 40 mm to the edge of the part at the end and exactly in the middle of the plane of the end. I made 2 holes per end. All holes (except for part 2) are not through. So as not to miss and not drill through, I glued electrical tape to the drill at the level to which it needs to be drilled. The drill bit was 8 mm since the dowels were of this diameter.
4. Pasting the parts with whatman paper, painting, gluing the ends with a flexible end edge.
Pasting
To level the surface, I decided to cover the parts with whatman paper. I glued it with regular PVA. I took a roller with foam rubber, first rolled glue onto the part and then onto whatman paper. To distribute the glue evenly, I used a rubber roller (I had one left over from a photo glosser). I used it to roll out whatman paper into pieces. I glued the identical parts first. Then he laid them on a flat surface in a stack and pressed them on top with the rest of the chipboard. This was done so that when drying, the whatman paper would not move away from the parts closer to the ends, since it shrinks when drying.
After drying, I took a stationery knife, pressed it to the end, placed it at an acute angle to the paper and carefully moved it. It cut perfectly.
Coloring
I painted the details with black gouache in three layers with a brush. Each layer was applied in different directions for uniformity. I added a little PVA glue to the gouache so that the next layer would not blur the previous one. I didn't paint the ends.
Varnishing
But then I did what I struggled with the longest - varnishing. This is why I do not advise everyone to make (at least at first) lacquered furniture. After many damaged parts and unsuccessful attempts, I developed the following varnishing technique:
1. Using a brush with fairly hard, short bristles, I applied three layers of varnish. I used nitro varnish, so I let it dry for about 30 minutes between coats, otherwise the bottom layer would lift. I applied the varnish as follows. First, I poured the varnish from the can in a snake-like manner over the part. Then he quickly spread it over the entire surface with a brush. I diluted the varnish with solvent almost in half - my varnish was thick. Each subsequent layer I used a brush to pull the siphon to connect the dishwasher in different directions. It is necessary to ensure that drops of varnish do not flow down and hang on the lower plane. I washed it right away with a rag.
2. After I had collected a sufficient layer of varnish, I took a fine sandpaper on a block and began to sand the surface. After removing a certain layer (I don’t know how I determined it - boom), I coated it with varnish again.
3. This time I applied the varnish using an airbrush. Of course, it’s probably better to use a spray gun, but I did it with what I had. I had to dilute the varnish even more.
4. Next I cut out the holes. I felt the holes in the parts under the Whatman paper with a needle. Then I cut it out using a utility knife.
5. Again the process of leveling the surface with sandpaper followed. Steps 2 and 3 were repeated one after another until, after leveling with sandpaper, a smooth matte surface was obtained. After that, I took the finest sandpaper I could find and cleaned the entire surface thoroughly and as evenly as possible. Then I applied several layers of varnish with an airbrush (almost one solvent, only 10-20 percent of varnish) until the surface became smooth and uniform.
Edge pasting.
I used the edge with glue applied. I glued it with an iron through paper. Since the edge was wider than the end, I aligned it along one edge. Without paper, marks remain and the possibility of edge overheating is greater. When the edge overheats, bubbles appear on it. After cooling, he took the same stationery knife, laid it on the varnished surface, having previously placed a thin sheet of paper so as not to scratch the varnish, placed the blade at an acute angle to the edge and slowly moved it, pressing the blade to the plane with the second hand. Next, I took a block of fine sandpaper and smoothed out the cut.
5. Assembling the bedside table.
In order to explain how I assembled the bedside table, here is the following diagram:
Before starting assembly, I cleaned the varnish holes with a drill. I started collecting the colors of acrylic paints for wood from the bottom. First, I secured parts 8,12 and 9 (10,13 and 11) together using dowels and glue. Using a nail, I coated the holes and the dowel itself with glue. My dowels fit into the holes with tension, and so I had to hammer them in with a hammer. In one hole, where there was a particularly thin wall left after drilling, when hitting the dowel with a hammer, the dowel came out on the other side, breaking out a decent piece of chipboard. This part had to be redone. Next, I attached the two resulting assemblies to part 3. I connected parts 1,4,5,6 and 7. Next, using specially made dowels (I did not find them on sale), we fasten all the resulting assemblies and part 2 together. “Special” dowels differ in length from store-bought ones. They were made for me on a machine by processing round sticks from a crib to a diameter of 8mm. A total of 8 of them are needed. I chose the length so that the dowel would fit into parts 4 and 8, passing right through part 2.
Now, while the glue has not yet hardened and the parts are moving relative to each other, I secured the fiberboard - the wall of the bedside table. I measured very carefully so that all angles were 90 degrees. I pre-painted the fiberboard with three layers of black gouache mixed with PVA glue.
I attached 4 wheels to the bottom, 2 under parts 9 and 10. And let the glue dry.
Since I forgot to drill blind holes for glass doors and shelves, I did it very carefully without breathing in the already assembled bedside table.
I secured the glass shelf using holders, having previously treated the edges of the glass with a fine abrasive wheel. I attached the brown tinted doors (the doors were the only thing I didn’t do myself). I pasted a decorative golden profile onto parts 1 and 2.
That's all. To check its reliability, I rode it around the apartment for about 15 minutes – it held up perfectly.
Video instructions for assembling a computer desk E 03
Description
: Tempered glass elements on a painted metal frame. Has an additional work table. Pull-out shelf for the keyboard, rounded ergonomic shapes, for greater comfort in work. Under the table there is a stand for the system unit. Instructions for assembling the table cabinet2014-12-15T11:06:03+03:00adminArticlestop bar, top bottom bar, leg bar, top bar leg
Contents Furniture in St. Instructions for assembling a computer desk STK GOOD line (Z) Video instructions for assembling a computer desk E 03 Furniture in St. CATALOG DIAGRAM FOR ASSEMBLYING A TABLE-STANDBALL (using the example of St-01) Assemble on a clean, flat surface, having carefully studied these instructions .
Install: a) thrust bearings (F5) with nails (9) on the side walls (4.5) and legs... SubscriberConstruction blog
Finding out goals and objectives
You set the parameters of your computer desk yourself.
Tables are different. Large, small, empty, filled with different shelf compartments. A successful choice will depend on how clear you are about your goals. For example, are you planning to use a laptop, desktop computer with all its components? What will you do at your workplace (write articles, program, do accounting, model, do video editing, etc.). There can be a lot of tasks. And based on your list of needs, you should make a thoughtful choice of computer desk. Let's say the choice falls on a desktop computer. Its components include a system unit, monitor, keyboard, mouse, speakers, modem, printer and various other additional devices. Based on this, calculate the required number of shelves. Another important point is the materials for making a computer desk. The most common inexpensive working material is chipboard. Of course, there are also expensive options.
- https://housechief.ru/kompyuternyj-stol-svoimi-rukami.html
- https://hozzi.ru/sovety/kak-sobrat-kompyuternyj-stol
- https://novinkimebeli.ru/kompyuternyj-stol-svoimi-rukami/
- https://berkem.ru/stoly/kak-sdelat-kompjuternyj-stol-svoimi-rukami/
- https://mblx.ru/samostoyatelno/578-sborka-kompyuternoj-mebeli.html
- https://mebelindesign.ru/sborka-stola/
- https://thewalls.ru/mebel/razbiraem-poetapno-sborku-kompyuternogo-stola-svoimi-rukami.html
Choosing a tabletop
Before making a desk with your own hands, you also need to decide on the configuration of the tabletop. Products are:
- Rectangular. This option has good capacity and fits into any interior. But it is not suitable for small rooms, as it takes up a lot of space.
- Radial. Such countertops are often installed in apartments where several children live. Their use is possible only if there is a large area.
- Corner. They allow you to use the entire space of the room. The outlines can be symmetrical or L-shaped.
Rectangular Radius Corner
As for the material of manufacture, there is also a choice here.
| Product type | Characteristic |
| Laminated chipboard | It is resistant to moisture, has a high degree of wear resistance, and cuts well. It can be cleaned with various household products. But despite its resistance to moisture, chipboard should not be exposed to it frequently, as the material may swell. |
| MDF | It can be used in children's rooms, as it is environmentally friendly, has a wide range of colors, is easy to process and durable. But if the surface is glossy, scratches will be clearly visible on it. |
| Tree | The most durable and durable material that matches any design style and is environmentally friendly. But a wooden tabletop is expensive, has quite a lot of weight and requires restoration after some time of use. |
You can also make a design with a glass tabletop. This material is wear-resistant and makes the furniture original and light. However, the glass always leaves marks, so it has to be washed and polished frequently.
Laminated chipboard MDF
Tree
Where to put such a table
The advantage of a do-it-yourself table-book based on drawings and diagrams that a person created himself is that you can make furniture to suit any interior. Some people install such furniture in the nursery so that the children have a place to play, but it is enough to lay out the table to create a surface on which the children can both draw, assemble puzzles, and learn their homework.
A table in the living room will allow you to receive guests at any time, and quite a lot. Such furniture is in demand both in offices and stores.
This type of furniture is perfect for studios, lofts and just small apartments.
A folded table-book can be used in the interior as a coffee table, and it can be installed either directly against the wall or in the center of the room or near a window.
A table assembled by yourself will last longer than a budget model, which is comparable in price to this product. Therefore, go for it - and you will enjoy the fruits of your hands for many years and be proud of the result.
How to make a children's table with your own hands
A very simple option, with the help of these step-by-step photos you will learn how to easily make a children's table with your own hands. The dimensions are not indicated here, you can determine it yourself, let the child place his elbows on the table and reach his temples, the back should be straight. This will be the optimal height for your table.
If you want to approach the issue wisely, use the table. The manufacturing process is shown in some detail, so if you have the necessary tools it will not take much time.
Photo source www.woodgears.ca
How to make a children's table and chairs in pictures
Making your own children's table and chairs is not difficult if you have the appropriate tools and supplies. This article provides many examples with step-by-step photographs, but for greater clarity, I also present a master class with step-by-step pictures.
There is such a wonderful site WikiHow, here, like in comics, the process is depicted very colorfully.
Photo source www.wikihow.com/Make-a-Kids-Table-and-Chairs
Children's table with shelves
You can make such a table with shelves yourself, without particularly ruining the family budget. If your children love to draw and do crafts, shelves will be very useful. Therefore, the idea of building a table into a cabinet is very functional. How to make such a gift for children, look at the step-by-step photos with the indicated dimensions.
Photo source www.ana-white.com
Drawing work
Once you have dealt with all the small points, proceed to assembling the computer desk with your own hands. First you need to determine the height of the structure. The standard figure is 75 cm. Not everyone has the same height. Therefore, it is worth correctly calculating the height using one formula:
“Your height” is multiplied by 75 and divided by 175. Your height is 190 cm. So the calculations will be as follows. 190×75/175=81 cm.
The above formula allows you to accurately make a drawing. If you want the table to be smooth and not take much time to make it, pay special attention to the drawing work. In order not to invent “bicycles”, borrow a standard plan for making a computer desk structure. For this model, too many manufacturing materials are unnecessary. The design has the following components:
- Monitor shelf;
- Keyboard shelf;
- Shelf of various small things;
- Cabinet for files and other documentation;
- Upper shelves for books and speakers.
As you can see, the computer components can easily fit on the table. What tools should I use to assemble a computer desk? For such a task, you cannot do without a jigsaw (preferably an electric one), a drill, a screwdriver, a screwdriver, a grinder and a chisel. And since you will do the work according to the drawing, do not forget about the construction pencil.
How to make drawings of computer desks correctly
Of course, as a computer desk you can use a student’s desk or a standard office table, one of those that stood in offices 15-20 years ago. But taking into account the many additional devices, for example, a printer, MFP, and many gadgets that connect to the system unit or laptop, you will quickly understand that it is very difficult to fit into such a space for full-fledged work. In addition, the child will need to do his homework at the same table, that is, draw, read, write.
You need to make a table so that it has as much useful surface as possible, not occupied by equipment. And all devices - monitor, system unit, etc. - will be in their places, and at the same time will not interfere at all.
We will consider the option of a fully functional computer desk that you can make yourself without much expense.
First of all, you need to create a drawing that will take into account the dimensions of the entire structure. You can see a detailed drawing of the computer desk in the picture:
As you can see, this is the simplest, classic form of a table. Straight lines, conciseness, and at the same time full functionality. This table consists of a tabletop, a stand for the system unit, a retractable keyboard, cabinets and shelves.
Once you have decided on the required dimensions of your computer desk using the drawing, make a list of everything you need and start shopping.
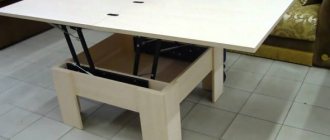
What is a book table
The design features are that the tabletop consists of two or three parts, which are mounted on butterfly-type curtains. If a table is not used, the side parts of the tabletop are positioned perpendicular to the floor.
But if necessary, the tabletop unfolds and rests on additional legs. In this case, the area of the tabletop increases several times.
DIY photo of computer desks
We make a computer desk add-on
In order to make a full-fledged multifunctional computer desk, the instructions provide for not only a tabletop and shelves for additional devices, but also an add-on that will also perform a decorative function.
- Mark and cut out the side elements of the structure, round the front upper sections with sandpaper. To ensure that the sides are evenly fixed to the tabletop, first make a template, the thickness of which will be 18 mm. Drill holes in its ends. Attach the manufactured ends to the tabletop and make markings for fasteners.
- The marked holes should be drilled according to the following pattern: through holes - in the tabletop, blind holes - in the lower ends of the side walls. At this stage you will need a square, it will help you maintain the correct angles. Install the side pieces onto the tabletop using a square for alignment.
- Screw in self-tapping screws under the tabletop, aligning the holes in the lid with the sockets in the ends of the sidewalls. After this, take a 400 X 2000 mm shield and cut it along the width. This way you will get a top shelf 315 mm wide and a securing cross-bar.
- The middle vertical wall needs to be cut out of a panel measuring 200 X 2000 mm. Attach it to the tabletop in the same way as the large side walls, using a square to control the joints. Screw the back panel to the sides and place the top shelf on the end of the central wall. Align and fasten with self-tapping screws.
- Now you need to make the left shelf. It will require a shield 200 mm wide. This shelf is intended for a printer or MFP, which means it must be strong enough and voluminous.
Furniture in St.
CATALOG
ASSEMBLY DIAGRAM OF A TABLE-STANDBALL (using the example of St-01)
Assembly should be carried out on a clean, flat surface, having carefully studied these instructions.
Install: a) thrust bearings (F5) with nails (9) on the side walls (4,5) and legs (7,8,9,10). Attach the card loops (F7) with screws (F8) to the side walls (4.5) from the left side into the left holes, from the right side into the right ones.
Using the confirmat (F1) using the key (FZ), connect the side walls (4.5) with the stiffening wall (b),
leg (7) with upper strip (11) and lower strip (16),
leg (8) with upper strip (12) and lower strip (17),
leg (9) with upper strip (13) and lower strip (15),
leg (10) with an upper strip (14) and a lower strip (18).
Attach the card loops (F7) with screws (F8) to the covers (1,2) and (3), having previously arranged the covers with the bottom side up in this order: 1 - cover (1), 2 - middle cover (3), 3 - cover (2).
Using screws (F8) and card loops (F7), connect the side walls (4,5) with the upper slats (11,12,13,14), the lower slats (15,16,17,18), and with the help of corner ties (F4) and euroscrews (F6) - side walls (4.5) with a middle cover (Z). Install the plugs (F2) on the side walls (4,5) and legs (7,8,9,10).
The simplest table made from boards with your own hands: assembly with self-tapping screws
Let's analyze one of the easiest structures to work with: a rectangular table with four square legs, a drawer made of boards, without additional parts.
For a table measuring 80x120x70 cm you will need:
- timber 40x40x680 mm, 4 pcs;
- board 10...20x76 mm, 2 pcs. 650 mm long and 2 pcs. 1050 cm;
- 20mm board 1200mm long. Depending on the width of the board, the required quantity is selected to obtain a total tabletop width of 800 mm (8 pcs. 100 mm each, 4 pcs. 200 mm);
- board for strengthening the corner joints of the drawer, section 20x75 mm, 4 pcs. length 100...200 mm;
- wood screws 20...50 pcs.
Important: in this model, the parts are fastened using self-tapping screws screwed at an angle. To maintain a uniform angle for all drilled holes, it is convenient to use a simple device - a jig.
Assembly sequence:
After cutting the parts to size, the frame is assembled - drawer and legs. To do this, the parts are placed on a flat, smooth surface and temporarily secured with clamps (when working with an assistant, there is no such need). It is convenient to perform operations one by one - two drawers and a leg. It is necessary to maintain right angles between the drawers as accurately as possible. To connect the elements, drill holes at an angle and fasten the parts with self-tapping screws;
After assembling the frame, it is necessary to strengthen it in the corners. You can also use metal plates or, as already suggested, a board for this. If the second option is used, the edges of the board are cut at an angle of 45 degrees to fit tightly to the drawers, after which the board is screwed with self-tapping screws;
the prepared frame is checked for stability, and if necessary, the length of the legs is adjusted; arrange the tabletop by securing the boards to the frame
For this, as well as for attaching the legs to the drawers, self-tapping screws and holes drilled at an angle are used.
Important: the length of the screws is selected so that they do not go right through the tabletop! The completion of the work will be the treatment of wooden parts with varnish or paint.
Calculating the size of a computer desk
It is more difficult to calculate the dimensions for a corner computer desk, so we will first consider this option.
Corner table dimensions
Factors that influence the size of the table:
- Tabletop width. The minimum tabletop width is 50 cm (500 mm). The optimal size is 60 cm (600 mm).
- The width of the sections (which are the table supports). Each table has a different section width. If this is a processor tray – 20–25 cm (200–250 mm). If the tray has drawers or a door – 45–60 cm (450–600 mm).
- Depth of the corner (where the person is located). The minimum size is 50 cm (500 mm), optimal is 60 cm (600 mm).
Common overlaps listed above -
- tabletop width – 50 cm;
- corner depth – 50 cm;
- section width – 20 cm and 45 cm;
- 5 cm + 20 cm + 35.4 cm + 50 cm = 110.4 cm – the length of one table wing;
- 5 cm + 45 cm + 35.4 cm + 50 cm = 135.4 cm – the length of the second wing.
Optimal table size
- tabletop width – 60 cm;
- corner depth – 60 cm;
- section width – 25 cm and 50 cm;
- 5 cm + 25 cm + 42.4 cm + 60 cm = 132.4 cm – the length of one table wing;
- 5 cm + 50 cm + 42.4 cm + 60 cm = 157.4 cm – the length of the second wing.
Optimal table size
- with one tray: 5 cm + 5 cm + 25 cm + 60 cm = 95 cm;
- with two trays: 5 cm + 5 cm + 25 cm + 50 cm + 60 cm = 145 cm.
Table height varies from 70 to 76 cm.
Note! It is not recommended to make the table higher or lower than the required dimensions, as this will lead to incorrect body position when working at the computer, the development and aggravation of back and spine diseases.
Drawing of a computer desk with dimensions
How to disassemble a table
The table can be connected to another table; first of all, you should unscrew the screws with a screwdriver (for convenience, you can use a screwdriver). The ties are mainly connected by brackets or plates.
Unscrew the ties that hold the tables together. Having done this, you have disconnected the table from the other furniture. Unscrew the tabletop mount a little. In this case, it will not be fixed, and you can begin to separate it from the table. Then you should unscrew the screws that secure any leg where it joins the cross board, tying them together. Unscrew one leg from the table. Do the same operation with the second leg.
All screws and fasteners should be collected and placed in a bag, put it in the box with the boards so as not to lose them during the move. Use a screwdriver to pry off the tabletop. Using the same screwdriver, you should turn it counterclockwise. Observe the rotation angles (no more than half a turn). The ties are located on the inside, next to the tabletop itself.
Typically, such screeds have an arrow pointer. When turning the drum, make sure that this arrow points straight up. This will indicate that the ties are relaxed. Loosen the remaining ties in the same way.
It is not uncommon for one leg to have not one, but two attachment points, which are usually hidden under the table cover. Therefore, you should not rush to remove the leg; first remove the decorative element (it is usually made of plastic). In order to disconnect the table legs from the cross board, bring them to a horizontal position and turn the ties that are located on these legs counterclockwise.
The idea of assembling a table yourself can come at least if there is a schoolchild in the family, which means you can’t do without a computer, and saving on buying a ready-made table will not be superfluous. If you try, self-produced tables will be no different from factory ones, like Techno Stolplit.
What types of computer desks can you assemble yourself? There are many options! Give preference, in particular, to those that are comfortable, ergonomic and multifunctional. All such models share the following details:
- pull-out keyboard shelf;
- CPU stand;
- internal shelf for various small items;
- side cabinet with drawers;
- wall-mounted design, hanging shelves above the bedside table and directly on the tabletop.
Hanging structures in a computer desk are difficult to overestimate. They are useful for installing music speakers, as well as books and stationery. This is especially true if the table is being built for a schoolchild. In addition, a printer and additional office equipment can be installed on such shelves - everything is determined by the needs and imagination of the owner of the homemade table.
If there is a laptop in the house
We've discussed how to make a computer desk yourself. But what to do if there is a laptop in the house instead of a computer? It would seem that the thing is quite mobile and does not require additional stands. But, as practice shows, lying in bed or on the sofa with a laptop in your hands is not always comfortable. Therefore, now we will make a laptop table with our own hands.
The easiest and free option
First of all, let's consider a design that does not require special construction skills and not a penny of financial investment. It’s tempting to make such a table for a laptop with your own hands. You can use parts of old furniture, remnants from renovations and other scraps of any building material.
You only need three parts: 2 side parts and a table top. Its size will depend on the size of the equipment. We will make a tabletop 270x660 mm. It’s easy to cut, the main thing is to measure it exactly.
It will be a little more difficult with the side strips: they must have a beveled side, which is attached to the tabletop. The dimensions of the side walls are 270×205×255×280 mm. it turns out that the back of our table will be raised by 280 mm, and the front will be lowered by 205 mm. Thus, a small DIY computer desk for a laptop will have a slope, which will make it very convenient for work.
The side parts are attached to the tabletop using self-tapping screws and are additionally reinforced with small corners. This enhances the strength and reliability of the structure. All that remains is to paint or finish it to your taste and preference. There is nothing difficult in such a design, and if a person likes to study or have fun while reclining, then why not think about how to make a laptop table with your own hands.
Another way: a folding table for a laptop
The folding design of the table is a little more difficult to make, but if you often move from place to place, it’s worth thinking about how to make a laptop table convenient and mobile. The following materials and components will be required:
- tabletop material;
- side wall material;
- screws or self-tapping screws;
- 4 folding fasteners with a lock.
You can use any material that is available. We cut out the tabletop 600x400 mm, the side legs - 400x310 mm. Using a ruler and pencil, mark the installation locations for the leg fasteners on the inside of the tabletop. We make holes for the screws, fasten everything securely and that’s it - our DIY computer desk, the photo of which you see, is ready.
As you can see, there are a lot of ways to make a computer desk with your own hands. The article discussed only the most accessible and simple ones. But there are craftsmen who are able to create furniture that you cannot find in any store.
Well, for clarity, watch the video on how to quickly and easily make a computer desk with your own hands, using the information from which you will cope with the problem easily and naturally.
Video:
Video:
Video:
Video:
Video:
Types and features of tables
There are a variety of models:
- With one side part of the tabletop or with two;
- With and without a bedside table in the central part, from which drawers extend;
- With a different number of additional legs;
- With or without wheels;
- Equipped with folding chairs.
Book tables can have modest dimensions even when unfolded.
Tables differ in the material they are made of, in the quality of the fittings, and in the shape of the table top, which can be either rectangular or with rounded corners. Each person has his own idea of what kind of table-book he needs.
There are many types of book tables available on the market.
If the models available in stores do not meet the requirements or are made of low-quality material, or the assembly leaves much to be desired, you can always read the instructions on how to assemble a table book and make the furniture yourself.
Choosing a place
The table can occupy a corner of the room or stand along the wall.
The comfort of the room will depend on the correct location of the table. If the room is small, of course, it would be unreasonable to place a large table here. If the room can accommodate large furniture, a small computer desk may not seem like the most functional furniture option. It is worth focusing on the following aspects before placing furniture in the room:
A computer desk serves as a carrier for computer equipment, which naturally requires power supply
This means that it is important to place the table next to an outlet. It is advisable to work at the table during the consecration. There is no better light for work than daylight. Therefore, it is worth organizing the location of the table in such a way that the light from the windows falls on the left side of the computer area. Computer equipment on the table already obliges you to get rid of unnecessary heating objects in advance, which can cause a short circuit or fire. It is extremely unwise to place a table near a radiator, fireplace, or electric heater. It is recommended to free the occupied space from other various objects (paintings, shelves and decorative elements).
You can choose a hanging table model, which, if necessary, can be raised and free up space.
Tables are divided into several types: straight, corner and combined. Let's look at each option in order.
Even a simple table can look elegant.
Shelves can be either above or below the table.
