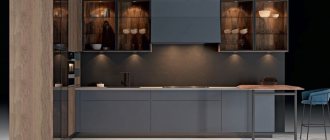
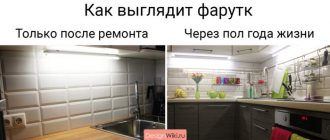
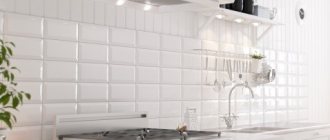
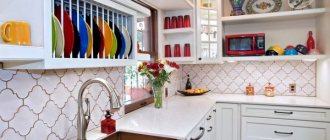
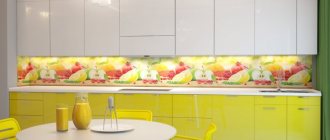
Samples of MDF wall panels for a kitchen apron
The front side of MDF panels is covered with polyvinyl chloride film, imitating various types of wood or a cut of natural stone. The panels can be plain or with any pattern applied. The surface can be either matte or glossy.
Often, wall panels are finished with natural veneer of valuable wood species, which in appearance do not differ from those made of natural wood. It is the cladding that gives MDF a decorative look and provides protection from moisture. Polyvinyl chloride film is easy to clean and does not change its original color for a long time .
MDF wall panels can be used in the kitchen to fully or partially cover walls, as well as aprons between the work table and wall furniture.
An MDF kitchen apron performs the main functions: protects walls from moisture and food waste, covers the gap between the table and the wall, preventing kitchen items from falling, and serves as a decorative decoration.
An MDF kitchen apron is almost no different in appearance from panels made of glass, tiles, mosaics and other materials.
How to install an apron in the kitchen from MDF
There are several ways to attach an MDF kitchen apron, and each of them has its own advantages and disadvantages:
- Installing MDF panels with glue directly to the wall.
- Installing panels with glue to the timber sheathing.
- Fastening panels using self-tapping screws or dowels.
- Fastening panels using aluminum profiles.
The fastest way is to install an MDF apron in the kitchen using glue. The wall on which the panel is installed must have a flat surface.
If there are significant deviations in plane, then the wall should be leveled by any available means.
Important! If you replace a damaged panel when removing the adhesive from the wall, the plaster layer may be destroyed. In this regard, fasteners using baguettes, self-tapping screws and plastic dowels are preferable; replacement is easier and does not require additional costs. This point should be taken into account when choosing how to secure an MDF apron in the kitchen.
Advantages and disadvantages of plastic panels
Compared to tiles and other materials, plastic (with the exception of PVC) has a number of advantages. Here are the main ones:
- reasonable price,
- moisture resistance,
- the ability to withstand elevated temperatures, the negative effects of household chemicals, food acids, fats,
- resistance to mold growth (if installation was carried out correctly),
- light weight of material,
- tight fit to the wall,
- possibility of installation by yourself,
- Possibility of adjusting height and length.
Due to the low price and cost of work in comparison with tiles, which should be installed only if you have experience, a plastic apron can be changed more often - this will not cause a “hole” in the budget. When replacing the apron, you don't even have to move the furniture.
The material also has disadvantages. You should not glue it next to a gas stove - any type of plastic will deform over time, even the most fire-resistant, because exposure to heat will be frequent and prolonged. Plastic should not be scrubbed with hard brushes.
Polycarbonate will not withstand intensive processing either - small scratches will still appear. Only some types of design will smooth out this drawback: if the surface is decorated with relief images, made to look like aged stone or brick, minor flaws will be invisible.
Marking and cutting MDF sheets
Often, a kitchen apron made of MDF consists of several panels, which can have different heights due to different configurations and sizes of wall cabinets.
Scheme for marking the dimensions of an MDF wall apron for the kitchen, taking into account the height for the hood
In this case, the vertical joint between the panels should be in the same alignment as the junction of the walls of the wall cabinets. When measuring and marking, you should adhere to the golden proverb: “Measure twice, cut once.”
Marking a kitchen apron with a metric tape measure
Important! Before marking, you should check the horizontal position of the kitchen cabinets and the plane of the countertop using a building level or a laser level. If necessary, adjust the position of the kitchen furniture.
Replacing an old apron
If there is a need to replace the old apron without redoing the entire repair, it is quite possible to do this. To do this, you will need to temporarily remove the kitchen unit.
If the new apron is made of MDF panels or polymer materials, then the material can be installed using the adhesive method directly on the old finish. This technique is suitable if the old apron was made of tiles.
For other materials, dismantling the old apron is necessary. Otherwise, the new finish will either look sloppy or simply fall off.
Cutting MDF sheets
MDF is cut quite easily with any tool designed for cutting wood with a small and sharp tooth. The use of a large tooth leads to crumbling and delamination of the material, as well as unevenness of the cut end. Recommended Tool:
- Hacksaw for metal.
- Hacksaw for wort.
- Electric jigsaw.
- Hand-held electric circular saw with fine pobedit teeth.
Cutting MDF sheet with a circular saw
If there is an image on the panels, you should carefully adjust the details of the picture, both horizontally and vertically. The joint of a correctly fitted pattern will be less noticeable and, conversely, the displacement will introduce an imbalance in the image, which will be noticeable at first glance.
What can be glued with liquid nails?
The special composition provides excellent adhesion to the surface of such materials as:
- plastic panels;
- ceramic tile;
- MDF panels;
- decorative strips;
- Fiberboard;
- fake diamond;
- linoleum;
- metal;
- glass;
- mirror, etc.
Surfaces can also be very different:
- tree;
- wallpaper;
- drywall;
- brick;
- tile;
- plaster;
- concrete, etc.
In the instructions for the glue you will not find all types of bases from this list - however, you can rest assured that home craftsmen have already tried everything. And below we will describe some apron options that you can make with your own hands.
Supporters of liquid nails claim that only classic nails can be better than them. The viscous composition is capable of forming the strongest possible adhesion of materials, allowing even heavy and large structures to be firmly secured.
However, this gluing method also has malicious critics. Some people complain about the discrepancy between price and quality, others about too much material consumption.
As a rule, these people simply do not know how to use liquid nails correctly. We have prepared a small cheat sheet for you. But first, let's look at what requirements apply to the surface being glued.
Using glue when installing MDF panels
Note. For those who do not know how to attach an MDF kitchen apron using glue: so-called liquid nails are used as the latter.
To apply the glue evenly, a special mounting gun is used. Liquid nails are applied to the back surface of the panel, sometimes additionally to the wall, after fifteen minutes the panel is pressed tightly and firmly against the wall. Thin wooden wedges inserted between the bottom of the panel and the tabletop will help prevent downward movement under the weight of the weight.
The glue is applied evenly over the entire surface of the panel
What requirements must a kitchen apron meet?
A kitchen apron is an integral part of the interior of the kitchen. This part of the design must have several basic qualities:
- Practicality.
- Resistant to chemicals and any cleaning agents. When washing dishes, a cleaning solution gets onto the surface of the kitchen unit. If the apron is not protected, it will lose its attractive appearance after just a few months of use.
- Resistance to humidity and temperature changes. Furniture and accessories without a protective coating will deteriorate in a short time.
- Long service life. Since the apron is mounted to the wall, it is inconvenient to often change the structure to a new one, especially if holes for fastening are drilled in the wall.
The requirements are due to the fact that the element is located in the working part of the kitchen - near the stove, sink and countertop. Food is prepared in this area, so the main task of the apron is to protect against all kinds of splashes, food particles and any kind of contamination.
Fastening the apron with dowels and screws
Fastening an MDF apron in the kitchen with self-tapping screws or mounting dowels is done as follows.
- First, holes are marked on the panel blank and holes are drilled for the inserts of the decorative caps.
- Then, having positioned the panel at the installation site, mark the marks of the holes for the nylon dowels. This method will avoid displacement of the holes.
- Having removed the panel, drill technological holes and then install nylon dowels.
Installing a decorative cap
The panel is secured with self-tapping screws or screws through inserts onto which decorative chrome caps are screwed onto threads. Of course, this fastening method requires accuracy and more time, but in the future, if necessary, it allows you to quickly replace partially or completely the wall elements of the kitchen apron.
Required tool:
- Metric tape measure.
- Pencil.
- Screwdriver.
- Drill.
- Hammer.
A set of fasteners for attaching an MDF apron in the kitchen
Note: It is recommended to use plastic dowels with a diameter of 6-8 mm.
First, a plastic dowel is installed in the technological hole flush with the wall surface, then a brass bushing with a silicone damper is put on, and secured with a self-tapping screw. The last thing to install is the chrome decorative cap.
Kitchen apron made of MDF, secured with dowels
Basic methods of fastening the structure
The simplest option is to fix it with glue. However, there are more reliable installation methods.
On guide profiles
To install the panels, metal elements with gutters in the central parts are used. They are mounted on the wall above the countertop and under the wall cabinet.
The panels are inserted into the grooves and moved according to the principle of sliding doors. The trim becomes removable, its elements can be replaced as needed.
On glue
To form a kitchen apron, use the composition “Titan Montazh”. This method is considered the fastest and easiest. The work takes no more than 2 hours, depending on the size of the wall being tiled.
Installation is done like this:
- Apply glue to the underside of the panel in a wave or lattice pattern. A construction gun helps to distribute the composition evenly.
- Place the tile on the surface. Press the element, releasing air. The glue begins to harden after 15 minutes. During this period, you can change the position of incorrectly installed tiles.
- Remove excess glue with a dry rag. It takes a day to gain maximum strength.
For self-tapping screws
This option is used to assemble a permanent structure. The wall is pre-aligned so that the panels do not form waves. It is also recommended to treat the surface with an antiseptic composition. The evenly laid element is secured with self-tapping screws along its entire height.
On the sheathing
In this case, surface leveling is not required. However, installing the sheathing takes a lot of time.
Installation is done as follows:
- Fix wooden slats or metal profiles of the appropriate size. To impart rigidity, elements are installed over the entire area of the area being coated. This prevents the panels from deforming.
- Install the slabs on the finished sheathing. Between the wall and the screen you can run cables for lighting fixtures.
For liquid nails
This method is not much different from installation with Titan glue. However, liquid nails set faster and can withstand more material weight.
To the kitchen baseboard
The element is installed between the apron and the countertop or cabinet. The plinth hides the cracks and gives integrity to the structure. In this case, the apron is installed after installing the headset. The cabinets are secured temporarily, after which the baseboards are placed. They are attached to adjacent surfaces with self-tapping screws. The caps are closed with plugs.
Apron fastening with aluminum profile
MDF panels are installed in the groove between two aluminum profiles
Important. Using an aluminum profile as an apron fastener eliminates the process of drilling panels, which ultimately simplifies installation, but slightly increases the cost of consumables.
The profile is attached to the wall with dowels around the perimeter of the apron. Corner joints are made with an internal angle of 45 degrees. The profile has mounting grooves with a silicone seal, ensuring tight installation of the panel.
Bonding technology
Below we will talk about the nuances of gluing an apron made of various materials.
The general operating procedure is as follows:
- Surface preparation.
Before starting work, it is necessary to tidy up the surfaces that are to be fastened with liquid nails:
- clean from dirt;
- degrease.
It is also important to remember the temperature of the materials. In order for the composition to take well, their temperature must be in a certain range.
Air temperature also matters:
Some representatives of polymer adhesives cope with their task even in cold weather.
- Glue preparation.
When all factors are taken into account, you can move on to the second stage:
- First, the protective seal is removed from the cartridge;
- in its place a cap is put on, the tip of which is cut at an angle of 45 °;
- install the cartridge into the construction gun.
- Gluing.
Let's get down to the main thing - applying liquid nails to one of the surfaces.
There are several application methods:
- when working with small elements, the traditional option of applying assembly adhesive is used - a straight strip ;
- if the adhesive composition has to cover large areas, it is best to apply it in a “zigzag” manner . In this way, the initial grasp is enhanced, and the task is noticeably simplified;
- The “point” method is suitable for fixing materials on an uneven surface. In this case, the adhesive composition is applied in small portions of 2 by 2 cm, at a distance of 20–30 cm from each other.
Immediately after applying the glue, the object must be pressed as closely as possible to the surface, fixing it in a constant position for 10–15 minutes.
You can fix it using:
- masking tape;
- special fasteners.
To prevent the glue from going beyond the joint, the borders can be covered with a toothpick placed on top.
If excess has already appeared, it can be washed off using:
- ordinary water - when working with acrylic-based glue;
- solvent (white spirit) - when working with synthetic compounds (rubber).
If glue accidentally gets on a porous surface, it must be allowed to dry and then carefully cut off.
Do-it-yourself preparation for installation of MDF and PVC wall panels
First you need to choose the material. Let's talk a little about the capabilities of each of them. You already know about the advantages: moisture resistance, cost-effectiveness, lightness, simple installation. But cheap types of plastic may not withstand temperature changes and may melt or be scratched by an abrasive sponge or cleaning agent. It is not recommended to install them above the stove.
The same applies to MDF, but to a lesser extent. There are improved models that do not have these shortcomings. For example, postforming products. This is a more durable type of chipboard with increased moisture resistance and heat resistance. As for decorative items, the choice in stores is quite large. Everyone will find a pattern and texture to their liking.
How to calculate the required amount of materials
Finding out how many elements will be needed for interior decoration is quite simple. You need to calculate the total area of the walls and subtract the square footage of windows and doors from it. Then multiply the width of the selected part by its height. Divide the first value by the second and add 10% for the margin.
Rules for using plastic strips
There are not many restrictions.
- if the PVC was at a temperature below +10°, warm it up before attaching it to the surface. This will take at least half an hour;
- the temperature in the room during installation should also be above +10°;
- do not remove all the sheets at once to preserve their presentation.
