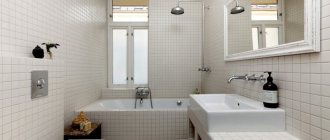
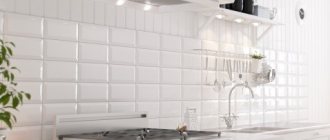
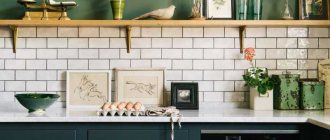
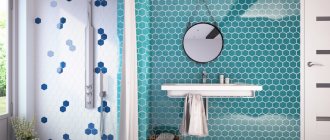
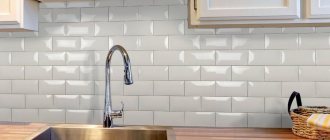
The boar tile on the kitchen backsplash is a legacy of American Art Nouveau at the end of the 19th century. Initially, it was used as an economical imitation of brickwork on the facades of apartment buildings. In the original it had a natural brick fawn shade. This cladding was decorated with colored glossy glazed masonry.
It was first used as interior decoration in the French metro. Hence the name “metro”. Later, this version of the tile migrated to home interiors. “Boar” began to be called in Russian-speaking circles because of the two holes on the back of the part, reminiscent of a pig’s coin.
This cladding option is popular for its durability and external “correctness”. This is a thick, glazed rectangular tile with edges cut at an angle of 45 degrees (chamfer), imitating the composition of brickwork. The dimensions of one element (7.5*15 cm, 10*20 cm, 15*30 cm) correspond to the parameters of the side of the building brick.
Most designs use white and beige shades of masonry. The advantages include resistance to frequent washing, wear resistance, and impeccable appearance of the canvas (subject to high-quality masonry). High wear resistance allows frequent wet cleaning with detergents.
Key features of subway tiles you need to know before purchasing:
- Thick, heavy. This tile requires careful and expensive pre-installation preparation. However, the durability of the coating makes it popular for permanent use.
- Chamfer. This characteristic element of “brick” cladding will cause a lot of trouble when cutting and adjusting the joints.
- Difficulty cleaning. The convex texture makes the surface embossed with deep seams. This can cause inconvenience when cleaning the apron from dust and dirt.
Advantages of a tiled apron
Kabanchik kitchen tiles are very environmentally friendly because they do not emit harmful fumes. Check out the other positive properties listed in the table below.
| 1. | The material is resistant to temperature changes. |
| 2. | The tiles are easy to care for – soot, grease and other contaminants are simply removed. |
| 3. | The boar does not deteriorate from high humidity. |
| 4. | Long service life. |
| 5. | Resistant to cleaning with any chemical means. |
| 6. | The tiles are versatile because they can be installed in different rooms. |
| 7. | Many colors, textures and sizes suitable for different interior styles. |
Many consumer reviews confirm the advantages of the material, so tiles are often used for various designs.
Features of using tiles in kitchens
Of course, “subway” tiles (the European name for the “hog” model) differ from other types only in appearance. Moreover, white boar tiles or light shades are much more practical than dark ones: water stains and stains are not visible, and dust is not noticeable. Tiles with deep dark tones will need to be wiped down more often to prevent white residue from showing through.
The installation is very beautiful with visible seams between the tiles. But kitchens require daily cleaning, and the sheer volume will make cleaning more difficult. Therefore, if the selected style does not provide for volumetric masonry, then the owners try to install the hog without a grown texture.
- Table setting and holiday recipes for February 23: the best original and traditional dishes
Table setting for February 14th - the best ideas and ways to decorate to create a romantic atmosphere
- DIY Easter flower arrangements: master class (photo), original ideas
Recommendations
If you want to partially decorate your kitchen using these tiles, but have no idea what style is best to decorate the room in, it is recommended to use classics.
This is the best option, which will make the kitchen bright and beautiful, and will also make it possible to use subway tiles as a finishing material in certain places.
The color of the tile itself should be white or beige, because the classics involve the use of only light shades. However, light types of tiles will fit perfectly not only into this style, but in fact into any style. For example, if you use Provence as a style for the kitchen, then the tiles should be beige or white with a beige pattern.
To buy boar tiles, you must first make all the necessary measurements and calculations, they will allow you to purchase the exact amount of material. Please note that you need to buy with a small margin, in case 2-3 tiles are cracked during transportation or turn out to be defective.
It is absolutely not necessary to lay the tiles next to each other, forming a regular masonry. Some styles allow for creative laying, allowing you to create truly unique tile shapes and patterns.
In addition, it is absolutely not necessary to completely lay out an entire wall or work surface in one color; you can combine them. This approach will refresh the appearance of the kitchen if you don’t want to do a full renovation.
Design options for boar tiles on a kitchen apron
The “hog” tile is available in 2 types: without a chamfer (a flat surface, not beveled at the ends) and with a chamfer (the ends are beveled and there is a relief). Regardless of the type, there are many different shades available. There are recommendations to help you choose the optimal shade:
- Milky and white tones are considered universal. Therefore, they are suitable for various styles, kitchen furniture, decoration, and accessories.
- Regardless of the texture of the black tiles (matte or glossy), the masonry will look beautiful against the background of a white, black glossy or wooden kitchen set.
- When selecting tiles, take into account the style of the room and the prevailing textures. For example, if the kitchen set is artificially aged, then the tiles can be installed with craquelure (small cracks).
- If the room has a neutral atmosphere, then the apron can be made of bright colors: scarlet, deep blue, grass, pistachio, ash, pink, purple, soft blue, orange, etc.
Decoration options
Below are the most popular ideas for decorating a backsplash using boar tiles:
- Contrasting row. You can play on color or texture.
- Original tiles with print. Give your backsplash a personal touch with photo printed bricks. The subject of the images can be any.
- Contrasting grouting.
- Colored lighting. Allows you to change the color of the apron depending on your mood.
- Changing the layout method. Several rows of masonry different from the main one can refresh the “brick” decor.
- Elements of a different size with patterns.
Suitable interior styles for the “hog” tiled splashback
Ceramic tiles are used for classic, modern and ethnic styles. Brick laying is especially often done in ethnic Scandinavian style.
In rustic country and Provence, tiles are selected in yellow, light green, soft blue, and muted pink colors. Staggered laying, imitating brick laying, is also suitable.
If you choose a shade and texture similar to natural brick, the material will be suitable for an industrial loft.
For modernism, white or milky boar tiles in combination with a brown kitchen set will be ideal.
- How to decorate the Easter table - ideas, tips for decorating the Easter table, photos
- How to decorate a table for March 8: photo of table setting, decoration of dishes
Curtains for the kitchen with a balcony door: how to choose the ideal option
In high-tech, minimalism, materials of unusual or mirror colors are suitable. This design is complemented by other metal elements.
For discreet art deco, a small hog in a black and white layout is used. This apron will go well with bright furniture and decorative plaster.
Tile material
In most cases, the hog is made of ceramics, but with the development of technology, other modern materials have appeared. Today you can find tiles made of artificial acrylic stone, glass, and mirrors. There is also a hog made of porcelain stoneware or quartz agglomerate.
In the classic presentation, a hog is a ceramic tile with beveled edges at 45 degrees. It is this shape that makes the surface finished with this material textured and voluminous. But the hog is not always made with a chamfer; sometimes it looks like a brick with a smooth surface.
Using mirrored hog tiles will visually expand the room and add light.
! Interesting fact! The “hog” tile owes its name to two holes located at the end of a special blank for making tiles. When you look at this blank, you involuntarily remember an animal with a snout. This is where the name “hog” comes from.
Popular sizes and methods of laying out boar tiles
The apron is laid with bricks of different sizes. But the main popular sizes are 7.5 cm. by 15cm. and 10cm. by 20cm. This type of masonry is suitable for large and small kitchens, varied in colors, textures and affordable prices. Typically, a boar can be 12cm in length. up to 30 cm, and in width from 6 cm. up to 10cm.
Interesting! Sometimes, to simplify the laying, tiles that imitate a wild boar are used.
Tiles imitating a wild boar are large in size, and a pattern and texture are applied to the surface, exactly like the facing material. The imitation shows that there are no seams as in installation in the usual way, but the canvas looks impressive and costs less.
The boar tiles can be laid on the apron in six ways:
Candle atmosphere: main types of candles for the home- Where can I find a gift?
- Schemes for the location of spotlights in the kitchen
1 Horizontally stackable. Suitable for modern and Scandinavian style. It’s the seams that add drama to the surface, so you can use grout in a contrasting shade that will stand out against the background of the tiles.
2 Diagonal. The layout is used for small or unusual spaces. The diagonal arrangement of materials makes a bright accent in the room, so contrasting grout is not needed.
3 Horizontally in a running start. This installation imitates brickwork and is often used for different types of interiors. It is easy to install, but it requires perfect evenness.
4 Zigzag. Herringbone laying is done with a slope of 45/90 degrees, it looks interesting and refreshes the atmosphere.
5 Vertically stackable. The stacked apron is very strict and attractive. However, the tile seams are perfectly aligned.
6 Vertical take-off. Most often used for large kitchens. To make such an apron beautiful, small format tiles are used.
What is a boar
Kabanchik is a small-format ceramic tile that looks like a glazed glossy brick. However, there are matte hog tiles, mirror hog tiles, and even craquelure tiles with aging effects. The tile has beveled edges around the perimeter, giving it a unique texture and volume. However, on sale you can find options with minimal chamfers or without them at all.
Of course, the first time you hear such a name, you might be surprised. Everything seems to be clear with the name Metro - the subways of New York, Paris and London are decorated with just such tiles. In our country, the tile has this name because in its manufacture a blank is used in the end of which there are 2 through holes. The side view of the workpiece makes one think of a pig's snout.
As for the size of the tile, its peculiarity is that the length of the product is 2-3 times greater than the width. Different manufacturers have different lines of tiles of this type. The most popular tiles are 7.5 cm by 15 cm, but sizes such as 7.5 cm by 30 cm, 10 cm by 20 cm, and 15 cm by 30 cm are also in demand.
It would not be out of place to list the advantages of boar tiles, for which modern housewives love them so much:
- Microorganisms do not accumulate in it and it does not absorb dirt. She is easy to care for;
- A large selection of colors and textures allows you not only to integrate tiles into modern interiors, but also to create unique and original compositions;
- Excellent resistance to temperature changes and high humidity conditions;
- Simple installation technology;
- Long service life.
Features of apron installation
Laying a tiled apron in the kitchen has nuances that must be taken into account for a good result:
- Do not buy tiles “back to back”; you should have a reserve of 5-10% in case of damage to the trim or replacement of tiles if they fail.
- The tiles on the kitchen apron will look good only with straight seams. The seams between the bricks should be 2-5mm, this is the optimal distance that everyone likes. Therefore, masonry is often ordered from specialists in order to comply with the parameters.
- When laying it out yourself, you need to prepare the walls well using a level, primer and putty.
- The tile is mounted on the kitchen apron using construction adhesive. But its quantity is greater if the material is chamfered compared to models without chamfer. For reliable adhesion, the composition is distributed onto the back of the surface and kitchen walls.
- Corners and boxes with protruding relief are difficult to line. To make work easier, the box is painted with moisture-resistant enamel to match the color of the tiles.
- Sometimes, for laying boar tiles, they also offer square-sized materials from the same manufacturer, style and color. They allow you to fill empty spaces and cut ceramics less. If there are no such tiles, then the cut edge of the tiles should rest against the wall or corner of the apron so as not to stand out and be camouflaged.
- For a neat joint, the tiles are cut at an angle of 45 degrees. If you need to join in a corner, then install a ceramic corner.
Styling Basics
Laying tiles correctly, especially if they have a bevel, can be a challenge. But, if you have a certain patience, tools and minimal knowledge, you will be able to do everything yourself. The main thing is to make all the calculations correctly, distribute your own forces and be prepared for certain difficulties.
Preparing the base
Any tile, and the hog is no exception, requires appropriate preparation of the walls. This nuance should be given special attention, since the final result depends on it.
Some craftsmen prefer to “level” minimal differences in the plane with tile adhesive, which is quite fair for deviations from the plane of 1–2 mm. In all other cases, it is recommended to use cement-sand plaster.
Before each stage of work, be it leveling or gluing tiles, it is always necessary to degrease and prime the base. This will significantly increase the adhesion of the wall and ensure a high-quality installation of the “hog”. If the rough coating consists of smooth concrete surfaces, ideally it is advisable to additionally treat the concrete with contact.
How to lay in corners
The plate format already initially involves making many cuts during the laying process. The main inconvenience is the chamfer, which makes it difficult to trim evenly. It is necessary to pay attention to even corners and high-quality joints.
Most craftsmen prefer to cut cuts at 45 degrees, which entails high costs for the customer. That is why it is ideal if there are as few joints of this kind as possible.
It is very inconvenient to place the “hog” in corners, both internal and external. Typically, in such places, regular tile trimming is carried out. The end can be further processed, for example, with ordinary fine sandpaper.
Next, the tiles are unfolded so that the cutting falls inside the row, and the entire edge is directed into the corner. This will make the junction of two vertical surfaces perfectly smooth and clear. If the “hog” is without a chamfer, the work will be even easier to complete. Especially when it comes to the external corner for which the bevel is being made.
Laying technology
There are different ways to stick a “hog”, but the most popular is the “staggered” option. In addition, some designers order styling with a side-by-side offset of 20–50% or in a herringbone pattern.
One of the conditions for successful completion of the work is maintaining the same distance between each plate. Otherwise, there is a possibility that the horizontal will shift, which will make the end result, to put it mildly, uninteresting in principle.
When choosing a tile with a chamfer, it is worth considering that it requires special care when making a seam. The volume of the plates attracts quite a lot of attention, which is why all the flaws and nuances become very noticeable.
The seam must be made perfectly even, as thin as possible, regardless of the method of laying the “hog” and the color of the selected grout mixture. It is advisable to discuss all these points with the master before starting work.
You immediately need to understand which crosses for tiles are best suited. Actually, they set the width of the seam.
With traditional classic tiles, it is considered quite normal to choose a cross of 2–5 mm, which allows you to hide any inaccuracies and errors using jointing, but in the case of a “hog” this is unacceptable. This kind of plate looks ideal with a seam of up to 1.5 mm. That is why no mistakes should be made here.
Calculation and marking of vertical rows
Since the “hog” has a specific profile, it is recommended that before installation you consider the issue of its placement on the wall.
If you plan to “stick” the plates only on the apron, then it is desirable that the furniture adjacent to them should be on the flat part, and not on the chamfer.
The situation is similar with the baseboard, in the case of laying tiles to the floor. Otherwise, the “hog” will look bad due to the loose fit of objects or baseboards, as well as the appearance of noticeable gaps.
That is why, before laying the tiles, you need to make an accurate calculation of the placement of the first row, as well as the total number of plates. Typically, craftsmen are additionally given a laying diagram for their work. Knowing what thickness crosses for tiles will be used and the size of the plates, it is possible to complete the task with a minimum error of up to 1 mm.
Note that making any adjustments on paper is much easier than doing it while working on the wall.
How to choose the right grout for joints
The grout should protect the space between the tiles from mold, mildew and bacteria. Therefore, waterproof compositions based on epoxy resins are recommended.
Interesting! Light-colored grouts with low cost tend to darken quickly.
The selection of grout depends on the preferences of the owners. If the apron should be neutral, then the grout color is matched tone to tone. If an accent is needed, then contrasting shades are selected.
Which grout should I choose?
You can choose grout (also called fugue) for the seams of a tile apron: to match the “hog”, universal white, beige, gray or black.
- Whatever color you choose for grout, it should be waterproof, designed to withstand frequent washing and temperature changes. Choose high-quality grout - cheap mixtures quickly darken.
- To avoid darkening of the joints, you can buy a grout mixture based on epoxy resin, which does not darken, since it hardly absorbs dirt and water. But it hardens quickly, so you need to work with it quickly and deftly.
The best photos of aprons from the “hog”
To find fresh ideas, look at photos of real interiors:
How do you like the article?
