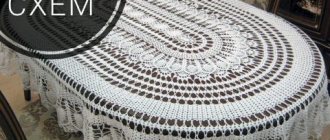
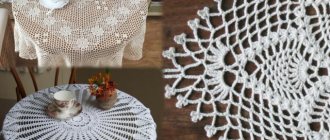
Many housewives love to crochet. In our article we will talk about knitting a rectangular tablecloth. It must be said right away that this work is long and requires patience, but if crocheting is your hobby, then it will bring a lot of pleasure, and the result will delight you and your loved ones for many years.
Can you crochet? Publish your work on kru4ok.ru
A hand-made rectangular crocheted tablecloth will complement and add uniqueness to any interior. Moreover, it can be used both for covering rectangular and square, as well as round and oval tables.
A rectangular crocheted tablecloth will become an original decoration for the most expensive wedding table, and will be remembered by many guests. Such things bring warmth and comfort from the distant past, from the time of our grandmothers and great-grandmothers.
For knitting you will need
- hook;
- yarn;
- knitting patterns.
The hook must be selected depending on the thickness of the thread. It should grip the thread well, but not be too big. Hooks vary in material of manufacture: wood, plastic, bone, steel, aluminum. The choice is yours.
Yarn for a rectangular crocheted tablecloth is selected depending on the purpose of the finished product. If the product is planned to be used daily, it is better to take a synthetic thread; for a festive tablecloth, it is recommended to take a thin thread made of linen or cotton.
Crochet techniques for making a rectangular tablecloth
There are two main methods of crochet: circular (circular or cylindrical shape of the product) and flat (square and rectangular shape of the product). You can make a rectangular tablecloth using crocheted motifs or using the fillet technique.
A motif is already a full-fledged napkin, and the product is sewn from them piece by piece or directly during the process of knitting the motifs themselves.
Another type of knitting is in a single fabric. You can crochet a finished rectangular tablecloth with a border on all sides for beauty or if the size is too small. Ideally, it will hang over the edges of the table by 20 - 40 cm. Whatever crochet method you choose, the result will definitely please you.
Selection of material and tools
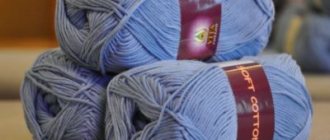
Yarn and tools for work are selected based on the purpose of the finished product. Traditionally, tablecloths are knitted from cotton thread. For a classic tablecloth, the ideal option is plain mercerized cotton with a thread thickness of 400 to 600 m per 100 g.
Metal hooks of different sizes are suitable for working with this yarn. The diameter of the tool is selected individually, focusing on the specific knitting density and the recommendations of the yarn manufacturer (they are indicated on the labels).
For example, for a thread with a thickness of 400 m/100 g, hooks from No. 1 to 2.5 are suitable. Fine yarn with a yardage of 600 m/100 g can be knitted using hooks No. 0.5; 0.9; 1.25 or even 1.5 and 2.
Choose a crochet hook based on the recommendations for knitting a particular product
The thinner the hook, the denser the canvas will be, and vice versa: the larger the caliber of the tool, the looser and softer the tablecloth will be. The sample should be measured only after WHT (wet heat treatment).
Cotton tends to shrink after washing, so only a completely dry sample will allow you to get real numbers for calculations. As an alternative to cotton, you can choose other yarn compositions, for example, viscose, bamboo, linen, silk or mixed types of materials.
A crocheted tablecloth for a rectangular table will be practical and durable if you knit it from synthetic thread (polyamide, microfiber). Such materials are easily washed from dirt and keep their shape. However, you should not use acrylic, as it can stretch, fluff and lose its attractive appearance over time.
The same recommendations will help you choose yarn for a tablecloth in a modern style, with the difference that there is greater freedom in choosing colors and textures. The total material consumption for a specific product can only be determined after weighing the sample. You need to calculate the area of the sample, compare it with the area of the future tablecloth and then calculate the amount of yarn.
Before knitting a tablecloth, knit a small sample - this will help calculate the amount of yarn required for knitting
For example: the sample has an area of 10x10 cm (100 cm2) and weighs 5 g, and the finished product should be 180 cm long and 160 cm wide (28800 cm2). If you divide the area of the tablecloth by the area of the sample, it turns out that the finished product will “fit” 288 samples of 5 g each. So, to knit a tablecloth you will need 1440 g of yarn (provided that the density of the craftswoman remains the same as when knitting the sample) .
Tips from craftswomen
All experienced craftswomen know that crocheting various napkins, coasters, vases and tablecloths can be a great pastime. However, some firmly believe that creating such interior details is a rather difficult, time-consuming and thankless job. In fact, there is nothing complicated about this, if you first practice a little and master a few simple tips:
- Start small, like a small napkin or miniature coaster. Once you master the basic techniques of working with patterns, crocheting rectangular tablecloths will be easy and simple.
- Choose a small hook and thin yarn if you want to get an openwork and almost weightless tablecloth. Threads made from coarser materials are more suitable for creating crafts and wardrobe items.
- An experienced needlewoman may not use the diagram at all. The patterns form themselves in her head, and her hands bring ideas to life. But for beginners it is still better to strictly follow the proposed scheme.
Of course, it is easiest to knit a tablecloth for a round table, but in our homes almost all the furniture has a rectangular shape, which we adapt to. Fortunately, today you can purchase a lot of auxiliary materials. For example, crocheting a rectangular tablecloth will be much easier if you take ready-made material as a basis, and then simply tie it in a circle with an openwork border or motifs. Such a tablecloth will also be more functional.
Technique for crocheting a rectangular tablecloth on a table
Tablecloths with an openwork border, assembled from motifs, made with a fillet pattern, or with additional embroidery are considered classic. Usually these are plain products made from natural material.
A crocheted tablecloth for a rectangular table can also be more modern. In this case, it should have a completely different look: a minimum of patterns and a laconic design, bright colors (although simple basic shades are often used), a small number of openwork holes.
All possible options for making a rectangular tablecloth can be combined into 3 large groups:
- Knitting a whole fabric.
- Combination of individual motifs.
- Formation of the central zone and binding of the border.
Making a tablecloth using the first method will be the easiest; it is ideal for beginner knitters. They may experience some difficulties at the very beginning of work, since the first rows will be very long.
The advantages of the technique are that the size of the finished product is immediately visible, it can be measured and, if necessary, adjustments can be made. The first type of tablecloths includes products made with various meshes, simple patterns, as well as models using the fillet technique.
Fillet patterns are a combination of empty (double crochet, 1 chain crochet) and filled squares (2 double crochets). A tablecloth is crocheted quickly for a rectangular table using the fillet knitting technique. There are many different patterns.
Crochet tablecloth: knitting patterns for loin patterns
Some of them are a repeat of 10-30 loops and rows, which must be repeated to get a large fabric. Others include an ornament for an entire product and can number several hundred loops and rows. You can adapt monochrome embroidery patterns to knit an unusual and original tablecloth using the fillet knitting technique.
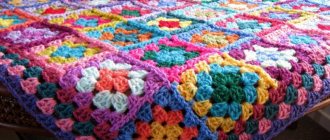
The second method of knitting tablecloths is one of the most popular, since it is easiest to assemble a rectangular tablecloth from square motifs. But there are other options: circles of different sizes, triangles, hexagons, octagons, stripes and irregularly shaped elements.
If the tablecloth is assembled from round modules, then choose motifs of 2 sizes. The main canvas consists of large circles, and the gaps are filled with small elements. When working with non-standard shapes, you need to think in advance about what shape the finished canvas will receive.
To form perfectly smooth edges and corners, it is often necessary to tie together halves and quarters of modules. Knitting a tablecloth from abstract motifs requires experience, perseverance, good spatial imagination and time.
Crochet rectangular tablecloth: knitting patterns for square motifs
Since the motifs are made separately, each has a minimum of 2 tips. They need to be securely hidden at the end of the work so that the canvas looks solid and neat.
Many experienced craftsmen recommend using a needle for these purposes, rather than hiding the threads inside the crochet posts. If the ends of the threads are not hidden securely enough, they will quickly appear on the surface of the tablecloth after the first wash.
Do not burn the tails of cut yarn. If we are talking about the natural composition of the material, then it will not melt, but will burn. However, even synthetic thread should not be burned, since the melted ball will stand out on the canvas in color and texture (you will get a hard black lump).
Combining motifs into a single piece is an important point. There are several ways to assemble modules into a tablecloth: sew separately connected elements with a needle, use a crochet hook for the same purpose, or connect the motifs when knitting the last row.
A tablecloth can also be crocheted from round motifs.
You can stitch modules with a needle or crochet only when their last row has a clear outline or is a straight line. For example, straight edges of a square, hexagon or octagon. All edges are the same size and are easy to match and stitch.
First, the finished motifs are laid out on a flat horizontal surface with the wrong side up, adjacent elements are pinned together and then sewn together. The most convenient way is to sew the motifs into stripes, and then connect them together. At the final stage, the seams on the finished tablecloth are ironed from the inside out or simply doused with steam.
To connect the motifs while knitting the last row, you should choose patterns that end with a picot. This element (loop) consists of 3 air loops having one base.
To combine 2 motifs, you need to knit the 1st completely, and attach the 2nd to the first as follows:
- knit the 1st picot loop;
- insert the hook into the picot of the 2nd motif and make a connecting stitch;
- complete picot knitting on the 1st motif (make the 3rd loop).
It is important to ensure the correct arrangement of the tablecloth elements so that all the “picots” are connected in pairs.
Delicate white tablecloth for the living room
We will need:
- reinforced threads (56% viscose, 44% cotton), about 900 grams, white;
- cr. No. 2.
Dimensions of the finished product: 130 x 170 cm.
Scheme
Sizes and shapes
A crocheted tablecloth for a rectangular table should also have the shape of a rectangle, but its edges may be uneven. This happens when the canvas consists of round or polygonal motifs and there are no small elements to align the contour. Uneven edges are not considered a mistake, because there is no standard or ideal sample.
Tablecloths made from square motifs or knitted in a single fabric have clear contours. The edge is obtained neatly as a result of tying the finished product with several circular rows of single crochets. Then an openwork border is added or the simplest binding is left.
The product looks beautiful and appropriate only when it completely covers the table and hangs from its edges to a sufficient height (from 20 to 40 cm).
When calculating the length and width of the tablecloth, it is necessary to add the length of the overhang, multiplied by 2, to the corresponding parameters of the table.
If the finished product will have very uneven edges, it is better to include longer overhangs in its size. In the case when all edges of the product will be decorated with a fringe of tassels, spirals or other long decor, it should be added to the total length of the overhang (so that the fringe does not start at the tabletop itself).
If the finished tablecloth is not large enough for a rectangular table, it can be turned at an angle of 90 degrees and laid on top of another (textile) tablecloth. This technique works best with square canvases.
Schemes of awesome round napkins
In this section, my favorite napkins from the new ones I knitted and plans for the future. So far the channel has videos for the first five. I don't do a description, I just post diagrams.
A large openwork napkin (63 cm) with a very beautiful pattern is knitted in apricot color. I named it “PRINCESS MARGARETHA” in honor of the variety of English rose with the same name and color.
The pattern is very easy, knitting is a pleasure.
The New Year's napkin “Frosty lace” also looks gorgeous, it turns out to be approximately 46 cm in diameter. It is preferable to knit from thin threads, then it will be especially elegant.
The “Leaves” napkin deserves attention, I love it very much, I don’t know how it looks in the photo, but in reality it decorates the interior so beautifully! (Diameter 43 cm)
Another favorite of mine that has been on the table for a long time without fail because it is beautiful! Its size is 36 cm in diameter.
I suggest you be sure to knit one more thing on a New Year’s theme - “Bewitching Snowflake”. It consists of 7 simple motifs, around which there is a very interesting, spectacular border.
And in this napkin I like the complex columns with which the “bump” pattern is made, very original.
How to learn to read complex crochet patterns and knit complex columns on legs
I came across this interesting idea online. The napkin should turn out to be dense, but its highlight is that it is colored in places, which is why it looks so impressive.
I don’t know if this beauty is new, but I also really like this model with voluminous flowers.
How to read diagrams correctly
Depending on the type of tablecloth chosen, the graphic scheme may include 1 or several repeats (elements that need to be repeated in width and height), a separate motif (round, square or polygonal) or a schematic image of the entire product.
Large patterns for the entire tablecloth are rare; they are usually drawn up for large-scale patterns using the fillet technique or in cases where a combination of several simpler patterns is being designed. Schemes of modules and simple patterns are much more common.
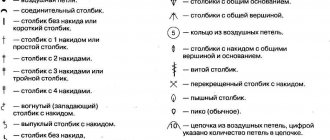
To work with graphic images of patterns, you need a key (decoding the symbols). It is attached to the diagram and contains a verbal explanation of the symbols used. Different designers can use both generally accepted symbols and their own unique icons.
Patterns compiled for knitting in straight and rotary rows read as follows:
| Row numbering | Knitting feature |
| 0th row | Chain chain of air loops |
| 1st and every odd | From right to left |
| 2nd and every even | From left to right |
The numbering is located to the right and left of the diagram. In circular motif patterns, each row is also numbered, but the numbers are located inside the pattern near the beginning of each row. Circular rows begin with lifting loops (1, 2, 3 and more) and always end with a connecting column. This makes the rows look neat and complete.
How to knit a tablecloth from motifs
The process of creating a large product from individual modules can be divided into the following stages:
- Measuring the table, calculating the size of the future tablecloth in centimeters.
- Choice of yarn and hook.
- Knitting one motif, washing it, drying it, measuring it.
- Calculation of the number of motifs that will make up the tablecloth. It is important to take into account the width of the border if it is planned for a specific product.
- Consistent knitting of all motifs, their connection.
- Working with thread tails.
- Tablecloth binding.
- Wash, dry, iron or steam.
It is necessary to hide the tails of the threads before performing an HTO, then they will be securely fixed in the desired position. Do not steam or iron the product in parts.
It is best to lay it on the floor or on a bed, pin the edges if necessary, and then expose it to steam. Otherwise, you can accidentally deform part of the product and fix it in this state.
As an interior detail
Knitted tablecloths are not just a beautiful table cover, but also a masterpiece of handicraft. And by adding a few design techniques, you can emphasize the magnificence of the knitted pattern. For example, the best way to do this is to cover the table with a fabric that matches the color scheme with the interior of the room. And cover the top with a knitted tablecloth. Against the background of a plain fabric, the pattern will be clearly visible and this combination will look impressive and stylish. Or lay a tablecloth of a suitable color on a white fabric.
Related article: Smeshariki made from tires: instructions with photos and videos
Knitted tablecloths are suitable for different styles of room interior. For example, for an interior designed in Provence and country style, a knitted tablecloth with clear geometric patterns and laconic images is more suitable.
A knitted tablecloth will fit very organically into the classic style of the interior. And if you choose a warm shade of threads, this will add nobility and grace to the product.
In rustic and eco-style, knitted tablecloths are simply a necessary detail that will help stylize the room. Knitted tablecloths over rough linen or burlap look especially stylish.
In shabby chic and vintage styles, crocheted tablecloths look charming and cute. Especially if you knit them from threads of delicate colors or add colored details. Knitted interior details add luxury to these styles.
Knitted tablecloths look great on forged and wicker garden furniture. In summer it is so nice to have lunch or evening tea in the garden, among the greenery and flowers in the open air. A knitted tablecloth with floral motifs will add romance and harmony.
Knitted tablecloths will be a successful addition to the overall picture of the interior in many styles. It will be great if, in addition to the tablecloth, you add a few more knitted decorative elements. This will help to organically fit in and dilute the design, and in tandem become a full-fledged part of the interior. Knitted covers on chairs and sofas and decorative pillows look good.
Openwork tablecloth on a rectangular table
The beginning of each motif, knitted in a circle, is a chain of air loops (ACL). It is closed into a ring with a connecting column (PSt) and then the 1st row begins.
To knit a medium-sized motif, you need to make a ring of 10 VPt and then follow the description:
- VPt for lifting, 14 single crochets (STbN) inside the ring.
- VPt for lifting, * 15 VPt, skip 1 base loop, 1 STbN *. Repeat part of the description from * to * 7 times. Instead of the last STbN, perform PSt in the first VPt.
- Knit 5 SC in the arch formed by the VP of the 2nd row. Perform 3 VP rises, 9 double crochets (ST1H) in the arch. Under the loops of the next arch and all other arches, tie 10 ST1H. Complete a row of Pst.
- 3 VPt for lifting to the level of the next row, 8 ST1N, 5 VPt, * 8 ST1N, 5 VPt *. Repeat part of the description from * to * 6 times. At the end of the row, perform a pst.
- 4 VPt lifting, 5 ST1N with a common top, 10 VPt, * 6 ST1N with a common top, 10 VPt *. Repeat part of the description from * to * 6 times and complete the row of PST.
- The final stage. It is necessary to carefully follow the corners and do not forget, when making picot, to connect the motif with ready-made elements. * 3 STbN, picot from 3 VPT *. Repeat this part of the description 3 times in the process of tying arch No. 1.
- Tie arch No. 2 in the same way. When tying arch No. 3 (motif corner), follow the instructions: 3 VPT, 3 STbN, picot from 3 VPT, 3 VPT, turn the work and knit 12 VPT, attach this chain to the middle of arch No. 2, unfold the work and tie the chain just completed just like arch No. 1 and No. 2.
- Then finish tying arch No. 3: 3 STbN, picot from 3 VPT, 3 STbN. Tie arches No. 4, 5, 6, 8, 9, 10, 12, 13, 14 and 16 in the same way as arch No. 1. Arches No. 7, 11 and 15, the same as arch No. 3.
A tablecloth made from such motifs is good because it looks great even without a binding.
Simple tablecloth on a rectangular table
Tablecloths for rectangular tables are usually crocheted in simple patterns - these are any grid patterns, basic patterns using the fillet knitting technique, or so-called “spiders”.
Knitting a simple tablecloth:
- table measurements, calculations of the dimensions of the future product in centimeters;
- knitting a sample with the selected yarn and pattern (at least 3-4 repeats in width and about 10 cm in height);
- calculating the product in loops and rows, determining the number of repeats in width and height;
- a set of air loops for the first row;
- knitting the tablecloth fabric with the selected pattern, according to previously carried out calculations;
- finishing of the product. Tying with several rows of STbN. At the corners it is necessary to knit 3 stbn from 1 base loop.
At the final stage, an WTO of the tablecloth should be performed.
Festive tablecloth
Tablecloths with an openwork border around the edges look elegant and festive.
Knitting such a product is quite simple:
- you need to make a simple tablecloth with any pattern or grid;
- the finished rectangle must be tied with several rows of STbN, this will align the contours and fix the shape of the product;
- tie the tablecloth with any border you like. It is worth knitting a sample border in advance and calculating how many repeats of the binding are required. If full repeats “do not fit,” then you can slightly change the width and height of the rectangular base.
Don’t be afraid to adjust the size of the tablecloth to the pattern repeats. This will allow you to get a truly neat and high-quality product.
Knitting patterns for decorative elements for tablecloths
If desired, the finished product can be decorated with additional decor:
- beads and sequins;
A crocheted tablecloth looks great with embroidery elements.
- embroidery;
- applique of knitted flowers and leaves.
Patterns of small floral motifs, cones and spirals are easy to find, many of them are freely available. In a modern interior, a simple, plain crocheted tablecloth spread on a rectangular table is more appropriate, so it is important not to overdo it.
Author: Anna Ocean
Article design: Natalie Podolskaya
Stunningly beautiful oval napkins
I personally like all oval-shaped napkins; there are a lot of patterns on the blog. But I would especially like to highlight this one among others. How graceful and tender she is! It has such a magnificent combination of a pattern of roses with fillet knitting, mesh and a simple border. The approximate size, as stated in the magazine where I saw it, should have been 30 x 37 cm.
But after this post came out, I knitted this model and it turned out to be very large: 89 x 52 cm.
You should start from the central part of the loin from its lower side, casting on 43 loops. Next comes step knitting.
And then arches are added to this finished part and further knitting occurs in the round (Diagram 2).
And this is my embodiment of the “Phoenix” embossed napkin, the design of which was changed by Victoria Gul so that it becomes so textured. I already showed you this idea in a publication about embossed napkins, and there is also a diagram there. You can find the video master class on my channel if you wish.
