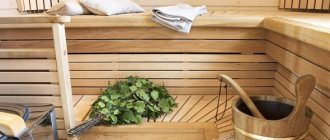
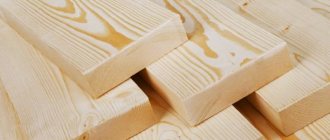
how to make a table for a bathhouse
Everything with your own hands is the motto of a good owner. If you are one of those people and are planning to make a table for the bathhouse with your own hands , pay attention to this selection of interesting projects. In these articles you will find tips on how to make a wooden table for a bath in different versions, read instructions, see drawings, and watch a video. Why should the table be wooden, you ask? It’s just hard to imagine a high-tech bathhouse in a summer cottage. Today there are many different materials available. But for a bathhouse, wood invariably remains the most suitable. But to make a wooden bath table , it is important to choose the right wood; you will learn about this and much more from this collection of articles.
Material selection
Let's start with the fact that the vast majority of craftsmen will make a table for a bathhouse from wood. What else should you put in a wooden or wood-lined bathhouse? Who would even think of doing high-tech on the site? So the question about the material can be safely reformulated into a question about the type of wood.
When it comes to furniture for the rest room, we have no(!) restrictions on the choice of wood.
ATTENTION! The humidity in the bathhouse during procedures is always elevated in any of the rooms.
But high humidity is not a reason to give up any preferences; you just need to take care of protecting the surface of the wood.
This means that breeds can be considered based on other qualities. In particular, in terms of hardness. Based on this criterion, we will highlight the following classes as an example:
| soft | spruce, pine, cedar, fir, juniper, poplar, linden, aspen, alder, chestnut, willow |
| average | larch, birch, beech, oak, elm, elm, birch bark, plane tree, rowan, maple, walnut, ash, apple tree |
| hard | white acacia, hornbeam, dogwood, boxwood, yew, maple, abash, merbau |
Everyone also knows about the division of species into coniferous and deciduous, which speaks primarily of the resin content and, sometimes, the number of knots (conifers often have more of them).
You can choose suitable wood by color, texture, and cut direction , but this is aesthetics (although the cut direction also affects the physical and mechanical properties). There are core and non-core species, that is, either there is or there is no color difference between the inner (core) and outer (sapwood) parts of the wood. The core with the core is usually darker than the outer one.
IMPORTANT! It is good if you have a moisture meter when purchasing a tree. Standard humidity should be 12-18%.
Remember that too wet wood may become unusable when dried, because warping is almost irreversible.
So, if you decide to make a wooden bathhouse table with your own hands, then you need to decide on the tools (if it is manual, then softer types may be preferable, although it will be easier to accidentally damage them in the future), and what the sellers offer in your region, with a budget (the cheapest species are aspen, pine, spruce, linden). In general, any tree is suitable, and then it depends on the circumstances.
Why do you make sauna stoves yourself?
The main reason why they manufacture equipment on their own is the opportunity to save money.
Before deciding to weld a bathhouse stove with your own hands or buy a ready-made, inexpensive factory-made model, it makes sense to carefully analyze whether the owner of the bathhouse has the skills (at least minimal) of a welder and whether it is possible to use a welding machine.
You can rent a welder or from friends. The services of a welder with equipment are quite expensive, but if the material is purchased inexpensively, then you can use the services of an invited welder.
Design selection
Material and design can be selected in parallel, although one does not depend on the other in any way. The table shape can be any, but still the number of basic options is limited:
- square;
- rectangular;
- round;
- oval;
- polyhedron.
This concerns the shape of the tabletop.
In addition, it can be sliding. The number of legs on the table may vary:
- one;
- two;
- three;
- four.
As for three legs, this option is, of course, rare, but possible. If the number of legs is less than three, then their stability will directly depend on the crossbars on the floor on which these legs are installed. For a one-legged person this will be a cross, for a two-legged one it will be a single perpendicular on each leg.
In addition to the tabletop and legs, there may be other structural parts. These include a transverse beam , which connects the legs, if there are two of them at the table, as well as strips that mask the junction of the legs with the frame , which at the same time impart rigidity to the structure.
Yes, and it would also be worth mentioning folding tables , which can be used not only in the rest room, but also in other rooms. This table is mounted on the wall, when folded it takes up very little space, and when unfolded it is no worse than a stationary table.
BY THE WAY! Those who love the original may recall hanging tables, like on a ship.
DIY bench step by step
It is better to make the back and seat of a garden bench not a solid canvas, but to make a small distance between the planks. In this case, rainwater will drain from them completely, the boards will be better ventilated, and the product will be less susceptible to rotting:
- The simplest option is to make a bench with crossbars from planed timber. Its cross-section is not particularly critical - you can take a 30x60 bar, a thinner 25x60 bar, or, on the contrary, a slightly more massive bar measuring 50x200. Frequently spaced slats of even a small cross-section are quite capable of supporting the weight of 2-3 adults.
- To chamfer and remove irregularities, the unplaned timber is carefully processed with a plane. After sawing it to length, each workpiece is treated with a protective compound, for example, drying oil.
- Our garden bench will consist of 4 main parts: two side supports, a seat and a back. When installing a longer 2-meter product in the center, it is better to add a third support post.
- Two additional spacer boards are installed between the supports to ensure stability. Below are drawings of a bench and table mounted on supports made of two crossed boards.
- If desired, the side supports can also be made in the shape of a quadrangle. If armrests are required, the side supports should be extended.
- When installing spacer boards on top and bottom of the bench legs, the structure will be more massive and stable.
- It is better to connect the bars together not with self-tapping screws, but with screws and nuts. Place a washer under each cap.
- It is better not to tighten all the screws too tightly at once, because it is quite possible that we will need to adjust them.
- Holes for threaded connections are drilled. If you want to completely recess the caps, you can additionally select wood for them with a drill.
- In order not to make a mistake when making a frame for an inclined back, it is better to cut them out after installing the lower support posts.
- At the top of the supports we attach horizontal bars on which the seat will be placed.
- We attach the crossbars to the back of the bench.
- You can darken the boards using stain, which is selected according to color.
- The last stage is painting the product or finishing it with drying oil or varnish. Such impregnation will not only help protect the wood from premature rotting, but will also give the product a finished look.
Sizes that are comfortable for a person
There is no way to get around this point: there is a certain relationship between the size of the table and how many people can comfortably (or not) fit behind it. Therefore, each bathhouse owner should estimate in advance how many people will most likely gather at the table in the recreation room or on the veranda at the same time.
The second important factor in choosing the size (and, possibly, shape) will be the area of the room. After all, you need not just to place a table, but to make sure that a person can sit down and get up from the table freely, that there is room for passage, etc. To do this, you need to add a few more parameters to the table dimensions - the width and depth of the seat, the width of the seat for one person at the table, and also the minimum width of the passage.
For our part, we will present the standards of ergonomics, which is the science of how to adapt things to human anatomy.
REMEMBER! To sit comfortably at the table, a person needs 70 cm of space. This is called the seat depth (see picture). Add these 70 cm to the dimensions of the table on all sides - you will get a spot that you allocate for this area. The minimum passage behind the seated person, if necessary, must be at least half a meter.
Now the dimensions of the countertops themselves (according to the estimated capacity):
A person is comfortable at a table if he is provided with at least 60 cm of table space in width. It's minimum.
A two-seater table of square or round shape should be 60 cm on the side or in diameter. However, the “spot” of the zone together with the chairs is calculated as 120 by 210 for a square and 120 by 200 for a circle.
A three-seater table is only possible for a round shape, but the dimensions increase: the table diameter is 80 cm, the spots are 220 cm.
The four-seater can be either cross-shaped or parallel. The side of the square is 85 cm, the side of the spot is 225 cm. The diameter of the circle is 90, the spot is 230 cm. The rectangle is 85 by 125 cm, the spot is 185x225 cm.
Five-seater - circle 100 cm, spot 240; rectangle, size 135 by 85 cm, spot - 235 by 225 cm.
Six-seaters - three types. Circle: diameter 120, spot 260, rectangle parallel seating - 85x175, spot - 235x225 cm, perimeter - 85x145 cm, spot - 285x225 cm.
We'll probably stick with eight-seaters The circle is 140 cm in diameter, the spot is 2.8 meters. Rectangle: parallel seating - 80 by 250 cm, spot 220x285 cm around the perimeter - 85 by 195 cm, spot 225x285 cm.
Also worth mentioning is a design called a “corner”. It looks cozy and fills the space well. The module of the proposed scheme is a seat measuring 55x55 cm. A corner measuring 220 by 165 cm is folded out of them. The table is also square in shape with a square side of 85 cm. Single seats in front of the table are the same dimensions as the module.
Classification
Tables for a bath can be divided into separate groups depending on various factors: material, type of general design, shape of furniture.
By material
For high-tech bathhouses, plastic or metal tables are suitable, but most steam rooms are lined with clapboard. For such rooms it is better to choose wooden furniture. Suitable wood species:
- Poplar. Its performance characteristics are similar to aspen. The advantages include low price and availability. Disadvantages include low strength.
- Alder. Easy to process, resistant to temperature changes and physical impact.
- Linden. Pliable wood for processing. When heated, it emits a pleasant odor and has a uniform texture. Retains its properties even under the influence of external factors.
- Oak. Strong, wear-resistant and durable material.
- Aspen. Natural defects can be found in the array.
To avoid damaging the wood when tightening screws, it is recommended to initially drill a hole with a smaller drill bit.
By design
Depending on this criterion, 3 types of tables can be distinguished:
- Classic rectangular. The legs are located parallel to each other.
- V-shaped. The legs rest on a horizontal beam that lies on the floor. They connect at one point, from where they diverge to different corners of the tabletop.
- X-shaped. The legs cross each other. They are connected by inserting into cut-out recesses.
Classic tables with parallel legs can be divided by the number of supports - from 1 to 4.
By shape
Varieties:
- With a round tabletop. Several bath attendants can gather around them at the same time, depending on the size. Due to the lack of corners, useful space disappears; such a shape is more difficult to make yourself.
- With an oval tabletop. They are similar to round ones in terms of operation and the difficulties of self-assembly, but they take up even more usable space.
- Rectangular, square. Especially popular among bath attendants. They are easy to make yourself.
A separate group of tables are polygons. They have low popularity because they are only suitable for large rooms.
Blueprints
In principle, the diagrams that we have given above can already be a source of inspiration when creating a table.
Below we present several drawings that we found on the vastness of the worldwide computer network. We do not claim authorship and do not know their authors, therefore we cannot provide links to primary sources (see appeal to copyright holders).
Let's go through the options already mentioned above. Let's start with a one-legged table made in the shape of a polyhedron. It rests on a crosspiece, and for greater strength (and, partly, greater decorativeness), the connections of the legs with the crosspiece and the tabletop are reinforced with jibs. The parts are fastened using glue and self-tapping screws.
A table with two legs also looks very attractive in a recreation room. In addition, it is not difficult to manufacture. As can be seen from the drawing, the transverse beam is inserted into the holes made for it in the legs and fixed with pins.
Three-legged tables are not used for feasts. Therefore, let’s immediately move on to the “classic” - a table with four legs.
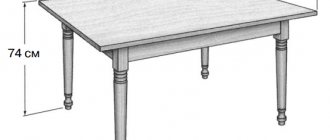
As you can see, the table is very simple, without frills, but correct in design and suitable for making even for beginners.
This is what we will use as the basis for our instructions.
What types of wooden tables are there?
Various materials are used to make wooden tables :
- solid wood;
- beam;
- edged board;
- logs;
- sawed logs;
- stump (no defects);
- branches, driftwood, parts of roots.
In the case of furniture and finishing materials for baths, special requirements are imposed wood . The following types are considered the best option:
- abashi;
- aspen;
- Linden.
These three materials have low thermal conductivity and high density, rarely have defects, and are easy to process. An important factor is the absence of resins in the structure of this wood.
The most common and accessible trees in Russia are linden and aspen. Abashi (abachi) is valuable wood native to tropical Africa. The cost of such material is much higher, but it is more durable when used in a steam room.
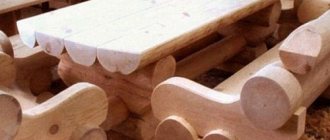
Wooden furniture made from driftwood and branches.
How to make: instructions
So, the model is quite simple. You don't even need an expensive tool for it.
Tools
- any saw - hand saw, miter saw, circular saw, even a jigsaw;
- (possibly) an electric drill with drills to match the diameter of the dowels;
- any grinding machine - manual, grinder, regular electric.
ATTENTION! It is assumed that you purchased high-quality material, and you will not have to joint the boards, bringing them to uniform dimensions.
Material
- boards 30x100, 20x100 mm;
- beam 60 mm section;
- glue;
- self-tapping screws;
- (possibly) dowels.
Actions
First you need to cut the parts of the required size in accordance with the drawing. These will be:
- 7 boards 30x100 mm, length 120 cm;
- 2 boards 20x100, 100 cm long;
- 2 boards 20x100, length 62 cm;
- 2 boards 30x100, length 58 cm;
- 4 bars with a cross-section of 60 mm and a length of 67 cm.
In the parts, 58 cm long, grooves are cut out at both ends for the legs of the table - 60x60 mm. The future legs are chamfered from one (only one!) of the corners.
The surface of all parts is pre-treated by grinding.
ADVICE! A second sanding can be done after the table surface has been varnished for the first time.
Now there is an important point: the fastening of parts is variable. They can be placed on self-tapping screws, screws , or dowels with glue . In addition, the methods can be combined.
Since we do not provide for turning any of the usual carpentry joints of parts, we decided that in some cases, dowels can be used to improve the reliability of fastening . An alternative method would be to fasten it with a metal corner. But first things first.
So, you have processed all the blanks. Let's start assembly.
First of all, the tabletop boards are laid on a flat surface and fixed. Then, according to the drawing, 58 cm boards are placed on them, which fasten the tabletop with self-tapping screws. They are screwed in from below, and the length should extend into the tabletop board by about half its thickness . That is, the length of the screw or self-tapping screw is 2 + 1.5 = 3.5 cm.
photo source: https://chertegnik.ru/mebel/45-chertezhi-stolov-iz-dereva.html
The next step is to attach the legs to the slots in the crossbars you just screwed on. We recommend gluing the connection, and then securing it with self-tapping screws, which are screwed in perpendicularly, fastening the leg to both sides of the groove.
To increase the rigidity and strength of the structure, you also need to make side ribs. Please note that the side ribs on the short sides have somewhere to fasten even without the participation of the table top - there is a block along the entire length, and the side ribs on the long side are fixed only 10 cm from each end.
Therefore, we offer two options: either connect them to the tabletop with dowels, or with a metal corner screwed to the inside of the rib.
If dowels are selected, then three on each of the two long sides are sufficient. Holes half the thickness of the board are drilled under the dowels using an electric drill. The connection is made with glue.
IMPORTANT! Why are dowels better than corners? The fact is that any wood joints tend to “breathe,” which loosens any metal fasteners over time (therefore they should be tightened occasionally), and the wooden dowel moves with the wood.
You can place one corner in the middle or several along the entire length - this is optional.
At this point the table is ready.
DIY sofa bed
As a rule, such models are chosen in studio rooms or when it is not possible to fit a double bed in the bedroom. Comfortable, healthy sleep can only be ensured by a product that has orthopedic properties. Therefore, it is better to buy ready-made mattresses for a homemade sofa bed.
The choice of method for transforming a model into a full-fledged sleeping place depends solely on the wishes of its creator. Using the example of making a sofa with the easiest-to-use “Eurobook” mechanism, you can study the main stages of work.
For this you will need the following materials:
- two mattresses;
- beam;
- Chipboard, fibreboard, plywood;
- thin foam rubber, synthetic winterizer;
- legs;
- agrotextiles;
- upholstery fabric;
- glue;
- fasteners, nails, screws;
- folding mechanism (2 pcs.)
- tools.
First you need to assemble a rectangular base box from fiberboard. Attach the legs and timber guides to the inside of the sidewalls, close to each other. Install a fiberboard spacer in the center of the box and cover the bottom with plywood.
Next, the frame of the retractable part is made from timber, the surface of which is covered with a sheet of plywood. Support bars are attached to the structure, and legs are attached to them. At the corners of the inner part of the frame there are small bars up to 10 cm long that prevent it from jumping off the base. A mattress is placed on the frame, its edging is connected to the surface using a furniture stapler. The seat is ready.
Then the upper parts of the folding mechanisms are screwed onto strips of fiberboard measuring approximately 15x30 cm with self-tapping screws. Four through holes are drilled in the corners of the boards.
To attach the resulting parts to the back, you need to “open” the mattress upholstery from the sides, gaining access to its spring blocks. Using a strong wire, the fiberboard is connected to the internal elements of the mattress. Now the lower parts of the mechanisms can be secured to the base.
At the final stage, the wooden parts are covered with foam rubber and synthetic padding. Next comes upholstery with sealing and decorative fabric. A seat is placed on the base. That's it, the sofa bed is ready. For convenience, the model is equipped with large pillows and armrest bolsters.
Protective coatings
All that remains is to varnish or paint it. Since the first layer always only saturates the surface of the wood, after which all the fibers on it rise, it is recommended to sand everything before the second layer .
Since our table is intended for a bath, it will inevitably encounter high humidity .
If the wood species is not resistant to rot and pests, you can first treat the table with an antiseptic, then varnish or paint.
Since we are talking about a rest room, we are no longer considering options for water-repellent impregnations - the varnish looks better.
As for recommendations, we recommend time-tested ones: Pinotex, Tikkurila, Dulux, Neomid. They all offer water-based acrylic varnishes that can be used in baths and saunas.
Colors
Do not be too zealous in painting wooden products. If you decide to enhance the natural color, then coffee tones are best for any breed. It is optimal to use water-based varnishes and paints. They are less toxic and interact well with wood.
It is perfectly acceptable to use undyed materials with natural colors. Cast iron without additional coating and wood of natural color will become an original decorative solution that does not require additional color shades.
But components made of iron, unless, of course, it is stainless steel, need to be painted in any case. Even if your table with iron legs will always be indoors, the metal must be coated with any coloring compound. Iron corrodes even in dry and warm rooms and requires painting.
Design
If you want to create a country style in your bathhouse, then you can and should use antique furniture. To give the headset the solidity of its age, simply clean it of the old coating. After this, it is worth covering the “cleaned” furniture with paint or glaze. Using a sponge, we randomly remove a layer of paint to create a worn-out feeling.
After all the above steps, we coat the set with varnish to protect it from external influences.
Add some design flair: scatter some elements around the bathhouse area in the form of birch brooms for the steam room and bunches of dry herbs.
The minimalist style is currently at the peak of popularity. Wooden furniture and a minimal number of accessories will give the bath an ascetic style. This design is well suited for small baths, because with a minimal amount of furniture, the space will visually expand.
Briefly about the main thing
Folding garden furniture is convenient not only when there is a lack of space on the recreation area. When the table is not needed, it is removed with one movement of the hand, turning the dining set into a comfortable bench with a backrest.
To have this opportunity, learn how to make a transforming bench with your own hands. A simple structure can be made from either a metal profile pipe or wood.
This will require ready-made detailed drawings, since the most difficult thing is to manufacture all structural elements in exact accordance with the project. Combining them into a single whole is a matter of technology. After looking at the photos and videos in this article, you will surely cope with this task.
Basic installation requirements
The appearance of the product will be determined not only by the material, shape, but also by the installation location.
Vent grilles can be installed outside and inside the room. The latter option should be harmoniously combined with the window sill, and also fulfill its main function. To do this, the structures are mounted closer to the end of the window sill or next to the window. The placement of the grille will depend on the location of the heating radiator. If the battery is hidden deep in the window sill, then the grille should be located close to the window. When the radiator protrudes, then ventilation is done above it. Products must fulfill their main function - to prevent the accumulation of condensation in the window area and regulate the flow of warm air.
Installing ventilation at the radiator location is a basic installation requirement. The length and width of the structure should be approximately the same dimensions as the radiators or slightly larger. Small sizes will lead to the accumulation of hot air and the appearance of condensation.
Design
If you want to create a country style in your bathhouse, then you can and should use antique furniture. To give the headset the solidity of its age, simply clean it of the old coating. After this, it is worth covering the “cleaned” furniture with paint or glaze. Using a sponge, we randomly remove a layer of paint to create a worn-out feeling.
After all the above steps, we coat the set with varnish to protect it from external influences.
Add some design flair: scatter some elements around the bathhouse area in the form of birch brooms for the steam room and bunches of dry herbs.
The minimalist style is currently at the peak of popularity. Wooden furniture and a minimal number of accessories will give the bath an ascetic style. This design is well suited for small baths, because with a minimal amount of furniture, the space will visually expand.
Bath benches photo
Here are photographs that show what benches for a bath should look like. The drawings will be given below in a special block.
Single-tier lounger
Multi-tiered sun loungers
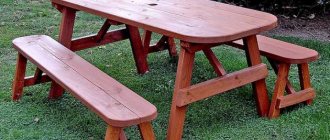
Benches and table for the rest room
Mini sauna bench
Upgrading furniture
If you have never done this, the instructions below will help you do it.
But first prepare:
- a metal brush or grinder with a similar attachment;
- acumen;
- large and small skins;
- brushes;
- "White Spirit";
- wood antiseptic;
- Belinka glaze or similar.
Rural or country style
It characterizes home comfort, memories and things dear to the heart. Country style in a bathhouse, in contrast to modern apartments where minimalism reigns, is quite appropriate. It gives warmth and sunshine to rural spaces.
Country style for a bath
If you find unsightly wooden furniture at your dacha, do not rush to throw it away. Let's try to create an expensive country style in a single product.
You can make beautiful furniture for the bathhouse for the relaxation room.
- Sand wooden furniture along the grain with a metal brush. You will remove soft fibers.
- Remove the sawdust with a sweeping brush so as not to pull splinters out of your hands. The wood will then acquire relief and a contrasting color.
- Cover it with two layers of translucent Belinka-type glaze. Apply it with a brush or roller.
- Remove the layer of glaze with a dry, clean sponge. After this, the relief will be immediately visible.
- Varnish wooden furniture.
- Wipe off the fresh glaze with a sponge. You will end up with bleached, aged wood.
- Give the furniture a final coat of varnish.
Care instructions
To prevent the tree from becoming damp and moldy, it is recommended:
- wipe the benches after the bath procedure with a dry towel;
- leave the door open for ventilation;
- treat the wood with oil once a year;
- wash benches with a solution of laundry soap (other substances must not be used, as they are toxic or abrasive);
- remove mold and rot by replacing the wooden part or product.
To protect wood from pests and mold, special compounds are used.
Accessories
If you decide to go to a craft store, stock up on everything you need right away. For your craft, you will need additional components to securely fasten the wooden parts together. The simplest steel corners will make the structure more reliable in operation. Don't skimp on additional decorative elements. They will not be superfluous, but will only decorate the appearance.
Ready-made kits that can be purchased in the store will add greater elegance to wooden crafts. A homemade desk for a child will look very nice if you use metal legs from any ready-made furniture set. It’s easy to make a bedside table for it yourself from the same standard kits. Handles and fittings can be picked up in the same store.
Advantages of convection grilles for window sills
The presence of ventilation grilles for radiators of the heating system, installed in the window sill, has a number of undeniable advantages that ensure an optimal microclimate in the room where they are installed. In addition, the advantages of their presence include the following indicators:
- natural ventilation in the room improves;
- the issue of preventing the formation of condensation in the window opening is resolved.
The advantages of such products can also be considered:
- versatility of the installation method and ease of installation work;
- variety of shapes, designs and colors;
- ease of use and maintenance;
- affordable price for models made of plastic.
Convection grilles can be installed in different ways, depending on the materials of the enclosing structures, the design style of the room and the personal preferences of the user
Summarize
Such elements are a fairly convenient way to get rid of dampness and fungus on slopes and double-glazed window frames. And the fact that the cost of plastic products is low, and installation is quite simple, only adds confidence in the necessity or simply profitability of their installation.
Sources
- https://ventihome.ru/elementy/reshetki/ventilyacionnaya-reshetka-v-podokonnik-konvekcionnaya-dlya-batarey.html
- https://HomeMyHome.ru/ventilyacionnye-reshjotki-dlya-podokonnikov.html
- https://okna-comfort.ru/ventilyatsia/reshetki
- https://oventilyacii.ru/otoplenie/ventilyatsionnye-reshetki-dlya-batarej.html
- https://seti.guru/ventilyatsionnyie-reshyotki-dlya-podokonnikov
- https://stroy-podskazka.ru/furnitura/podokonniki/ventilyacionnaya-reshetka/
How do you like the article?
Sergey Vladimirovich
Ask a Question
Purpose of the grille
A convection grille in the window sill helps prevent condensation (which, in turn, leads to the formation of fungus).
This happens due to impaired air circulation in the room and due to increased humidity levels. The installed grille relieves a person of this problem: the air heated by the radiator freely flows through it up to the window, and when cooled at the opening, it falls down.
Location of the convection grille in the window sill
Now let's take a closer look at why it is important to install grilles and what causes condensation on the windows.
According to SNiP, central heating radiators should be located under the windowsill. Their task is not only to warm up the room, but also to heat the window opening - in order to avoid the appearance of condensation. Therefore, the radiator always protrudes slightly relative to the window sill - so that warm air from it can rise up to the window.
However, now the methods that were relevant in the past are often violated:
- During repairs, window sill boards of greater depth are installed, completely covering the radiator.
- Sealed plastic windows are installed.
Old wooden frames, which were installed in houses built in the second half of the last century, had gaps and cracks. Through them, air freely entered the rooms and was removed through ventilation shafts - that is, there was natural circulation.
Several ventilation grilles in the window sill above the radiator
Before the “2000s” (when people began to massively replace old, cracked wooden windows with new PVC structures), there were no such problems with condensation. And the rooms were not so stuffy - again, due to the flow of fresh air through the cracks.
Now people often forget that they need to worry not only about the beauty and tightness of the window, but also about normal ventilation. There are two ways to solve the problem:
- Install a supply ventilation valve in the window.
- Install the ventilation grille in the window sill.
Ideally, these methods should be combined: if there is a grille in the window sill, this will not solve the problem of stuffiness in the room.
Types and characteristics of products
Regardless of which window sill the grille is chosen for (plastic, wood, stone), it can be made from the following materials:
- Aluminum.
- Steel.
- Tree.
- Plastic.
External view of the ventilation grille for the window sill
The shape of the bars is rectangular (like the window sill). The most common frame sizes (in millimeters) are:
- 80 x 800.
- 100 x 800.
- 100 x 600.
- 80 x 480.
- 100 x 500.
- 80 x 500.
Based on the control method, products can be divided into 2 categories:
- Non-adjustable – having fixed slats.
- Adjustable - having slats that can be tilted, thereby letting more or less air through and directing it.
Appearance of ventilation grilles of different models
Products can also be divided according to their location relative to the window sill:
- Flush with the surface.
- Protrude relative to the surface.
As for the shape of the holes, most often they are made in the form of slits. Much less common are window sill grilles with round perforations, or any other shape, even some kind of figured decorative one, with ornaments or patterns.
How and what to choose?
The main rule when choosing a ventilation grille for a window sill is to focus on its length and the length of the battery.
The best option: choose a grille that is approximately the same length as the radiator. This can be either 1 long lattice or several shorter ones. A product that is not long enough and located on one side of the board simply will not protect against condensation in the other part of the window.
With this rule, one more thing should be followed: pay attention to the open cross-section of the grille (for reference: this is the area of the holes through which air can pass). For most convection models, this characteristic ranges from 0.42 to 0.6 - which will be quite enough to solve problems with condensation on windows.
We recommend: How to glue foam to metal: sealant, polyurethane glue and other means, video and photo
Window sill with bars
By the way, for those who plan to put something on the windowsill, it is not recommended to choose grill models with holes that are too large. In this case, small things may fall through them, and debris will accumulate under the batteries.
If the window sill board is not used in any way, you can choose ventilation grilles with a large open cross-section (large size of the notches) - up to 0.9. This way, more air will flow through the holes, which means there will be less chance of condensation forming.
About the grating material
As for the material: the most expensive option is steel. However, its use is not mandatory - plastic, aluminum, and wooden gratings will do the job equally well. They all have their own characteristics:
- plastic is the cheapest, but in white it fades in the sun and changes shade;
- wood is a less common option, which costs more than plastic and aluminum, and is more demanding to maintain;
- aluminum is the best option: not susceptible to UV radiation, and not too expensive.
Hole in the countertop for the ventilation grille
You should also pay attention to the location of the grille relative to the surface: ideally, it should be flush with the window sill. Protruding elements, firstly, catch the eye, and secondly, they do not allow the window sill board to be fully used (for example, as a “shelf” for flowers).
Approximate price minimum for some grilles:
- aluminum, non-adjustable, 80 x 800 mm: from 1100-1200 rubles;
- aluminum, adjustable, 80 x 800: from 1200;
- aluminum, non-adjustable, 100 x 600: from 1100-1200;
- aluminum, non-adjustable, 100 x 800: from 1200-1300;
- plastic, unregulated, 80 x 800: from 800-1000;
- plastic, unregulated, 100 x 500: from 700-800;
- wood, unregulated, 90 x 500: from 2500.
And some companies have now even begun to produce window sills with already installed grilles. This option is not always suitable - since their location may not correspond to the location of the radiator.
