how to make a table into a gazebo
Whether for decorative or functional purposes, a gazebo is a popular addition to any garden or yard where you can enjoy a warm day with friends and family while outdoors. To make your stay comfortable, make a gazebo table with your own hands , using one of the suggested instructions. Gazebos can be either free-standing or attached to the wall of a building or fence, that is, of different shapes and sizes. Based on this, you can make a table and benches for the gazebo , if dimensions allow. If benches are already built into the structure, the ideal solution would be a round table in the gazebo . For small wall structures or pergolas, a small coffee table is perfect. Look at this small selection and choose for yourself the appropriate step-by-step instructions on how to make a gazebo table with your own hands to your liking.
Types of tables for gazebos
Based on the shape of the tabletop, there are 3 types of tables:
- square (rectangular);
- round;
- polygonal.
Round tables are considered the most popular and convenient. The smooth shape makes them ideal for all types of gazebos.
Several materials can be used in the manufacture of tables: metal, plastic, wood, as well as their combinations. Each option has its pros and cons. Metal tables are durable, but they are expensive and get very hot in hot weather. Plastic options are inexpensive, but will not last long.
The combination of wooden tabletops or seats with brick bases looks very interesting, especially if the same materials were used in the construction of the gazebo.
Wood is considered the most affordable material for making gazebo furniture. Wood is environmentally friendly, easy to process, and has an affordable price. A wooden table can be bought at any specialized retail outlet, but the owner’s special pride will be furniture made with his own hands.
Benches for gazebos
Making a bench for a gazebo is an equally exciting process. If the standard dimensions are observed, it can easily fit 3 people.
Benches in the gazebo save space and help accommodate many guests
Assembly steps:
- Take boards 15 cm wide and 3.5 cm thick (the length of the material should correspond to the length of the wall along which the bench will be installed).
- Process the workpieces with an electric planer.
- Round and sand sharp corners.
- Cut a piece of timber (5 by 5) along the length of the boards.
- Also prepare 2 pieces of timber, each 40 cm long.
- Take 5 bars measuring 30 by 50 mm and cut off the corners of each on one side - you will get supports under the seat.
- Saw off five 50-centimeter bars and trim the corners on both sides.
- Paint and varnish all parts.
- After drying, screw the timber (5 by 5) to the gazebo posts.
- Install 2 supports under the beam.
- Fix the prepared stops on top of the beam after 50-70 cm.
- Place a special spacer under each stop.
- Secure the boards to the supports.
Making wooden tables and benches for a gazebo with your own hands is a great chance to show off your skills and save your family budget. The only thing is not to forget about following safety rules and choosing reliable and durable materials. And then every visit to the gazebo will become a pleasant reminder of your own skill.
Round table
A round wooden table is one of the most popular solutions for a gazebo.
If the gazebo is small, then you can install a round table on one leg. assembly steps :
- To make a support, you need to take a beam with a cross-section of at least 10 by 10 cm.
- Drill a hole in the lower part of the future leg.
- Clean the recess from dust and coat it with epoxy glue.
- Insert a wooden or metal pin into the hole (it will help keep the table on the floor).
- Drill a hole in the floor.
- Make 4 sawn spacers and fix them to the support using self-tapping screws or glue.
Table top:
- Take a tongue and groove board and assemble a rectangular or square shield from it.
- Drive a small nail into the middle of the structure.
- Build a homemade compass. To do this, take a long thread, tie one end to a nail, and the other to a pencil. Stretch the thread and draw a circle on the tabletop.
- Cut the workpiece.
- Nail 3-5 cross members to the underside of the structure.
- Connect the support and the tabletop.
- Fix the structure to the floor.
Useful little things
- The wisest thing is to take your time. Any work requires thoughtfulness and precision in execution. Don't set yourself any deadlines. Do work when you are in the mood.
- If something doesn’t work out, put the craft aside and come back to it after a while. Such work will only be a joy, and you will achieve good results.
- Don't take on a complex project right away, start with simple work. It is necessary to gain some experience for subsequent more complex crafts. Using power tools will make your work easier. Be sure to follow all safety precautions when working with any tool used for wood processing.
Even a small splinter can become a problem if you do not pay attention to it in time. Follow safety regulations
Always wear glasses when working with wood products, especially if machining is involved. If you have little experience, but you want to make at least a wooden table in your own home with your own hands, start by going to the building materials supermarket. There you will find everything you need for individual creativity. Design solutions will be suggested by the materials themselves. To begin with, use wooden blanks that require minimal post-processing. Carry out all work in a spacious room. A small workshop in the country is an ideal option. Painting should be carried out in a well-ventilated area, even if low-toxic compounds are used. Observe all required drying times for glued and painted parts.
Finishing
A finished country table made of wood will last for centuries if it is additionally treated with a bioprotective composition. It will protect the wood from bugs and rotting. It is advisable to apply the treatment in 2-3 layers and let the table dry completely in the shade.
Then the wood is covered on all sides with stain or varnish. The first will give the wood a deep dark shade. The varnish will form a beautiful glossy gloss. In addition, the varnish coating repels water. So you won’t have to remove the table from the garden even when it rains.
Advice: experts recommend pre-treating the wood with protective compounds before assembling the table. After all, after its installation, the joints of the parts cannot be coated well.
When making wooden furniture and working with a circular saw or sander, it is advisable to wear safety glasses. Small wood chips can cause eye damage.
We hope that thanks to our drawings with dimensions, you will get a wonderful outdoor, wooden table for your garden, made by yourself.
Which table design was easy for you?
Choosing what the table will look like
Before you get down to business, it’s worth deciding on the types of design. There are many, but here is a brief description of several types:
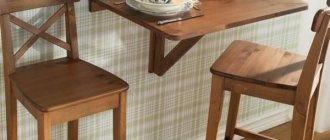
- Folding table. Its main advantage is its compactness. This design has twist-out or folding legs, as well as a folding tabletop. This table is easy to carry, transport, or fold and remove from the gazebo for a while.
- Transformer. This type of table is represented by a folding mechanism. The design differs from the previous type in that this table can be transformed into a bench. The option is quite convenient, but not very durable due to the many sliding mechanisms
- Stationary table. This design is without additional mechanisms, without the possibility of a transforming table. Looks great in a gazebo or on the terrace.
- Decorative designs. Wood craftsmen decorate the table with various animal figures, patterns or ornaments. When creating decorative tables, you can show your own imagination. Or look at ready-made options on websites on the Internet. Specialized stores sell ready-made table decorations made from different materials.
- A round table visually adds space and adds aesthetics to the gazebo. The leg of a round table can be one massive stand, which is well secured with a cross at the bottom. Or maybe the tabletop rests on four legs located in the corners.
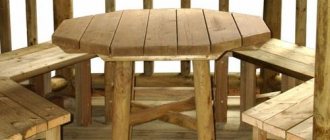
- Hexagonal table. Suitable for a gazebo with strict elements and several corners. Guests at a hexagonal table will feel freer than at a round one.
Making a countertop
To create a simple tabletop, boards 2-3 centimeters thick are used; the width and length of the boards can vary. The tabletop of the required size is folded on a horizontal surface with the back side up. The folded boards are fastened with guide bars; this will make the tabletop more durable and protect the boards from loosening.
For a small tabletop, 3-5 beams are enough, which must be carefully adjusted to each other. To fasten the tabletop parts together, it is better to use stainless steel screws. You can, of course, make do with wood glue, but this method is not very reliable. When using glue, it is important to allow the parts to grip together; for this, you can use pressure, such as heavy bags.
After assembly, the tabletop should be processed: sharp corners should be trimmed, the surface should be sanded. To protect the table from negative natural factors, the wood is treated with special water-repellent agents or parquet varnish. If desired, you can paint the working surface of the tabletop with moisture-resistant safe paints, lay it out with a mosaic made of natural materials, and fill it with epoxy resin.
Wooden portable table
A portable table made of boards is a strong, stable, reliable and lightweight structure. The dimensions of the tabletop must correspond to the dimensions of the gazebo itself.
Assembly steps
Table top:
- Mark the required length of the boards.
- Cut the material.
- Secure the boards.
- Using self-tapping screws, install several guide bars on the back side of the structure.
Legs:
- The table legs are made of the same material as the tabletop.
- The number of supports depends on the size and shape of the table.
- The legs of the structure must be stable.
- When installing supports, the floor level should be taken into account. The slope of the surface must be compensated by different lengths of the legs.
Each element of the future table must be thoroughly polished and treated with an antiseptic!
At the end of assembly, at least 2 layers of varnish must be applied to the product.
Stages of making a wooden table for a gazebo with your own hands
There are many instructions on how to make a table into a gazebo. Their complexity depends on the type of structure.
Used as the main drawing for instructions
One of the simplest, consists of the following steps:
- Wooden blanks are cut to size according to the drawings. All surfaces are carefully sanded. Including the inner sides of elements, corners and ends;
- The outer edges of the tabletop, the edges of the beams used as legs, as well as the lower edge of the frame boards are chamfered. To do this, use a jigsaw mounted at an angle or a miter machine with a corresponding shaped cutter.
- All lumber used to make the table must be dried and treated with an antiseptic primer. When making products from wood and metal, all metal parts are also coated with anti-corrosion agents - varnishes or paints.
Ivan Mukhin
Expert of our site. Specialist in country houses and landscape design
Ask a Question
When impregnating lumber with antiseptics, pay special attention to the ends. During the work: when adjusting dimensions, cutting out tenons, grooves or drilling holes, all places that were processed are also additionally primed.
- The supporting frame is assembled from two long (2) and two short boards (4). A short board (4) is installed on the edge and to it, legs (1) are attached close to the edge. Vertical installation will be checked with a square. Then long elements (2) are attached to the existing blanks. You should end up with a rectangular box, inside of which there are legs installed at the corners.
- To improve spatial rigidity, an additional cross member (3) can be installed in the middle of the frame.
- Lay the tabletop boards face down on a flat surface. For more convenient work, they can be pre-secured with clamps. Or fasten them together with wood glue. The second option is preferable as it prevents the formation of cracks.
- The tabletop is held together by crossbars (at least three) located along the edges and in the middle. The length of the screws must be selected so that when they are screwed flush into the wood, the tip does not come out from the front side. As a rule, the length of the self-tapping screw should be 5 mm less than the total thickness of the tabletop.
- The frame with legs is attached to the tabletop using special perforated angles and shorter screws.
- After assembly is completed, the entire structure is additionally sanded and painted. Crevices and other defects must first be filled with putty.
A couple more table frame options:
Construction tools and material for work
To build a wooden table for a gazebo, you will need:
- dry board 15 cm by 5 cm (about 20 meters);
- bars, measuring 5 cm by 5 cm and 70 cm long (4 pieces);
- a plane or grinder with a grinding wheel;
- galvanized wood screws;
- screwdriver or drill;
- electric saw or jigsaw.
On the Internet there are many photos of wooden tables for gazebos, which are made from waste. This option reduces the time spent searching for blanks, as well as the cost of purchasing them. It’s just impossible to get good quality using this option.
The disadvantages of such a design will be not only a short service life due to low strength, but also the appearance of the table, which leaves much to be desired.
To build a good, solid table, you will need high-quality materials. Conifers such as pine and spruce are usually used.
Deciduous trees have high strength, especially oak. Such materials are difficult to process, but their service life increases significantly. It is also worth noting that hardwoods contain less resin.
The workpieces must not be damaged. Boards with falling knots and resin stains are not suitable for work. Gray spots on the surface of the board must be cleaned off. This is mold that will gradually destroy the array.
The main task is to buy 20 meters of board. Self-tapping screws cost pennies, and you can ask friends for the missing tool or rent it for the weekend.
Table drawing with dimensions
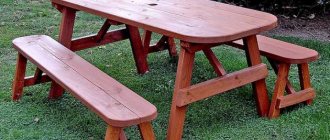
Let's look at the step-by-step production of such a table as in this photo:
The finished product will have the following dimensions:
- length - 2 m;
- width - 0.75 m (5 boards, each 15 cm).
- protrusion beyond the leg – 0.3 m;
- leg height – 0.7 cm;
- height to tabletop - 0.7 m.
Depending on the parameters of your gazebo, you can proportionally increase or decrease the size of the table proposed for consideration.
This table is suitable for both small and medium gazebos. In large gazebos it is necessary to use longer and more solid material.
Tree selection
A table made of wood looks aesthetically pleasing and stylish; it is an environmentally friendly and pleasant material to work with. However, there are many types of wood from which you need to choose the best one. When choosing a breed, it is worth considering not only visual characteristics (color, texture, general appearance), but also more important qualities.
Wood for furniture must meet three basic requirements: to be durable, wear-resistant, and resistant to various types of deformation.
All of the listed characteristics depend on the density of the tree (the ratio of mass and volume). There are three types of density:
- Soft. These include linden, willow, juniper, cedar, aspen, pine, chestnut, and fir.
- Solid. This group includes ash, elm, rowan, apple, larch, and beech.
- Very hard. Its representatives: hornbeam, yew, boxwood, white acacia, dogwood, birch.
Wood species for making furniture.
Let's look at the most common types of wood with their advantages and features:
- Pine. Perhaps the most common and affordable type of wood. It belongs to soft breeds, therefore it is pliable in work, resistant to moisture, dampness, temperature changes and rot. It glues well, and after de-resining it can be easily processed with paints and varnishes.
- Oak. A hard, durable type of wood, pleasant to work with, resistant to rotting. Oak furniture has a beautiful appearance, the color without treatment varies from yellowish-white to brown.
- Beech. Durable and hard wood, easy and pleasant to work with. The price tag is more affordable than oak. The main disadvantage is hygroscopicity.
- Ash. The wood is characterized by strength on par with oak, has a beautiful soft golden color, and does not crack. However, the tree does not tolerate high humidity conditions.
- Linden. Durable, does not rot, does not crack or deform when dried.
- Walnut. Dense wood, nevertheless pleasant to work with, has a beautiful texture and is easily covered with paints and varnishes, although the natural color of wood is very rich in various shades and transitions.
Beautiful examples for inspiration
Wooden pergola-type solariums look elegant and weightless. Textiles can be used to create shade. The Mediterranean style in the garden of a country house will evoke pleasant thoughts of the sea and give a feeling of complete relaxation and bliss.
Oriental style is too demanding in terms of design. For example, a Chinese gazebo should stand in a garden that will fully meet all Eastern traditions - these include rock gardens that will support the idea, and paths paved according to all the rules of the East, and the calming surface of artificial reservoirs.
A forest-style gazebo appears as a kind of shelter for a real hunter. For such a construction, you can actually use materials from the forest without buying ready-made beams or round timber. This building looks unusual and authentic.
Even when decorating your site in a modern style, for example, hi-tech or minimalism, you can use wood material. The main thing is to properly process the wood and find the necessary form for the future building.
Wooden gazebos with a stove look very cozy. The combination of wood and stone is the main feature of the rustic style. Natural rough materials look very harmonious together.
To learn how to build a wooden gazebo with your own hands, see the following video.


