Advantages of drywall for kitchen finishing
- This material has good thermal insulation properties
- Good fire resistance of this material
- Fast and convenient installation
- Plasterboard structures can hide all communications in the kitchen, namely pipes, ventilation devices, etc.
- Environmentally friendly material
- Creates an excellent surface for further finishing work
- Resistant to temperature changes
- Using drywall, you can implement almost any lighting solution.
Design options
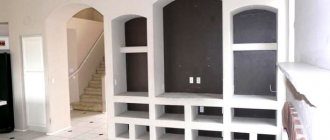
Modern man has the widest possibilities in the matter of design. A plasterboard wall in the kitchen can be covered with wallpaper of different colors or painted. As an option, you can rely on a combined surface design; a variety of design ideas are used for this.
Plasterboard material gives ample opportunities to owners of apartments and houses. The main thing is that the walls in the kitchen, finished with plasterboard, are durable and strong.
Types of drywall that can be used in the kitchen
GKL is the most common type of drywall and is used mainly in dry rooms.
GKLV is a moisture-resistant plasterboard sheet. Mainly used in rooms with high humidity. What distinguishes it from regular gypsum board is the green color of the sheet. You can also use it in the kitchen if desired.
GKLO are fire-resistant sheets; this type of drywall is used in rooms with a high risk of fire. A distinctive feature is marking with a red marker.
There is also, as they say, three in one called GKLVO and moisture-resistant and fire-resistant.
Selection of drywall and tiles
The kitchen is a room with high humidity. However, material with a moisture-proof layer is not always required. Why:
- Modern kitchen units are equipped with hoods, which prevents steam or condensation from reaching the material.
- Drywall is never left without finishing - paint, tiles, film, waterproof wallpaper. Through them, moisture will not reach the cardboard - the volume is too small.
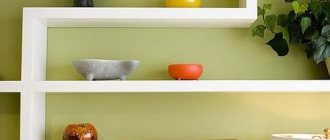
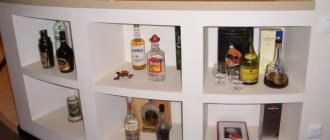
As for thickness, the function of the shelf is taken into account. If it is intended for storing crystal sets, cast iron frying pans or pots, then a significant thickness is natural - from 10 mm + metal frame. For pencil cases, plasma TVs and designer inserts, even less will do.
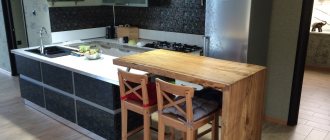
Furniture in a light-dark tone looks ideal with lighting
Kitchen ceiling made of plasterboard
Many design solutions can be implemented in plasterboard ceilings, namely, creating any geometric shapes or arranging lighting to suit every taste. The ceiling is installed using profiles, plasterboard boards, and various fasteners. Plasterboard ceilings can be divided into several types used in various solutions.
Single-level structures - used when the surface is not perfectly flat to hide various irregularities. It is better to use a metal structure made of profiles than wood. Preference here should be given to 9.5mm plasterboard sheets. Try to sculpt fewer different scraps to avoid a large number of seams.
Multi-level ceiling - with the help of this design you can visually increase the space of the kitchen, create multi-level lighting, and hide various communications. It differs from the first design in more complex work due to the wavy shapes.
Room characteristics
The kitchen, like the bathroom and toilet, has its own specific requirements that the material used here must meet. The list of such requirements includes:
- good resistance to high humidity;
- the material must withstand sudden temperature changes;
- strength and durability;
- the ability to easily apply finishes to the surface in the form of ceramic tiles, water-repellent paint or wallpaper.
Drywall is more than suitable for these requirements. Note! The kitchen needs a special type of plasterboard sheet that meets the above requirements.
Installation of a kitchen ceiling made of plasterboard
- The advantages of installing a plasterboard ceiling are that the work is completed faster than with other finishing materials.
- Markings are made using a water level horizontally, after which parallel lines are drawn on the base of the ceiling. Don’t forget to take a 60cm step between the lines.
- Fastening a galvanized U-shaped profile around the entire perimeter of the room. U-shaped are: 30x30x2; 30x30x3; 40x40x4; 50x50x4; 20x32x2
- Once we have finished with the guide profiles, we will need to start installing the hangers. They are needed for fastening PP profiles in a vertical position.
- Installation of a frame made of PP 60/27 profiles
- Fastening drywall sheets
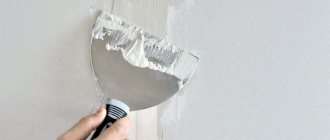
- Sealing seams on drywall using sickle and putty
- Finishing with various materials. This means that it will be applied to drywall. Namely, putty with further painting, decorative plasters, etc.
Let's go in order
Before choosing plasterboard for finishing the ceiling in the kitchen based on its properties, you need to select sheets according to their intended purpose. At the moment, plasterboard sheets, depending on their purpose, are divided into the following types:
- wall;
Sheets for walls
- arched;
Arched sheets
- ceiling
Ceiling sheets
All sheets have characteristic properties that allow the material to be used in certain places. The differences lie largely in the weight of the sheets, as well as their flexibility. As the name implies, it is necessary to use ceiling sheets to decorate the ceiling in the kitchen. Of course, if you have a simple ceiling design, you can also use wall plasterboard. But for larger and multi-level devices, only the ceiling type is needed, since it will weigh much less and will not overload the entire structure. And the ceiling sheets will perform much better.
Plasterboard finishing of kitchen walls
Finishing walls with plasterboard in a kitchen is literally no different from installing a ceiling. A frame of profiles is also mounted and sheathed with sheets of plasterboard. Don't forget to decide on wires, switches, and sockets.
- First of all, we need to check the level of the wall to see if it is blocked. This can be done using a plumb line or a Horizon laser level.
- Next, we make marks on the floor and ceiling and drill guides using dowels.
- Then we attach the vertical CD profiles in increments of 60cm.
- If necessary, we insulate the walls using mineral wool or polystyrene foam.
- We screw the sheets of drywall and seal the seams.
- We cut holes for sockets and switches.
Bar counter made of gypsum board
Materials and tools used for work:
- GKL;
- Profiles;
- Self-tapping screws;
- Dowels;
- Hammer;
- Level ;
- Screwdriver;
- Sealant;
- Dye;
- Putty;
- Putty knife;
- Drywall knife;
- Brushes and roller.
A convenient location is determined, taking into account all the details that would make it comfortable at the bar counter - the parameters and dimensions are measured and specified. A frame is being erected; it is better to use a solid profile (two walls are cut, the rest of the side must be bent in a straight line, then secured with crossers). Measuring all the lines with a level, both perimeters of the walls are attached to the floor and to the wall. It is necessary to install a transverse profile and crossers between the walls, this will strengthen the device. Next, the wiring is laid if lighting is expected. Next comes the sheathing of the frame - screw in the screws using a screwdriver; the heads of the screws should not protrude beyond the sheet. Sand the ends. Then the joints are puttied, then when dry, they are sanded and primed. You can trim the bottom of the structure using a plinth. It is also better to seal loose areas.
When arranging lighting, you can use a halogen or LED lamp; they will successfully highlight the bar counter. With the help of a lamp, everything will also look impressive. Finishing the structure is possible with regular painting, but you can also get creative and use tiles or mosaics.
With the right approach, accurate measurements, quality of materials and knowledge of the matter, you can build a plasterboard kitchen yourself, which will significantly save money and bring useful experience.
Necessary materials for finishing a kitchen with plasterboard
- Regular plasterboard gypsum board size 2500x1200mm (ceiling and wall)
- Ceiling profile 60x27mm
- Guide profile 28x27mm
- Suspensions, also with wire traction
- Dowel nail 6x40
- Serpyanka self-adhesive
- Self-tapping screws with press washer 3.5x13; 3.5x25:
- Putty
- Crabs – universal fastening for profiles
Adviсe
So that the renovation of the premises does not “bring” unexpected surprises, great attention must be paid to the choice of high-quality material. Design and production technologies do not stand still, but when choosing new models it is better to give preference to proven brands with a good reputation
Only well-reputed manufacturers guarantee that no toxic or hazardous substances are used in the production of sheets. This is confirmed by the corresponding safety certificates - do not forget to ask the seller for them.
To prevent the wrong choice of plasterboard sheet, use the following recommendations.
- If you want to purchase a time-tested product, go to the branded stores of companies that have earned a huge number of positive reviews.
- Before purchasing, carefully inspect the sheets and consider the conditions in which they are stored.
- There should be no defects of any kind on the surface of the material, namely dents and cracks. The paper should not move away from the core or curl on the back side. The edges of the edge must be smooth.
Particular attention must be paid to loading the material. If you finally managed to choose the perfect plasterboard sheet, this does not mean at all that it will remain so when it is delivered to its destination.
That is why be sure to control the loading and delivery of material. If you need a large number of sheets, you should not buy everything at once - take some drywall “to test”. Cut a small piece from the sheet and carefully examine it: the core should be uniform, the cut should be even, and the knife should move smoothly when cutting. Saving is good, but not always. If you decide to buy the cheapest option, you risk getting flimsy cardboard that will be impossible to work with. Choose sheets with the best price-quality ratio.
When buying drywall, it is recommended to first calculate the required amount of material. To do this, you can use special online calculators available on the Internet.
The calculation itself is not difficult. The main thing is to correctly determine the area of the wall to be finished.
Consider doorways and window openings that may also be on the wall. If they take up little space, experts recommend not counting them out of the total area: the remaining sheets of drywall can be safely used to finish the same openings. If the openings are large or there are many of them, then there is no point in spending money on extra material.
Experts advise buying 15% more material: during work, a huge amount of unnecessary scraps will appear that cannot be used in any way. They often buy sheets with standard sizes - 1200 * 2500 mm, but they often choose another format - 600 * 1500 mm. The calculator calculates the required number of sheets of both formats.
You can install drywall yourself in any way: using glue or a frame. In some cases it is necessary to make a bend from the sheet. To do this, the material must be moistened in advance, secured to the template and allowed to dry completely. To do this, use a special roller with metal needles. When it is passed over the surface, small holes are formed on it through which moisture passes.
After installing the plasterboard structure, it should be cleaned of dirt and dust, and then coated with a primer. After it dries, wallpaper is either glued to the surface or plaster is applied.
How to install a plasterboard partition, see below.
Tools for working with drywall
I will give you the tools that can be used when working with drywall, just for general overview, and choose which ones to use yourself.
- Screwdriver - for tightening screws
- Level – (laser, water, block)
- Cord for breaking the ceiling level
- Grater - for cleaning the shackle
- Spatula – for filling seams and slopes
- Hammer – for driving dowel nails
- Tape measure - for different measurements
- Ballerina or a set of crowns - for holes for sockets in plasterboard
- Square - for making 90 degree angles
- Metal scissors - (can be replaced with a grinder)
- Notcher – for making holes in profiles (can be replaced with a drill)
- Pliers – for connecting profiles (works like riveted connections)
- Edge plane - used for chamfering the transverse edges of gypsum boards
- Needle roller – (it is used to roll gypsum board sheets for curved shapes)
- Rasp - it is used to remove rags on the edges of sheets
- Lever – for lifting gypsum boards off the floor
- Gripper - for carrying gypsum boards (you can also use a handle)
- Cutter – used for cutting gypsum boards if a large amount of work is being carried out. For smaller volumes, use a drywall knife
- Lifter and spacer - for raising sheets of drywall to a certain height for further fixation.
Let's sum it up
So, to assemble a multi-level ceiling in the kitchen, you should use moisture-resistant ceiling plasterboard with a UK or PLUK edge. Ceiling sheets in this situation will be the best option, since their weight is significantly less than wall plates, and the thickness will be only 9.5 mm, as opposed to 12.5 mm for the standard. Its use will make it possible to lighten the entire structure and use figured elements on it. Note! The strength of a multi-level structure can be increased by assembling a more rigid frame, with additional sheathing of the entire working surface. With a simple single-level ceiling, you can also use standard sheets of material, since the design of the project does not provide for a significant load on the ceiling. Regardless of the complexity of the planned ceiling device, you should always choose only moisture-resistant sheets. This is the only way your ceiling will serve faithfully for many years, maintaining its original appearance without changes.
Methods of attaching suspended ceilings to plasterboard
How to choose plasterboard for the ceiling
Why drywall is not the best choice for walls; compare alternatives
It’s rare that a redevelopment can be done without erecting new partitions, unless you decide to make a studio and are just tearing down the old walls. New walls can be built from piece materials, such as brick, slabs and blocks of various compositions - we have already talked about them in the article “From brick to glass blocks: what to build interior partitions from.” Or use sheet materials.
There are three most popular today, and we are ready to tell you about all their pros, cons and features so that you can choose the best one.
- There are 1-2 mm joints between the plates, which cannot be avoided. So, either use this material in rooms whose length does not exceed the width of the slab (in bathrooms, storerooms), or cover the joints with wood or metal overlays.
- Not the lightest weight, complicates installation and puts an average load on the floors.
- Sound insulation is better than gypsum plasterboard, but not by much. It can be improved by installing the material in two layers.
- For items heavier than 20 kg, you will still have to make additional reinforcement of the wall at the hanging location.
Cost: 450-500 rub./piece. The final wall is approximately the same in cost for gypsum plasterboard and gypsum board, since gypsum plasterboard is mounted in two layers, and gypsum board in one.
- It is well processed to create complex shapes: arches, convexities, concavities.
- It is convenient to lay communications inside the frame, which is sheathed with gypsum board.
- Easy installation.
- The wall turns out smooth and does not require additional leveling.
- If you mount the frame on top of the floor screed, the plasterboard wall can be dismantled and rebuilt as needed.
- Very light material, gives very little load on the floors.
Drywall cutting technology
Plasterboard for walls is produced in sheets with an area of about 3 m². With the same width of 1.2 m, the sheet can have different lengths, which will help fit it into the height of the room. The characteristics of the room, the size of the walls and partitions, heating devices, and distribution boxes dictate the need to cut the sheets into more practical pieces.
This is done on a circular saw or manually - with a small or wide cutter. This operation is called cutting out gypsum boards. Its success depends on the accuracy of the horizontal position in which the sheet is located, and the presence of an assistant who is ready to support the cut fragment until it is completely cut.
Marking of drywall is done from the front side with a pencil and a folding meter with a small allowance for processing the edges. Using a cutting tool (mill, hacksaw or knife), make an incision along a ruler that does not cover the entire thickness of the sheet, carefully breaking the gypsum core along the edge of the table or workbench. The cardboard is trimmed on the reverse side - the cut is ready.
The process is very similar to cutting glass. The uneven edge of the gypsum board is cleaned with a roughing plane. The integrity of the cut shape and the prevention of breakage and crumbling depend on the quality of this operation. Round holes are cut with a special cutter, shaped elements are cut with a jigsaw, and U- and L-shaped ones are made after gluing the sheets along the edge of the opening.
