If the closet is large, then finding the right thing in it is problematic. Therefore, a backlight is built inside the case. For convenience, it is better to install a motion sensor in the closet, which will automatically turn on the lighting.
- Advantages of lighting in such places
- Necessity
- For sliding wardrobes
- dressing room
- Hallway
- How to install
- Installation sequence
- Types and methods of connecting with your own hands
- Contact when opening doors
- Wired with motion sensor
- Wireless with motion sensor
- Possible options for installing backlight using sensors
- Wardrobes
- Hallway
- Recommendations for self-installation
- Video showing the ease of use of cabinets and drawers with their own lighting
Benefits of installing closet lighting
Cabinet lighting has a number of undeniable advantages. Here are some of them:
- Doesn't take up much space and doesn't interfere with opening doors.
- Helps create a unique design in the room.
- Makes it possible to quickly find the item you need on the shelves, saving a lot of time.
- Allows you to direct light to a specific location. There is no need for general lighting in the room.
You can add ease of installation to the list. In order to make wardrobe lighting, you don’t have to spend a lot of time and effort.
Spotlights.
Typically, halogen lamps are used for spot lighting of a sliding wardrobe. This process already requires the intervention of a drill and some skill:
– Firstly, it is also worth deciding on the location of the lamps. Next, you need to take a special round bit on a drill for woodworking and drill identical holes in these places;
– Spotlights come complete with self-tapping screws or special metal clamps that secure it tightly in any material. Fixing several lamps in the holes made in the closet will not be difficult;
– Connection phase. To connect the lamps you will need wires with a cross-section of 0.75, two wires, a step-down transformer with a 12V output, terminal wire connectors, a switch, a plug.
Attention! The power of the transformer should be 5% greater than the total power of all lamps. Example: 5 halogen lamps of 20 W each are connected
The total power is 100 W, therefore, the transformer must have a power of at least 105 W.
Halogen lamps are connected in parallel to each other and connected to a transformer. Terminal connectors are used for connection. Also, a plug and a switch are connected to the circuit, namely to the transformer. The photo below shows an example of connecting wires to a transformer.
After securing the wires and lamps, you can plug in the plug and use the backlight.
Types of cabinet lighting
Lighting in a closet can be done in many ways. Dozens of options allow you to equip it with door sensors, battery-powered lamps and remote controls, etc. Each of these options has its pros and cons.
Halogen cabinet lighting
As the name implies, it is equipped with halogen lamps. Essentially, this is the same incandescent lamp, but there is gas inside it. Usually these are iodine or bromine vapors. This design allows you to extend the life of the product, as well as increase its power and brightness.
Among the advantages of halogen lighting for sliding wardrobes, the following stand out:
- The brightness does not change throughout the entire service life.
- Small sizes.
- Absolute safety for humans.
This type of lighting also has a number of disadvantages:
- The already fragile flask becomes very hot.
- Halogen lamps have increased sensitivity to sudden voltage changes.
- Short service life compared to other similar products.
Due to the shortcomings, experts do not recommend installing these lamps inside a cabinet, for example, on shelves. The ideal option is outside on the visor.
Expert opinion
Viktor Andreevich
An expert in the field of cabinet furniture, he was engaged in the assembly of cabinet furniture, as well as its production.
If you want to know how to quickly add lighting to a closet, let’s quickly go over the possible options. So, the first option is to take this nuance into account when ordering furniture, and ask for light bulbs with wiring to be built in. And the necessary power supply (step down from 220 V to 12/16/18/24 V). Masters should know. If you have passed this option, then you can do it yourself. Go to the store, buy an LED strip, the required amount of cable, and immediately place a block under this strip. Since the tape is self-adhesive, we stick it on the bottom of the shelves and the sidewall, as if in a zigzag. In general, where exactly to glue - you know better, because most often we ourselves are the authors of our ideas. Good luck with your DIY installation!
LED with door opening sensor
LED lighting for cabinets is deservedly popular. And this is not surprising, since it has a number of positive properties and characteristics:
- Unlike halogen lamps, it does not heat up, which means it has a high level of fire safety.
- A variety of colors and brightness levels, allowing you not to limit your imagination, but to create lighting that best suits the design of the room as a whole.
- Using multi-color designs, you can create unusual decorative elements to decorate your closet.
- LED strip lighting is known for its long service life.
- If necessary, you can install a door opening/closing sensor.
Another undoubted advantage is low power consumption.
Despite so many advantages, LED lighting that turns on when doors are opened also has a number of disadvantages:
- Costs more than other lighting options.
- You can't create diffused light.
In addition, you will additionally have to install power supplies in the cabinet.
Cabinet lighting with LED strip
One of the varieties of LED backlight. Its advantages are the same. But there is one significant disadvantage - poor color reproduction. Moreover, to equip wardrobe lighting using LED strips, you also need power supplies.
Fluorescent backlight
A more convenient option when compared to halogen lamps. But less profitable in comparison with LED ones. The advantages of such lighting for sliding wardrobes include:
- does not heat up;
- has high luminous efficiency;
- has a long service life;
- There is a wide range of colors available in the market.
Fluorescent light bulbs also have disadvantages. Firstly, they differ in considerable dimensions. Secondly, to connect you will have to draw up a diagram. And thirdly, they are temperature sensitive.
In addition, and this is perhaps the biggest drawback, there is mercury vapor inside such lamps. If the product is damaged, the risk of poisoning increases.
Battery operated lamp
Most often, LED lamps have this design. In another way they are called autonomous. Their main advantage is that there is no need to install additional power supplies. In addition, they are economical, safe for humans, and also have high brightness.
The disadvantages of battery-powered lamps are their high cost, the need for a high-quality cooling system and timely recharging.
How to install
To prevent the backlight from turning on every time you open the door, you need to decide on its type and characteristics. It is important to correctly calculate the direction of installation of the device and the angle of action.
There are three types of lighting inside the cabinet:
- directional – has a certain coverage area;
- scattered - used as a decorative element;
- changeable by program - settings are preset for it.
Thus, if the cabinet does not block the lighting of the room, then it is recommended to install the lighting deeper, closer to the back wall. Then it will work later and highlight only those areas where it is dark. Otherwise, closer to the door so that the backlight works immediately when it opens.
Advice! If you need to install a programmable lighting option, the photocells are attached in two places: one near the door, the other to the wall.
Installation sequence
The best option would be to install lighting at a height of 300-400 mm from the floor. The location should be such that most movements occur through the sensitivity zone and not near the detector.
It is best to purchase devices that should be located at the maximum distance from each other.
Note! The wires connecting the lamps to the light source are low-voltage, they are safe, so they do not need to be inserted into a metal or plastic box.
When starting the installation process, turn off the electricity and check with a tester that there is no voltage in the network. To do this, you need to take a device whose wires are connected to the grounding wire, and then to the active and neutral wires, alternately. If the light does not light up, it means there is no voltage in the network, and you can begin installation.
Before starting work, you should read the instructions for the device. Although LEDs are easy to install, each type has some differences that must be taken into account before installation. It is also important to know the purpose of a specific photocell. For example, photodiodes are used in industries where the mains voltage is at least 220V; in everyday life they are very dangerous.
Types and methods of connecting with your own hands
It is not recommended to use existing wiring to connect the backlight. Often it does not have a grounding wire, or there are other methods of grounding, such as metal conduits. Such a system will be cumbersome and inconvenient, since all junction boxes will need to be grounded.
Contact when opening doors
In this case, it is better to use an LED strip; it is simpler and more convenient to install.
Important! To ensure safety, wires should be laid in a cable channel.
To install contact lighting yourself, you need to:
- Cut the required piece of LED strip and solder it on one side.
- Fasten the tape over the profile, and glue the entire structure with liquid nails.
- Next, you need to decide on the location of the power supply and the routing of the wires. The most suitable option would be to lay the wire behind the cabinet and lead it to the unit through a hole in the side wall.
- A microswitch is connected to the gap in one of the wires so that the contacts are open when the button is pressed (i.e. the door is open).
The entire system is checked for functionality, and if everything works, the microswitch is fixed on the side wall of the cabinet through pre-prepared holes in the housing.
At the end of the entire structure there are bare leads, which after installation are hidden under a heat-shrinkable tube.
Wired with motion sensor
In this case, the entire lighting system is connected to the mains, socket or socket box.
So that the lighting works without human presence, i.e. without movement, it is necessary to install an additional switch. It duplicates the automatic system.
The installation process is as follows:
- To begin with, electrical wiring is carried out in the cable channel to the place where the light source is installed. Before starting work, you need to measure and cut the required length of cable.
- Next, the structure is fixed to the ceiling using screws.
- After installing the cable channel, the power cable is inserted into it and closed with a lid on top.
- The base of the lamp is attached, and the power cable is connected to it.
- The backlight is connected to the power supply.
- Lamps are installed in the luminaire.
- The design is tested for functionality.
- If the lighting is working correctly, a light-diffusing platform is installed.
At the last stage, the lighting direction and direction are adjusted, as well as the necessary parameters.
Wireless with motion sensor
Connecting a motion sensor for cabinet lighting is very simple. The main thing is to choose the right installation location and eliminate the negative influence of external factors (batteries, heating devices, etc.).
The sensor operates on batteries with a service life of at least 1 year.
The installation process is as follows:
- A location for the sensor is selected.
- Using wires, the lamp and sensor are connected to the battery terminals.
After this, the functionality of the lamp is checked, and all structural elements are attached using a glue gun. Next, the lighting is adjusted.
Installation locations of lamps in the closet
Its installation and the quality of lighting in general depend on where the lighting will be located in the cabinet. There are several options.
Up in the closet
Lamps can be located in the central part if it is a large compartment. Or evenly distributed over the entire surface. An alternative is a tramp rod. In this case, it is recommended to give preference to a fluorescent lamp or LED strip.
On top of the visor
A universal option. Lamps illuminate the space in front of the cabinet more than inside it. This allows you to look in the mirror when getting dressed or applying makeup.
You can turn on this backlight even with the doors closed.
Side
This option is suitable for multi-tiered cabinet sections. Thanks to it, it is possible to ensure uniform lighting of all racks.
Above each shelf
This is ideal for illuminating the contents of each individual shelf or compartment. But there is one caveat: it is better to install fluorescent or LED lamps. Halogen lamps can damage things due to their high heat.
Pros and cons of backlighting
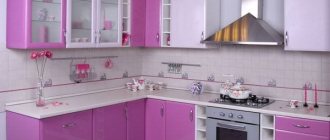
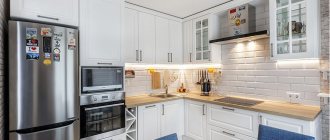
Kitchen cabinet lighting has its advantages and disadvantages:
| pros | Minuses |
|
|
Be sure to look at the options for interior filling of kitchen cabinets.
The photo shows the backlight of the glass apron
Cabinet lighting controls
This is the second most important parameter after location that you need to pay attention to when installing lighting in a closet. The backlight can be controlled in several ways.
Remote control
Allows you not only to turn the backlight on/off, but also to control its brightness and change parameters, for example, color.
Remote controls usually come with battery-powered LED lights.
Opening sensor
Otherwise called motion sensors. The backlight is turned on when the cabinet door is opened or a person approaches it at a certain distance.
Switches with a sensor are installed either at the top of the cabinet or on the inside. This is convenient because they do not interfere and do not take up much space.
Manual switch
Traditional cabinet switches come in 3 types:
- Corded. To turn the backlight on/off, just pull the chain.
- Push-button. The device is similar to the one used to control a floor lamp or sconce. This is a cable with a module with a button installed at the end. When you press it in one direction, the backlight turns on, in the other, it turns off.
- Keyboards. Such switches are surface-mounted and built-in. This is the most common option.
There are also touch-sensitive lighting controls. They turn on if the hand approaches the sensor at a certain distance (depending on the model, on average 6 cm).
Overhead furniture lamps
The overhead furniture lamp differs in power and size. There are models in the form of long lamps, in the form of spotlights, and there are also options for rod overhead furniture lamps.
The shape of overhead furniture lamps can be square, round, oval, triangular and rectangular.
| Rice. 25-27. Various options for surface-mounted lamps |
There is even a light option that fits over the door hinge arm.
| Rice. 28. Surface-mounted lamp on a hinge |
Surface-mounted lamp with switch, dimming sensor and motion detector
This overhead lamp is simply mounted using clips and adhesive plates. The motion detector in the lamp has a range of 2m and is activated when the cabinet or drawer door is opened.
The lamp also has a built-in day-night sensor, which adjusts the backlight intensity depending on the time of day. This overhead lamp can be installed inside the body of a sliding wardrobe, as well as in a drawer of a sliding wardrobe.
| Rice. 29-30. Surface-mounted light with motion sensor |
What to especially pay attention to when choosing lamps and fixtures
Of course, it is important to take into account your wishes and preferences. But there are a number of parameters that also require attention:
- Interior Design. If the room is already decorated, the illuminated cabinet should fit harmoniously into it. Even small lamps should be chosen taking into account how the room is decorated.
- Area and level of illumination. Bulky lamps will make a small room even smaller. If, on the contrary, it is large, small light sources will look extremely ridiculous.
- If we talk about choosing lamps, it is important to take into account their power, brightness, and color.
And, naturally, you need to decide in advance on the acceptable price. It is worth remembering that cheap products from unknown manufacturers quickly fail. Therefore, experts recommend choosing high-quality lamps that can perform their functions uninterruptedly for a long time.
How to make a backlit strip with your own hands using an aluminum profile
If you have a desire to make a backlit shelf yourself, we recommend that you pay attention to this method. Making such a shelf will be quite simple, but the result will undoubtedly please you
Step-by-step master class with photo instructions
First, you need to decide what size your shelf should be. If you are going to install it in a niche, then it must have the appropriate width and depth so that there are no gaps and the glass does not extend beyond the boundaries of the niche. Also in this case, you will need to take care of the issue of wiring.
The glass must be polished on the side where the LED strip will be located.
Other edges need to be sanded to a matte finish. This way the light will pass through the glass and create a glowing effect.
The aluminum profile is cut to the length of the glass. The thickness of the gap in it should correspond to the thickness of the glass, but not be larger - otherwise it will fall out. The edges must be thoroughly cleaned.
We drill several mounting holes inside the profile and then mount it on the wall. You can attach it with dowels.
We insert the LED strip inside the profile. It has a special groove and the tape will easily fit into it.
We insert the glass, it should fit very tightly. We connect the tape to the power supply and put special plugs on the sides.
You can also familiarize yourself with the technique of making a shelf with lighting in a niche, without using an aluminum profile.
Photo examples of illuminated glass shelves
To summarize, I would like to say that lighting shelves with LED strips is a truly magnificent find of modern designers. Thanks to these simple tricks with available materials, which, if necessary, can be purchased at any hardware store, you can give ordinary things an unusual and truly unique look. Surprisingly, even such an insignificant element as a shelf can sparkle with new colors and become the central object in the design of your room if you work with it creatively.
Methods for installing lighting devices in a cabinet
In general, installing cabinet lighting looks about the same. Therefore, we can consider the procedure using the example of installing an LED strip.
With your own hands
First you need to prepare the necessary tools and materials:
- LED strip;
- switching power supply;
- switch;
- wires for connections;
- aluminum profile;
- screws 1.5 cm;
- screwdriver with a 1.5-2 mm drill.
The aluminum profile is needed in order to direct the light inward onto the shelves, and not into the person’s eyes. It will be needed no matter where the lighting will be: from above, on the sides or on the back wall.
Installation takes place in several stages:
- Temporarily empty your closet of things.
- Measure and cut the tape to the required size.
- First fasten the aluminum profiles, and then the tape inside it. It is recommended to pre-mark the installation points for the profile using a screwdriver.
- Using the diagram, connect the tape to the power supply.
- Install and connect the switch to the system.
During the installation process, it is worth remembering the polarity and that pieces of tape with a length of 5 m or more should be connected in parallel. If the LED strip is multi-colored, you will additionally need to install a controller between it and the power supply.
With the help of the “husband for an hour” master
If you don’t have the necessary skills and abilities to install regular lighting in a cabinet, with a control panel or with an opening sensor, there is no need to rush to textbooks and training videos. You can use it. Why is this convenient? Firstly, the work will be done by a person who understands all its nuances. Secondly, the craftsmen give a guarantee. Thirdly, they work quickly and efficiently. And fourthly, they always have all the necessary tools available.
Recommendations for self-installation
In order for the installation to be correct and quick, and the lighting to fit the specified parameters, you must follow the tips:
- All lighting components must have waterproof protection (covers). This will extend the life of the device and ensure safety.
- It is important to ensure the tightness of the structure so that dirt, dust and moisture do not get there.
- The joints must be sealed to prevent moisture from seeping into the sensor and wiring. This significantly reduces the service life of the devices. To do this, the structure is placed under a protective cornice, which is usually laid along the inner corners of the cabinet.
- It is better to avoid using incandescent lamps. They consume a lot of electricity and negatively affect the operation of the sensor, since the heat from them helps turn on the backlight.
It is better to use copper wiring as aluminum, since aluminum requires special handling. In addition, the temperature inside it may rise, which reduces the accuracy of the backlight sensor.
Having a backlight with a motion sensor is a very convenient, modern option.
Disadvantages of lighting in the closet
Overall, there are many benefits to closet lighting. But there are some points that will make you think about the feasibility of its equipment:
- Lamps installed on each shelf steal useful space.
- In some cases, difficulties arise with the control system and, consequently, connecting the backlight. An example is a system with an opening sensor.
There are no more cons. And those that exist are, rather, features rather than shortcomings. Any problem can be solved using the advice or help of specialists.
