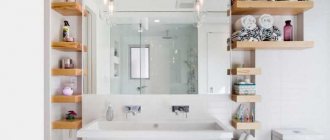
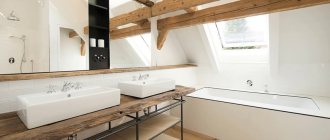
A bathroom shelf is an important and functional element of the interior. It is used to store various detergents, shampoos, and cosmetics. That is why it is important to choose the most convenient location for the structure - so that all items are at hand.
Shelf in the bathroom
In this case, any shelf can be purchased at a furniture store or made with your own hands. If you choose the second option, you will be able to get the product according to your personal preferences. Below we will tell you more about what bathroom wall shelves are available and how to make them yourself.
DIY wall shelves
Pros of making a homemade shelf
Every person has the opportunity to make a piece of furniture that will be used in everyday life for a long time. The shelf in this case is no exception. Moreover, the procedure for its manufacture cannot be called complicated.
So, what are the pros of a DIY built-in shelf? Let's talk about them:
- the ability to create an option that suits all the necessary parameters;
- independent choice of material and coating for the future shelf;
- designing the work process, including all the thoughtful details.
Of course, for the finished accessory to look great, you need to have certain knowledge and experience in this area of craftsmanship. These skills will help you make something truly convenient.
Narrow pull-out shelving
This master class will be especially useful for those who live in small one-room apartments. I'll show you how to make a retractable shelf in the gap between the wall and the refrigerator. It would seem that the width is only a few centimeters, but you will definitely be surprised when you see how many items can be stored in this gap. Initially, the shelf-rack is not visible at all. In fact, after its manufacture, nothing will change in your kitchen, except that a new and convenient space will be created for storing various jars, bottles, etc.
The rack can be pulled out with a simple movement. Now look how much is stored there.
The gap distance is only 11.5 cm (in the photo the tape measure is in inches), and what a huge number of different items can be stored.
Materials
- Back board for the back. Mine measures 61 cm in depth and 121 cm in height - essentially these are the dimensions of the entire rack without thickness. The width of the entire rack is slightly less than the width of the gap.
- Boards for shelves - 6 pieces.
- Two boards for the top and base.
- Two boards on the sides of the shelf.
- Two wheels for moving the entire structure.
- Round wooden slats.
- Wood screws
- Wood glue.
- Cabinet handle for pulling out the rack.
Making a kitchen rack
The entire structure can be assembled using just self-tapping screws, but in addition I glued everything with wood glue. I laid out the shelves and estimated the number needed.
I started assembling the box. I installed the joints with glue.
I left it to dry, pressing it with whatever I had.
The result was a glued shelving box.
Additionally secured with self-tapping screws. If you use thin boards, drill a hole before screwing in the screw to prevent the board from cracking.
In the end I got to the shelves, placed them and screwed them on with self-tapping screws.
Since the rack is very narrow and bottles and cans can fly off when pulled out, you need to make a kind of side. At first I thought about stringing a fishing line or rope, but in the end I settled on round slats.
I drilled holes on the sides, cut the strip to length, inserted it and secured everything with glue.
At the end, we measure the thickness so that there are no excesses. In my case there shouldn’t be any, since I don’t have the opportunity to move the refrigerator a little further.
Screw the wheels into the base.
Handle for easy removal.
We check it in real conditions.
Everything runs great and doesn’t hurt.
We fill it with spices, products that are stored at room temperature, etc.
A very convenient thing, and most importantly incredibly useful - everything you need is always at hand. Original article in English
Types of shelves
Based on the type of fastening, shelves in the bathroom are divided into the following types:
- removable - fixed on the wall, if necessary they can be removed and fixed in another place;
- suspended - attached in the same way as the previous option;
- corner - are particularly practical in narrow-shaped bathrooms;
- floor - often used in spacious rooms;
- stationary - fixed without the possibility of future movement;
- wall mounted - it is advisable to place them in free rooms where there is a need to visually reduce the space.
Accessories and decorations
There are no limits to perfection here: contrasting, monochromatic, combined in shape or theme - whatever you like.
Why not create a sea corner in a white and blue bathroom? Seashells, pebbles, starfish and other beauties brought from vacation will be of great use. You can put them on shelves, on the side of the bathroom, decorate a frame for a mirror, a cup for toothbrushes with small shells, or create some other craft...
Hanging from the ceiling, fish made of glass or clay will both please the eye and, if you remember the rules of Feng Shui, increase the positive energy of qi. An anchor or a steering wheel painted with acrylic paint on the door, a pair of striped vest-like towels, shell soap dishes, a rug on the floor, a curtain in the appropriate style - and a seaside corner in your home is ready. You can apply a thematic design on both tiles and panels. The main thing is to choose the right paint. You can come up with a lot of items for decorating a bathroom: a bath broom on the wall, a wooden bowl on the floor that would perfectly fit shampoos, sponges or a headrest, figured soap, bouquets of dried flowers, clay floor vases, scented candles, an aroma lamp. If the bathroom has a window, then It’s quite possible to decorate the room with flowers (moisture- and shade-loving). If not, you will have to do without “green friends”. Mosaics with a variety of images from small pieces of colored tiles, which are glued to chipboard, hardboard, wood and hung on the wall like a painting, decals... It’s not worth talking about towels - soft, fluffy, all kinds of bowls for soap, cups for toothbrushes .
What materials are the shelves made of?
If you still haven’t made your choice, look at the variety of photos of shelves in the bathroom.
It is also possible to choose the material from which the shelf will be made, namely:
- plastic;
- stainless steel;
- glass;
- tree;
- drywall.
When choosing a material, you should take into account that a large amount of humidity is concentrated in the shower room, so it must be moisture resistant. A homemade shelf is not only beautiful, but also useful in use.
It is best to make bathroom shelves from wood, since this natural raw material is resistant to any external influences.
Choosing a frame for a specific bowl
When choosing a frame for any bathtub model, its dimensions, configuration and wall thickness are taken into account. The thinner the wall, the more it needs to be reinforced with additional structures.
- A universal rectangular design will suit a cast-iron bathtub of a traditional shape, the main thing being the dimensions of the bowl. Choosing a frame for a bathtub is not difficult; there is a very wide choice; they differ in the country of manufacture and the thickness of the material. Your choice depends only on preference and financial capabilities.
- An acrylic bathtub, having a complex shape, with hydromassage and other accessories, cannot in any way be installed on a universal frame. The bowl turns out to be heavier than usual, and the design for it is weak. Such a bowl requires a reinforced frame, or even an entire metal platform.
If everything is clear with the form, you need to pay attention to the material from which the structure is made. It is installed in a room where there is high humidity, so the manufacturer is obliged to take care of anti-corrosion protection
It is worth remembering that a good quality product will be made of metal of sufficient thickness.
If you haven’t found a frame for a steel bathtub with legs in the store, then you’ll have to do it yourself, or seek help from specialists.
Necessary tools for the job
To make a shelf for storing necessary items in the restroom, you need to have the following list of available materials on hand:
- building level;
- screws and fastenings;
- hammer;
- saw - for making a wooden or metal shelf;
- ready-made forms from available raw materials;
- hooks;
- slats and holders;
- primer and varnish - required when making a wooden shelf.
It is worth adding that this list is not final. During the work, you may need additional tools, since the shelves have different shapes.
Making a shelf with your own hands
When all the necessary tools are in place, you can get to work.
If wood or MDF sheets are chosen as the material, you will need to follow the following procedure:
- make marks with a pencil along the edges of the slats;
- Glue blocks of equal size to the areas of the marks;
- draw additional marks in the center of each block, drill holes in them;
- assemble the structure using screws for the previously made holes;
- cover the finished structure with a varnish base for its presentable appearance;
- make special holes in the wall, fix dowels in them;
- mount the assembled shelf on the installed mounts in the wall.
The homemade shelf is ready! This option is great for any bathroom.
Glass shelf for bathroom
This type of design is very attractive, although fragile. To make it, you need to choose a material with a thickness of 5-6 mm. Next, you should cut out blanks of the required size from the glass.
The edges of the structure must be processed to avoid further cuts. Depending on the thickness of the glass, suitable brackets are selected - with or without drilling.
Using a drill, you need to fix the shelf into the wall. To keep the piece of furniture firmly in place, rubber gaskets are used.
And as a decoration, a special limiter will serve to prevent objects from falling onto the floor.
Tabletop in vintage style
Such a shelf will be a godsend for the owner of a small bathroom. It can accommodate all the items that are necessary for daily personal hygiene. It does not take up much space, looks stylish and is very easy to use.
What will you need?
Tools you should prepare:
- grinding machine;
- electric jigsaw;
- knife saw;
- scraper;
- compass and pencil;
- router (if you want to make the edges of the shelves rounded).
You will also need:
- solid wood boards 1.5-2 cm thick;
- carved legs or any other parts from old furniture;
- wood glue;
- white acrylic paint;
- candle (uncolored).
Size and number of components
The photo shows a shelf consisting of three tiers, but their number can be increased or decreased by one, focusing on your needs and the availability of consumables.
The recommended diameter of each subsequent circle should be 3 cm smaller than the previous one. This will ensure the stability and functionality of the structure.
Step-by-step production
There should not be any difficulties during the work process. It will take even an inexperienced craftsman no more than an hour to make a bookcase:
- Using a compass, mark the contours of the shelf circles on the board.
- The blanks are cut out with a jigsaw.
- The cuts on the resulting parts are processed using a grinding machine. If there were splinters on the surface of the board, they should be removed. It is not necessary to achieve ideal smoothness of the circles so that the texture of the wood is visible.
- A saw is used to separate the carved elements into several parts, if necessary. The length of each determines the height of the tiers.
- If the carved parts were varnished, remove it with a grinding machine or fine-grained sandpaper.
- Using glue, connect all the component parts, making sure that the axis of the shelf runs exactly in the center.
- When everything is ready, start painting. To make it look vintage, you need to create the appearance of wear. To do this, the wood is chaotically rubbed with a candle - acrylic will not stick to areas covered with wax or paraffin. Then a little dye is poured onto the part and distributed with a scraper so that a thin layer is obtained. Excess is blotted with a rag. Very thick paint is pre-diluted with a special solvent. It is more convenient to handle carved parts with a brush.
- After the paint has dried, the product is used for its intended purpose.
Making a wooden corner shelf
If you decide to make a corner shelf for your bathroom with your own hands, you need to follow the following steps:
- collect the necessary parts;
- take a sheet of paper and draw a circle from its central part;
- attach the paper to the wood and use a jigsaw to cut out a circle shape on it;
- make grooves in the rail for the future shelf;
- mount the corner structure using mounting bolts or foam for installation work;
- installation of the shelf in the finished grooves.
Apparently, making a corner shelf option will not be difficult. It is important to work clearly point by point so as not to miss the right points.
Making a shelf under the sink
The appearance of this design resembles a floor stand. However, depending on the type of washbasin, the shelf can be wall-mounted or built-in.
As a rule, it is intended for decoration. But, sometimes it is used to hide plumbing communications. At the same time, it is convenient to place household chemicals on the shelf under the bathroom sink.
Making such an interior item is not difficult. The complete manufacturing process includes two stages:
- production of frame parts;
- shelf installation.
The material for the frame is wood, plastic or metal profile. This structure is usually located behind the bathroom screen. Therefore, you don’t have to make special doors. You need to make the frame itself and place shelves from the selected material on it.
If you are making a shelf under the sink, do not forget about making an additional countertop. Sheets should be sewn onto a frame base made of a metal profile.
The material for the sheets can be moisture-resistant plasterboard or plastic. To keep the tabletop level, use a level.
Care instructions
Glass shelves, despite their fragility, are not very demanding to maintain. It is enough to simply wipe them with a cloth to remove dirt so that they have the same pleasant appearance. It’s the same with plastic ones - you don’t need to take special care of them, you just need to wash them.
Difficulties arise with wood, since this material reacts poorly to moisture and collapses. You need to make sure that the paint or varnish does not peel off, and you should choose shelves that have been treated against mold with an antiseptic.
With iron shelves, everything is also quite simple, but you need to ensure that rust does not appear on them under any circumstances.
Useful tips
Spacious drawers with a large number of shelves for storing household products and other small items will help you properly use the area under the bathroom.
It’s even convenient to put various accessories in this place. Such containers are also made on wheels for easy movement.
DIY shelves under the bathroom are very easy to use.
A sliding bath screen is often equipped with shelves for storing brushes, sponges or bath accessories.
Where is the best place to place it?
The placement of the shelf depends on the size of your bathroom, as well as on the contents of the shelf itself. If the bathroom area is small, then you will have to install the shelf on the wall.
If you store clean towels and an unnecessary heating pad in one of its drawers, then you can place it anywhere where it simply won’t get in the way. The same goes for products you don't use very often. But shower accessories or toothpaste should be placed as close as possible to the area of their use. Your sink can serve as a guide. Place a shelf next to it. Consider your height so that it is comfortable for you to look and reach, and feel free to place the bookcase there.
Decorative design
If the shelf was made with your own hands, you need to take care of decorating it. The absence of the necessary design will give the design a poor appearance. When decorating, you need to follow important rules.
You should not make shelves in the form of a floor structure in the bathroom. In a standard type room this option will look bad. Therefore, it is worth choosing classic models.
When making a shelf, it is not recommended to use elaborate decorative elements. It is important that the finished shelf fits perfectly into the overall design of the room.
If you want to highlight a shelf as an accent in the bathroom, make it original, but not very catchy. Perhaps this piece of furniture will have an unusual shape, or consist of several types of materials.
How to choose a product for a bathroom depending on the material?
The most common option for wet bathroom conditions is glass products.
Such structures can be used to store anything, including cosmetics and household chemicals. If you choose glass, it is very important to use high-quality material. It can be ground or tempered glass
Other types of this material are not recommended because they do not have sufficient strength.
The main advantage of such structures is their attractive appearance. There is only one disadvantage - fragility. Over time, after prolonged use, the products may crack, and this is a potential danger.
A fairly popular material for making shelves is plastic. Such products have a long service life. In addition, cracks are unlikely to form on them, and finger marks will not be visible. To care for these structures, simply wipe them with a damp cloth. The only drawback of such shelves is their not very attractive appearance. Most plastic designs look pretty cheap, so if you've done a high-quality renovation, it's best to avoid them.
Moisture-resistant plastic shelf
Some bathrooms use metal shelves. Modern production technologies make it possible to produce fairly light and elegant shelves that will not take up extra space in an already limited space. In addition, they are durable and have a long service life. Despite all their attractive features, there is also a drawback - metal products are susceptible to corrosion, so you need to choose shelves with an anti-corrosion coating that does not form rust.
Wood is used quite rarely for these purposes. The texture of natural material and its color make it possible to create coziness and warmth in the interior, especially if the interior contains wooden elements. If you decide to use wooden structures, then you need to remember about the special substances that need to be used to treat them so that water does not penetrate into the wood.
Return to content
